The ability for Judge to approve a temporary order
Recently updated on April 15th, 2025 at 04:21 am
This page is for court officials and describes the flow of case after it has been e-filed. It covers the specific steps of:
- Clerk’s (or District Court front desk staff) approval at which point the case is accepted and a cause number is assigned.
- Judge approval (or denial) at which point the signed Temporary Order (Denial) is created.
The case can be any of the civil protection orders such as:
- Domestic Violence Protection Order (DVPO)
- Sexual Assault Protection Order (SAPO)
- Anti-harrasment Protection Order (AHPO)
- Stalking Protection Order (SPO)
- Extreme Risk Protection Order (ERPO)
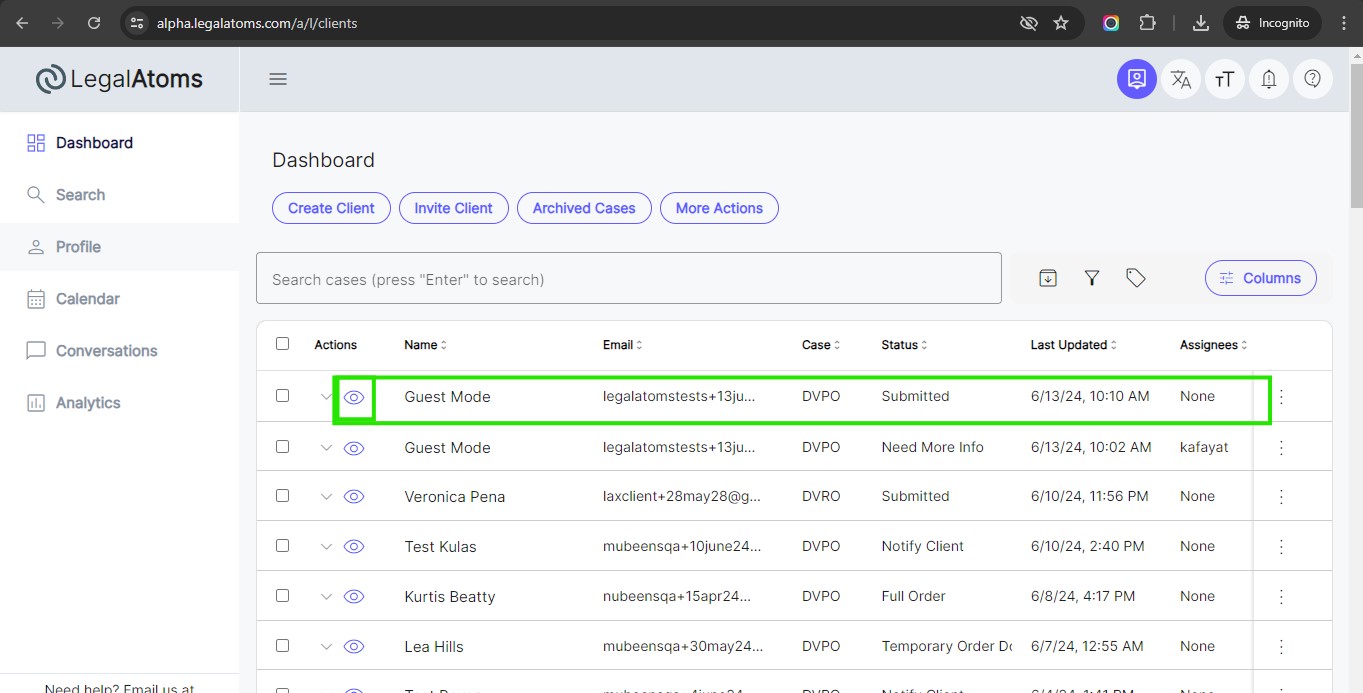
Step 1: Locate the Case
First, login to LegalAtoms, and you will land on the dashboard.
In case you are using the test environment, you will see some cases added to your dashboard for testing purposes.
Select the desired case with the status Submitted by clicking on the eye icon.
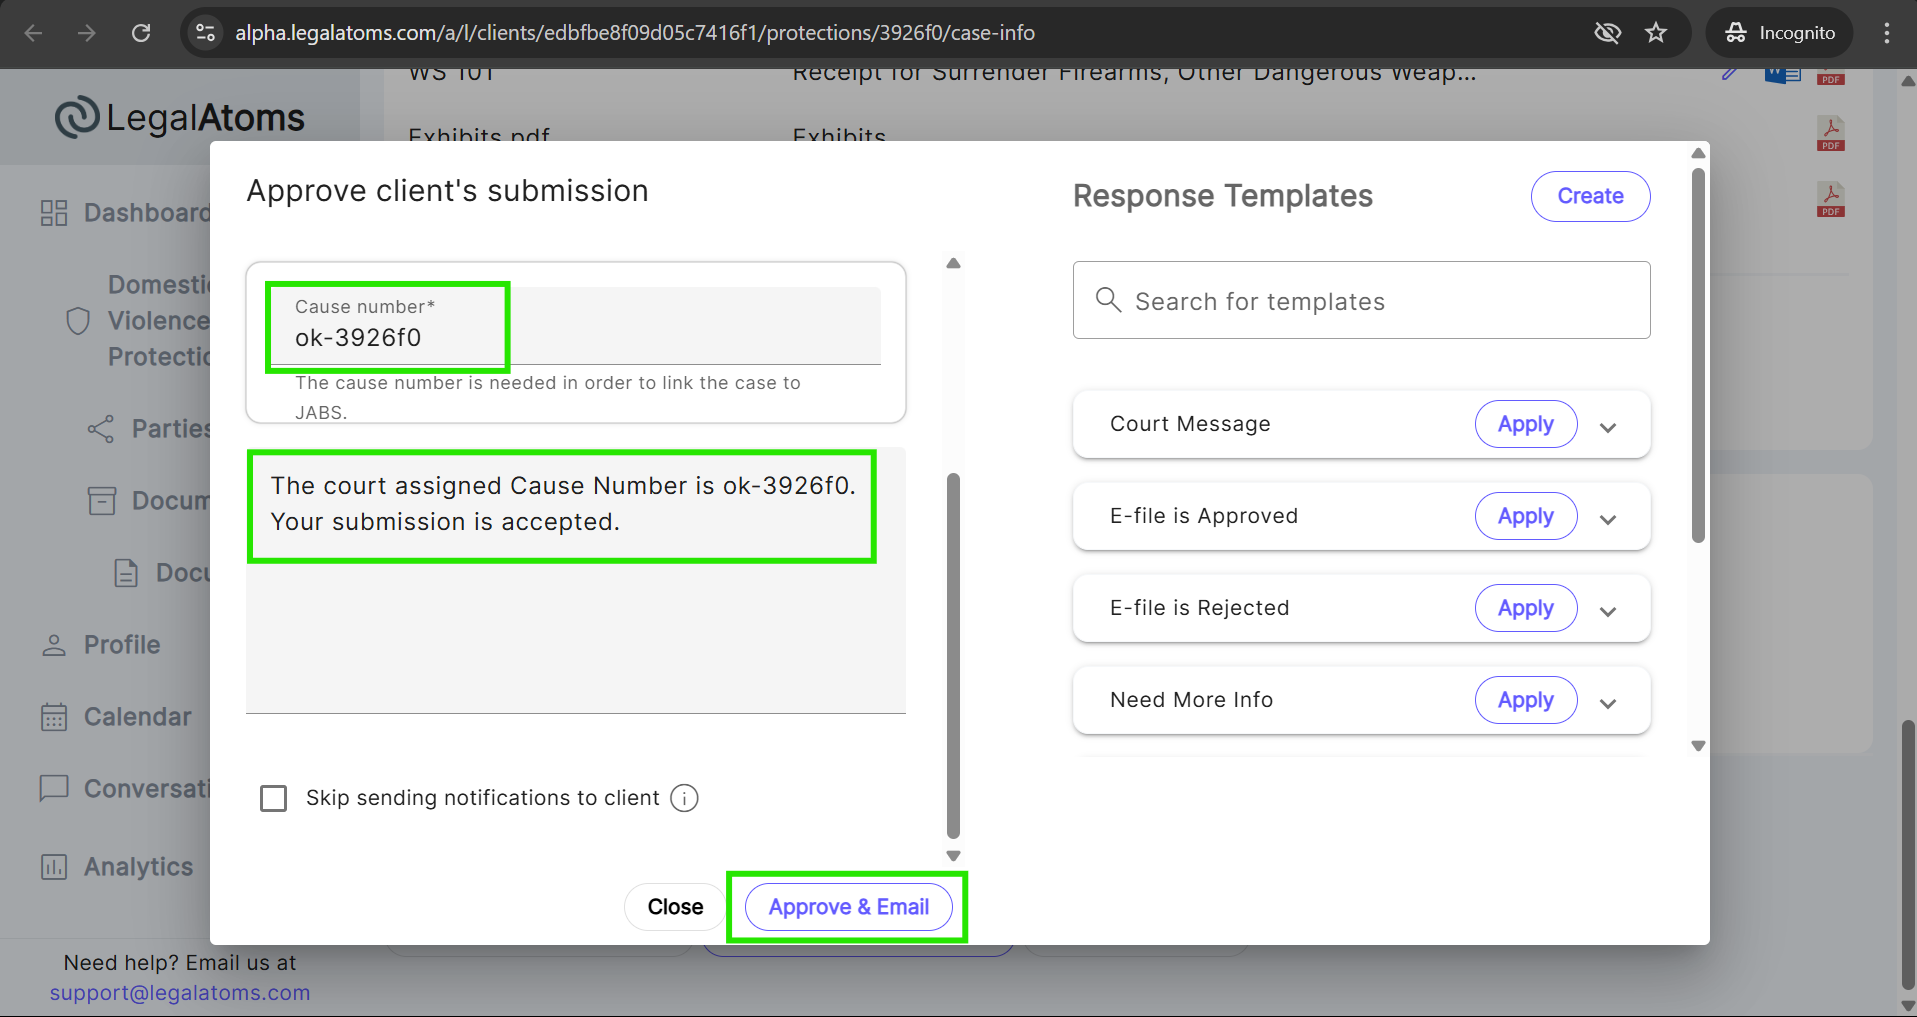
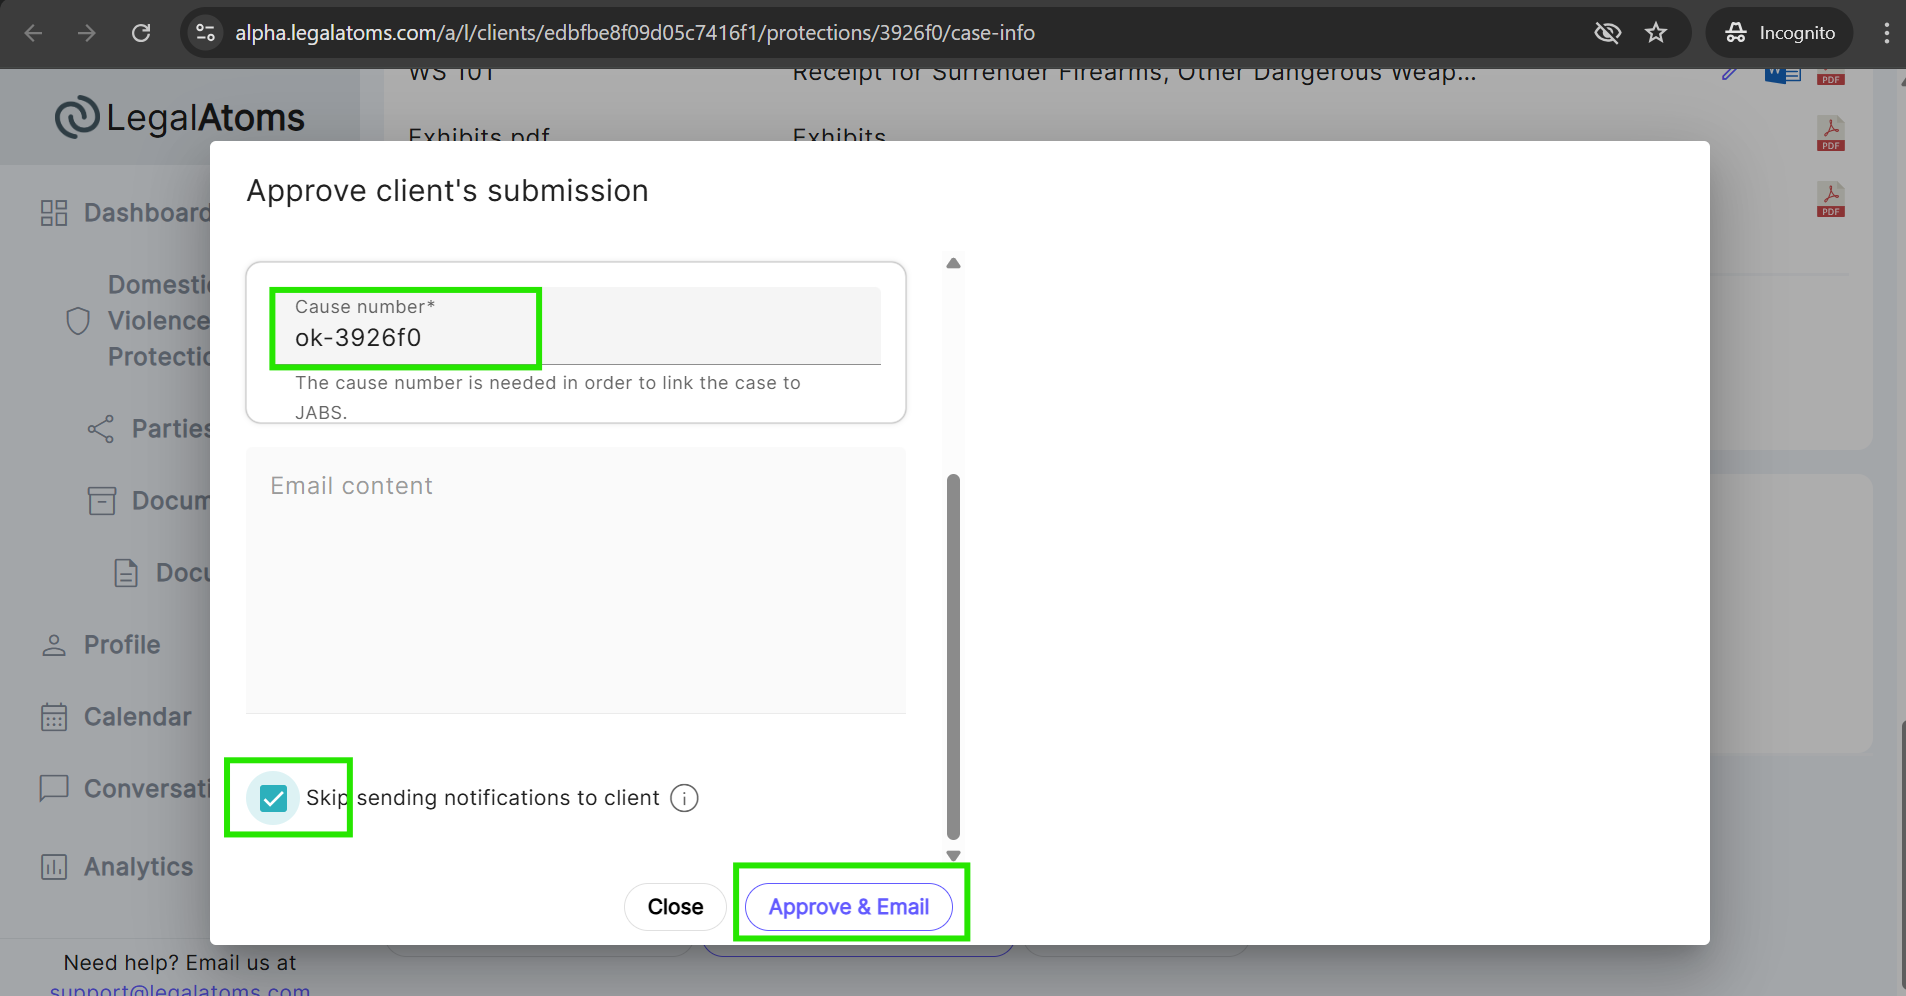
Step 2: Clerk Approves
- When the clerk clicks on the Submission Received button a popup will appear where the clerk enters the Cause Number and Email Content.
- The clerk can approve the submission without sending an email, SMS, or in-app notification to the client by simply checking the ‘Skip sending notification to client’ checkbox.
- Next, the clerk will click the Approve & Email button in order to approve the case.

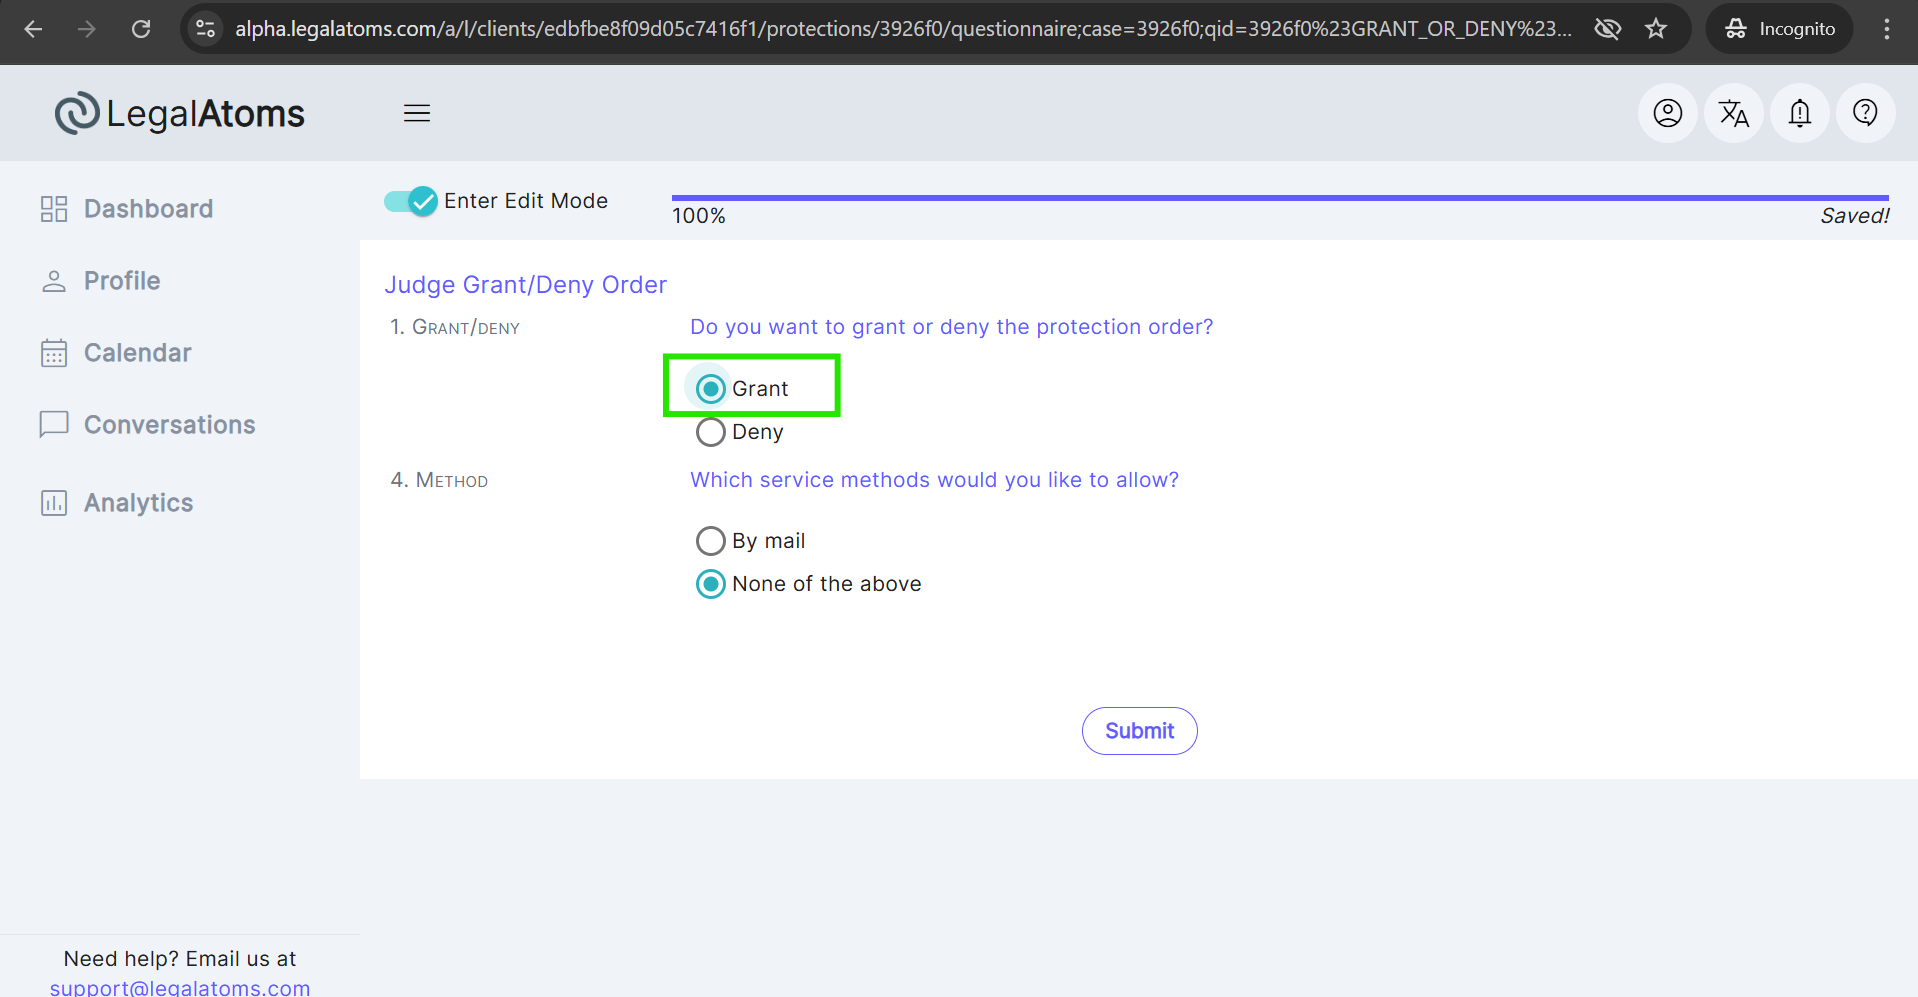
Step 3A: Judge Item
The Judge can approve or reject the case by clicking the Start button.
- Choose whether to Grant / Deny the protection order
- Submit the form

Step 3B: Judge Item
The Judge can approve or reject the case by clicking the Start button.
- Choose whether to Deny the protection order
- Submit the form
Step 4: Make Edits and Sign the Temporary Order Documents
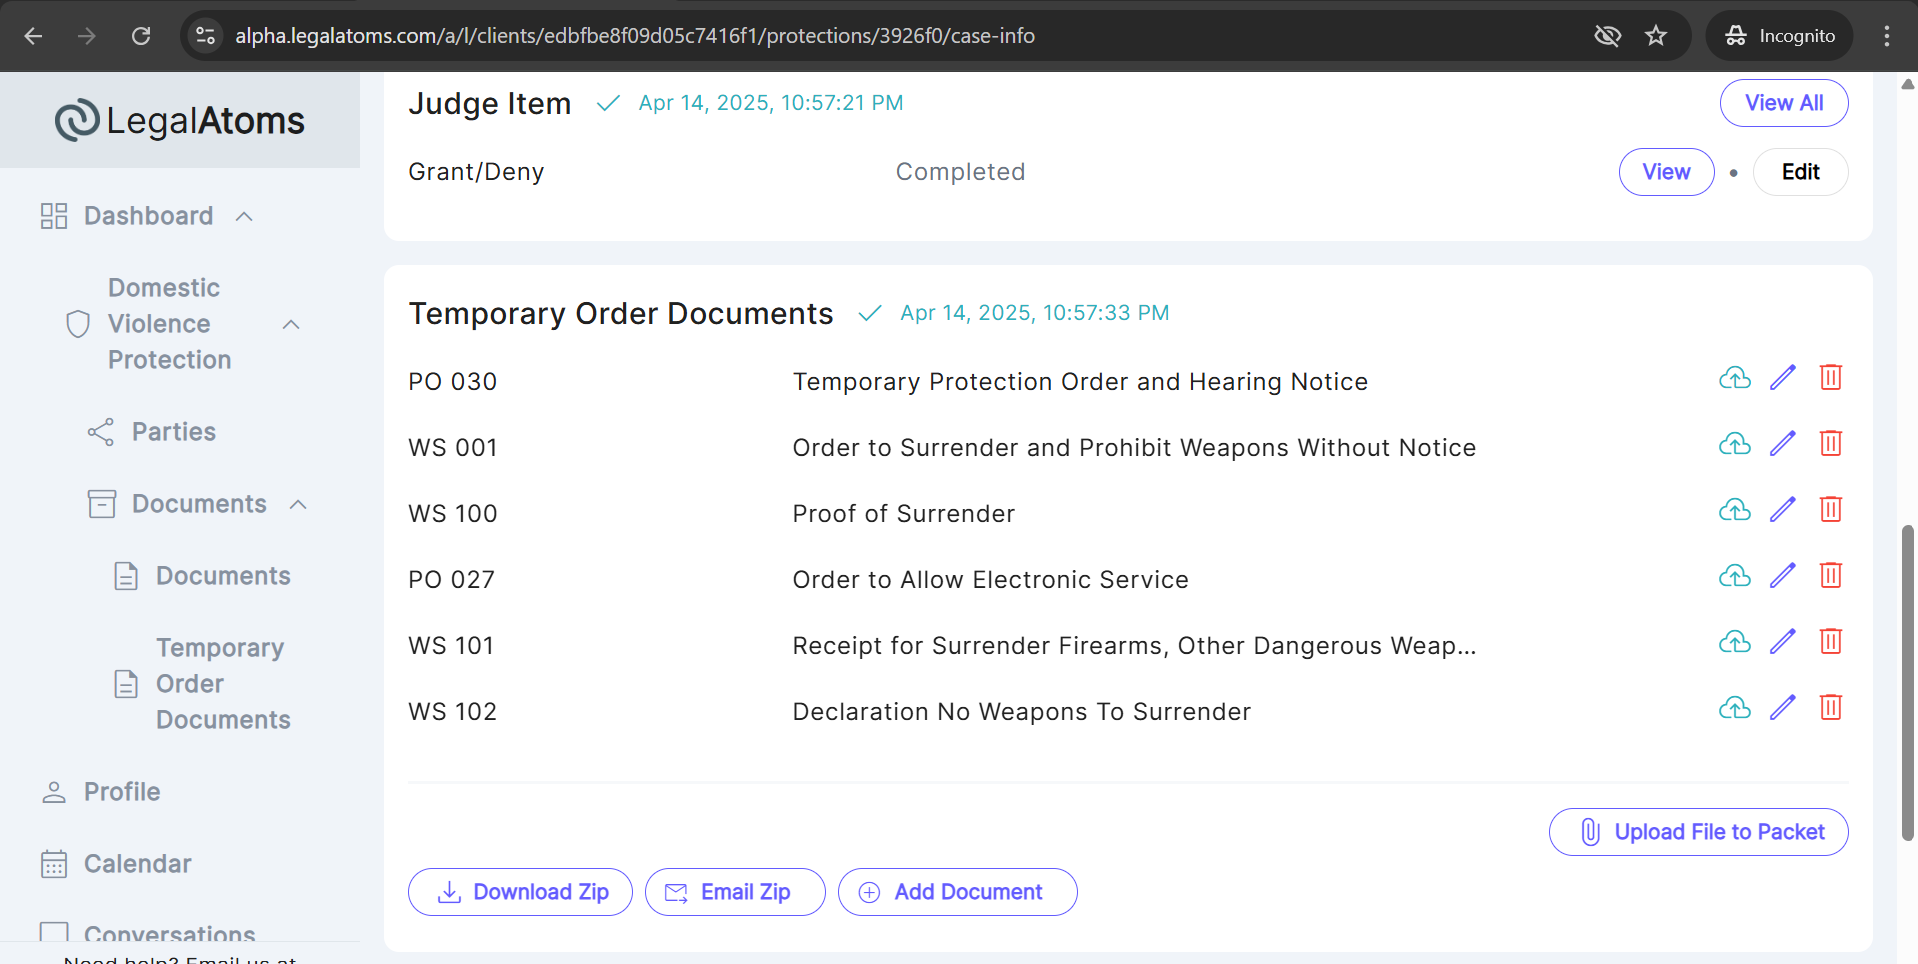
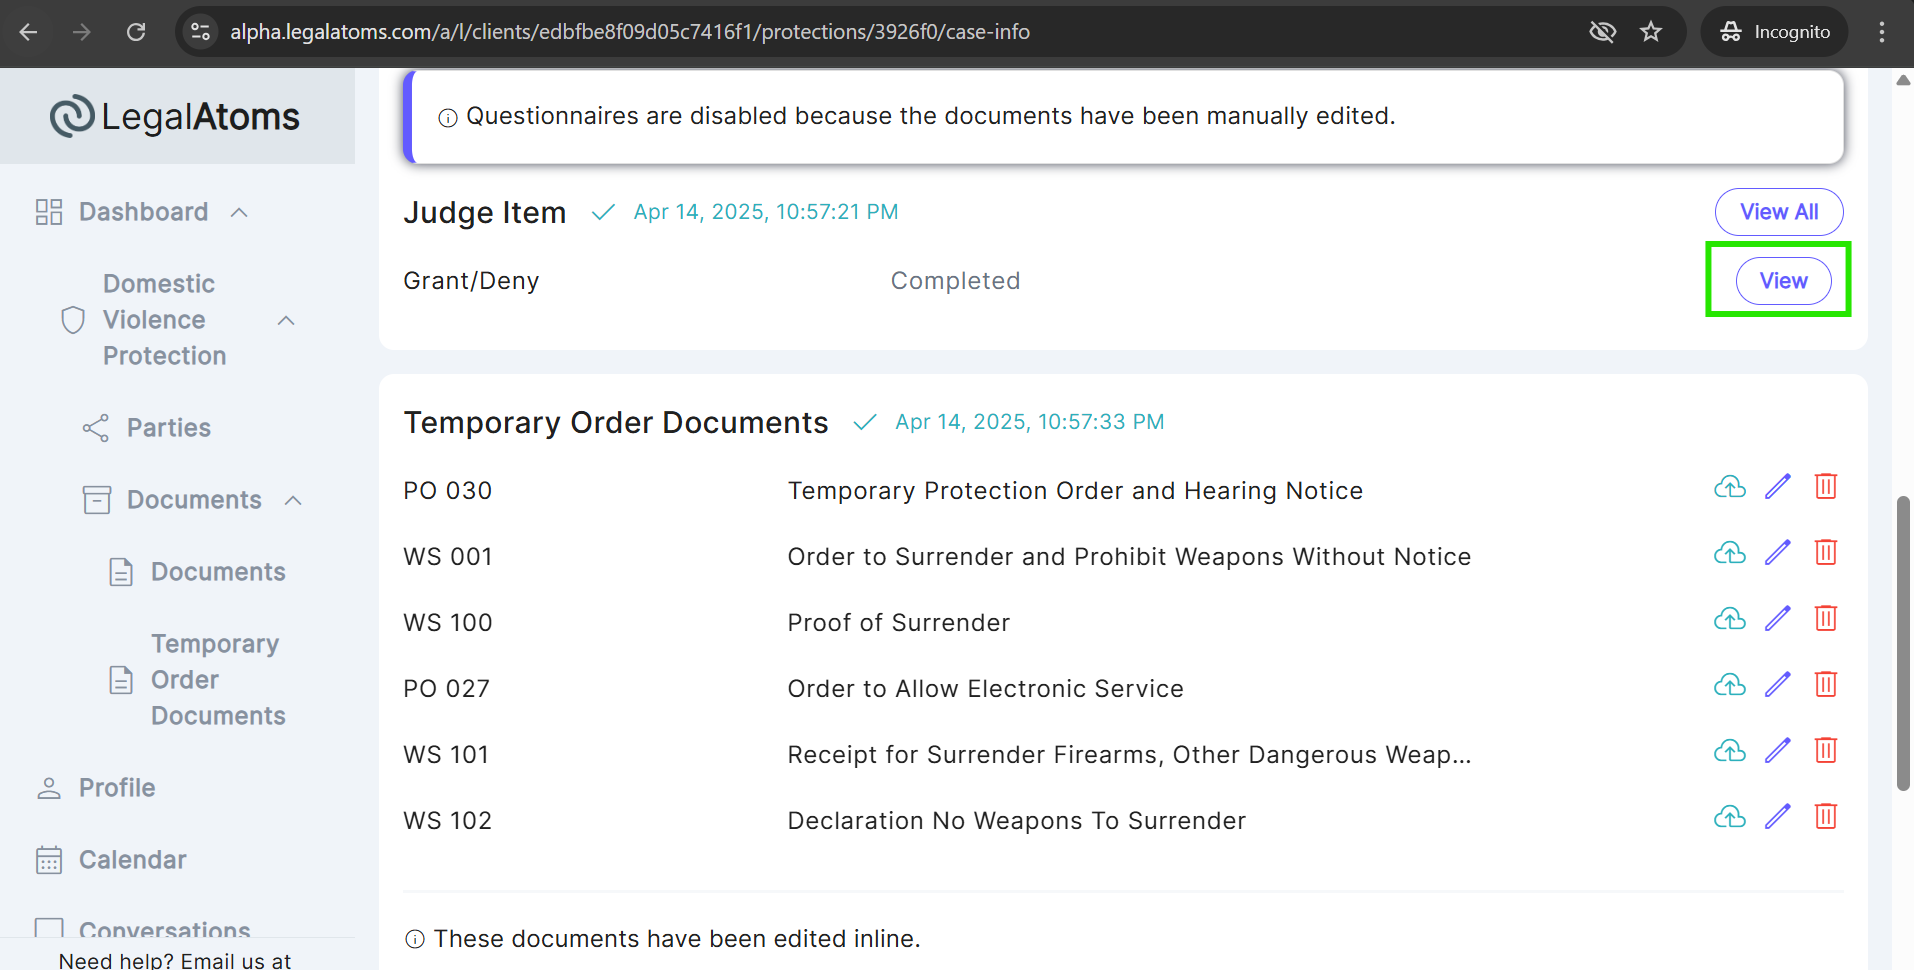
After Grant/Deny the protection order, the document starts auto generate and you will see the temporary order document HTML version on your dashboard within a few seconds.
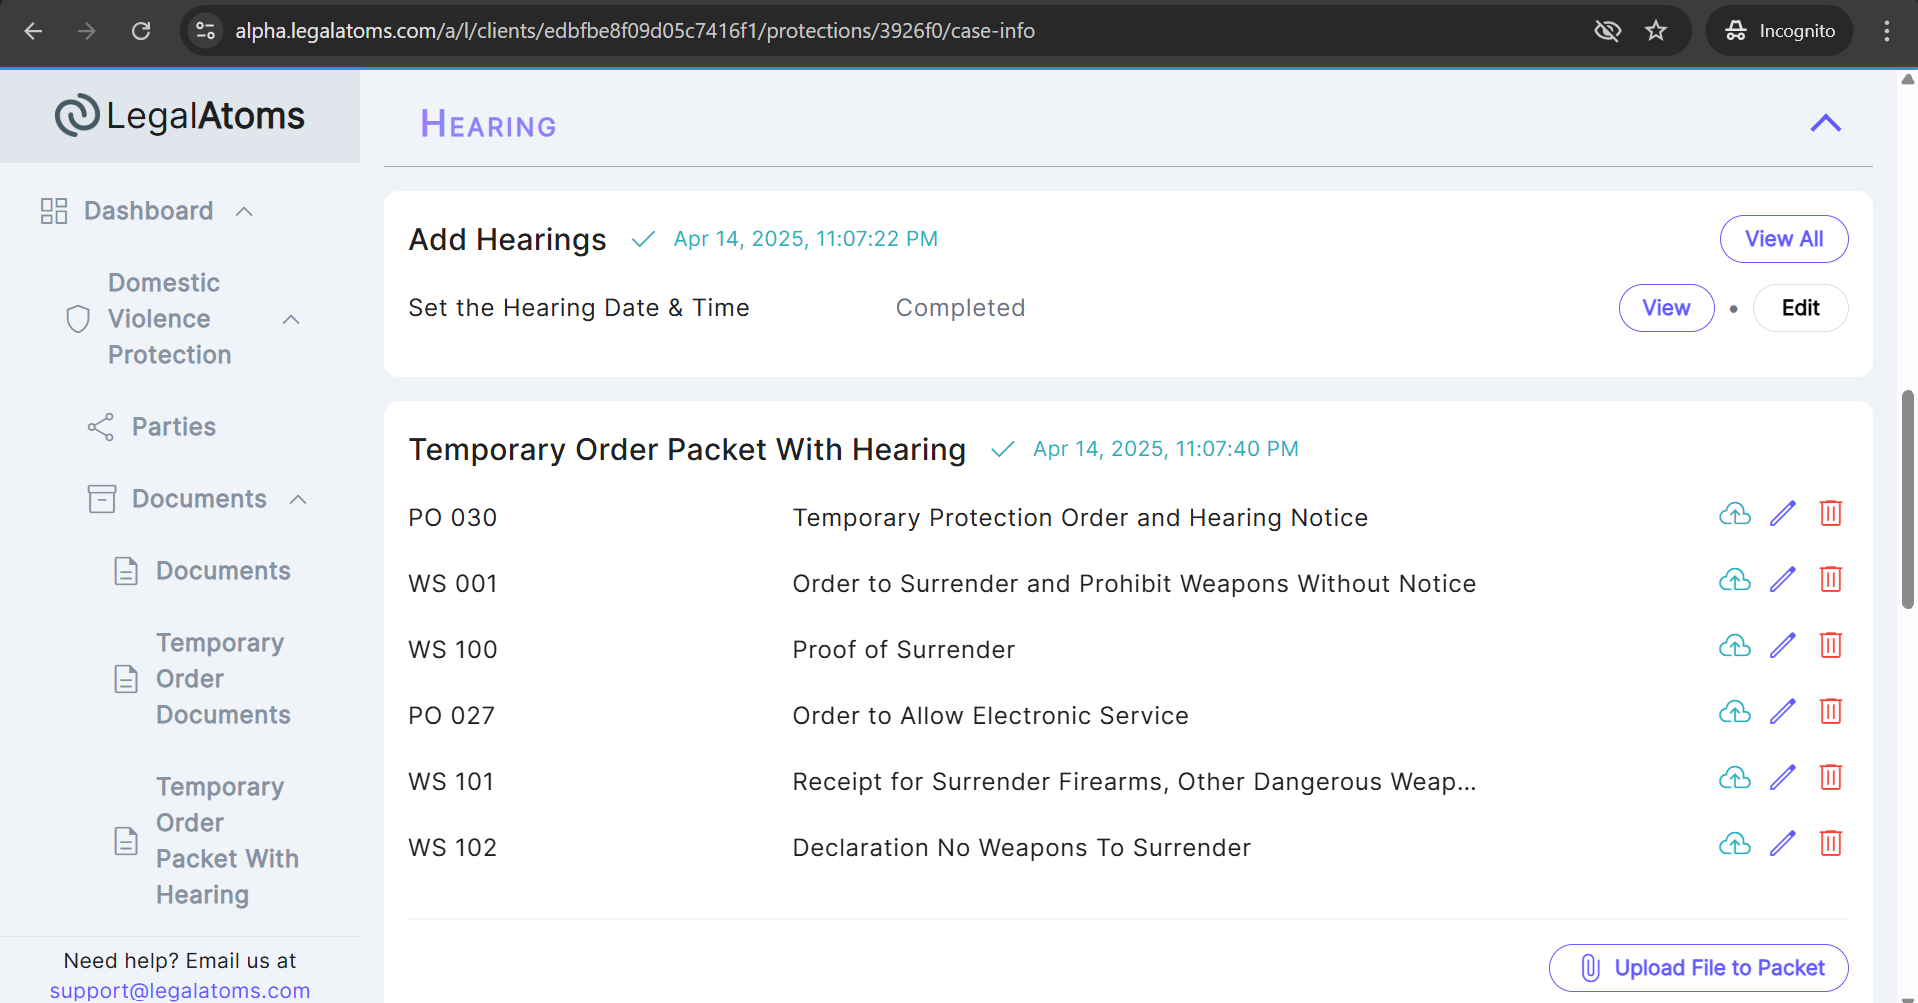
These additional documents are generated under (Temporary Order Documents, and Temporary Order Packet) if Temporary order is GRANTED and also firearms surrender is granted
1. WS 001 Order to Surrender and Prohibit Weapons
2. WS 102 Declaration: No Weapons to Surrender
3. WS 100 Proof of Surrender
4. WS 101 Receipt for Surrender Firearms, Other Dangerous Weapons and Concealed Pistol License
These documents are generated under (Temporary Order Documents, and Temporary Order Packet) if Temporary order is GRANTED and also firearms surrender is not granted
This document generation depends on whether you choose the email method or not “PO 025 Order to Allow Service by Mail”.
1. PO 030 Temporary Protection Order and Hearing Notice
2. PO 027 Order to Allow Electronic Service
3. PO 025 Order to Allow Service by Mail
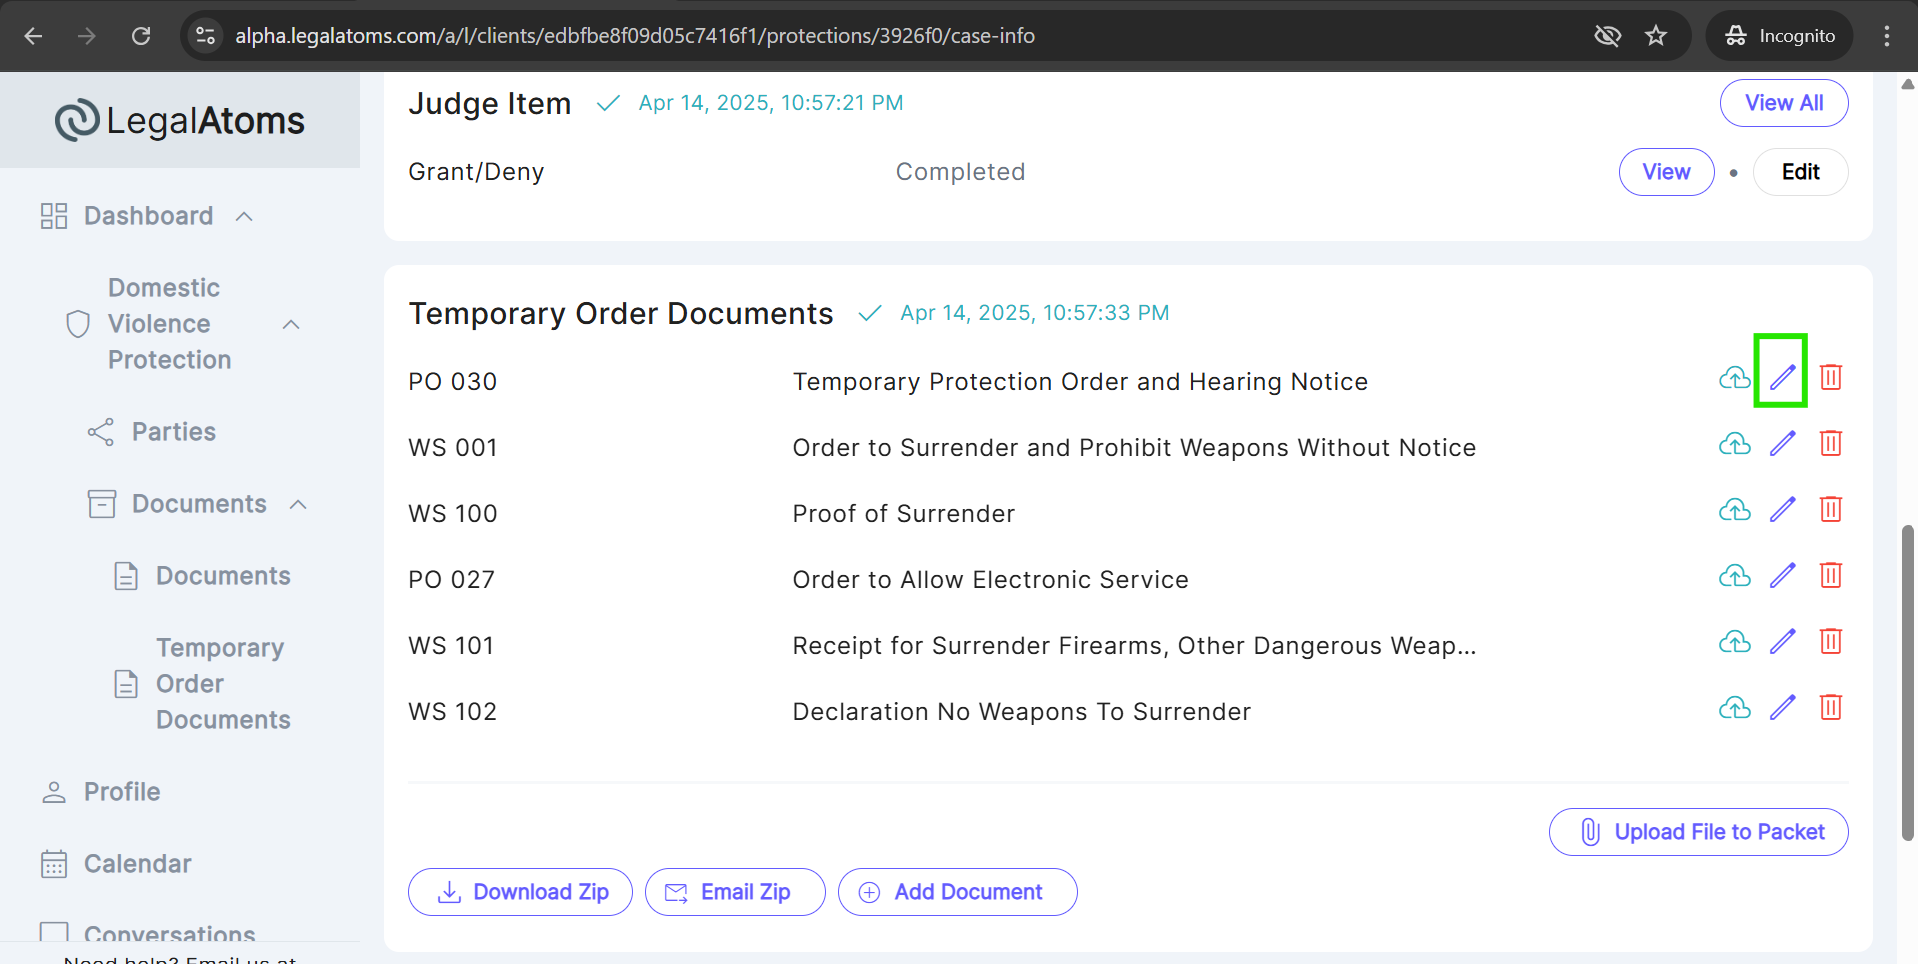
LegalAtoms allows to judge add a signature to a temporary order document using the Edit HTML feature. Follow the given steps to add a signature to the document.
- Click the Edit icon/button to open the document in edit mode.
- In the document editor, click on the top left Edit button to switch to Edit HTML view.
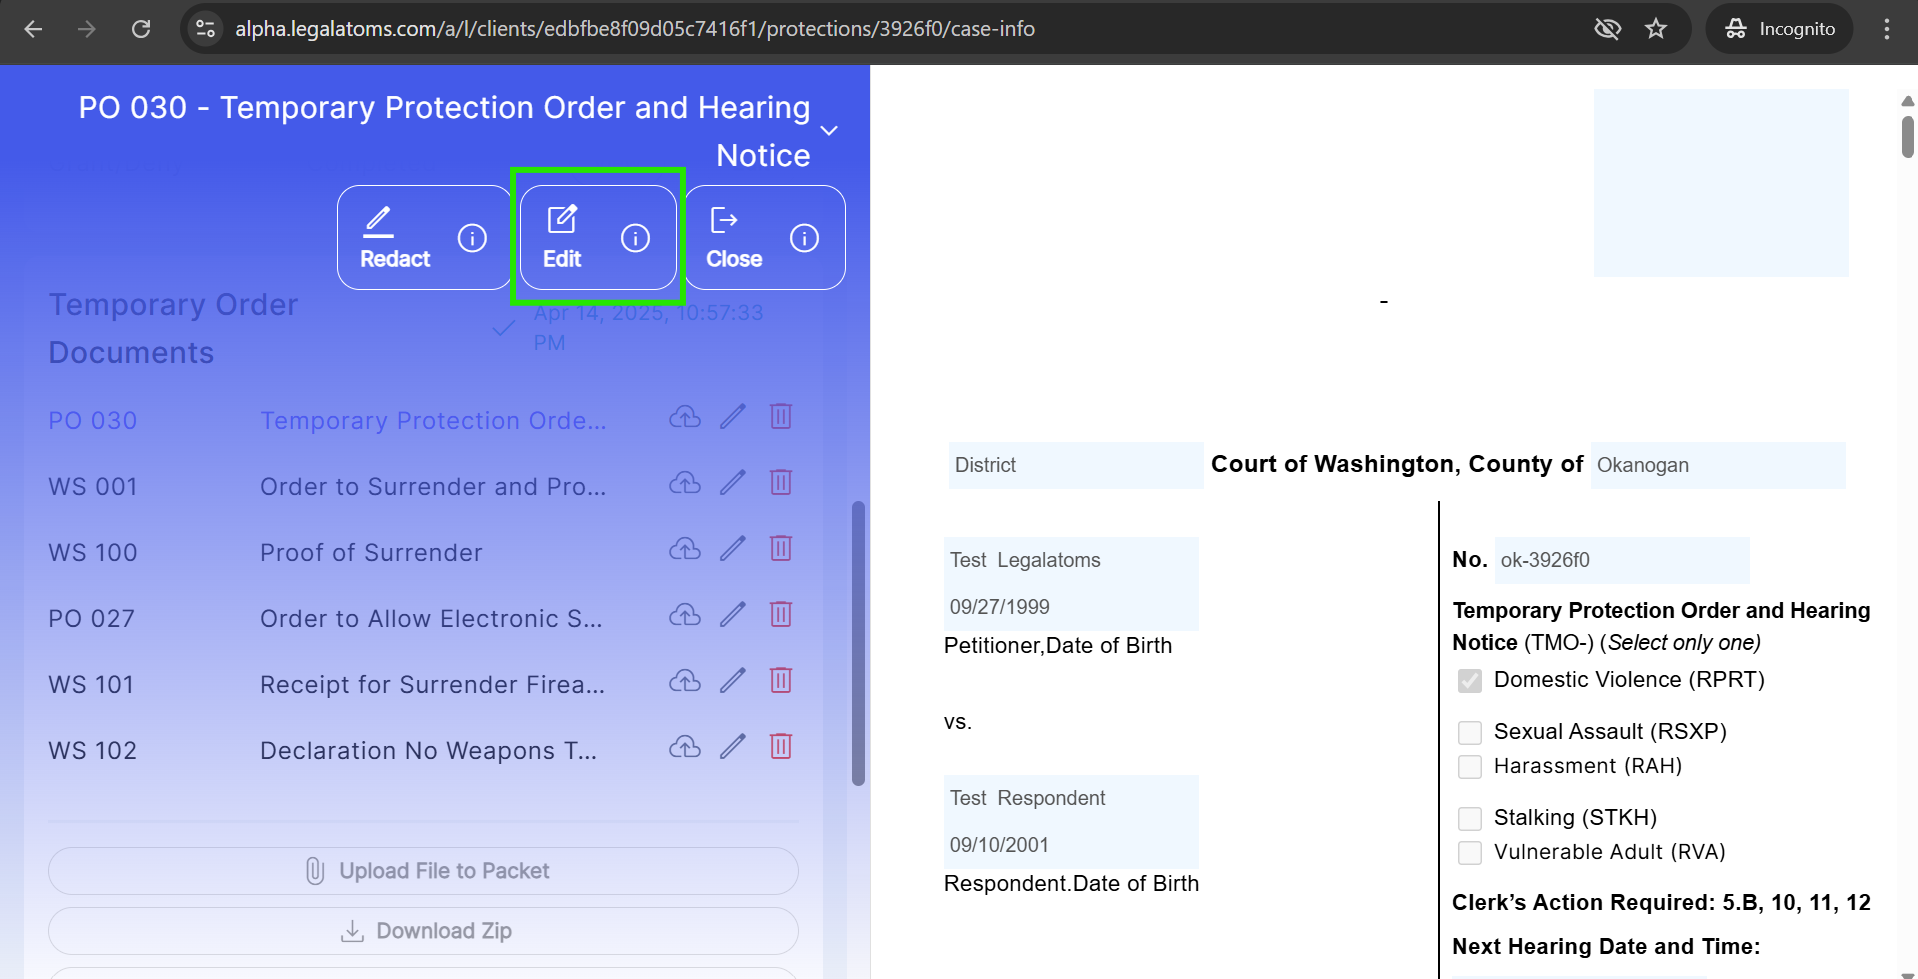
- Scroll through the Edit HTML document to locate the judge section where the signature should be placed.
- Judge can add name in the input field “Print Judge/Court Commissioner Name”.
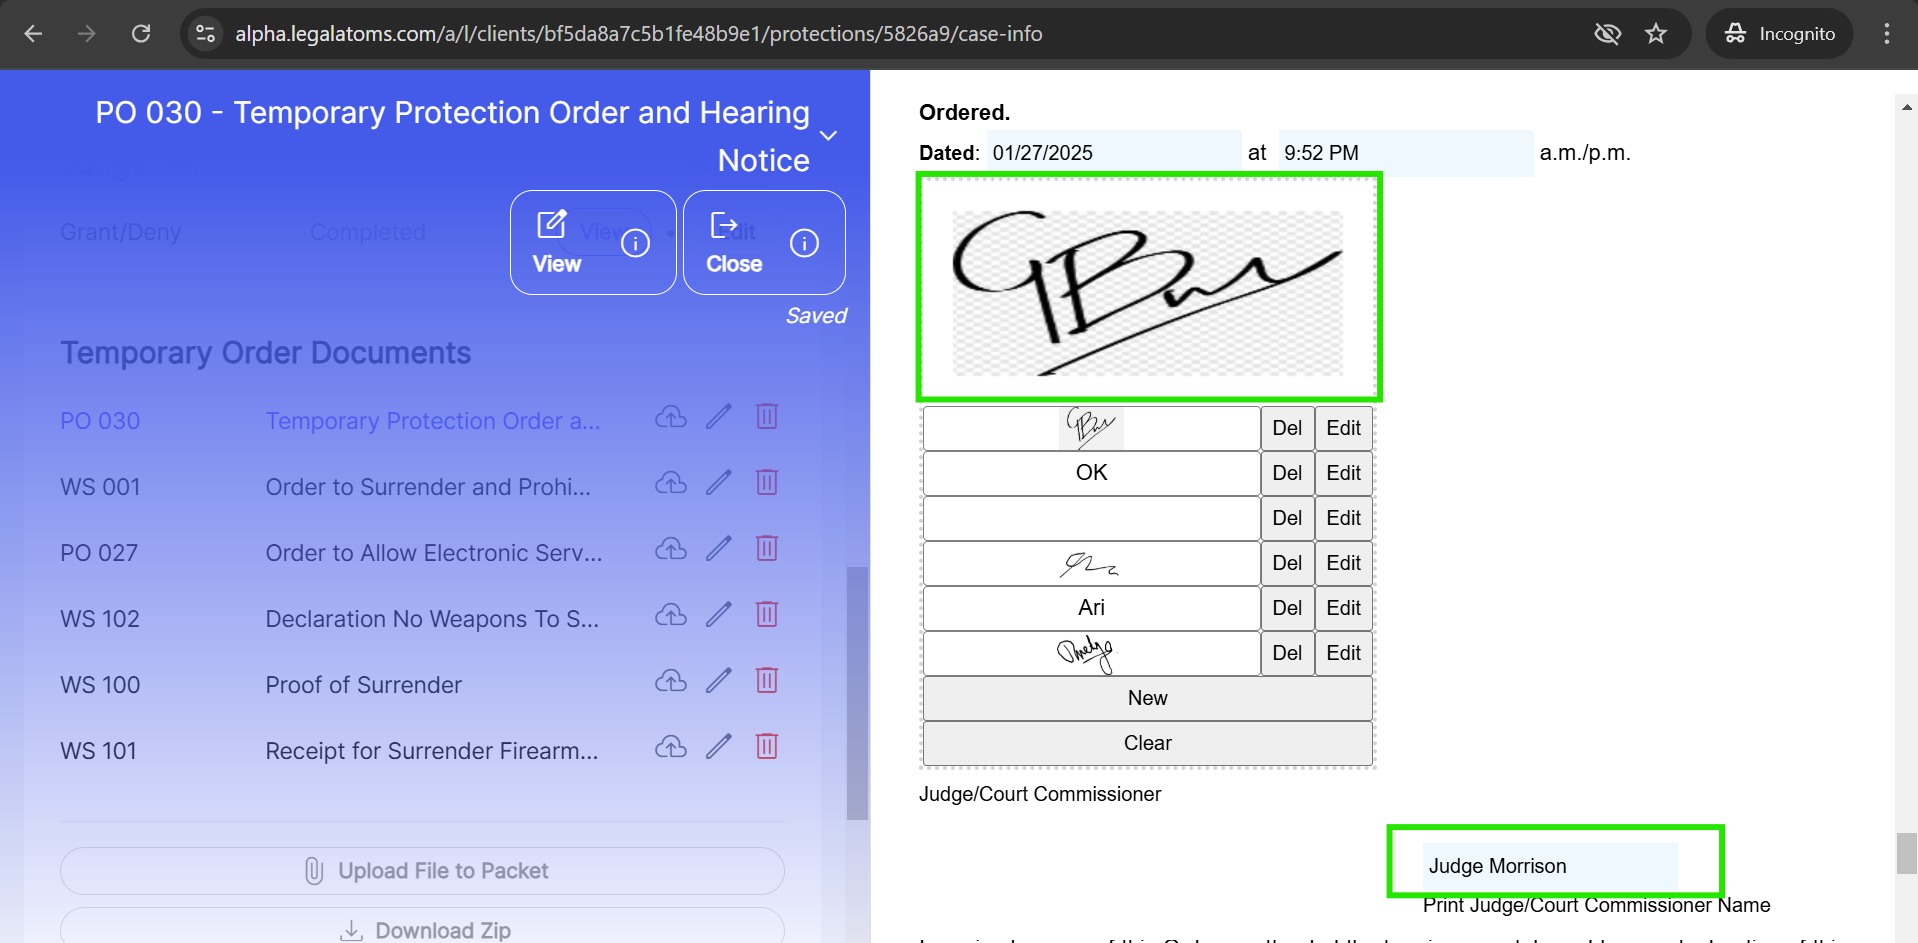
- Once judge have added the signature and name, click on the Close icon button to save the changes to the document.
- The changes will be auto save and reflected in all the documents within the section.
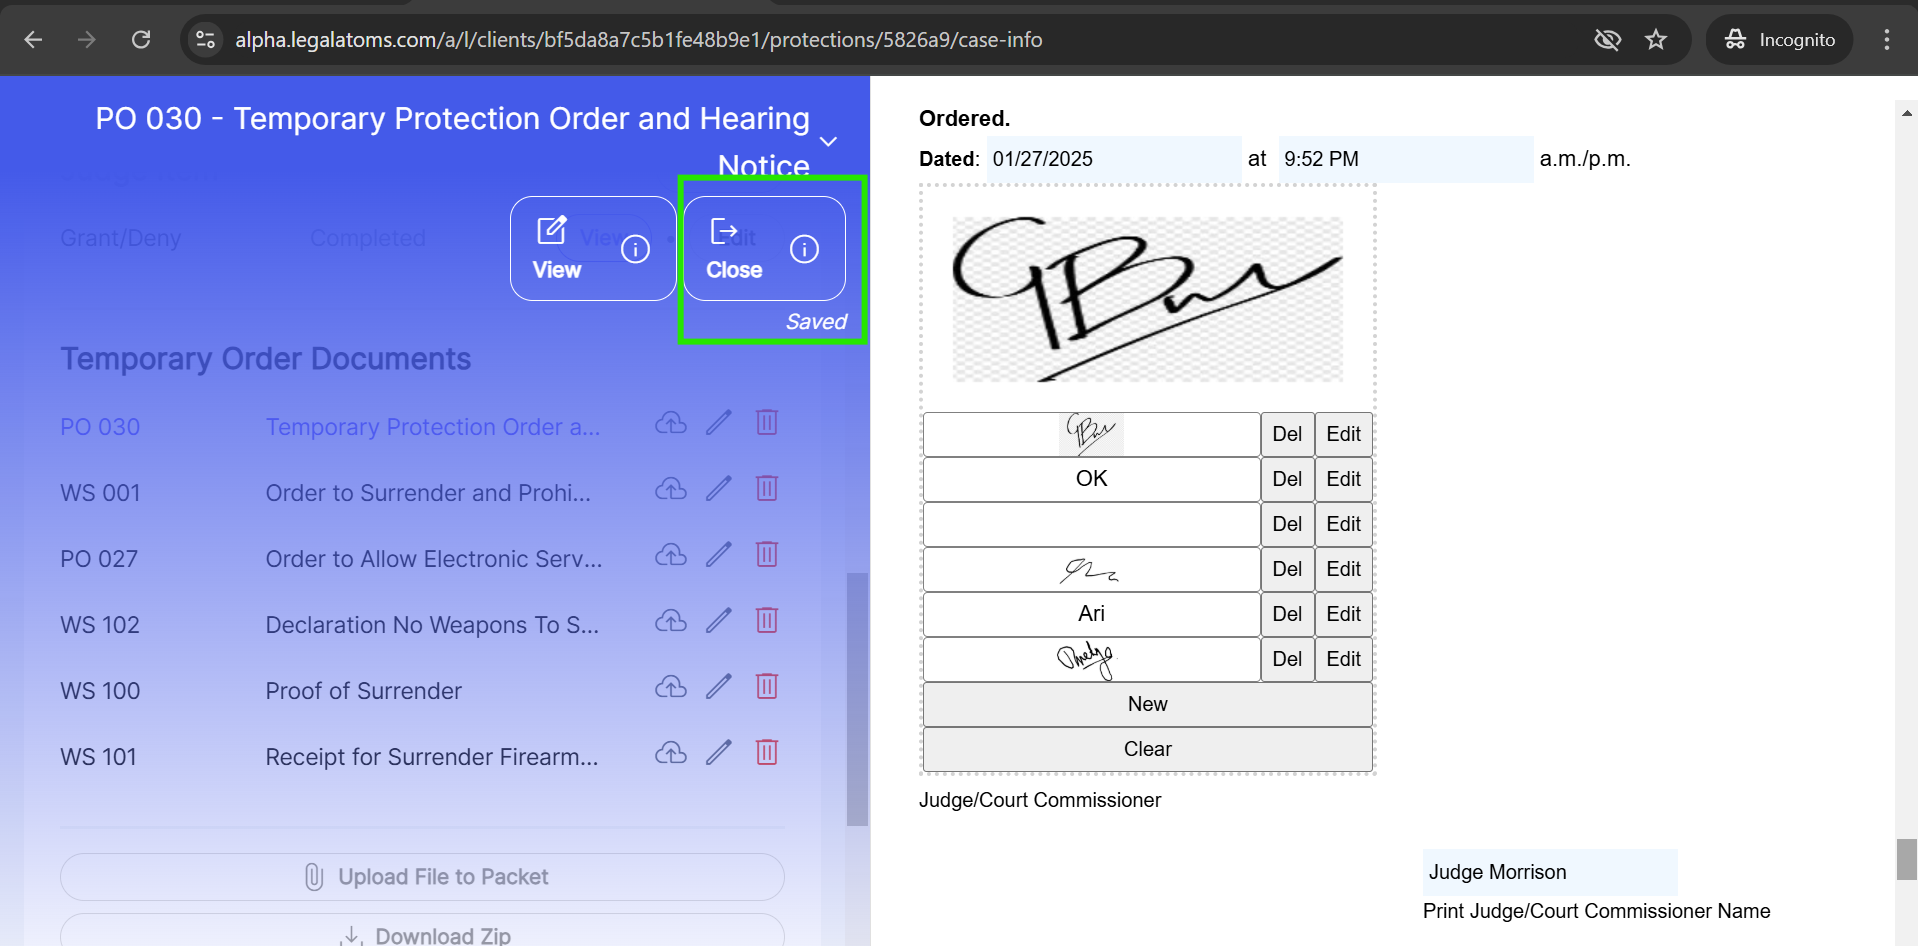
- After changing the document manually via Edit HTML feature judge can not amendment to the question he can only view the questionnaire.
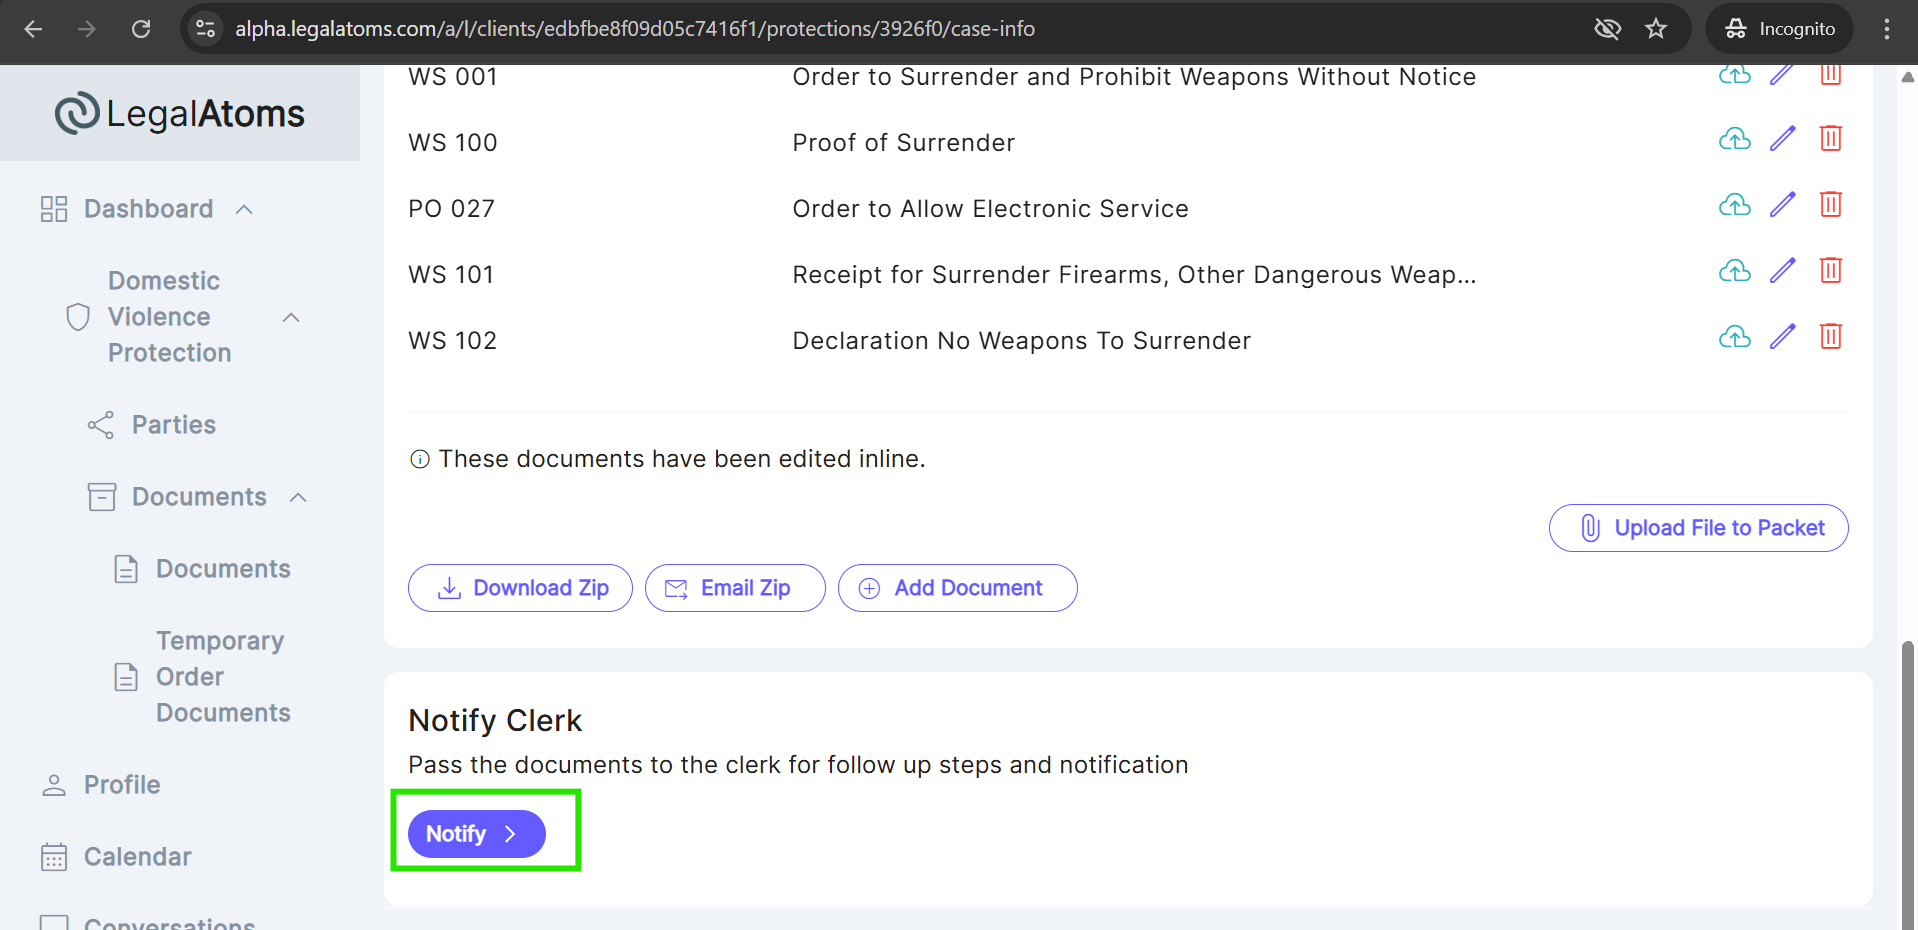
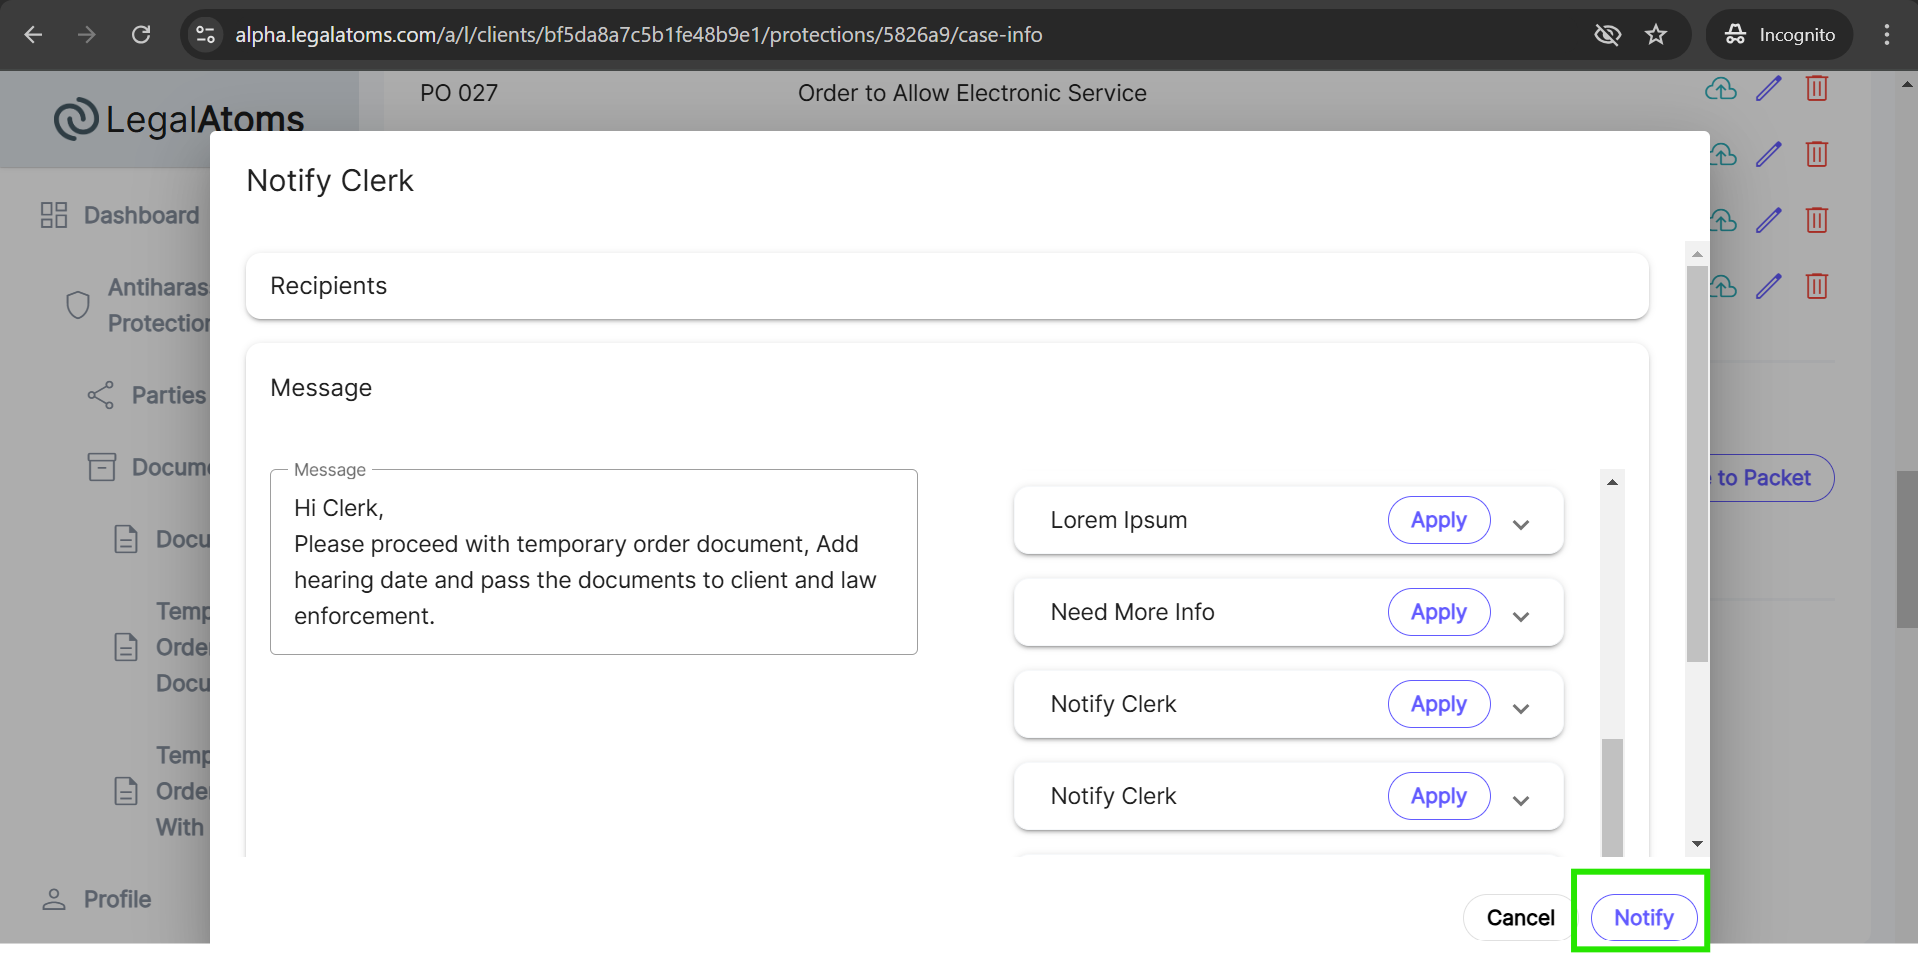
Step 5: Notify Clerk
Simply click on the Notify button to send the temporary order documents to the clerk. A popup will appear where the Judge adds a message and clicks the Notify button.
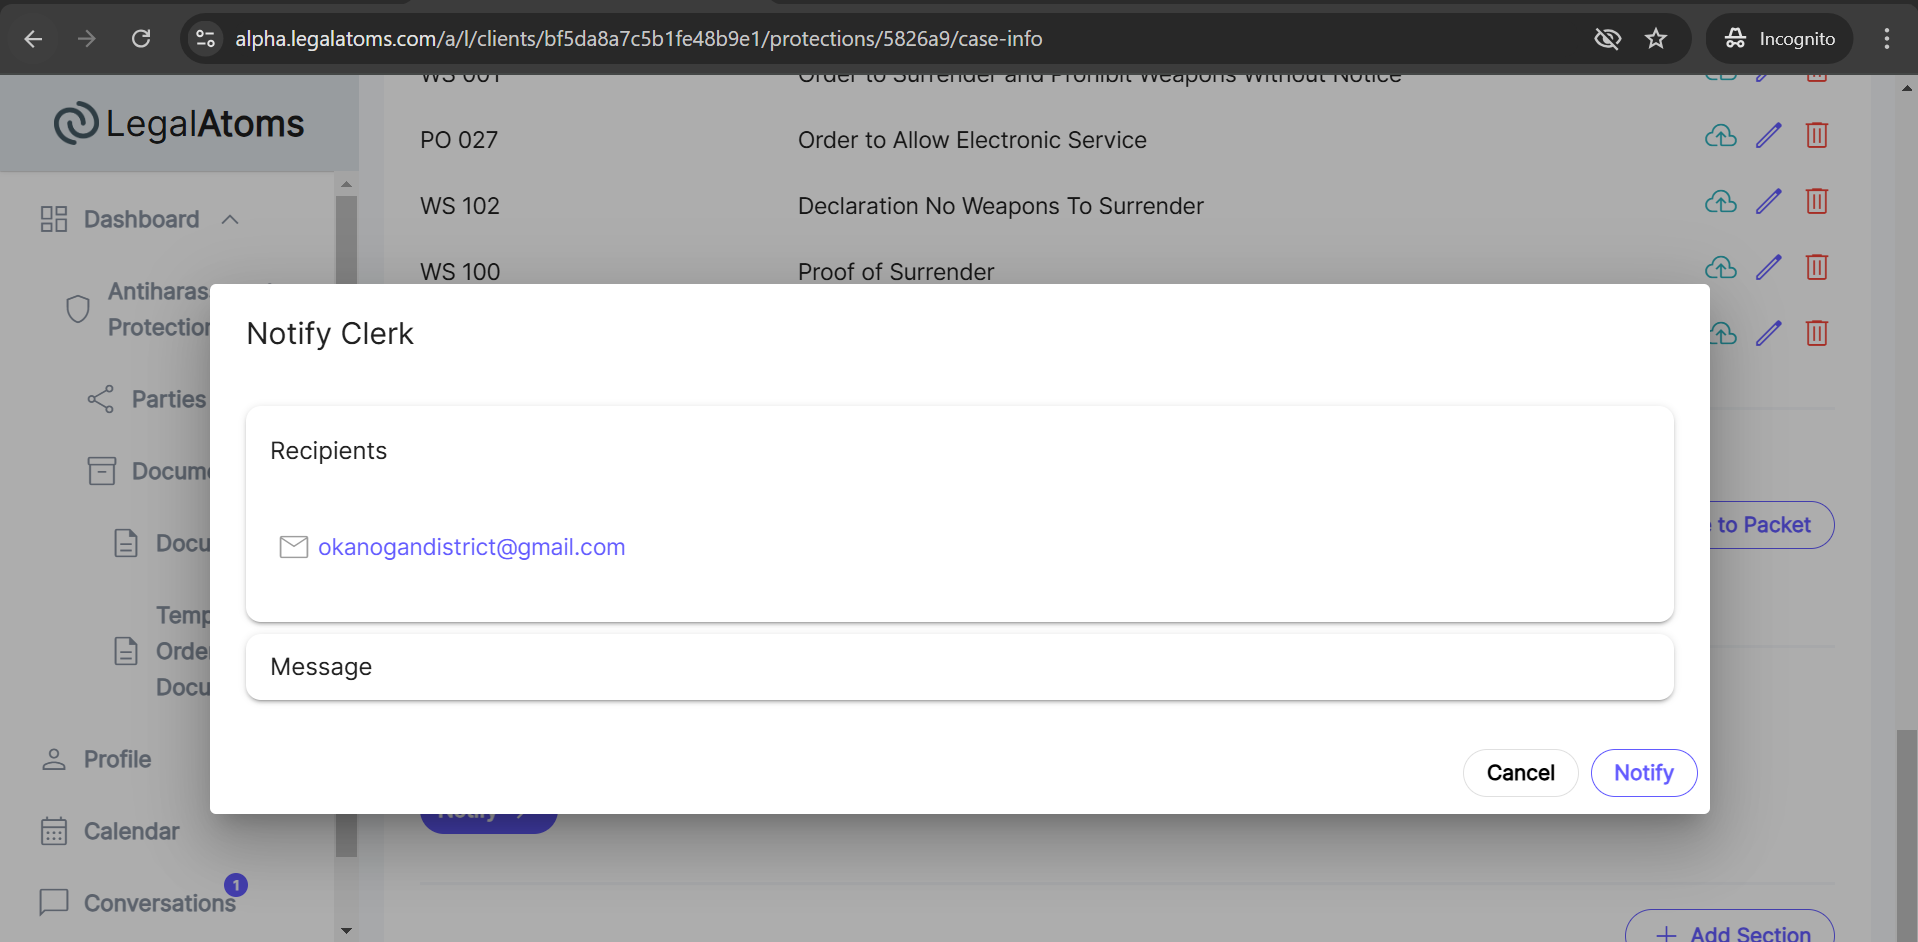
After Notify the clerk, the document will start auto generate, after generating the document an email with the attached zip PDF document will be sent to the clerk.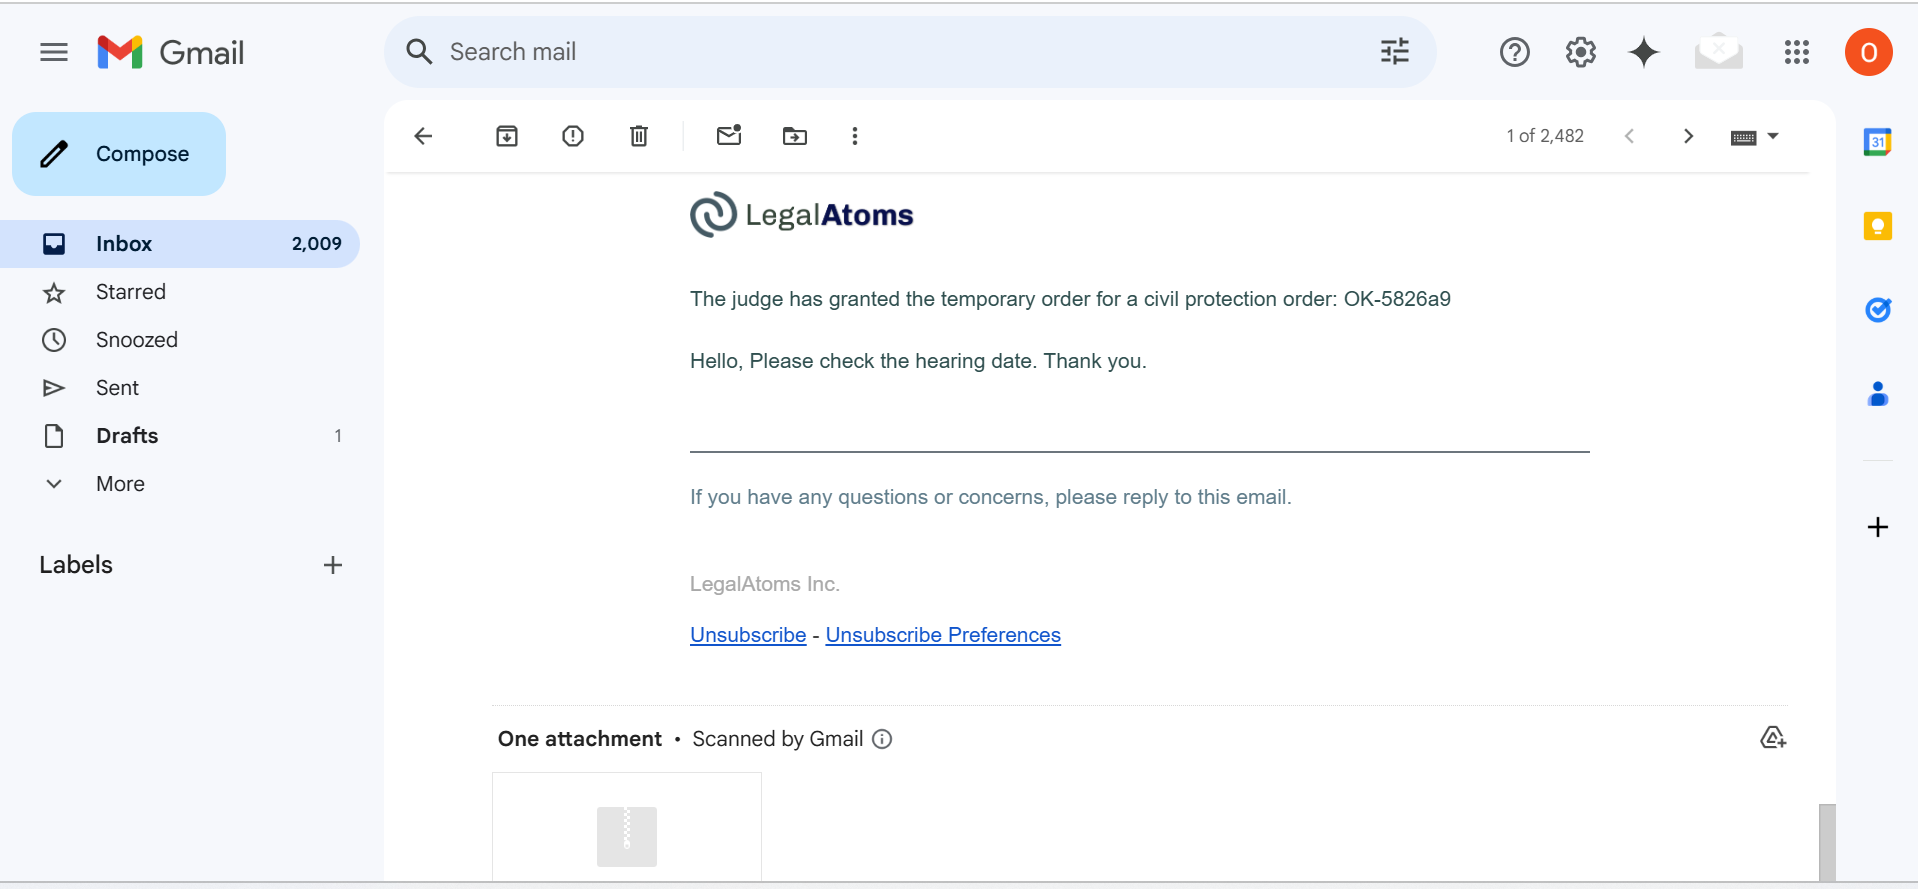

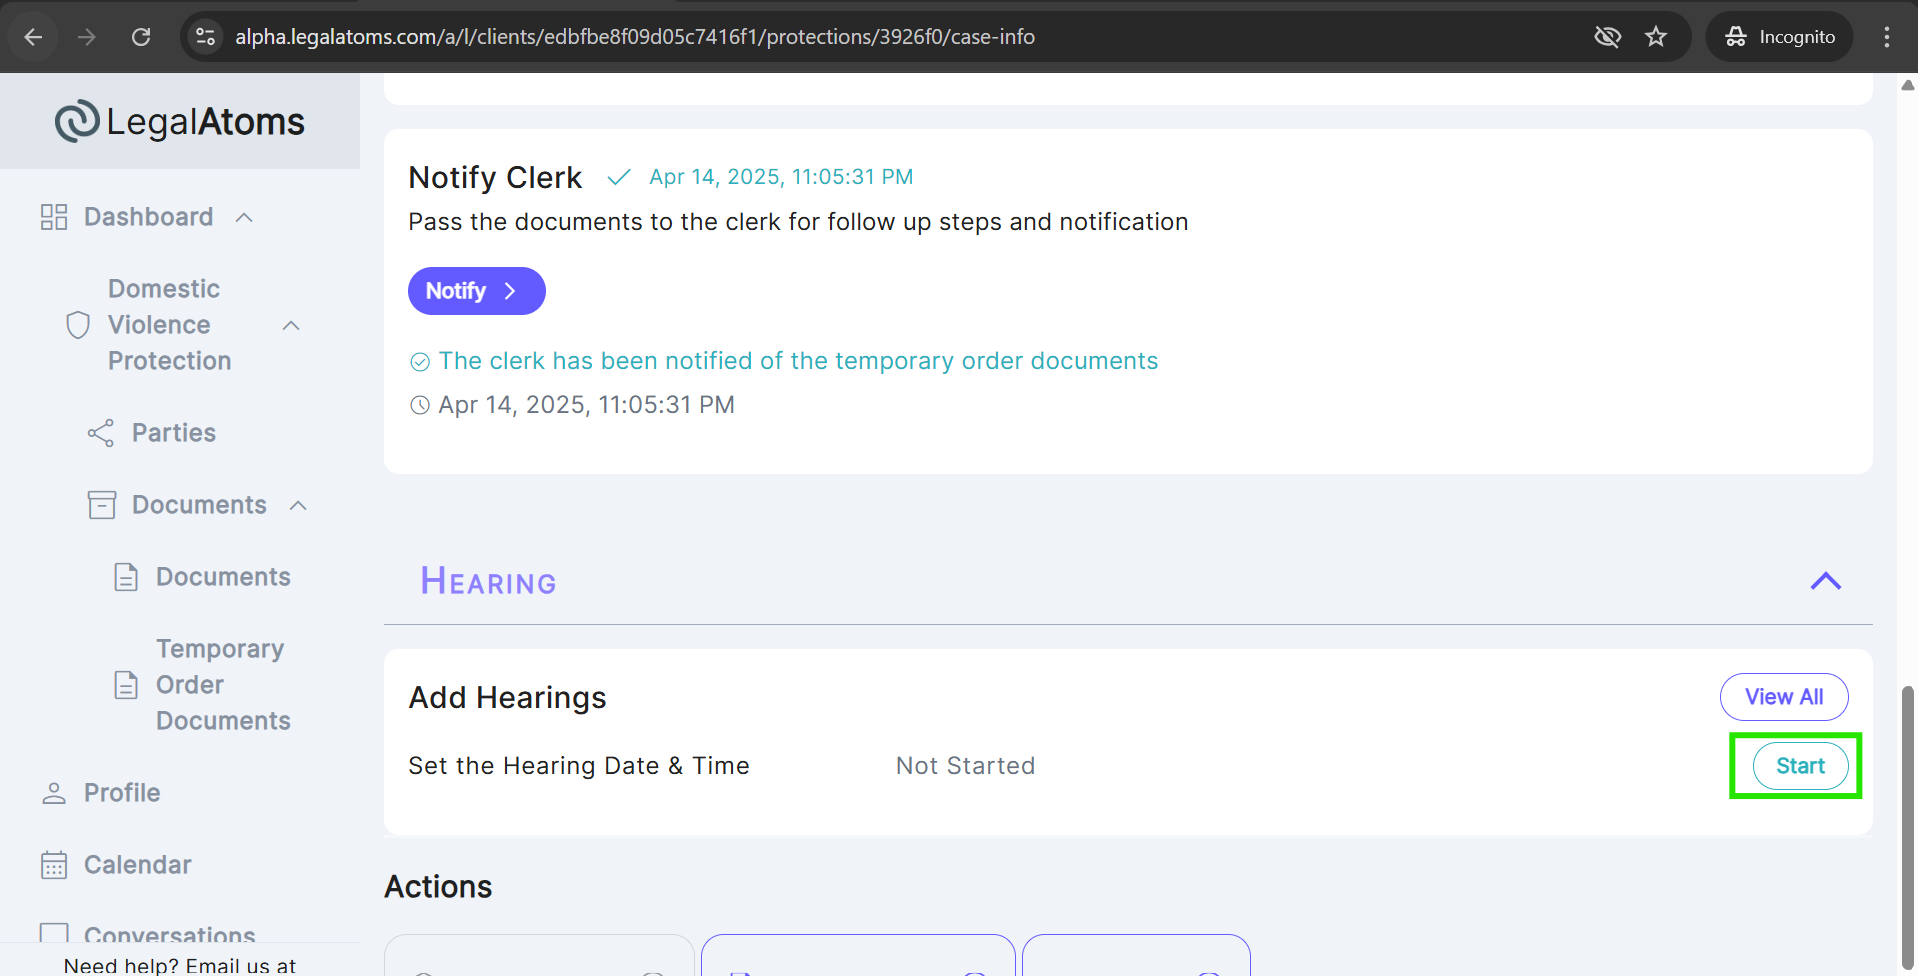
Step 6: The clerk set a hearing
After Notify the clerk, the section titled Document Packets and Notifications will be displayed. Hearings can be set as follows:
- Click on the Start button
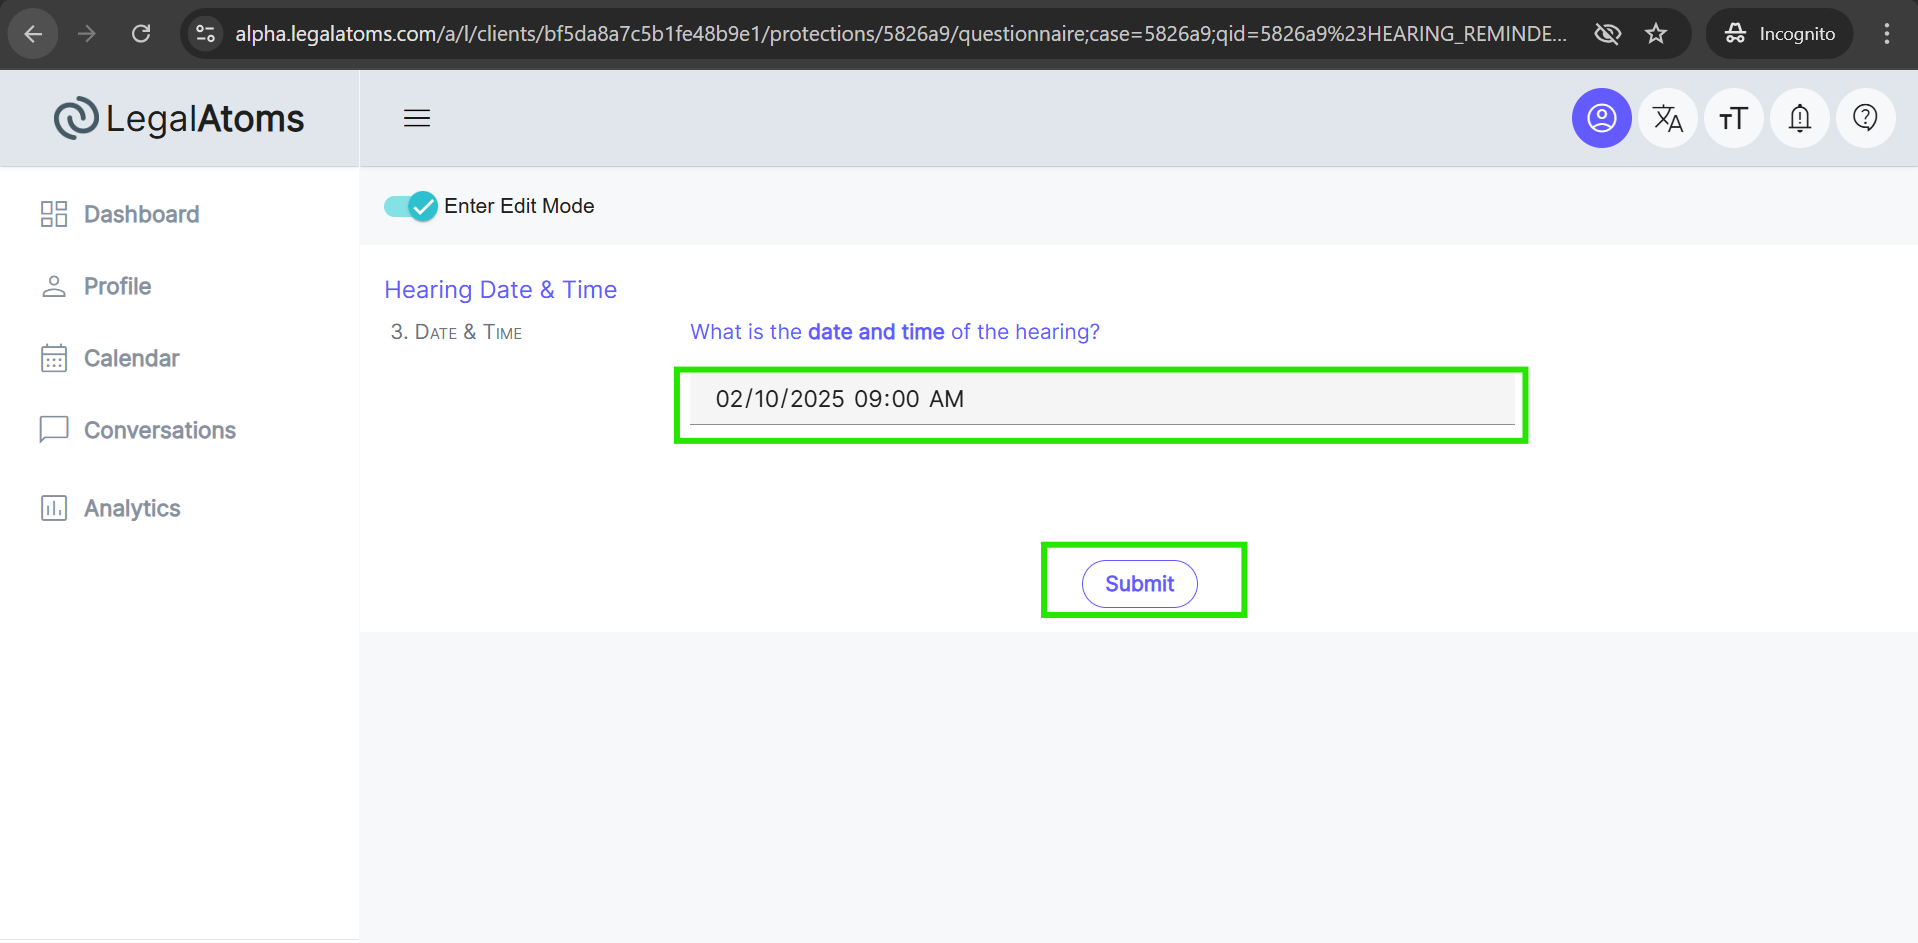
- The hearing date and time are auto populate, and the clerk can also change the hearing date.
- Click on the Submit button
- The document will start auto-generate. After generating the document it will appear under (Temporary Order Packet With Hearing, and Law Enforcement Packet) section.
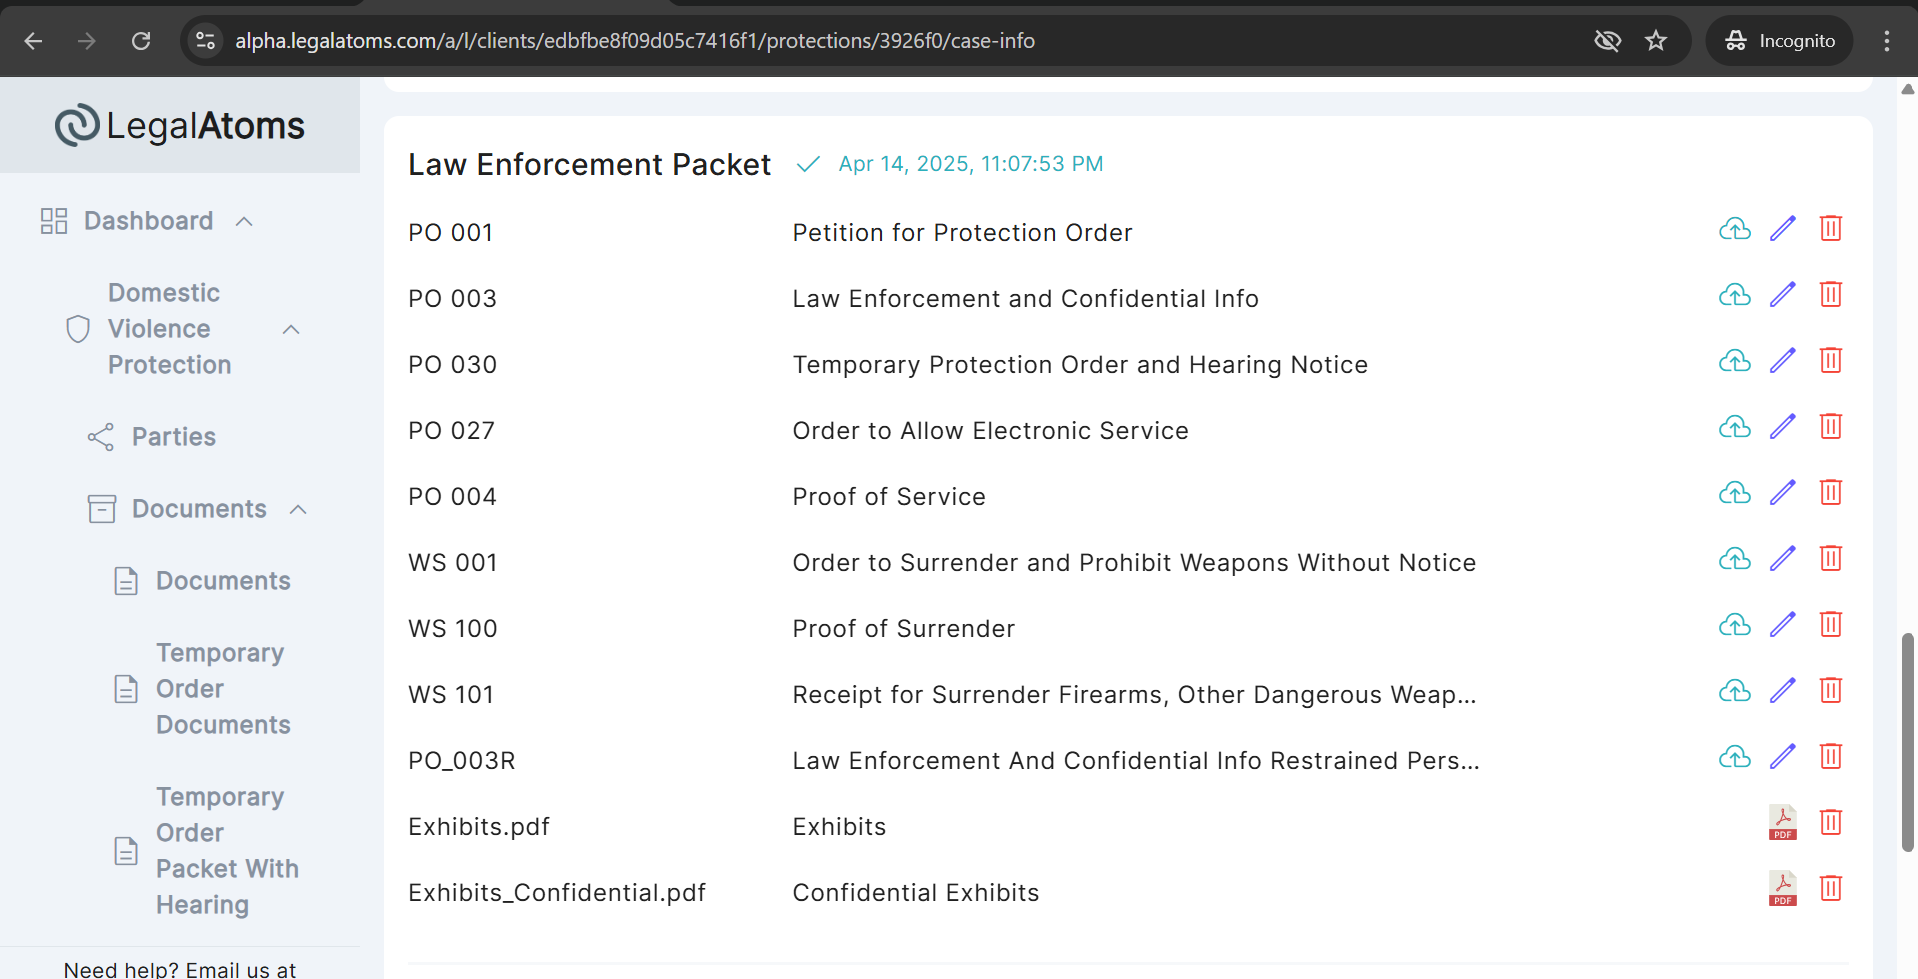
After generating the document, the hearing date will be populated in these two documents (Temporary Protection Order and Hearing Notice, and Order to Surrender and Prohibit Weapons Without Notice).


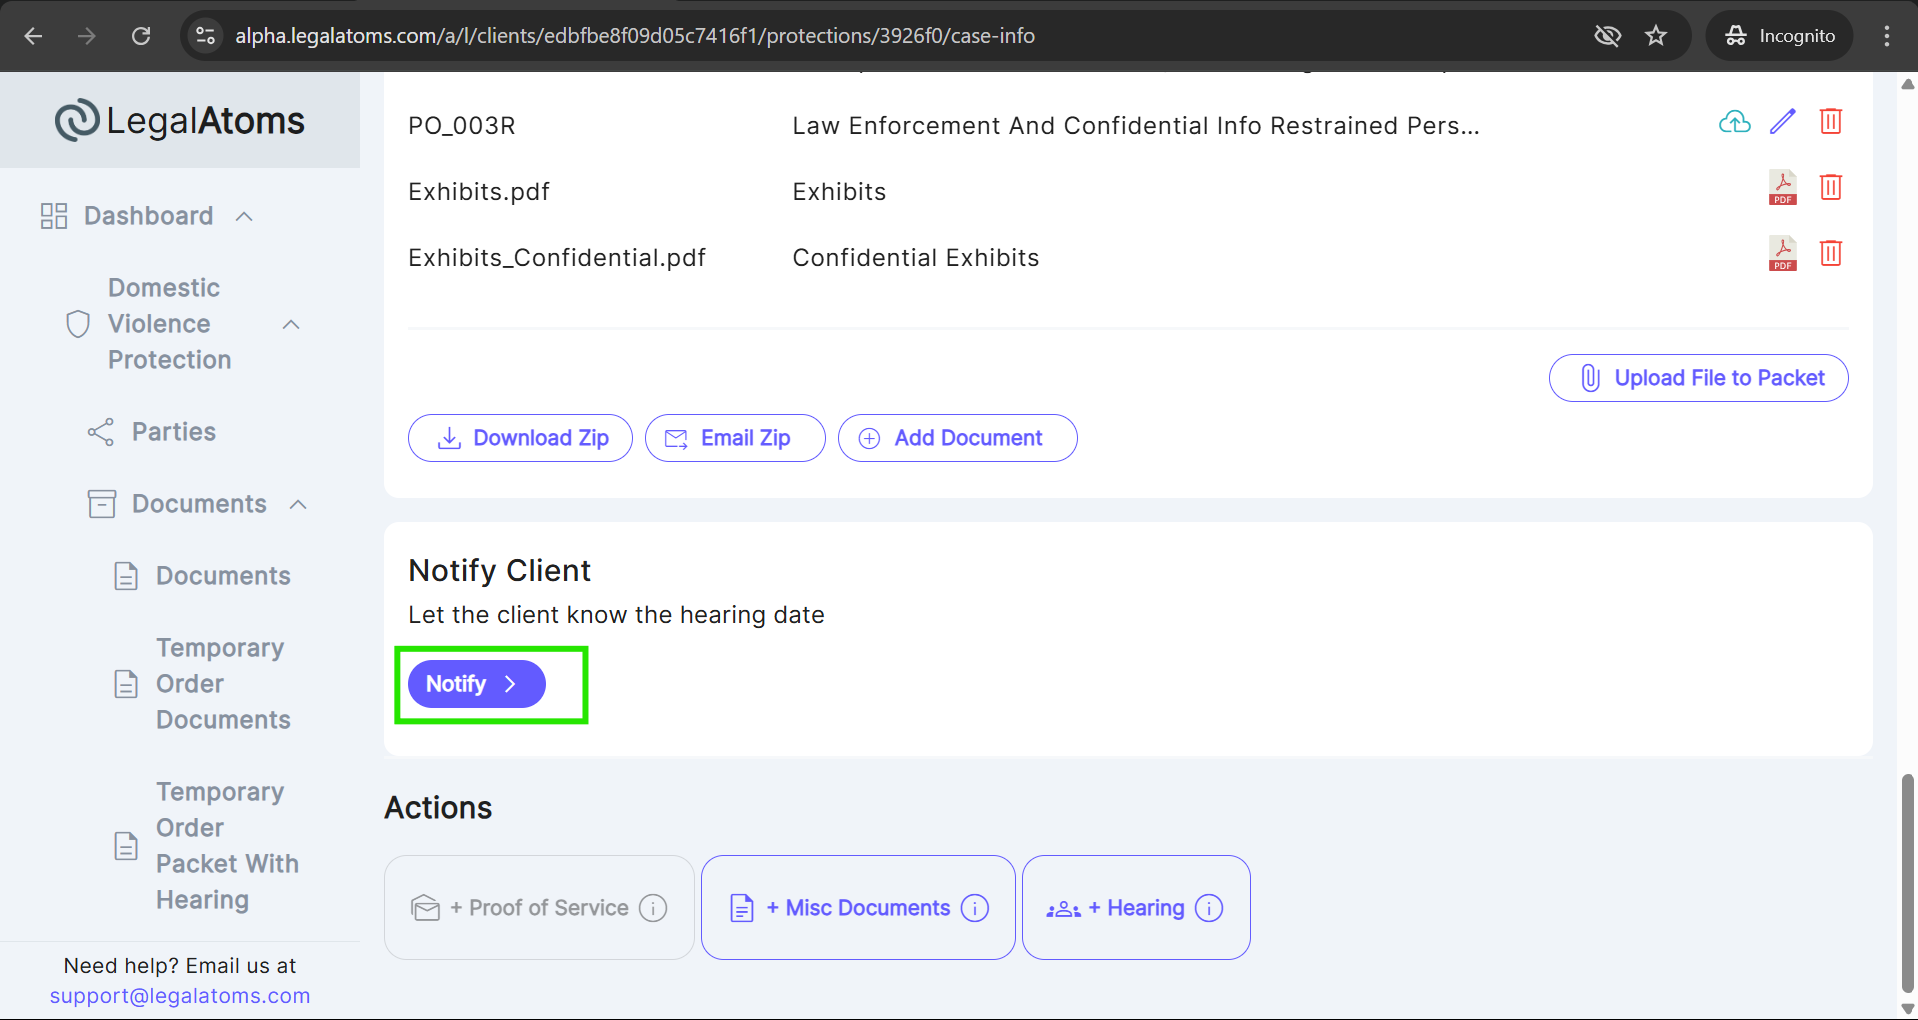
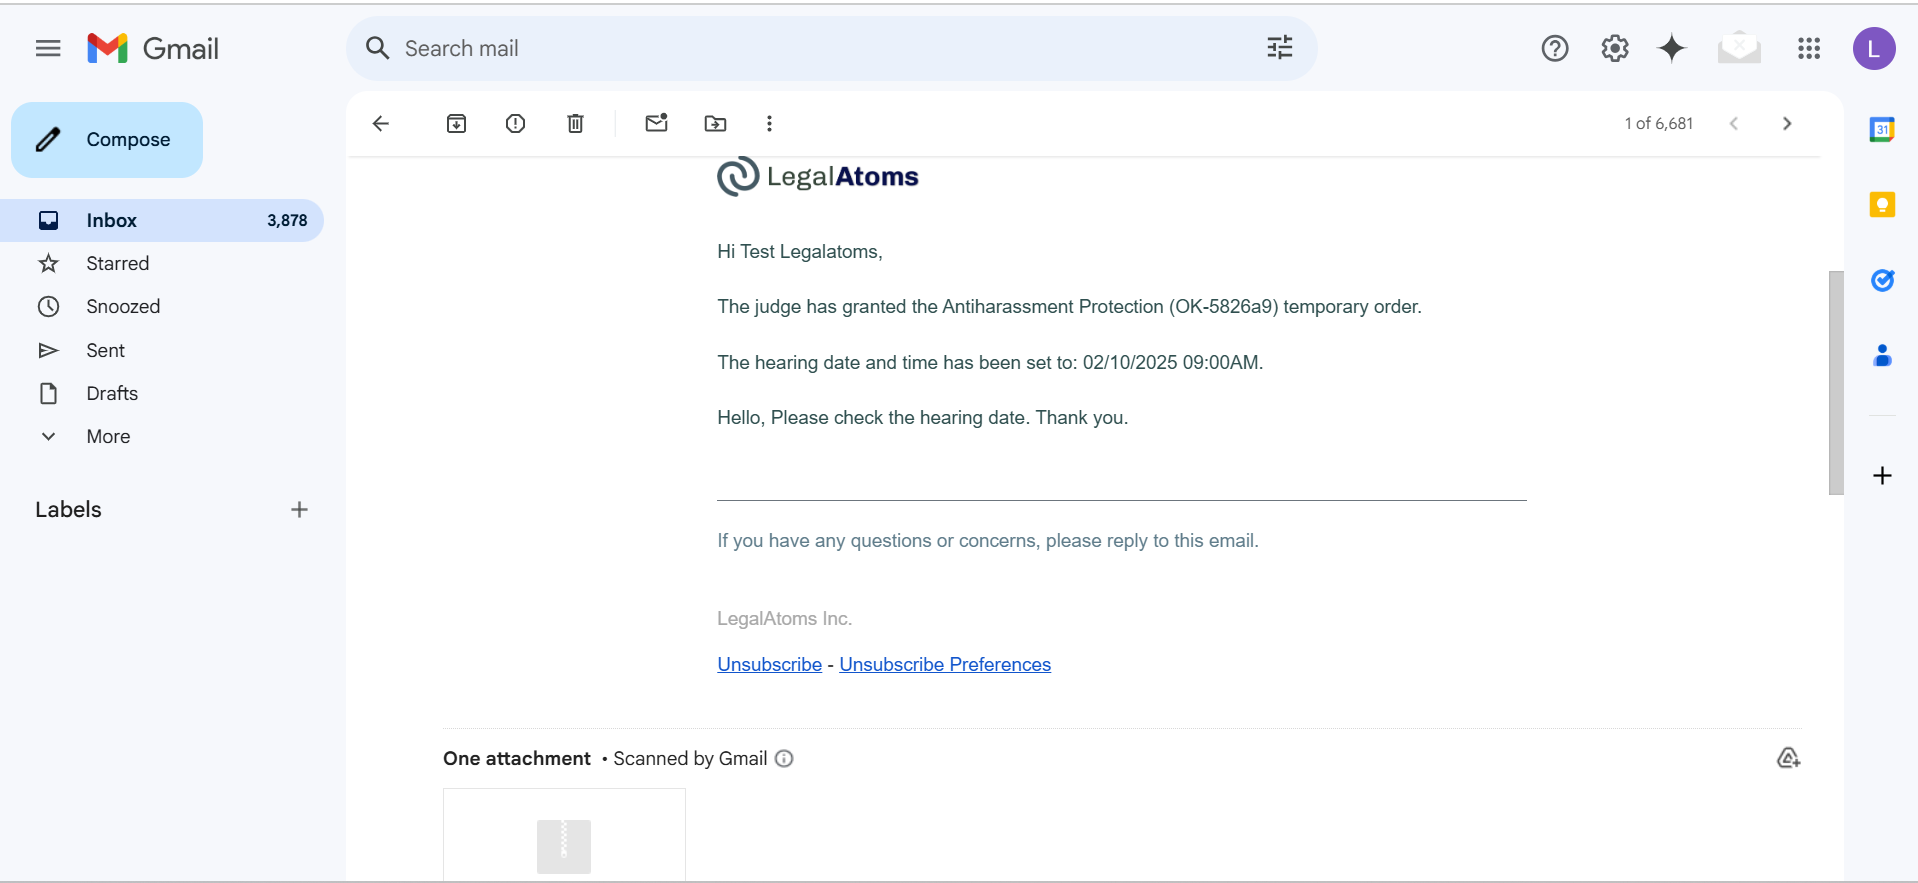
Step 7: Notify Client
Simply click on the Notify button to send the “temporary order Packet with hearing” documents to the client. A popup will appear where the clerk adds a message and clicks the Notify button.
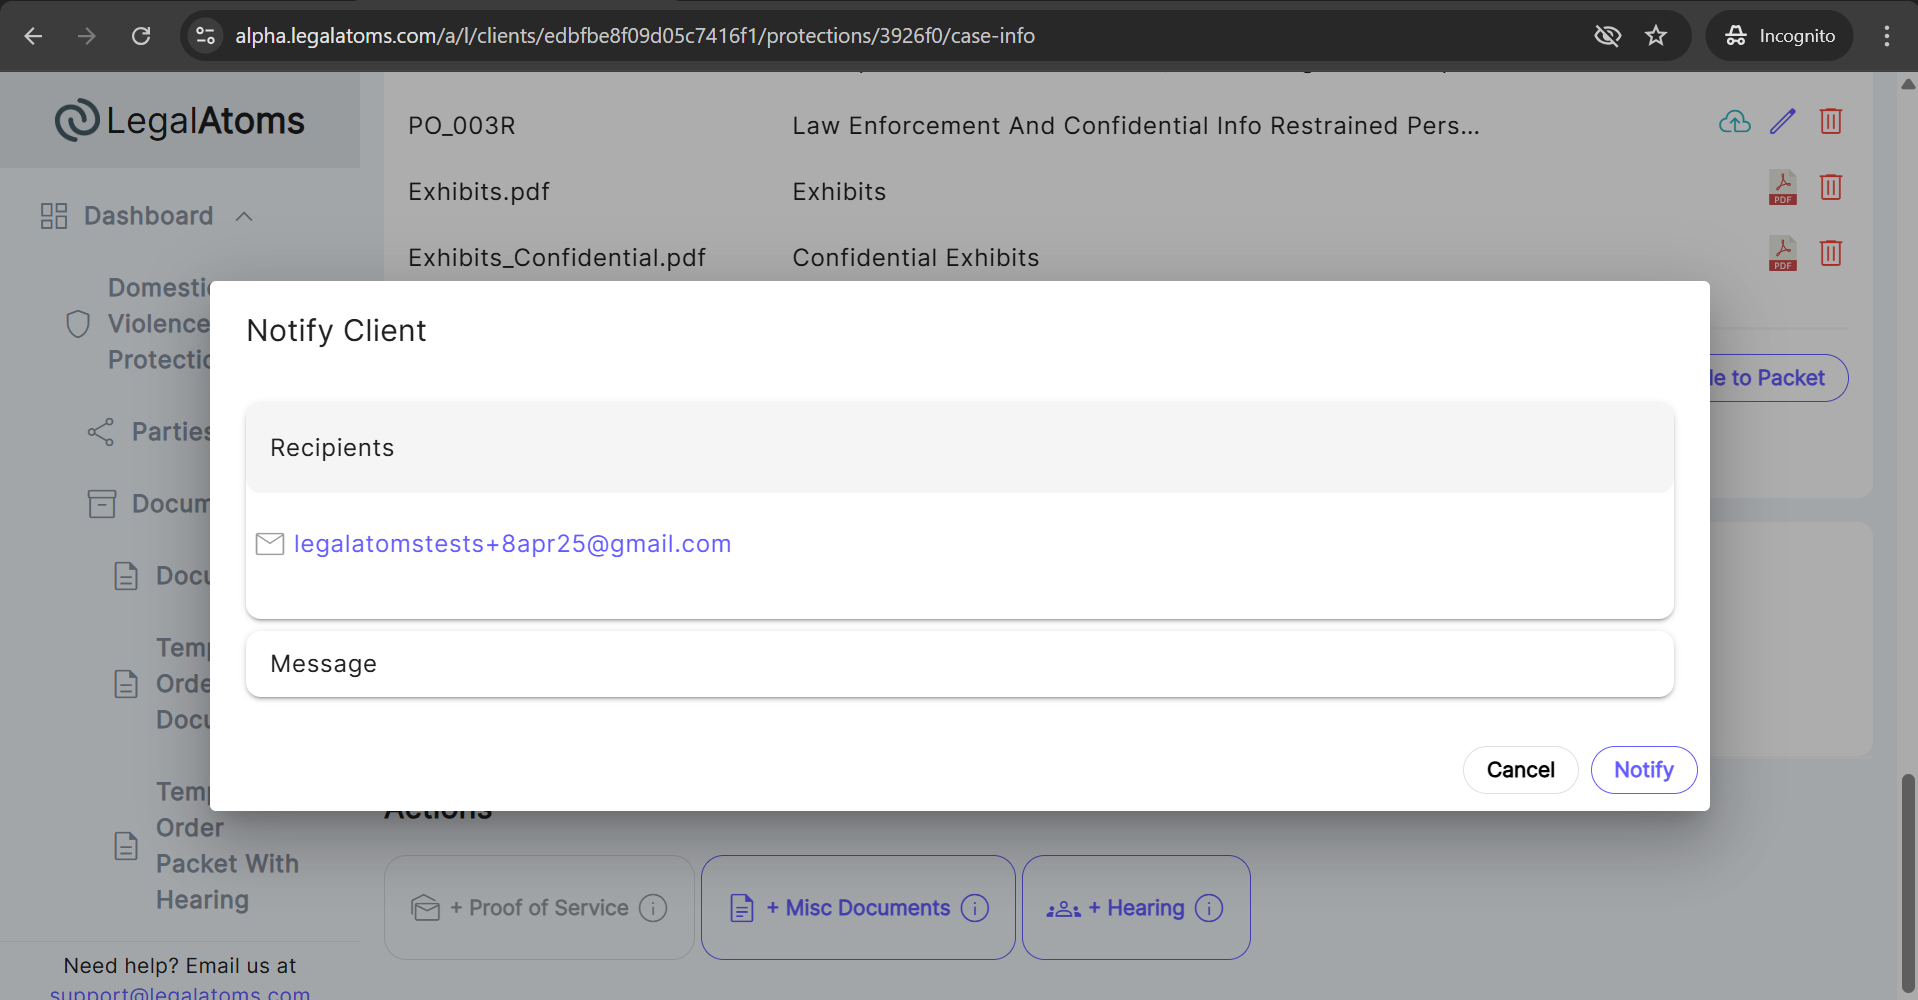

After Notify the client, the document will start auto generate, after generating the document an email with the attached zip PDF document will be sent to the client.

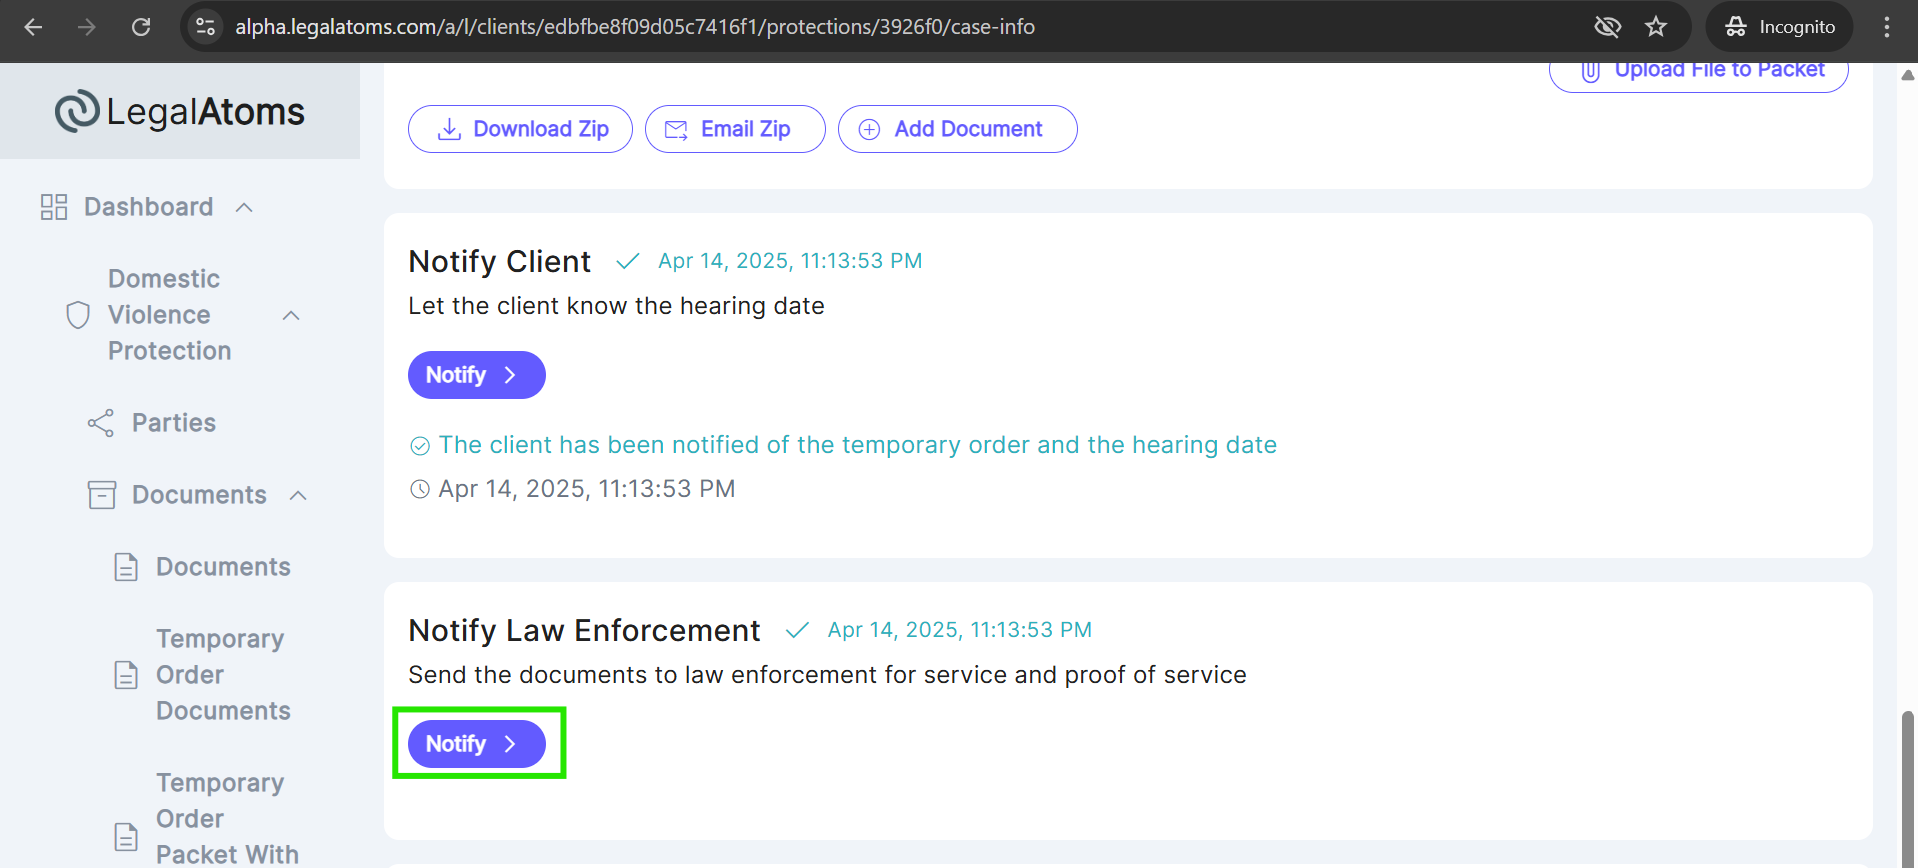
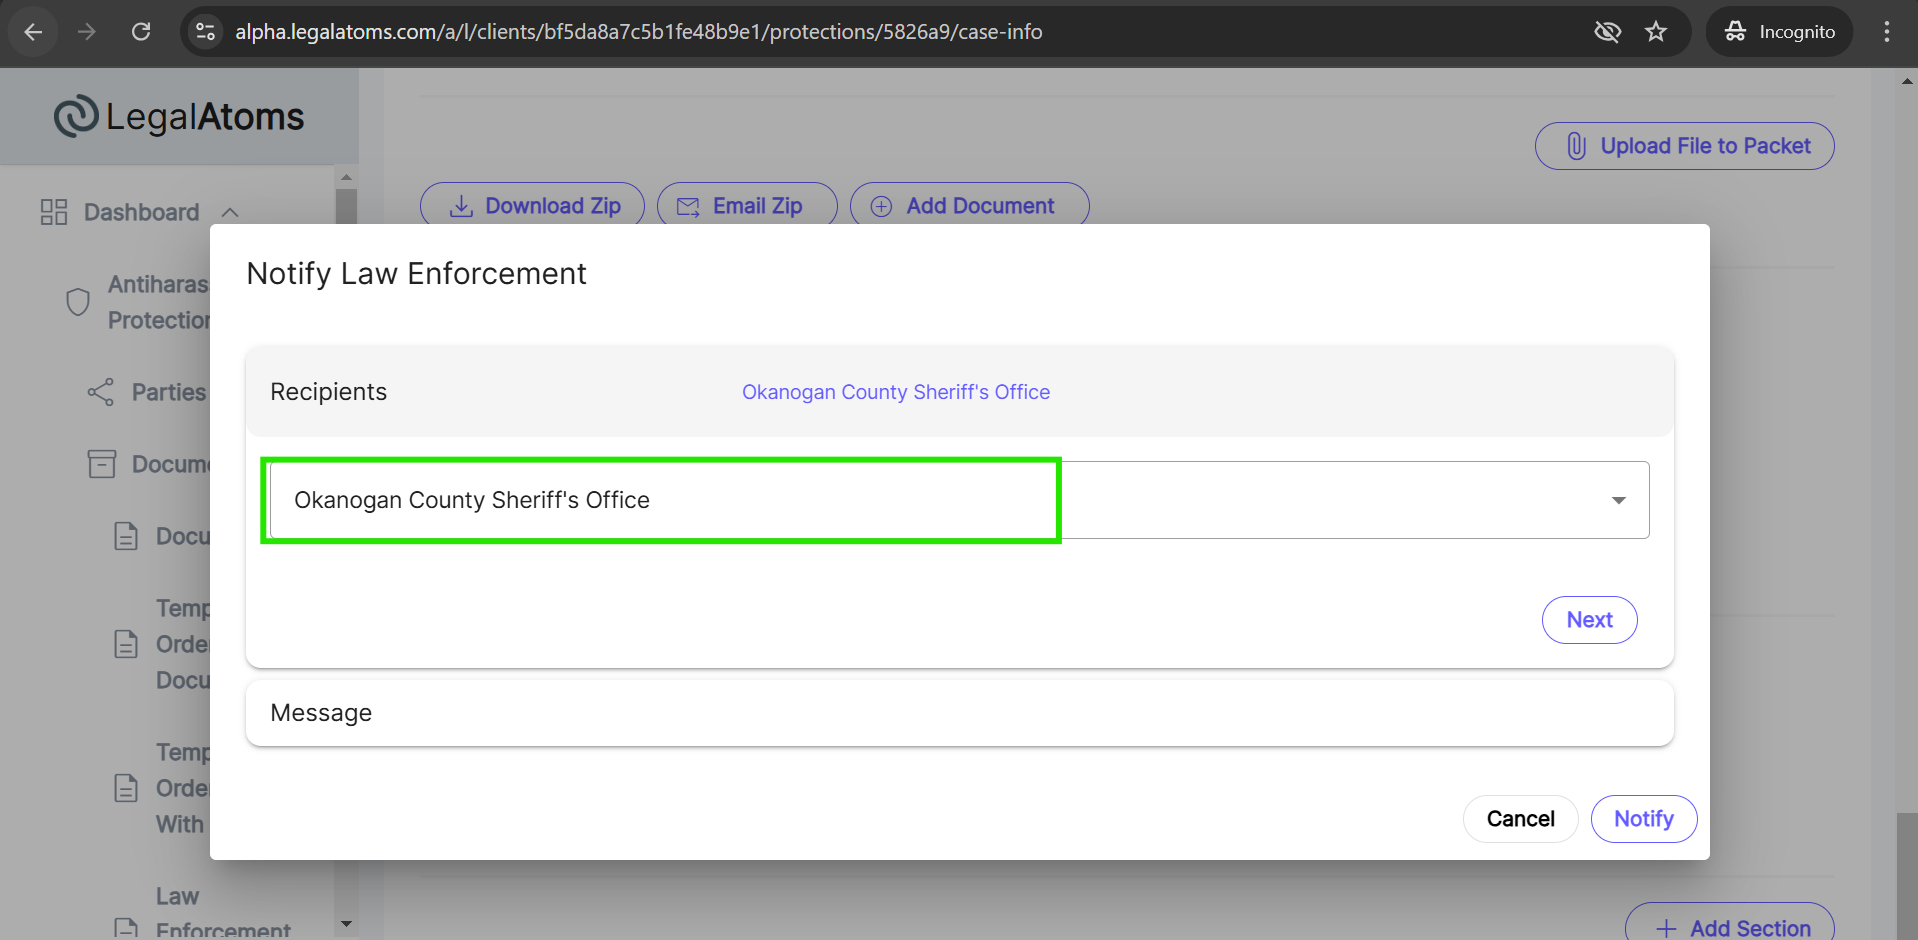
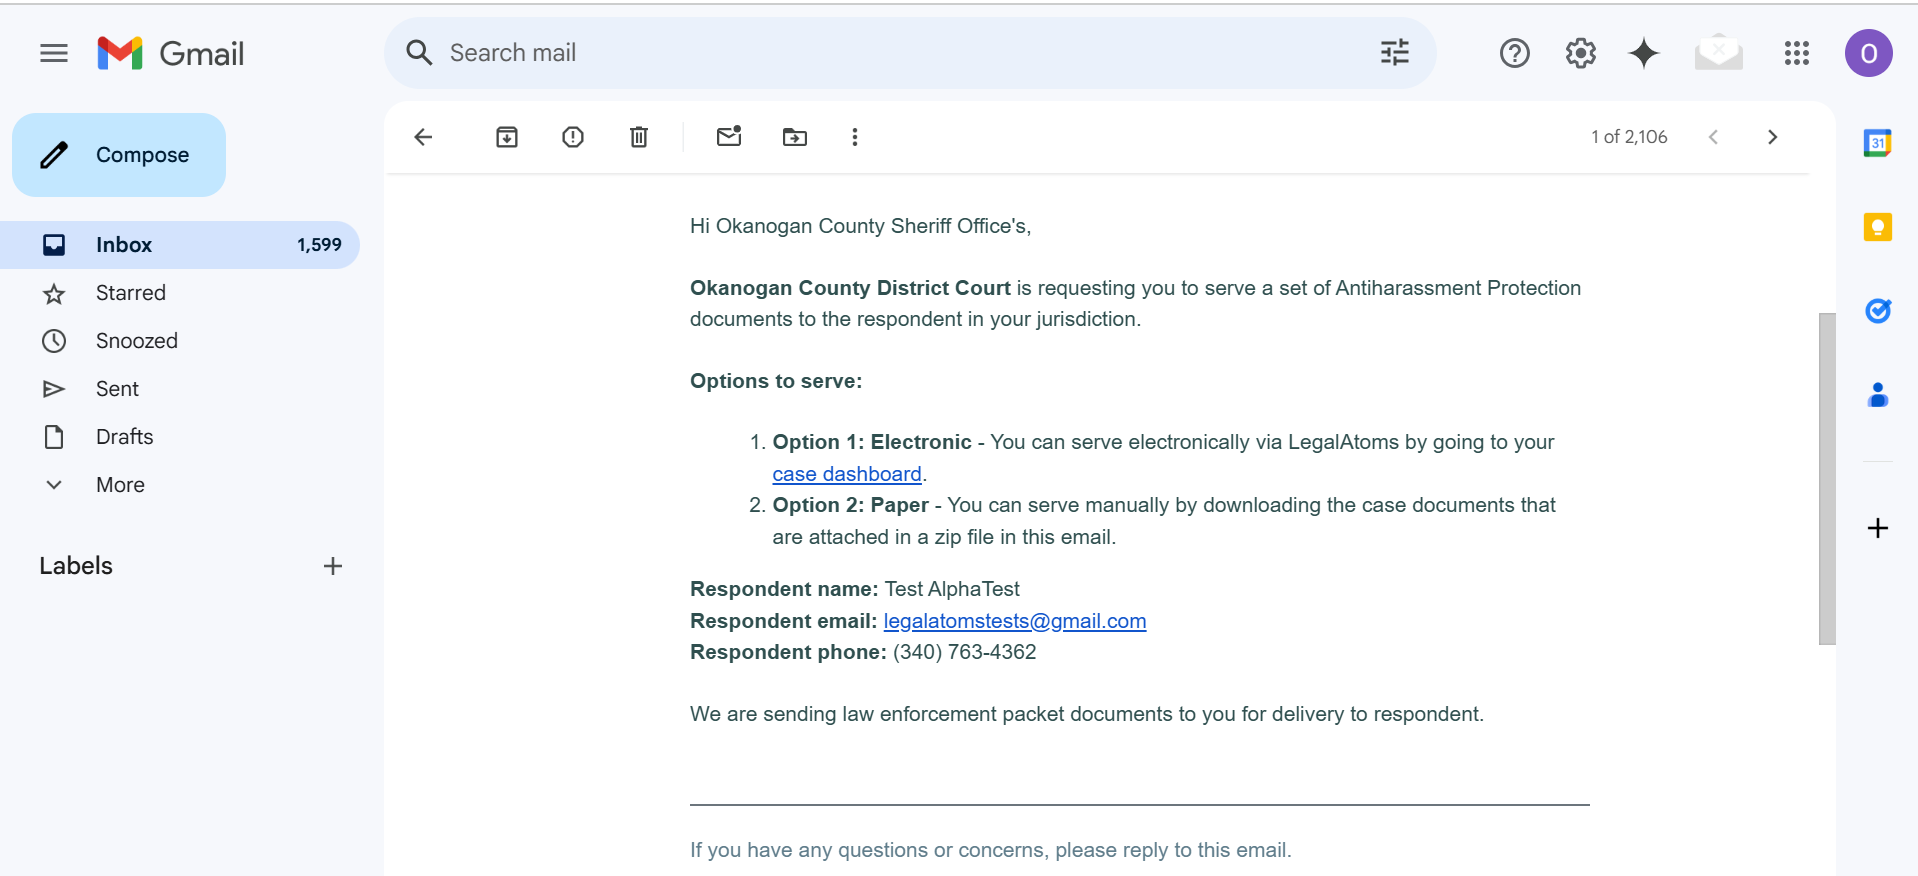
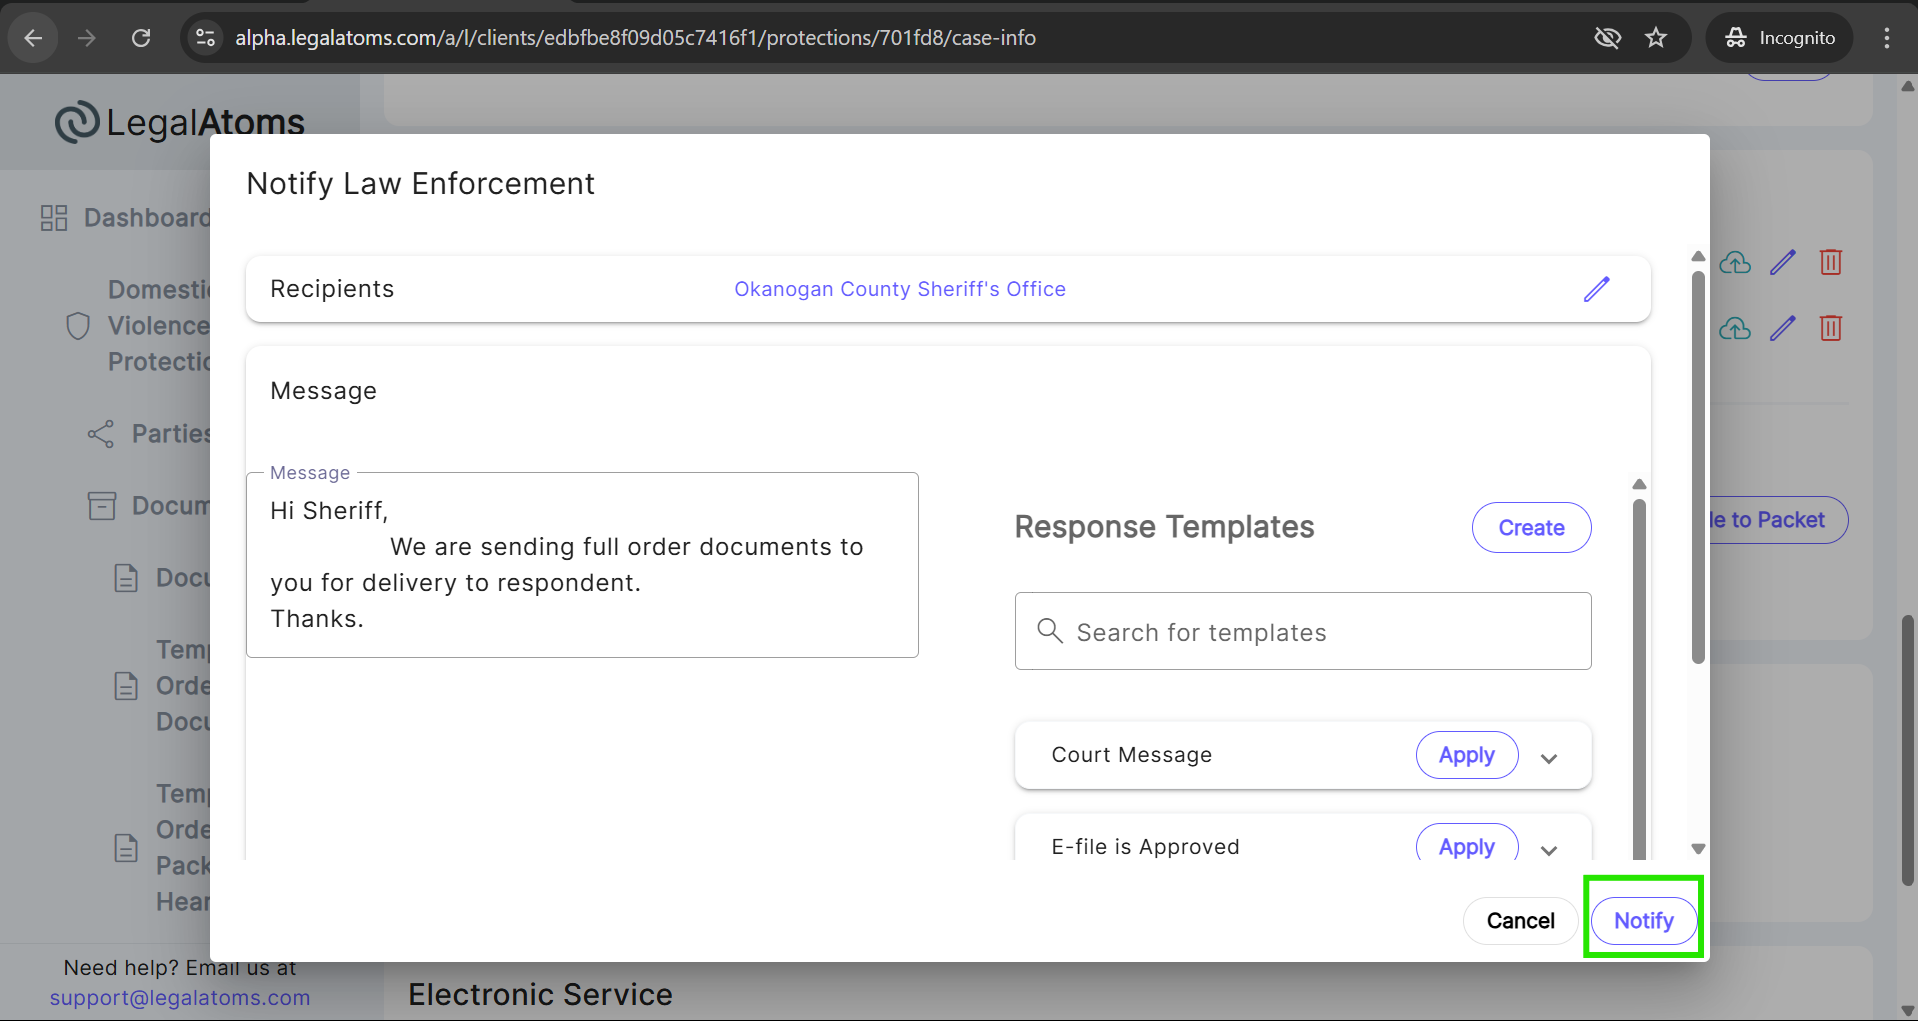
Step 8: Notify Law Enforcement
Simply click on the Notify button to send the “Law Enforcement Packet” documents to the sheriff. A popup will appear where the law enforcement name is auto-populated, and the clerk adds a message and clicks the Notify button.
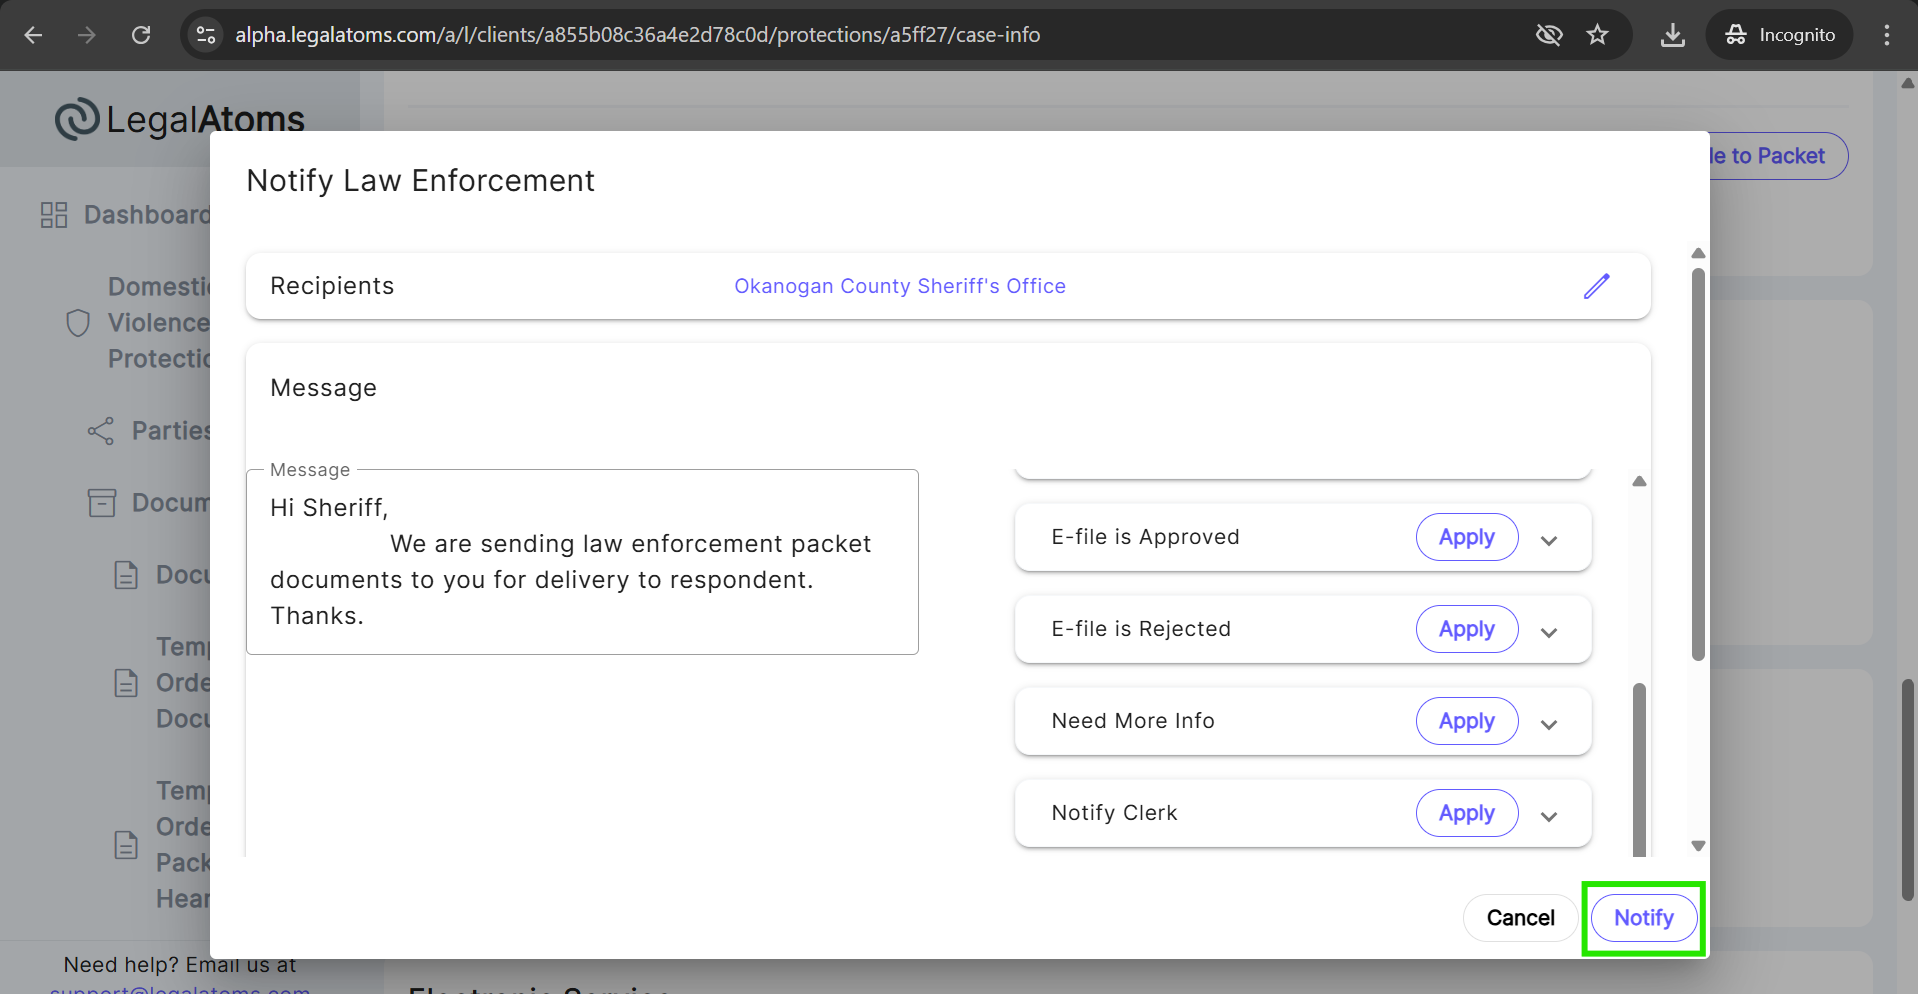
The clerk can Notify different law enforcement agencies by simply re-click “Notify” law enforcement in which case the law enforcement packet of documents would be delivered to the subsequent law enforcement agency.
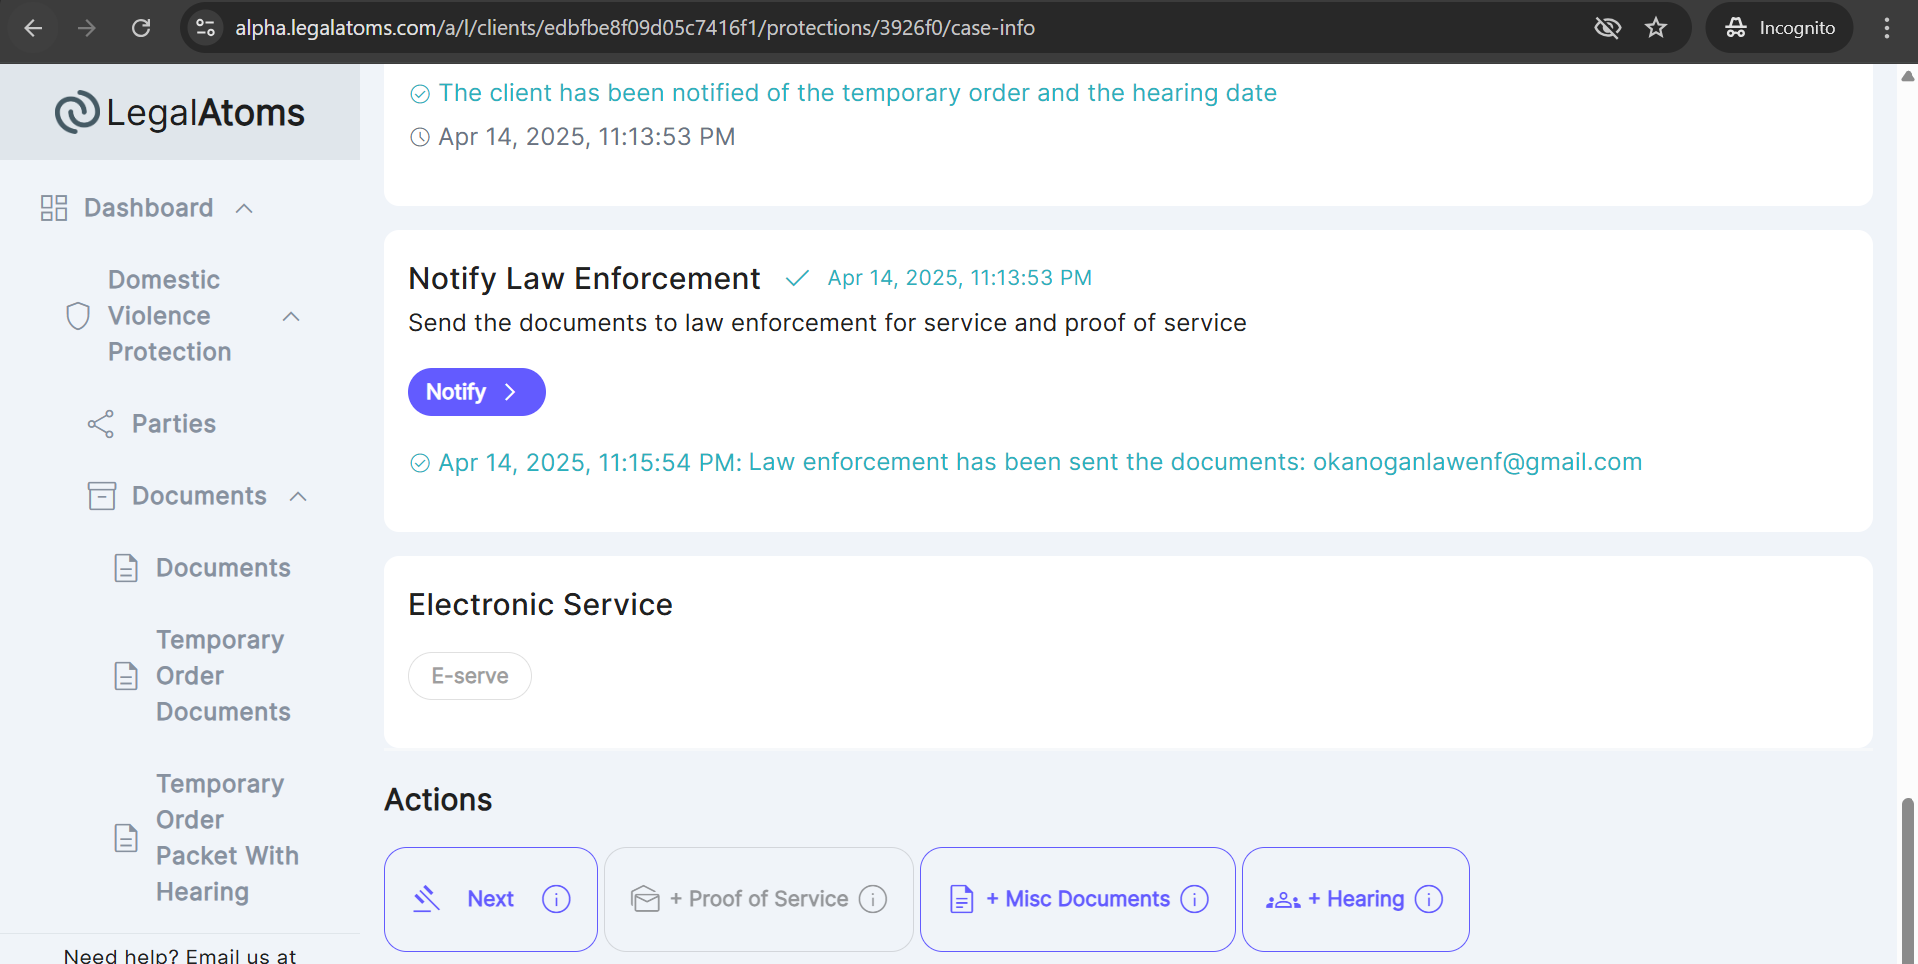
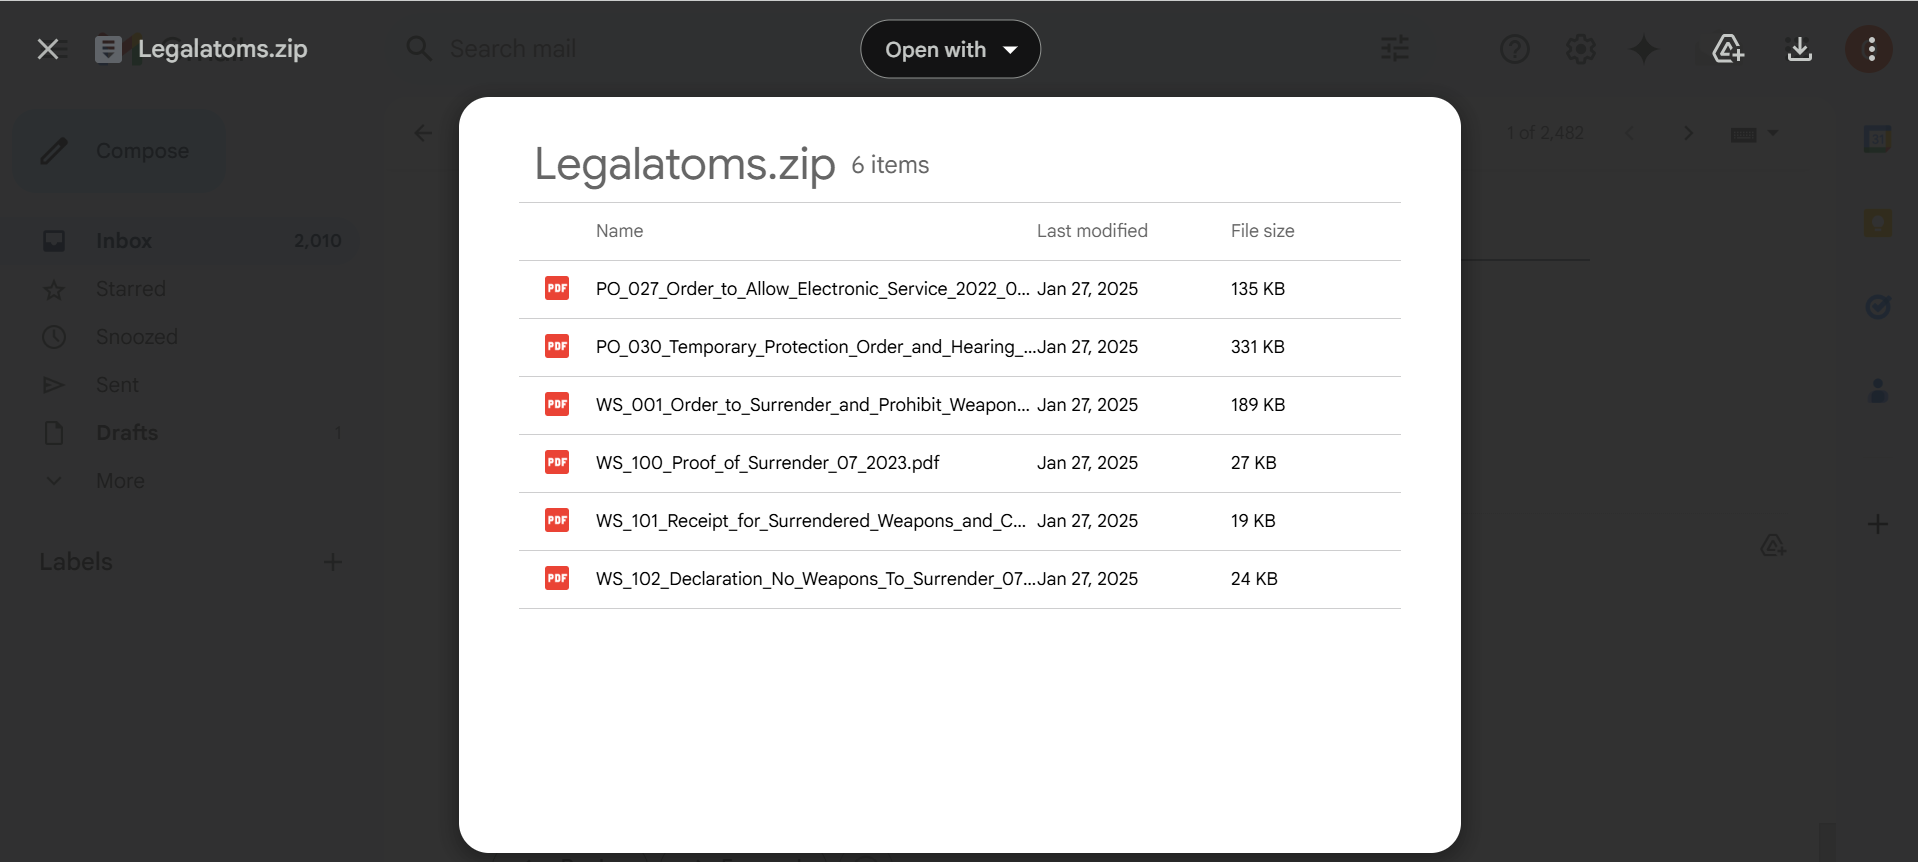
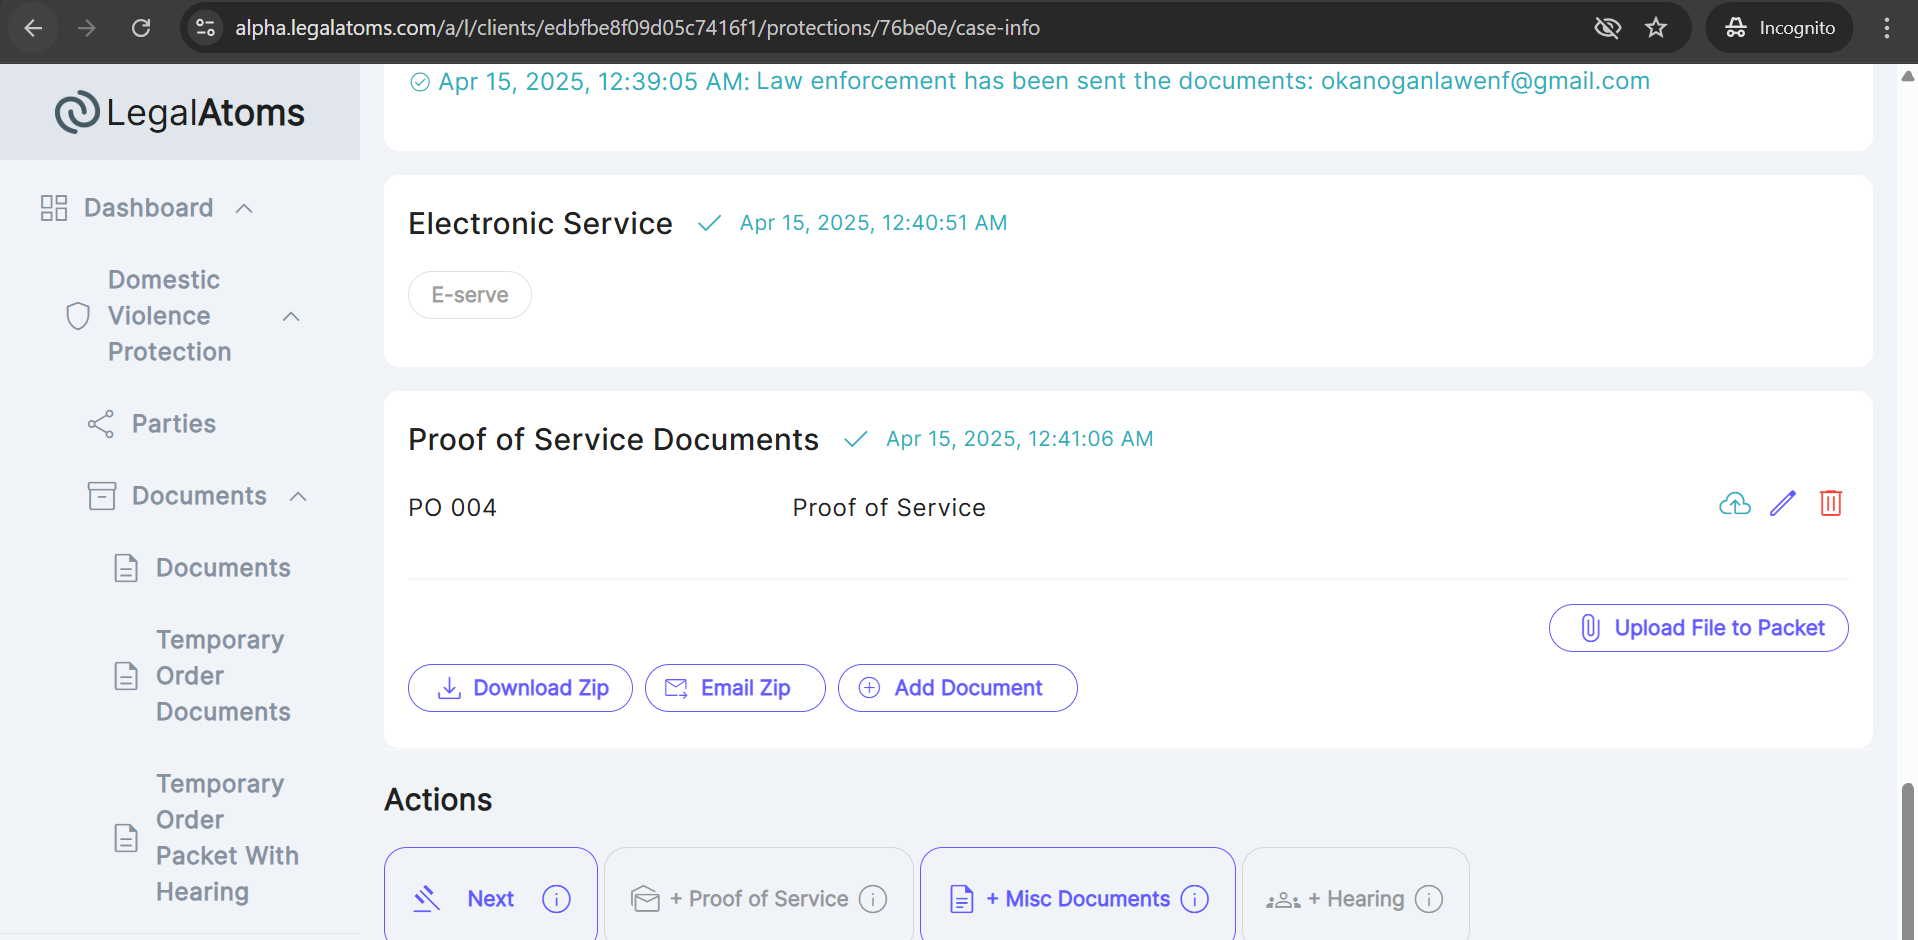
After Notify the LE, the document will start auto generate, after generating the document an email with the attached zip PDF document will be sent to the sheriff.
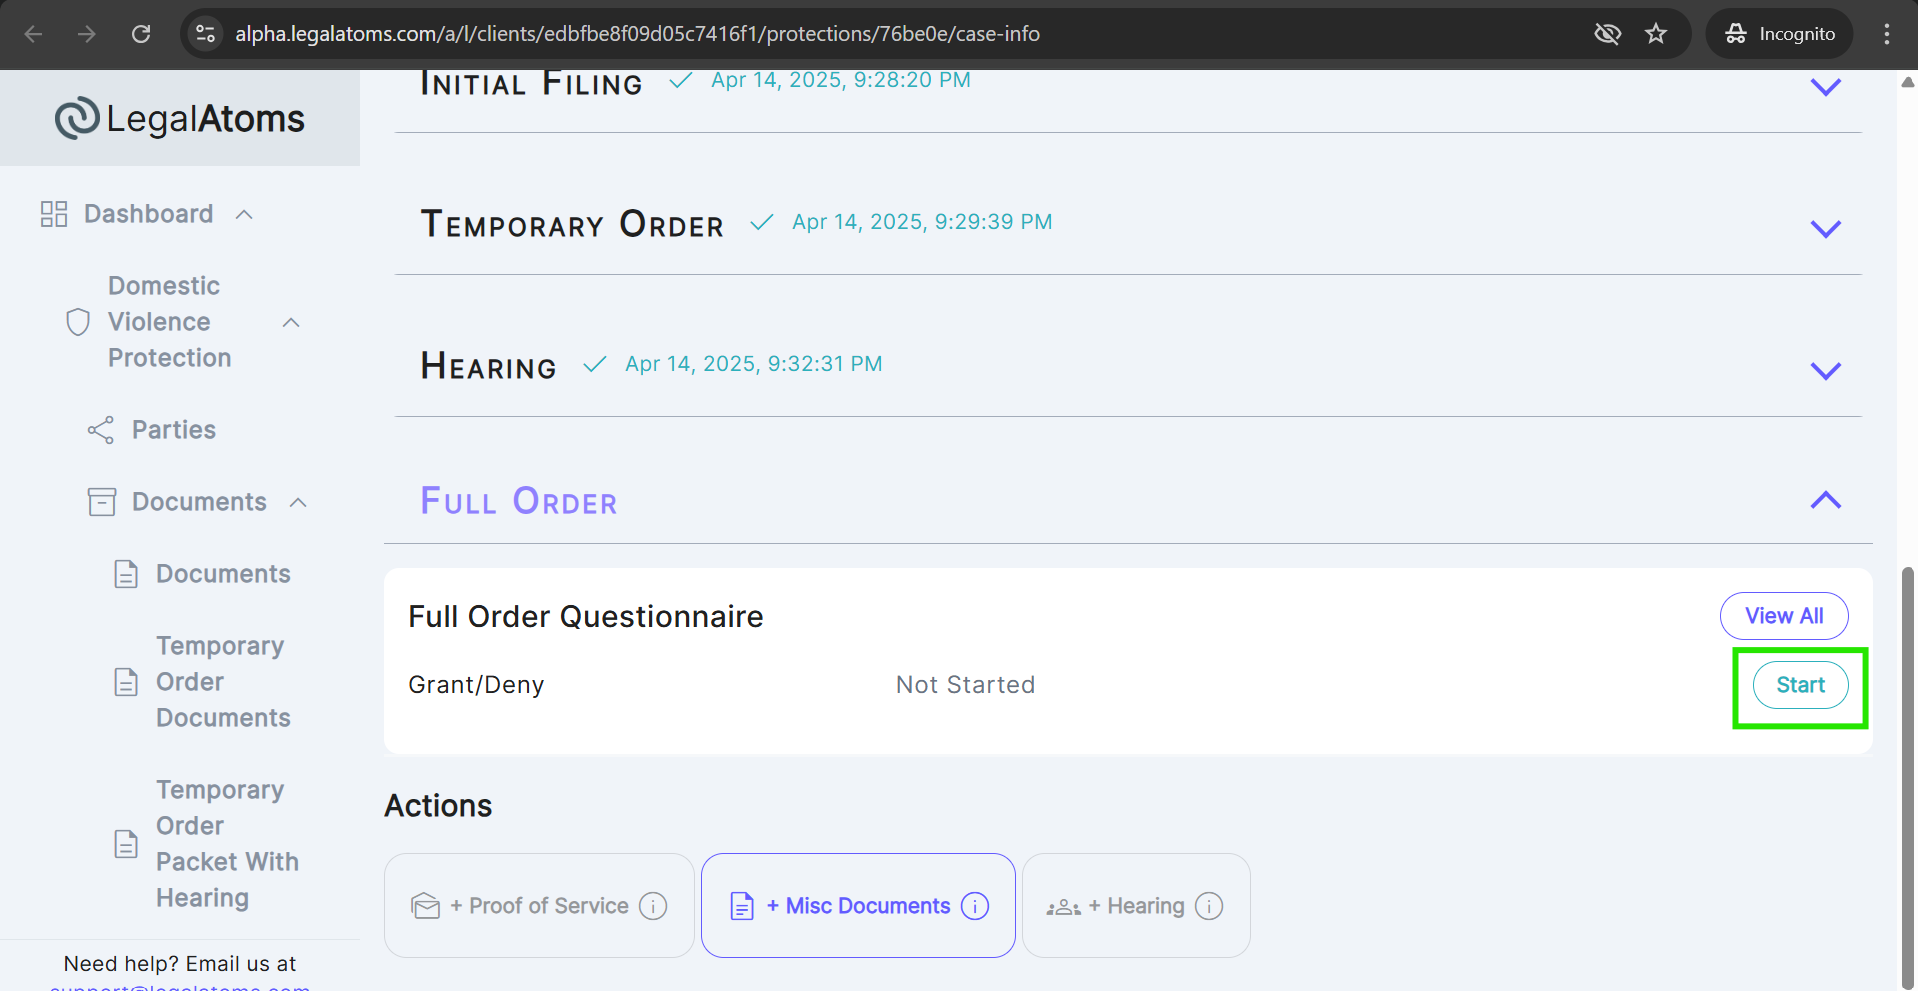
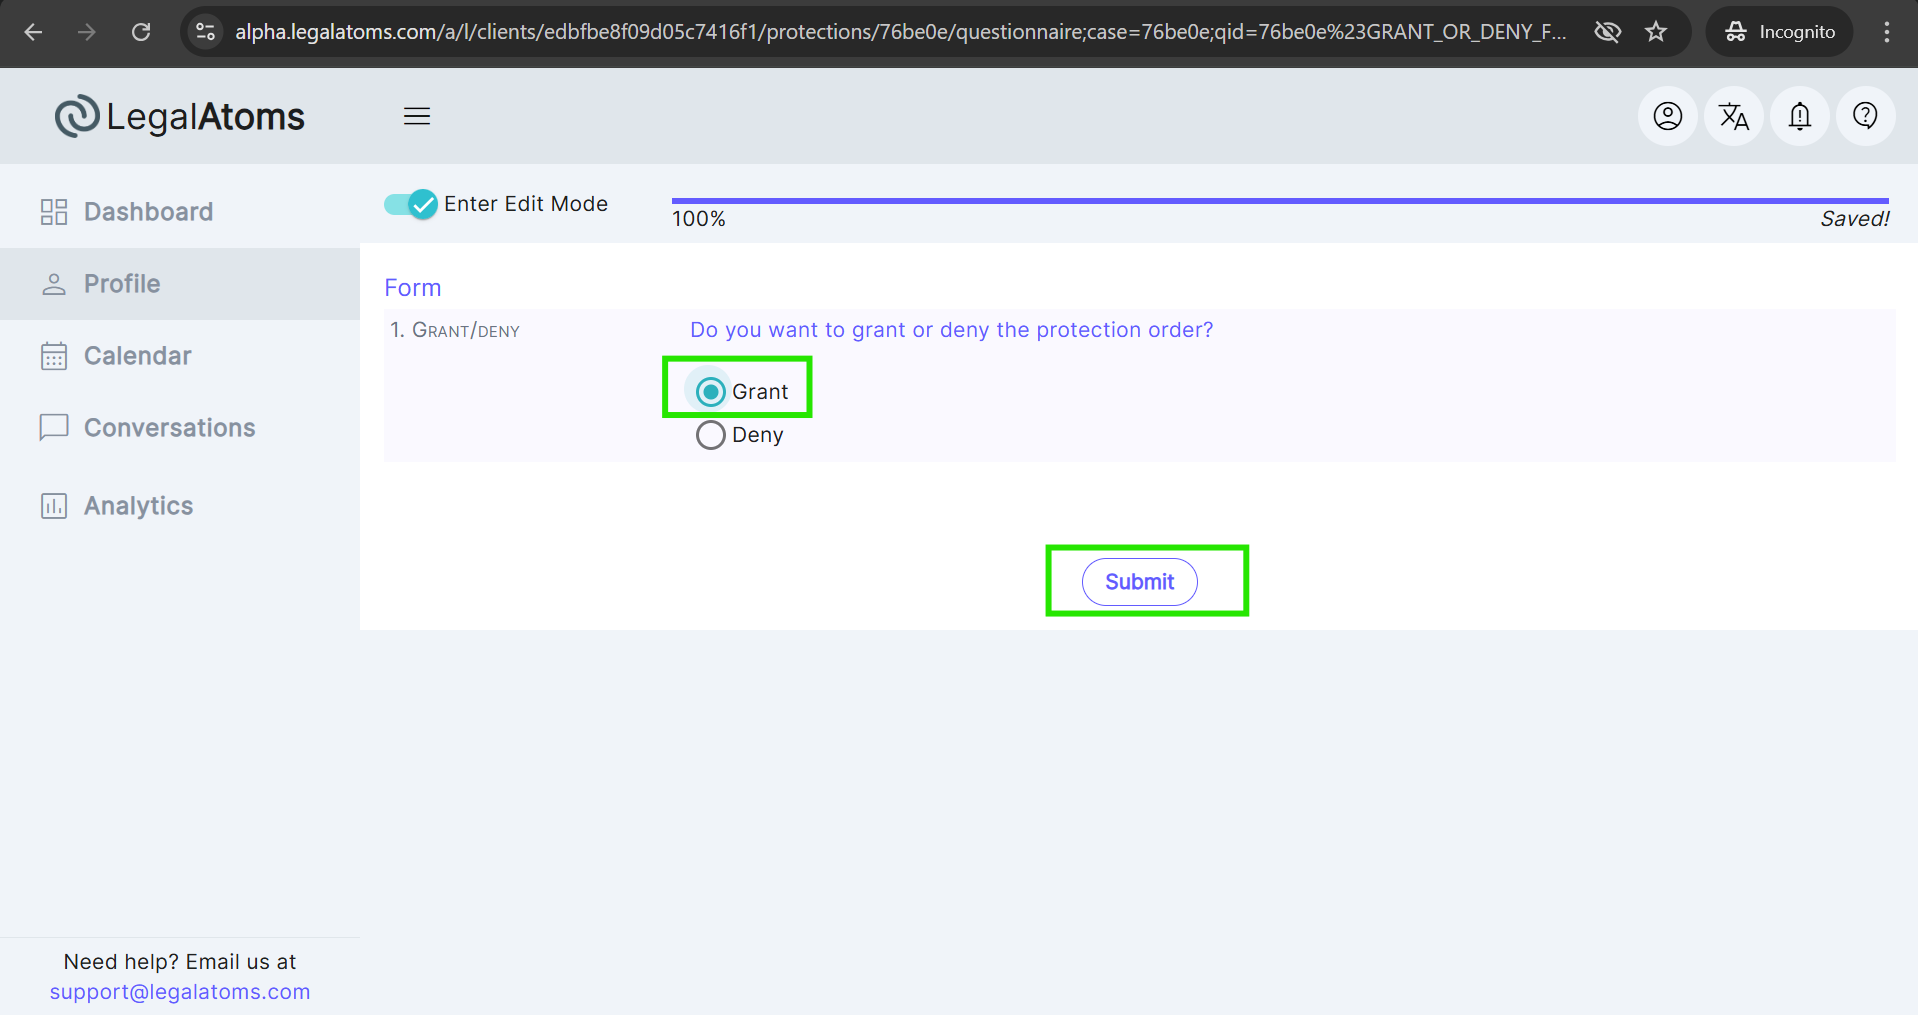
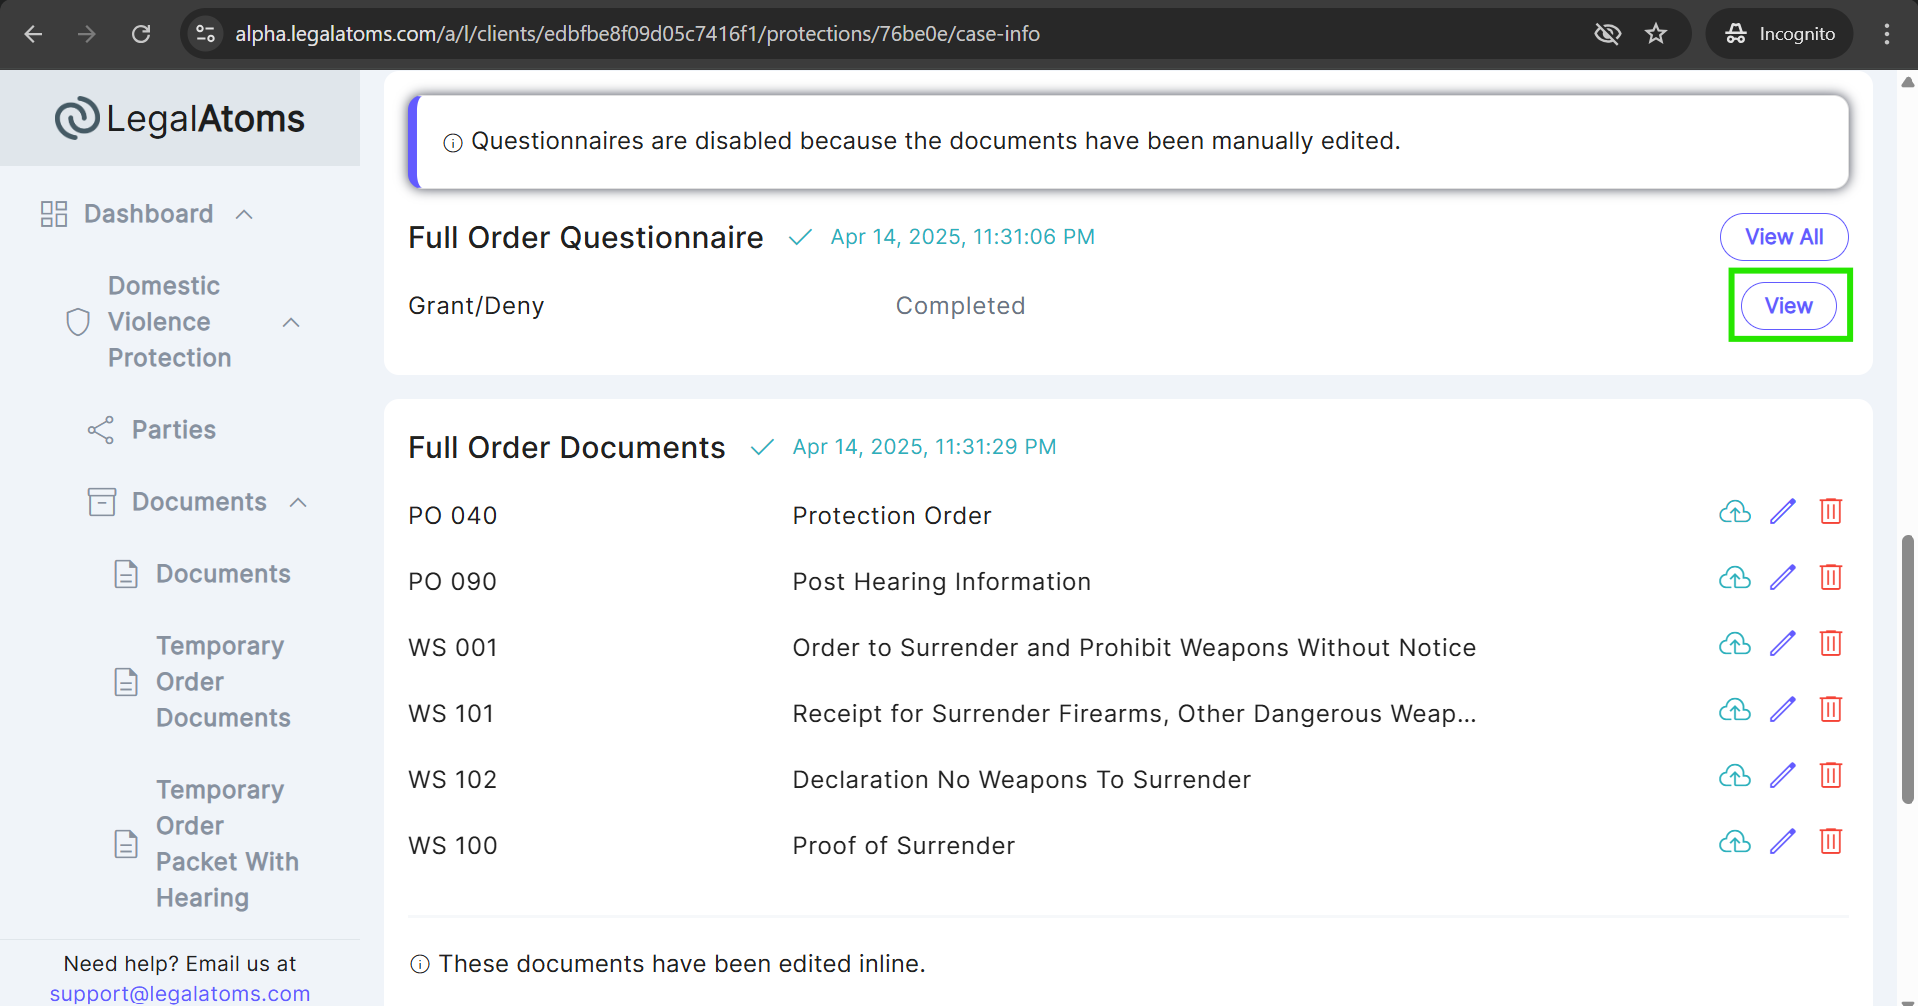
Step 9: Judge Grants Full Order
After the Proof of Service and hearing documents are completed, the Full Order section becomes visible to the judge. From there, the judge can begin the process to grant or deny the full order by clicking the “Start” button.
- Choose whether to Grant / Deny the protection order
- Submit the form
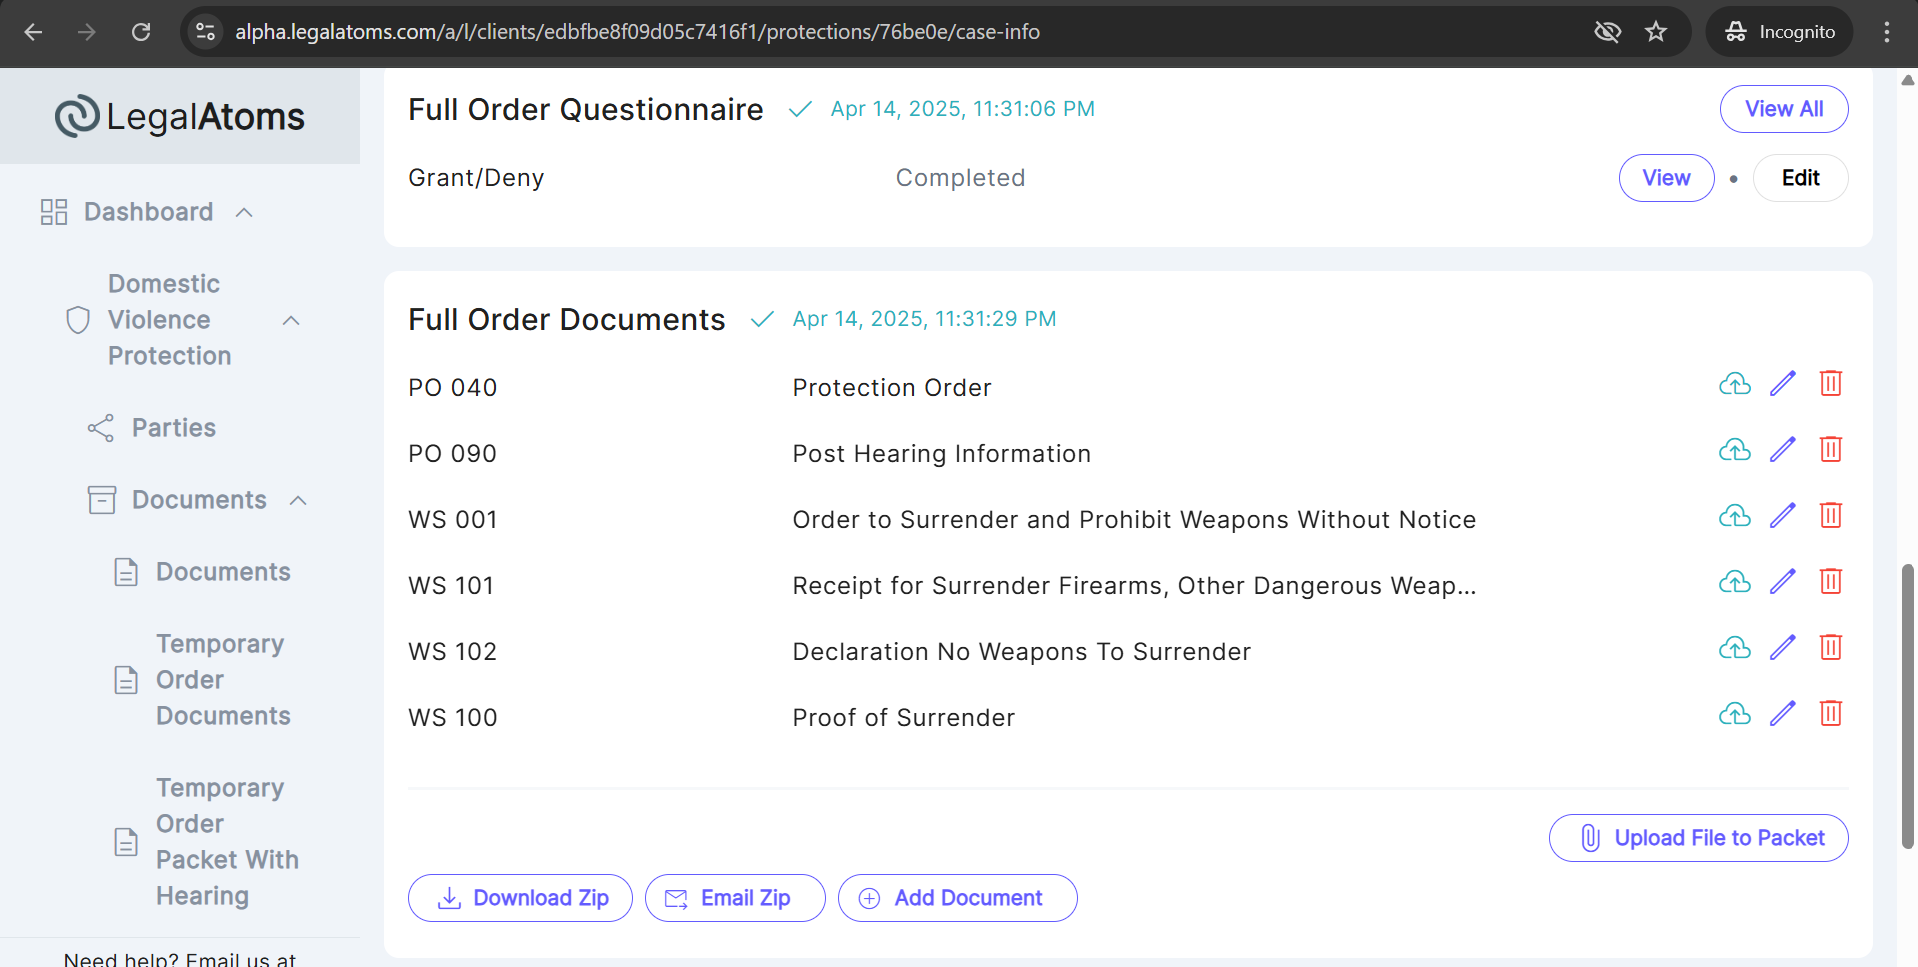
Step 10: Make Edits and Sign the Full Order Documents
After Grant/Deny the full protection order, the document starts auto generate and you will see the full order document HTML version on your dashboard within a few seconds.
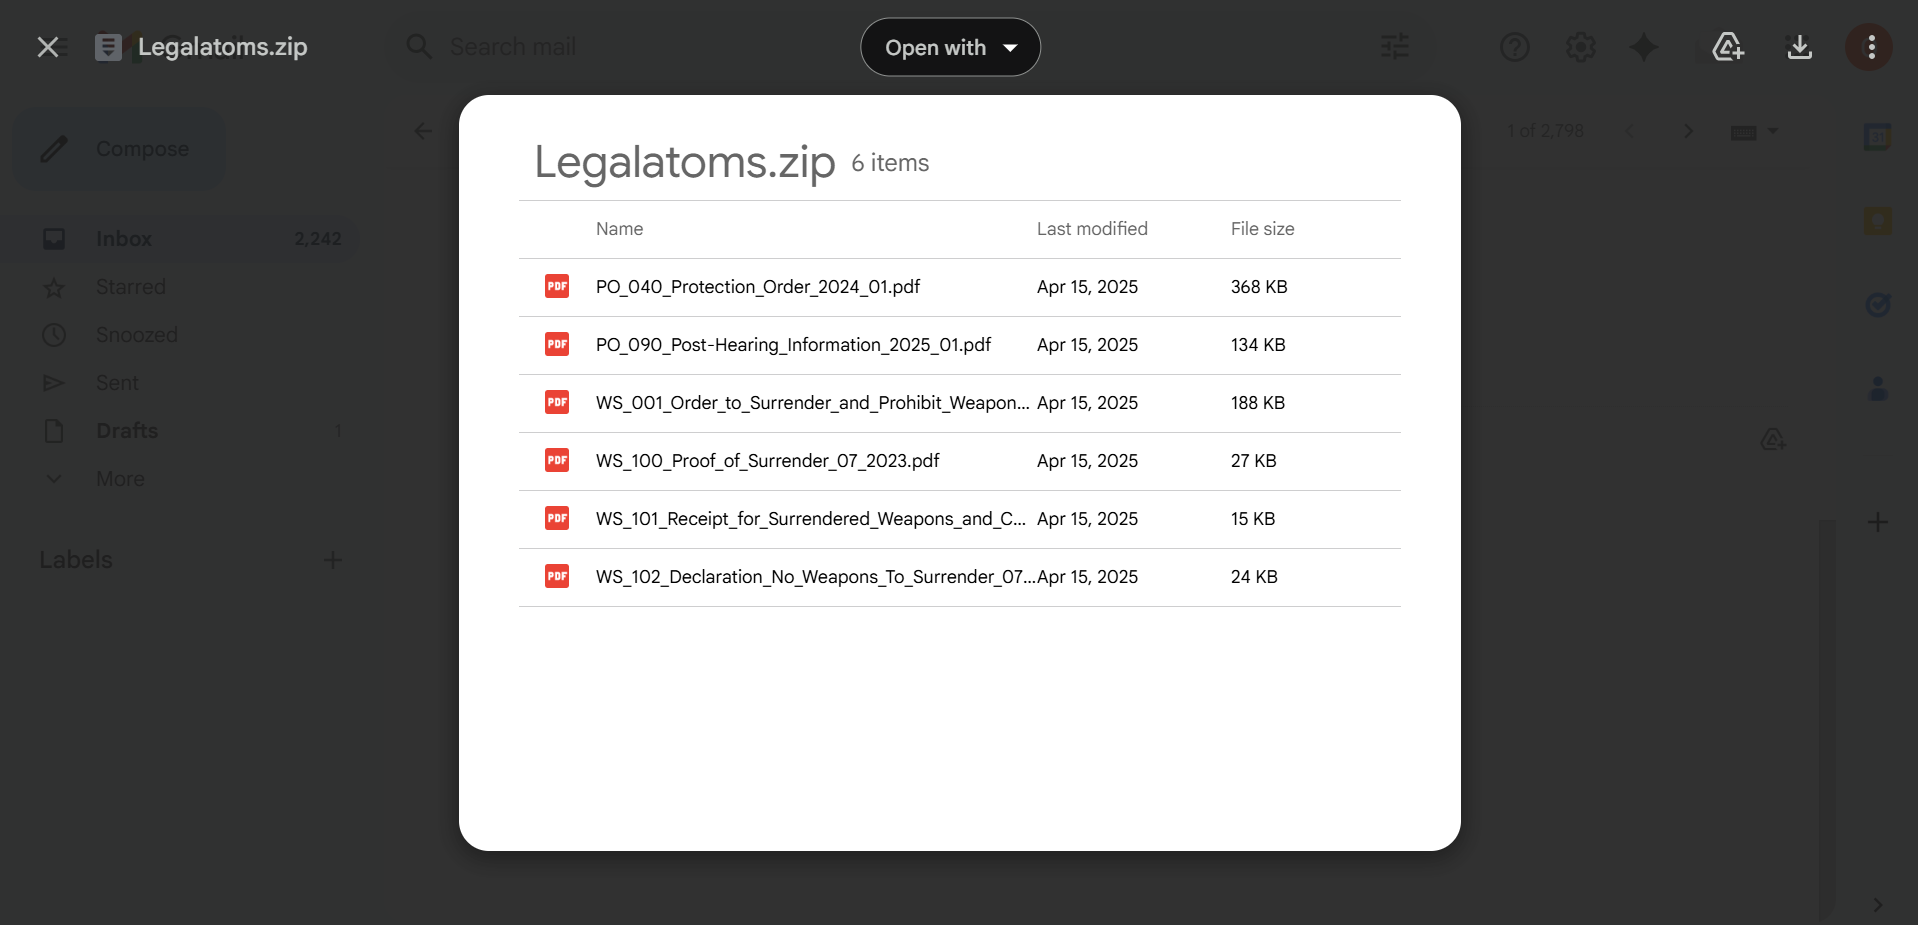
These additional documents are generated under (Full Order Documents) if Temporary order is GRANTED and also firearms surrender is granted
1. WS 001 Order to Surrender and Prohibit Weapons
2. PO 090 Post Hearing Information
2. WS 102 Declaration: No Weapons to Surrender
3. WS 100 Proof of Surrender
4. WS 101 Receipt for Surrender Firearms, Other Dangerous Weapons and Concealed Pistol License
These documents are generated under (Full Order Documents) if Temporary order is GRANTED and also firearms surrender is not granted
1. PO 040 Protection Order
2. PO 090 Post Hearing Information
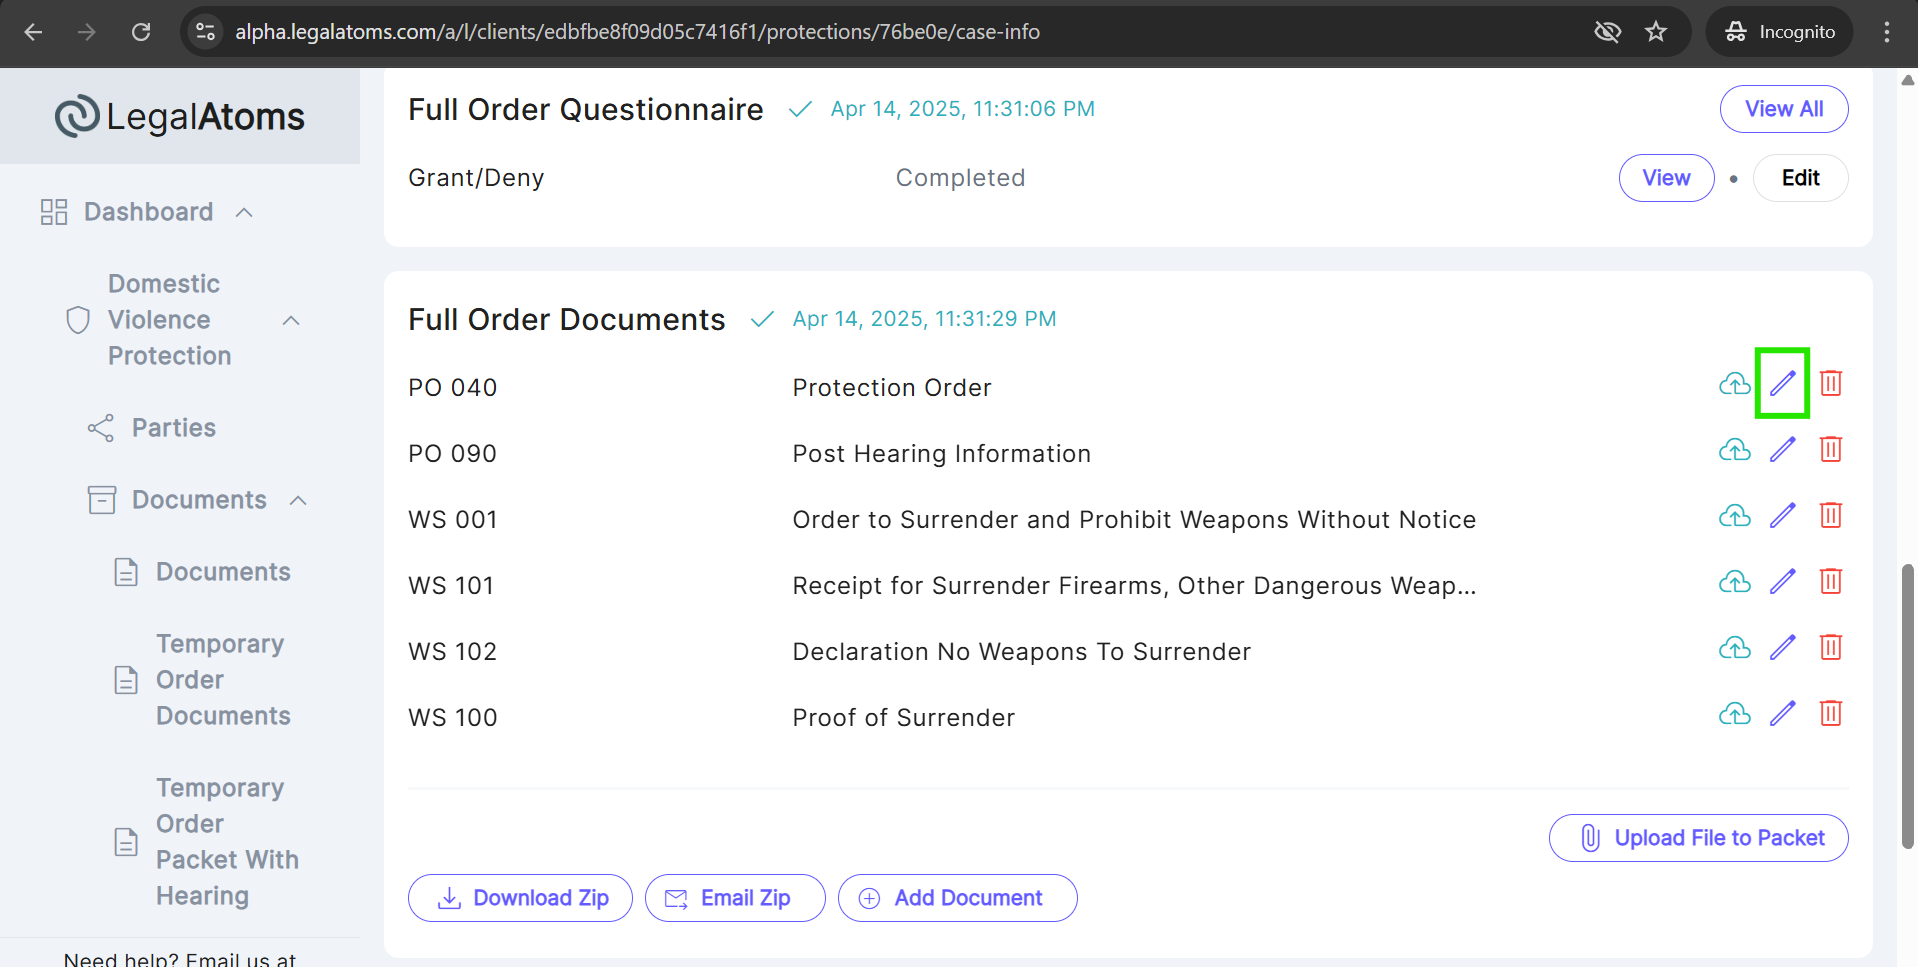
LegalAtoms allows to judge add a signature to a full order document using the Edit HTML feature. Follow the given steps to add a signature to the document.
- Click the Edit icon/button to open the document in edit mode.
- In the document editor, click on the top left Edit button to switch to Edit HTML view.
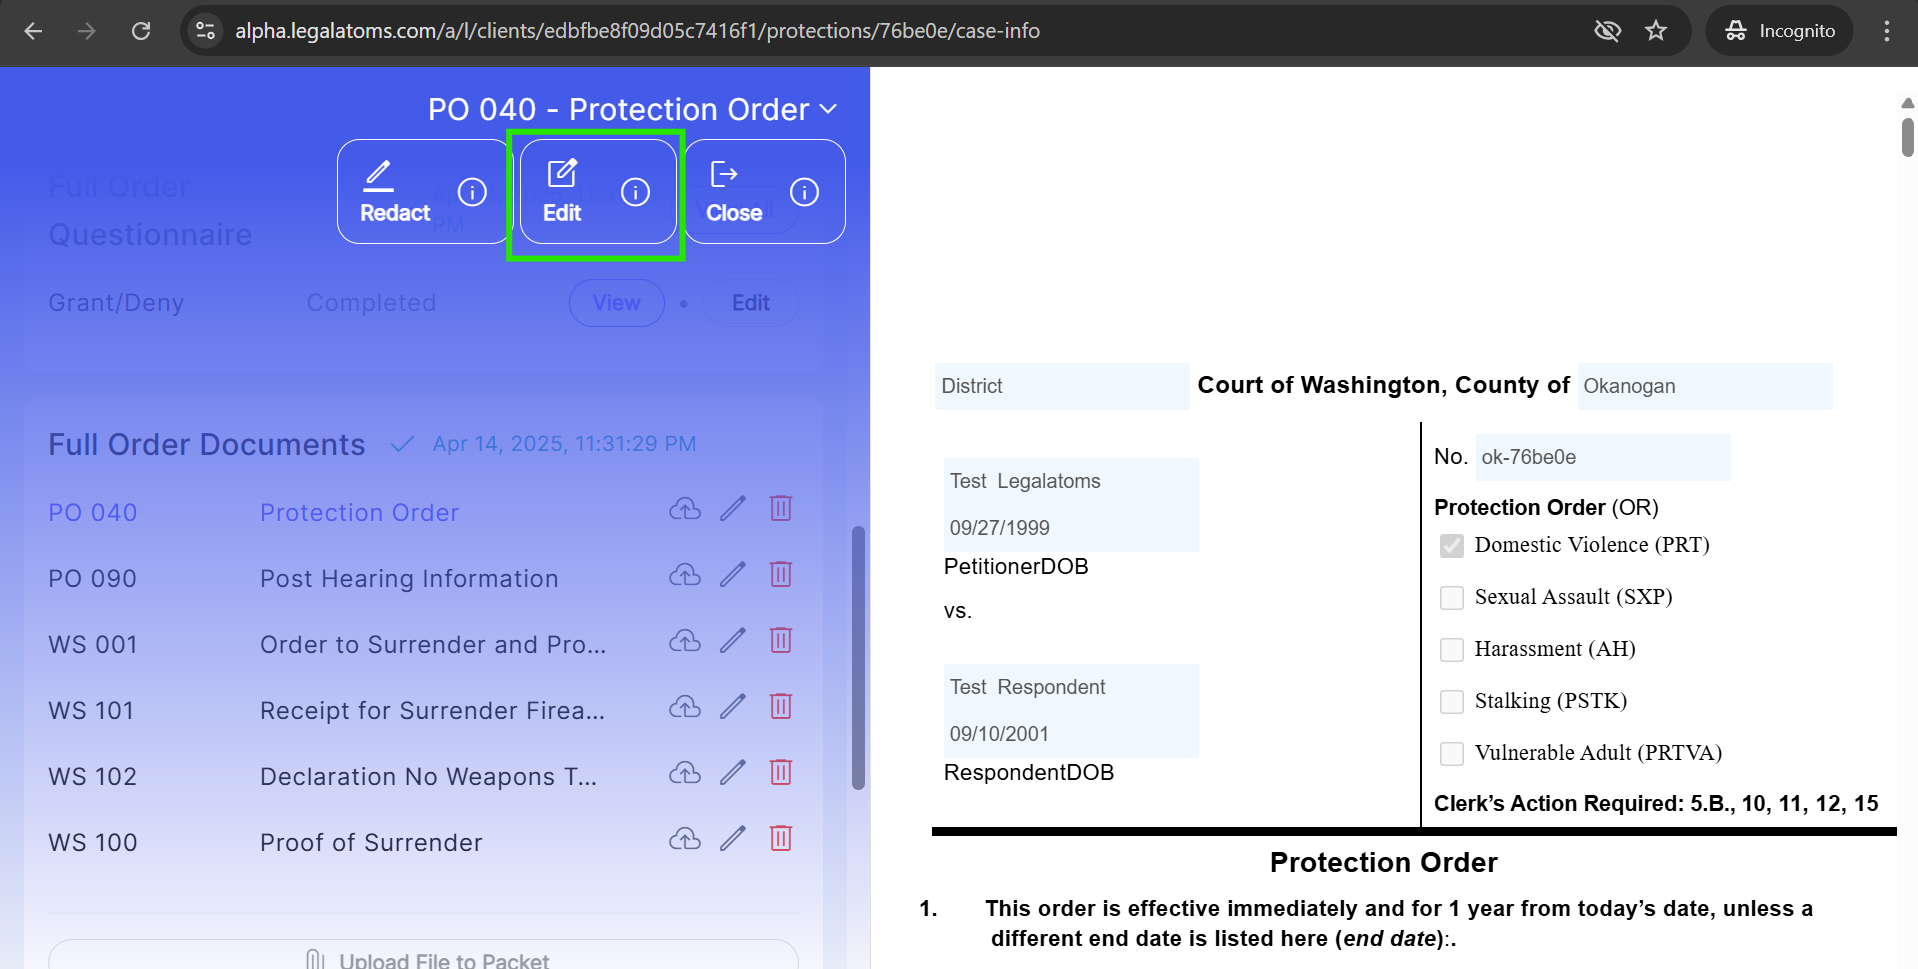
- Scroll through the Edit HTML document to locate the judge section where the signature should be placed.
- Judge can add name in the input field “Print Judge/Court Commissioner Name”.
LegalAtoms includes a feature where, if the judge has added a signature during the Temporary Order stage, the same signature will automatically carry over to the Full Order document. This means the judge does not need to re-enter the signature. However, if the judge wants to use a different signature, they can simply clear the existing signature by clicking on the clear button and add a new one.
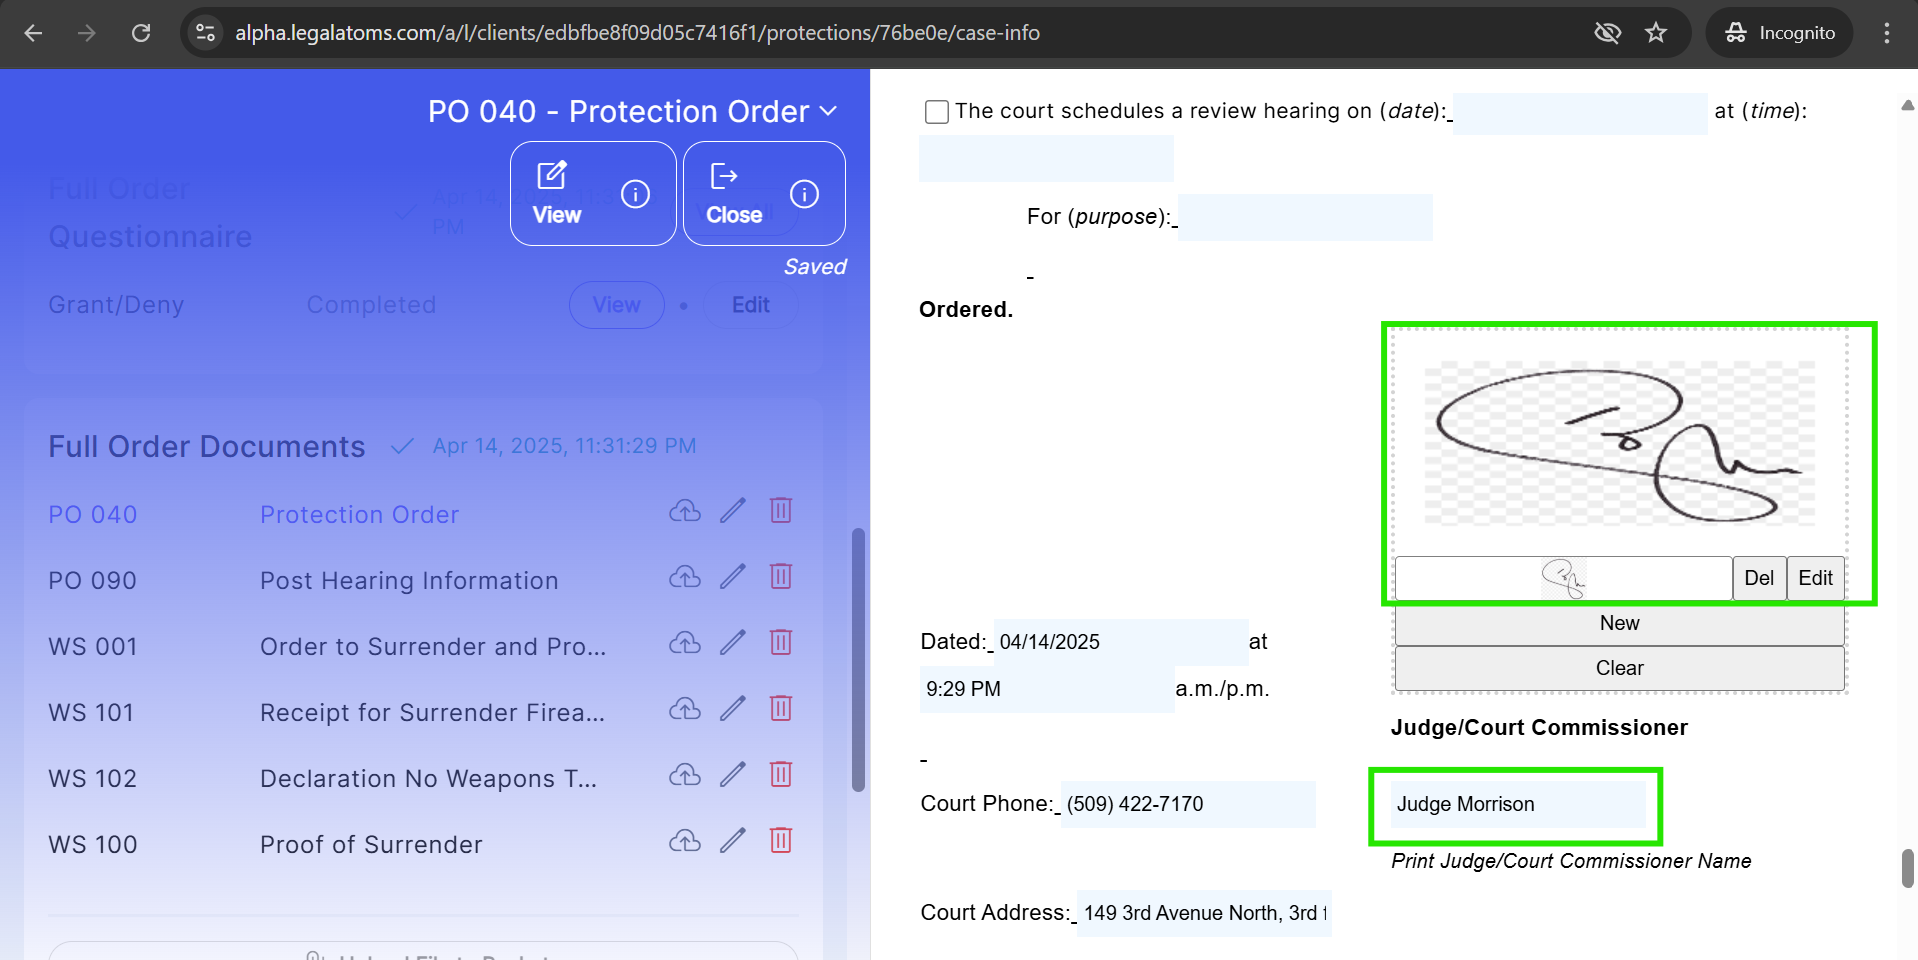
- Once judge have added the signature and name, click on the Close icon button to save the changes to the document.
- The changes will be auto save and reflected in all the documents within the section.

- After changing the document manually via Edit HTML feature judge can not amendment to the question he can only view the questionnaire.
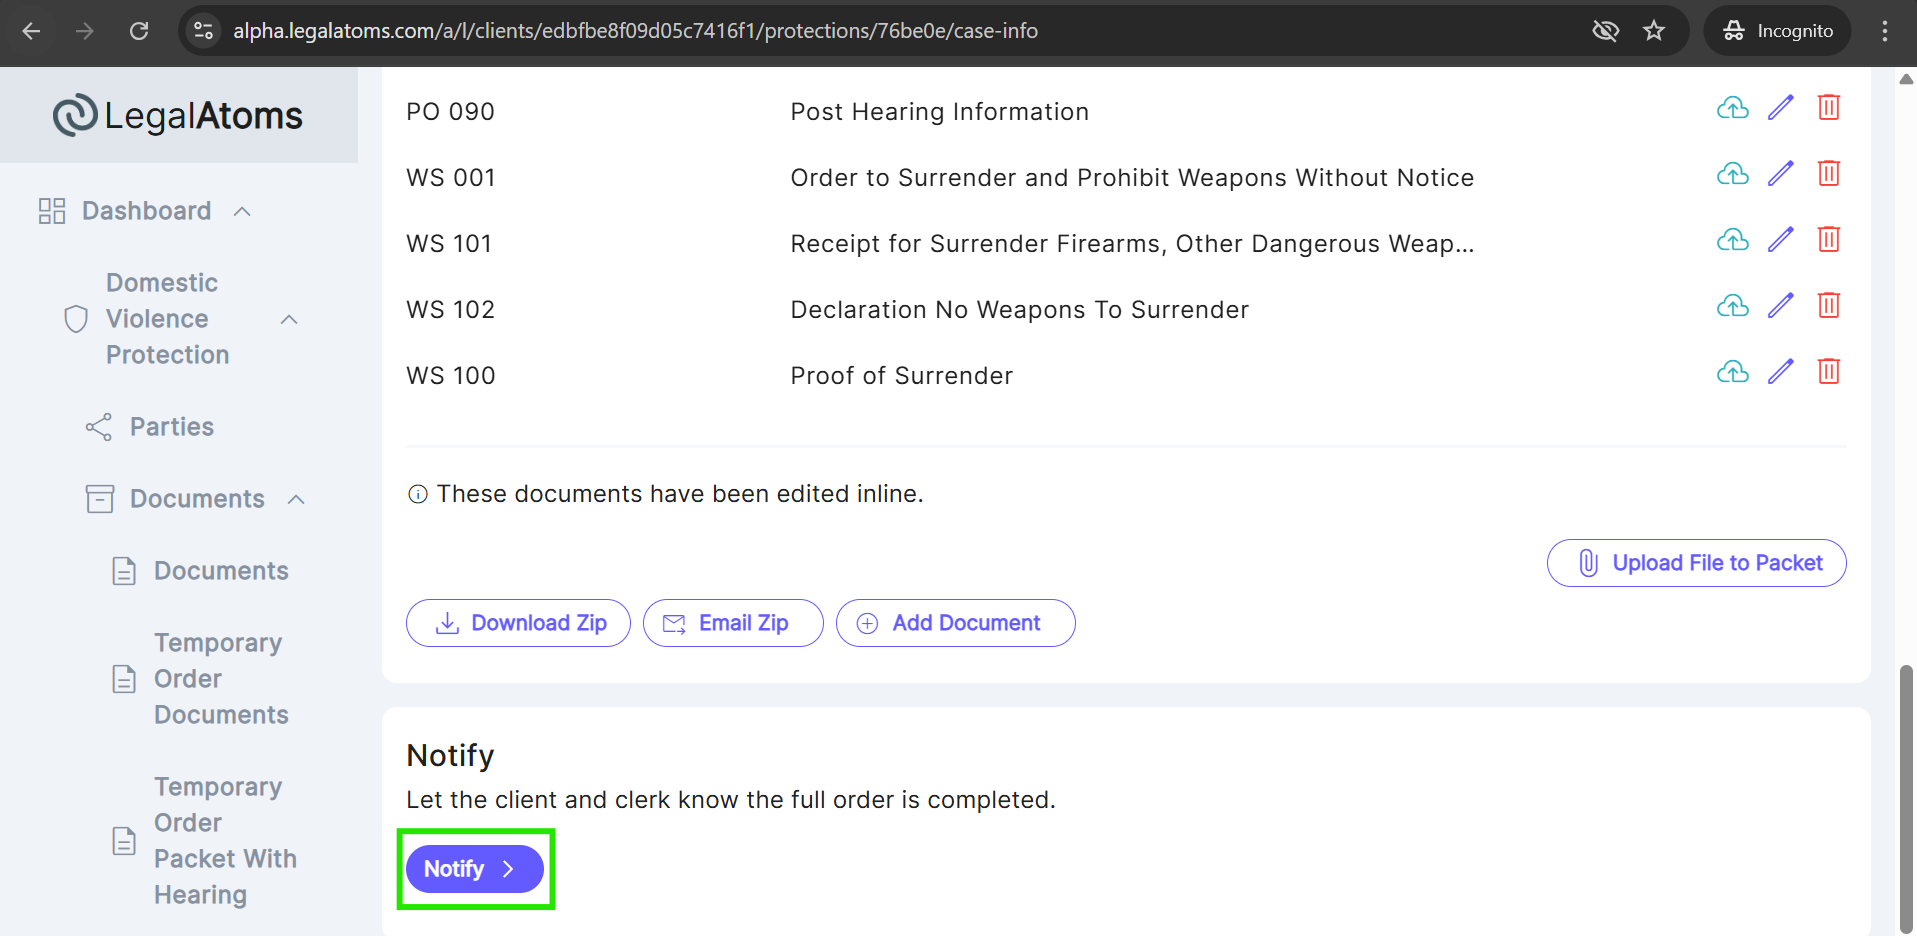
Step 11: Notify
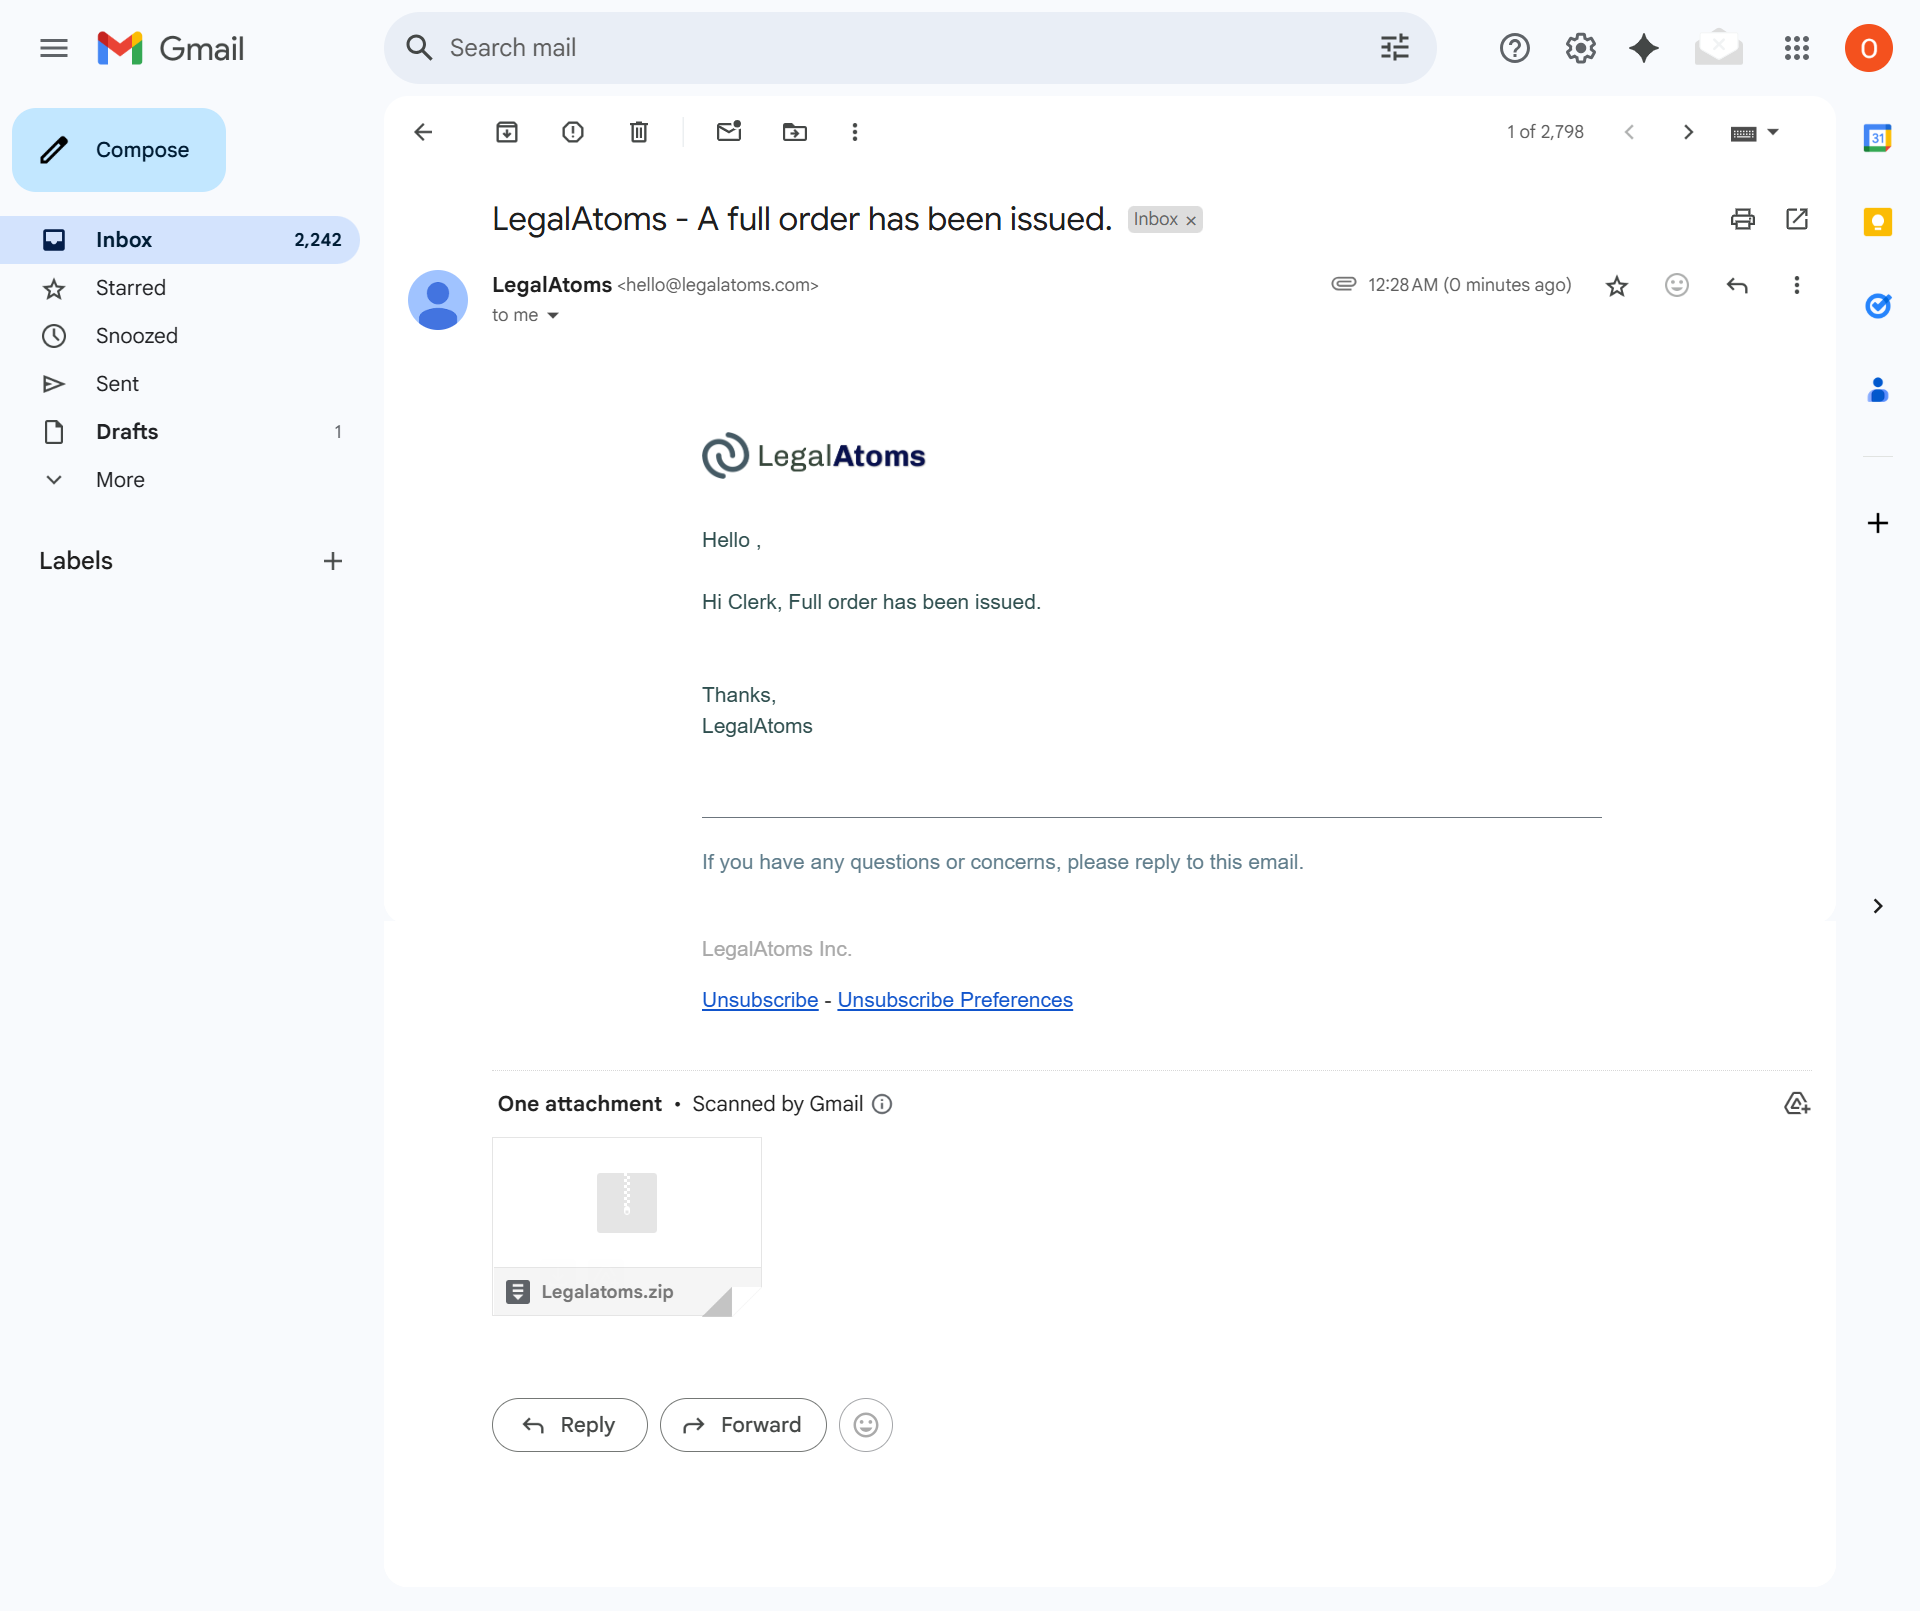
Simply click on the Notify button to send the Full order documents to the clerk and client. A popup will appear where the Judge adds a message and clicks the Notify button.
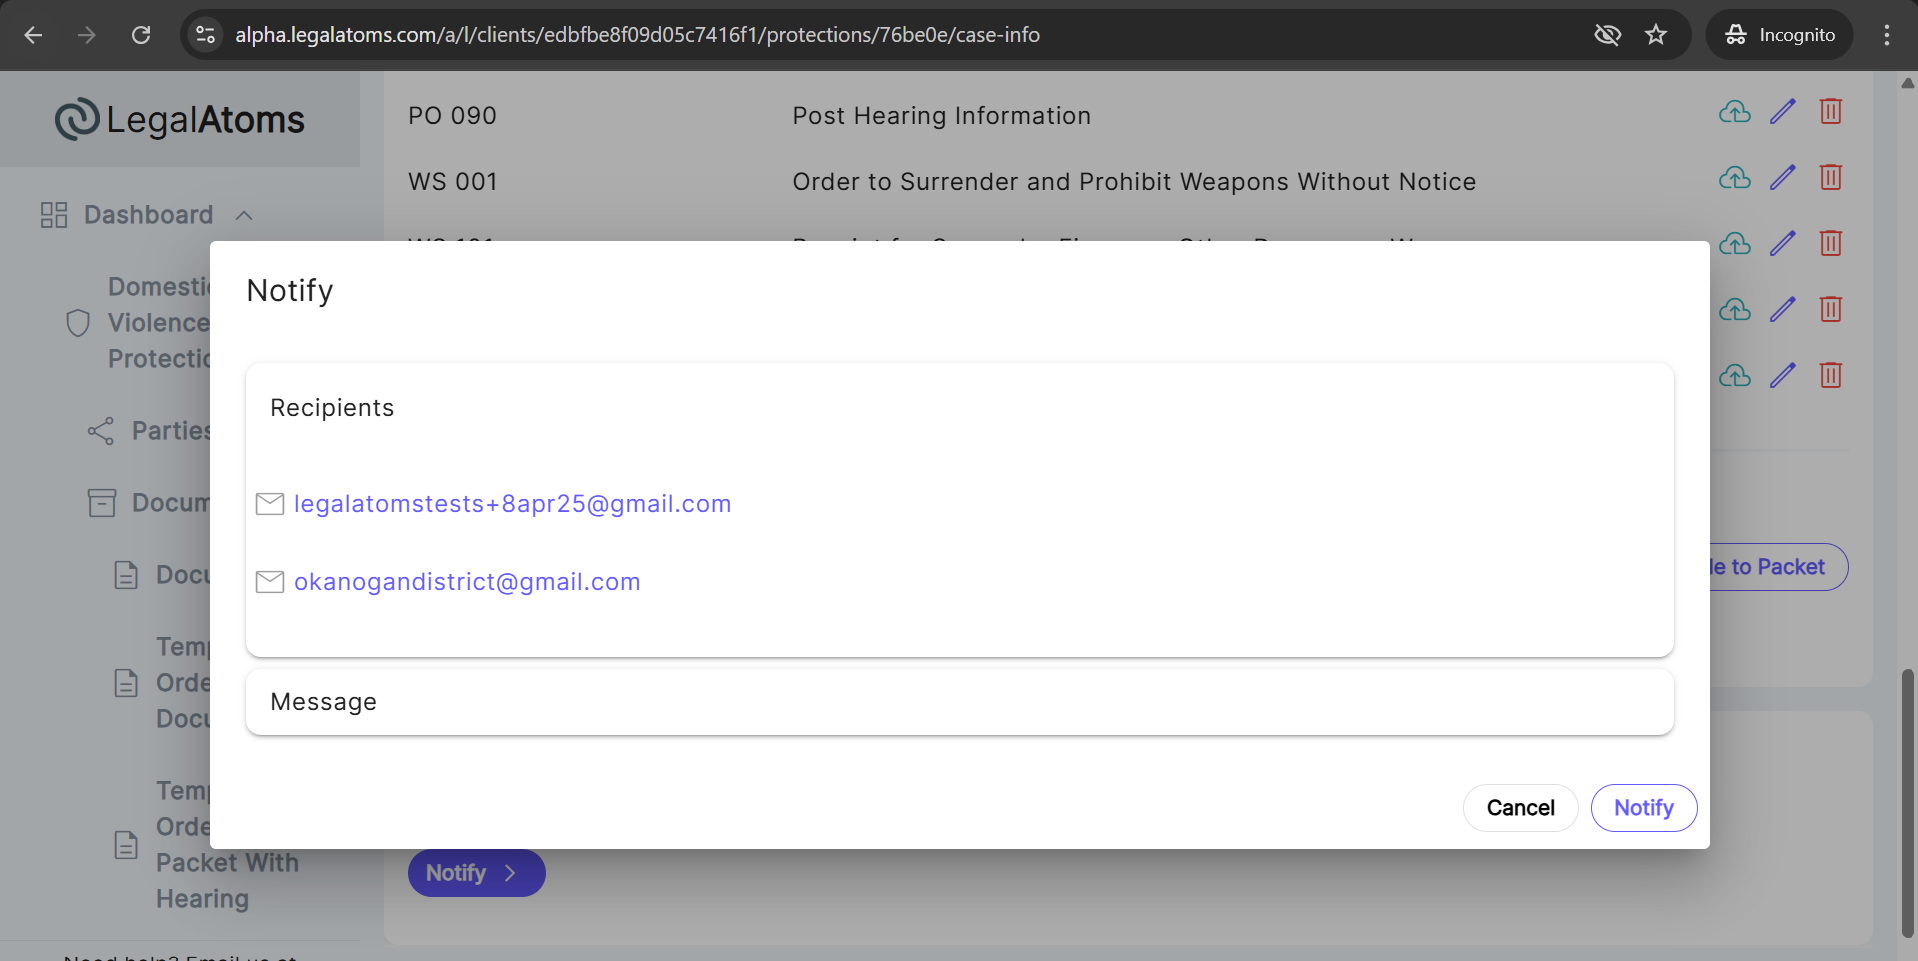
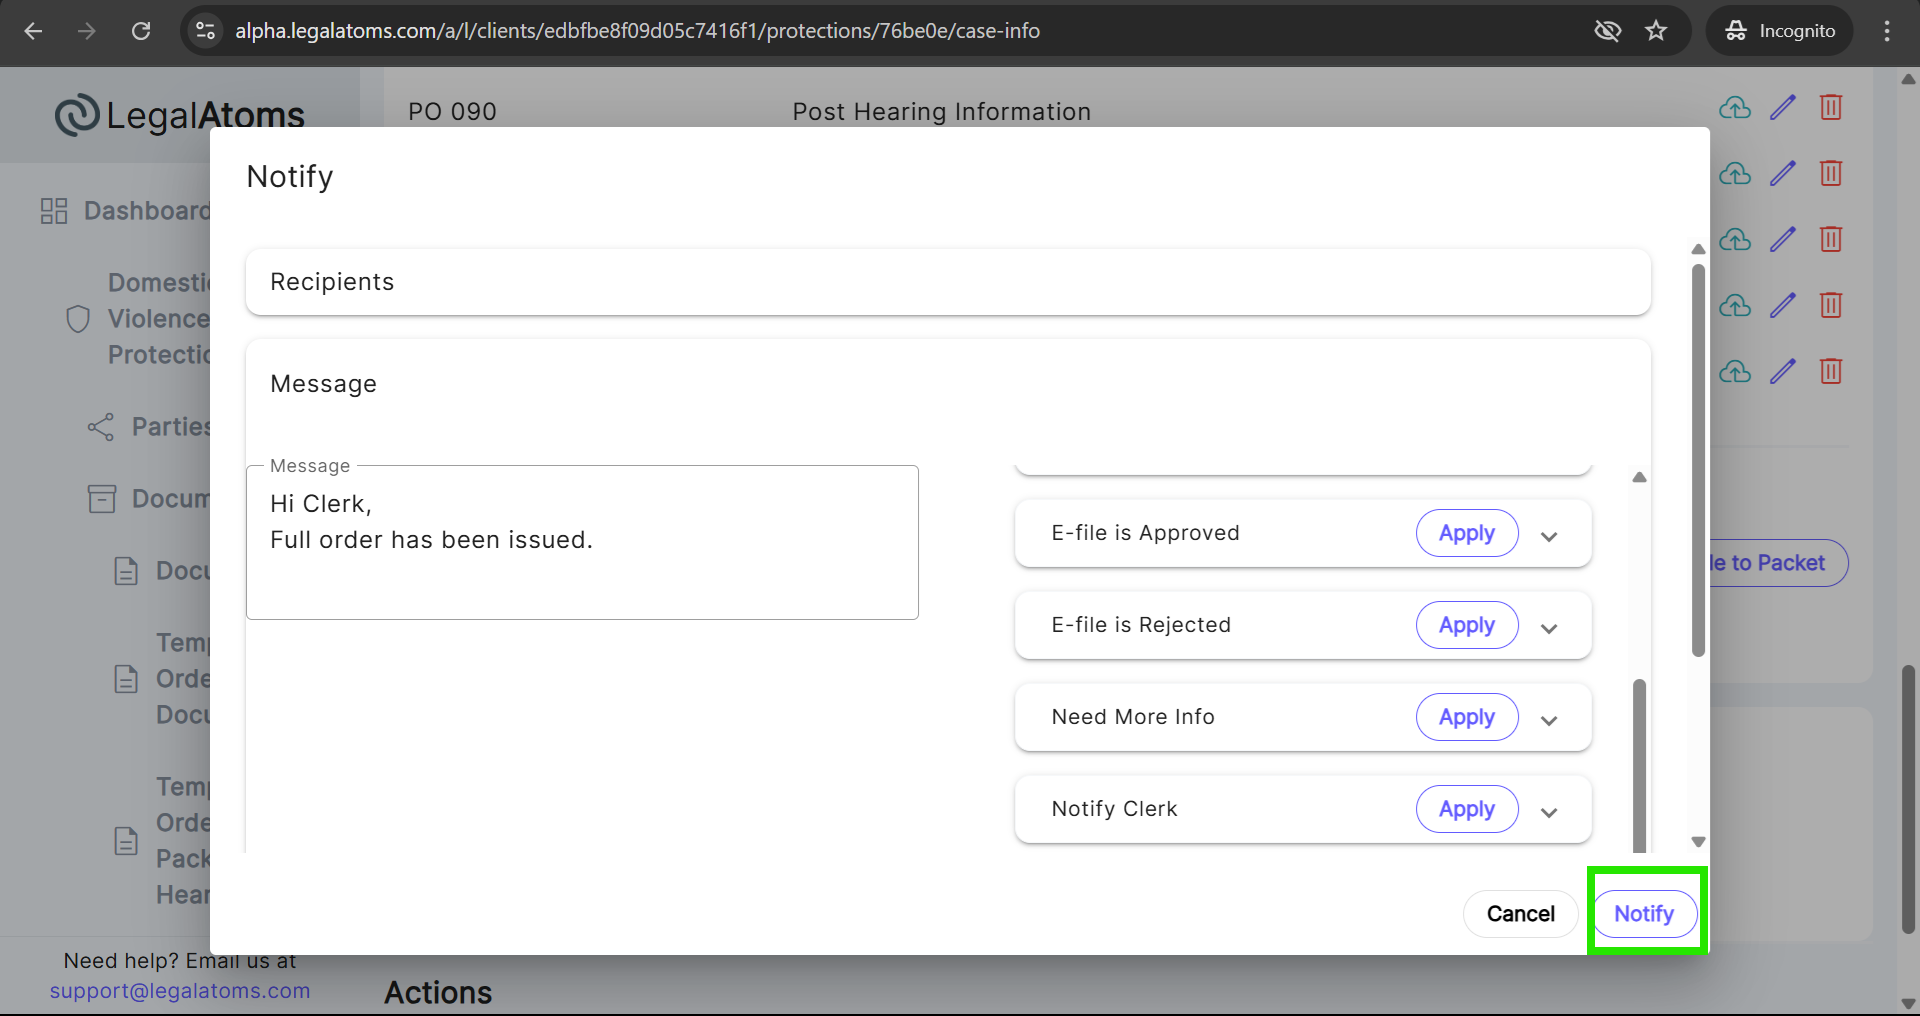
After Notify the clerk and client, the document will start auto generate, after generating the document an email with the attached zip PDF document will be sent to the clerk and client.
Step 12: Notify Law Enforcement
Legalatoms allow to judge to send the full order document to law enforcement for service. Simply click on the Notify button to send the “Law Enforcement Packet” documents to the sheriff. A popup will appear where the law enforcement name is auto-populated, and the clerk adds a message and clicks the Notify button.

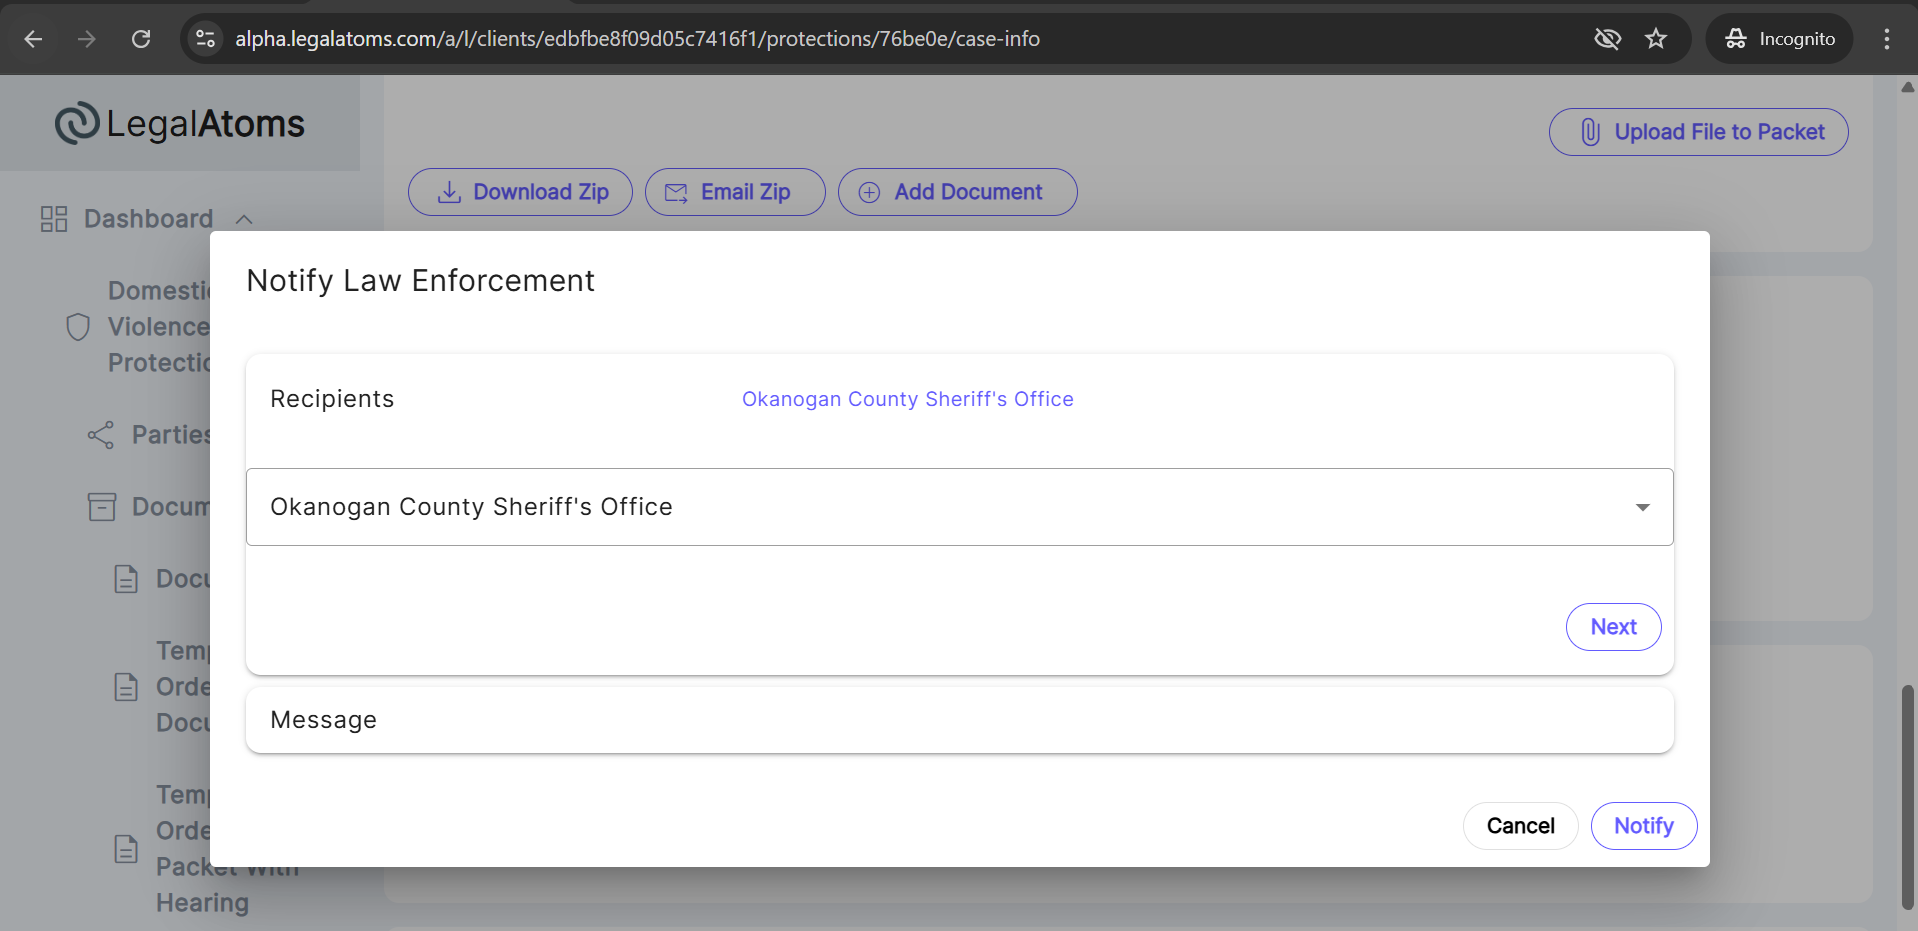
After Notify the LE, the document will start auto generate, after generating the document an email with the attached zip PDF document will be sent to the sheriff.
Law enforcement may use the E-Service option to serve documents. Once the service is completed, they can file the Proof of Service. This document will then become visible to the judge for review.
Video Recap: Grant
This video step throughs all the steps for a clerk and judge