Templates for responses to clients
Recently updated on June 14th, 2024 at 05:47 am
This page describes how clerks can use different pre-canned messages in response to clients for E-file Accepted / Rejected.
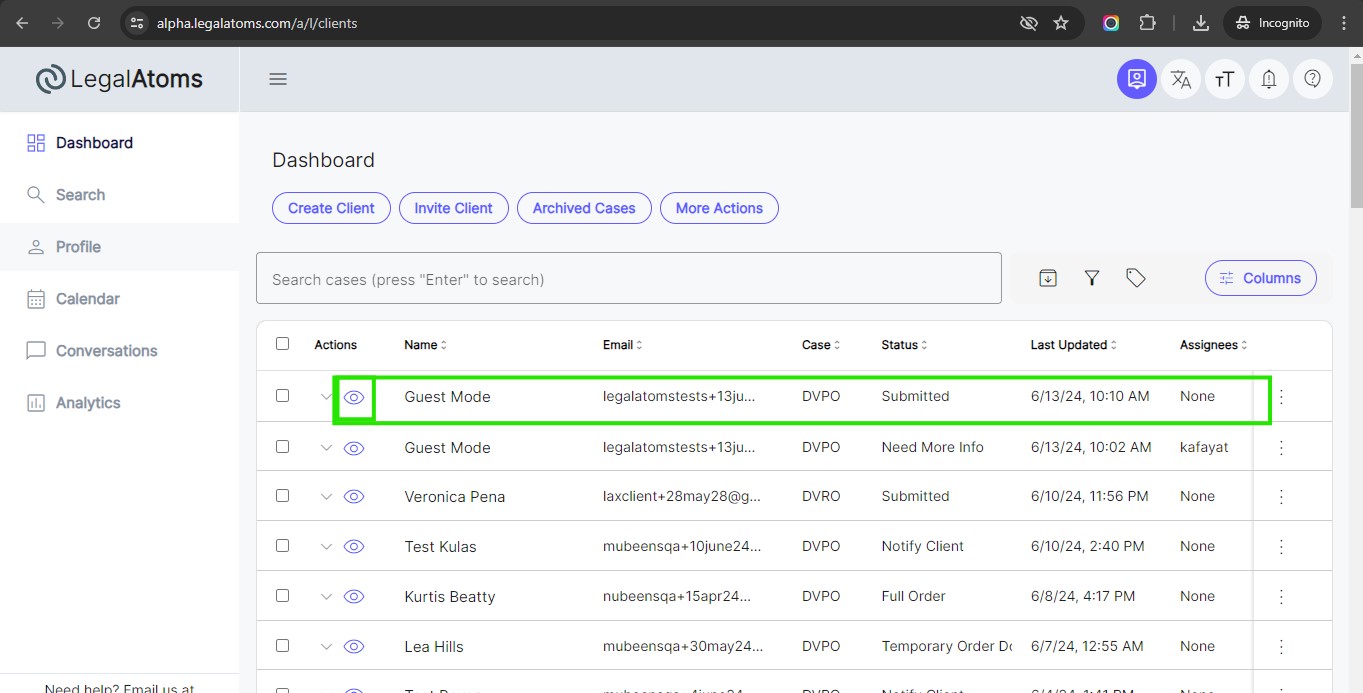
Step 1: View a specific Case
On the main page, titled “Dashboard”, locate the specific case you want to E-file and click the Eye button under the action column.
Step 2: scroll down to “Filing” section
Once you click on the eye button, you can scroll down to find the E-file section.
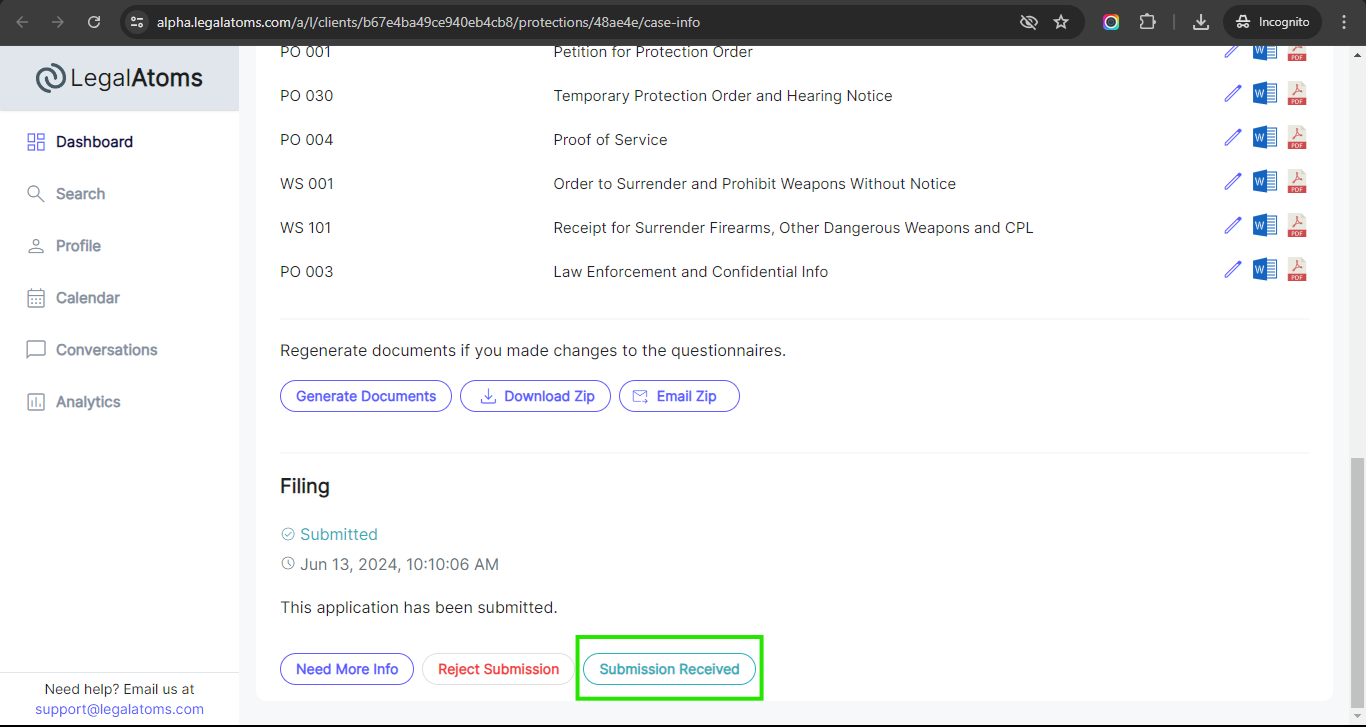
If the clerk clicks on the Reject Submission / Submission Received button, it shows a popup having list of Response Templates on the right side.
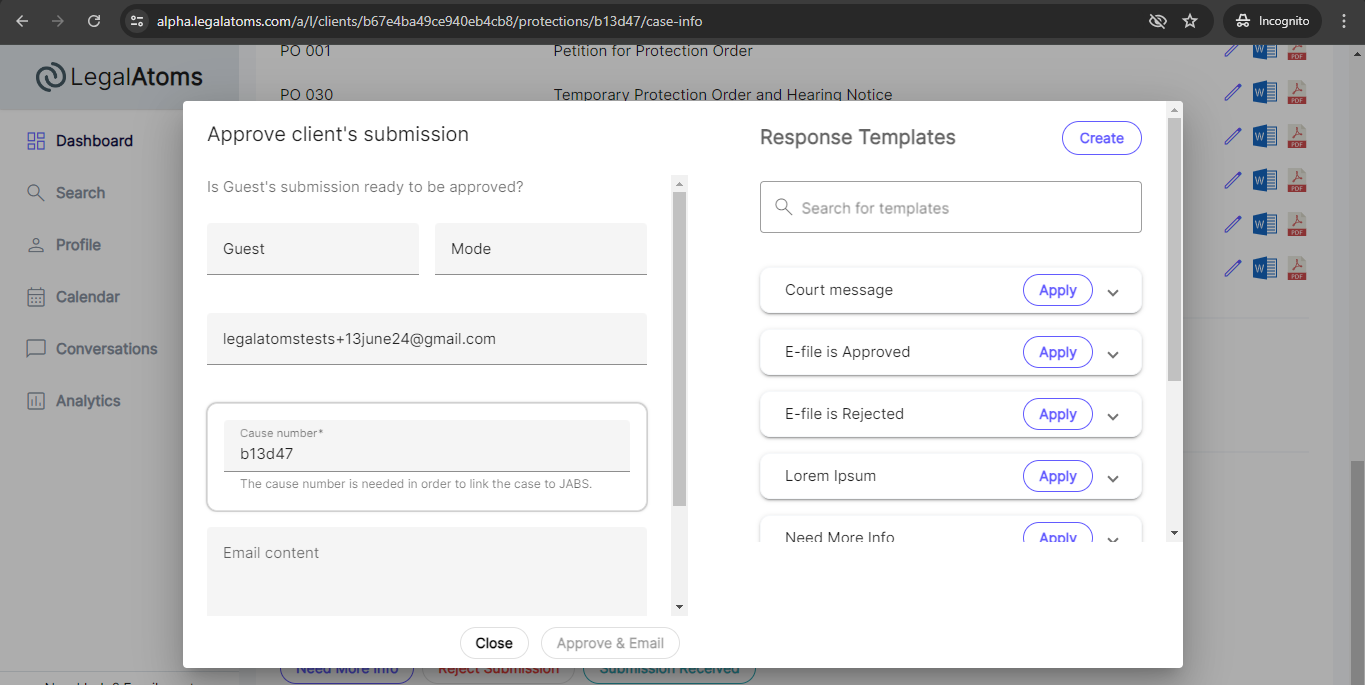
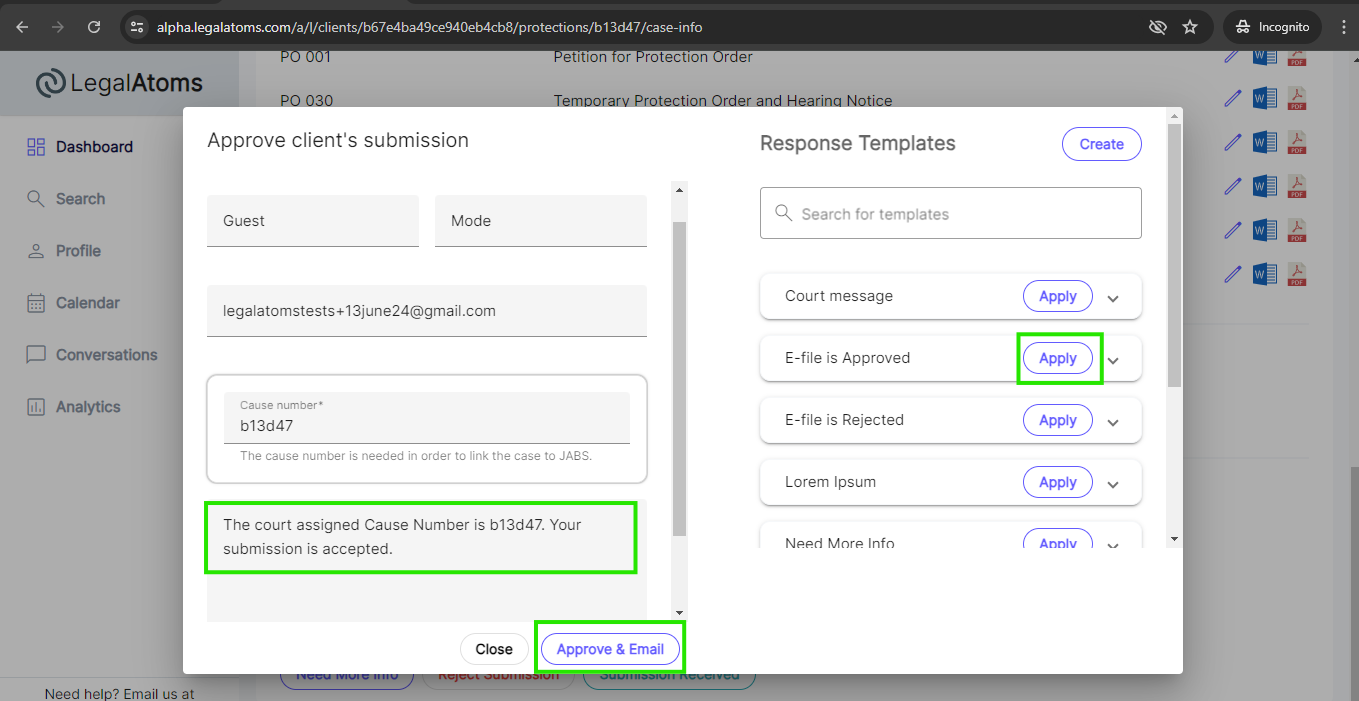
Step 3: E-file Approved Template
If clerks want to approve the client’s submission, you can simply use the existing templates for submission accepted. The professional needs to click on the Apply button. The existing template automatically appears in the Email Content section. Simply, click on the Approve & Email button.
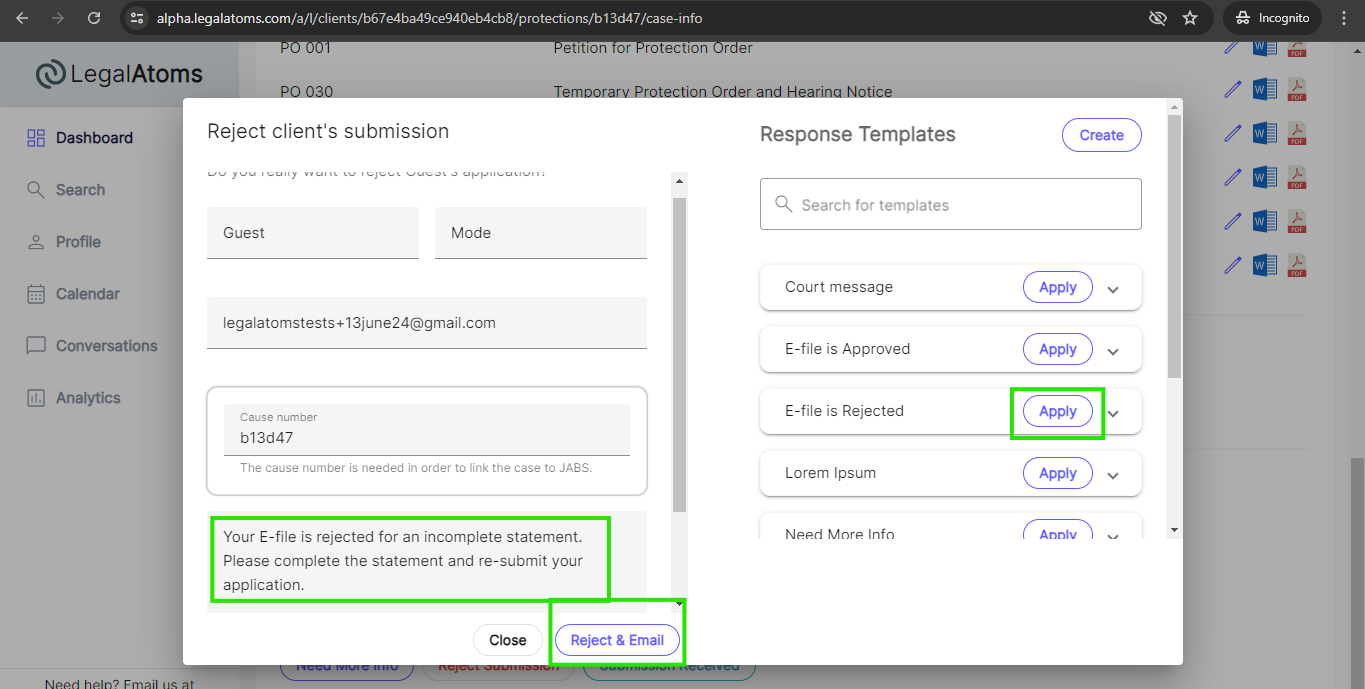
Step 4: E-file Rejected Template
If clerks want to reject the client’s submission, you can simply use the pre-canned messages from the given templates. The professional needs to click on the Apply button. The existing template automatically appears in the Email Content section. Simply, click on the Reject & Email button.