Setup a Profile as a Professional
Recently updated on June 26th, 2025 at 09:13 pm
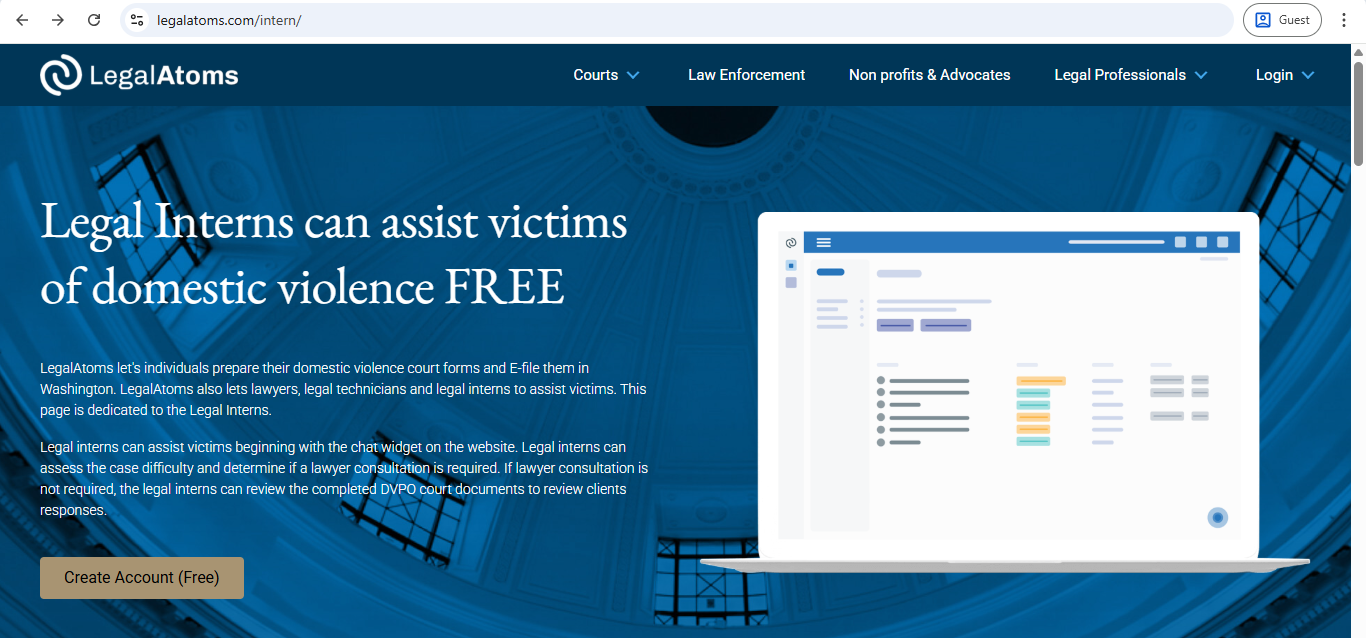
Step 1: Visit a page under “Are you a professional”
Start at legalatoms.com
From the top menu, please visit the appropriate professional type

Step 2: Click on “Create Account (Free)” button
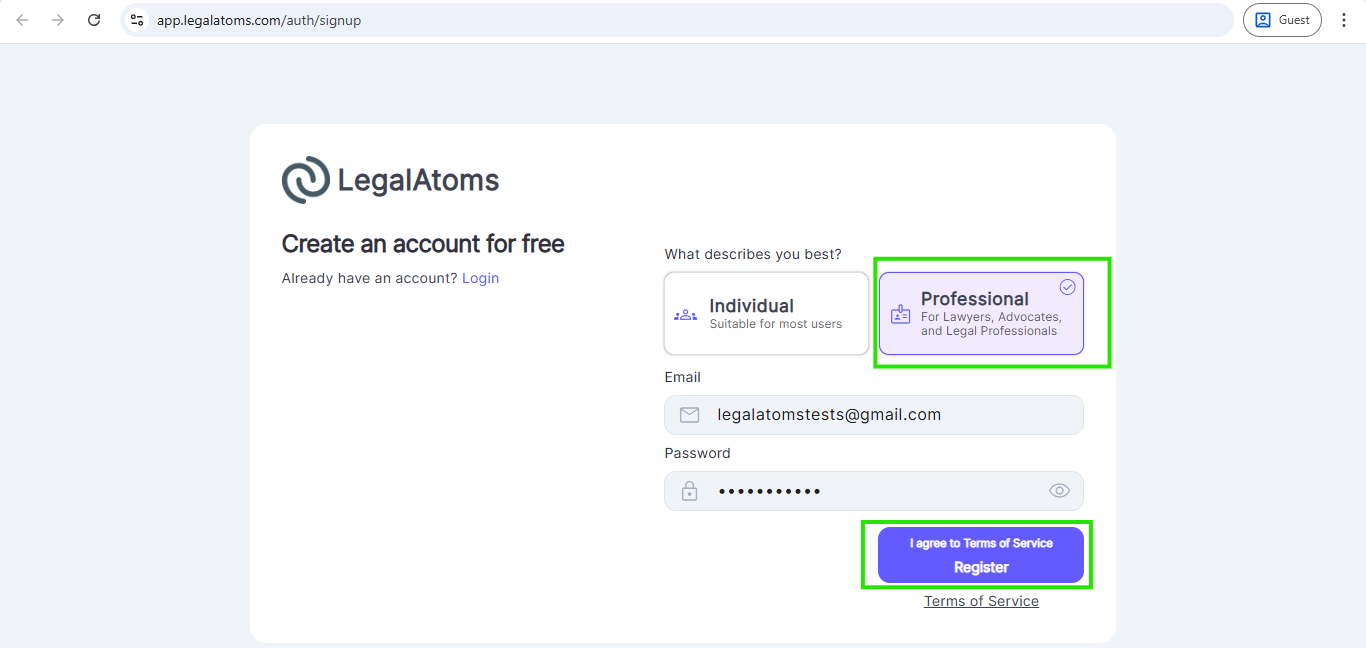
Step 3: Register as a Professional
After clicking on the Create Account (Free) button, you will be redirected to the signup page
Then enter the following fields
- Email: Note: This is where you want to receive your important account notifications. This email is not publicly visible. The email visible to the public is setup later
- Password:
- First Name:
- Last Name:
- Select Professional For Lawyers, Advocates, and Legal Professionals — this is key to setting up an account as a professional and not a client. Note: If you accidentally miss this, you can delete your account and start all over again
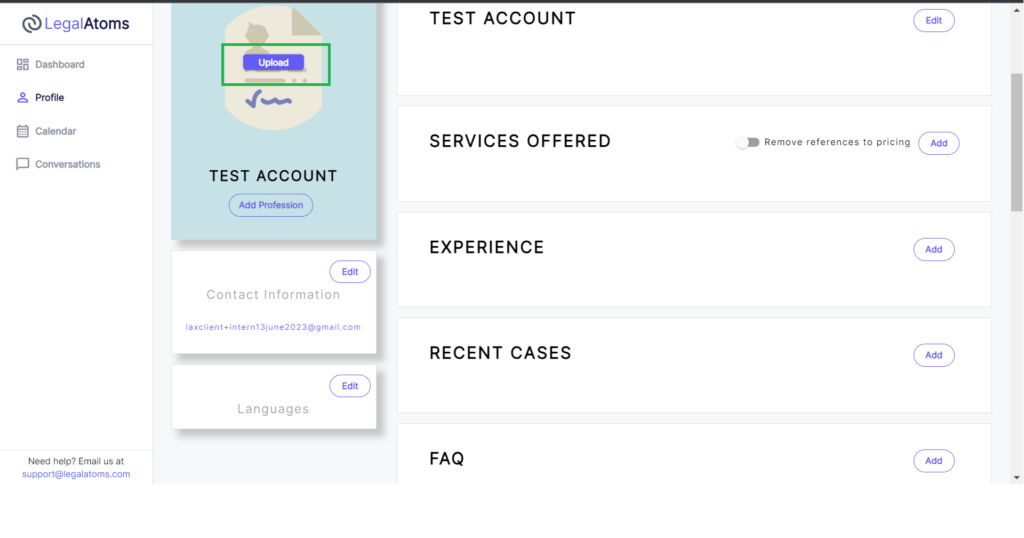
Step 4 Setup your profile beginning with a profile picture
For personal accounts: a profile picture is important for lawyers, legal interns and even advocates as it helps people see the human and professional face
For Organizations accounts: A logo or some branding image may be uploaded
A profile picture greatly increases the chance of being selected by the client. However, you are not required to have one in case you don’t feel comfortable releasing one for privacy.
Step 5 Set Profession
You can set any profession. There are some special features available for these professionsl
- Advocate: These would fall under the court
- Lawyer: Licensed lawyers only
- Clerk: Clerk of a court only
- Judge: Judge of a court only
- Law Enforcement
- Legal Intern
- Nonprofit (Social workers, victim advocates can also select this option)
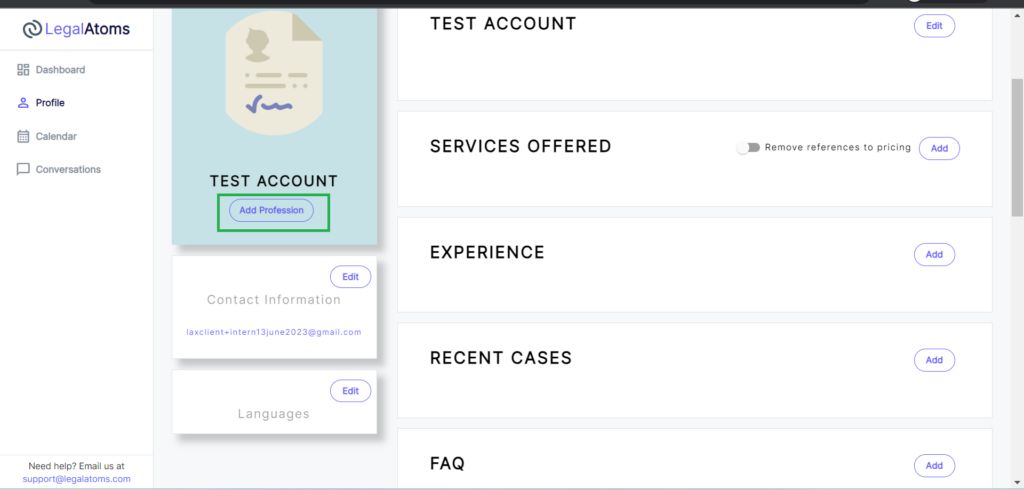
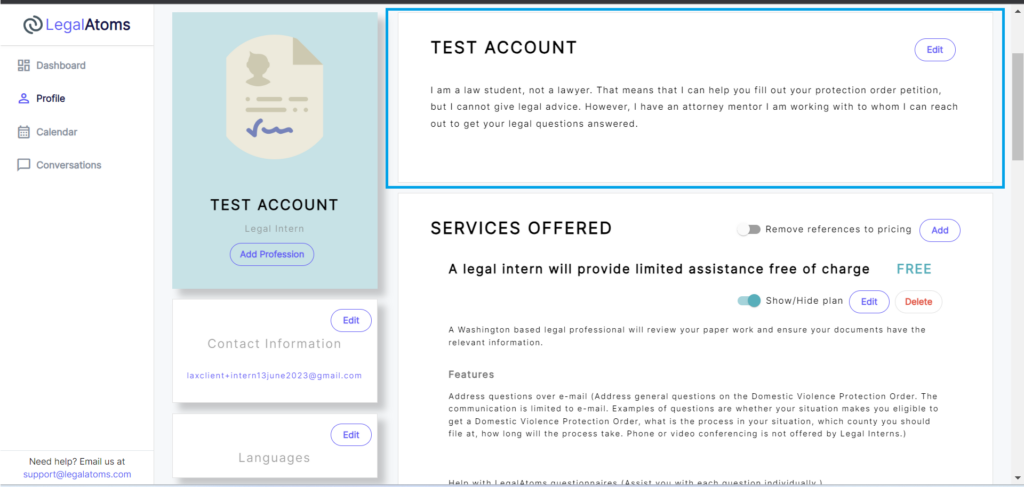
Step 6 Write a standard blurb
For Legal Interns: this is auto-populated when you select the Profession = Legal Intern
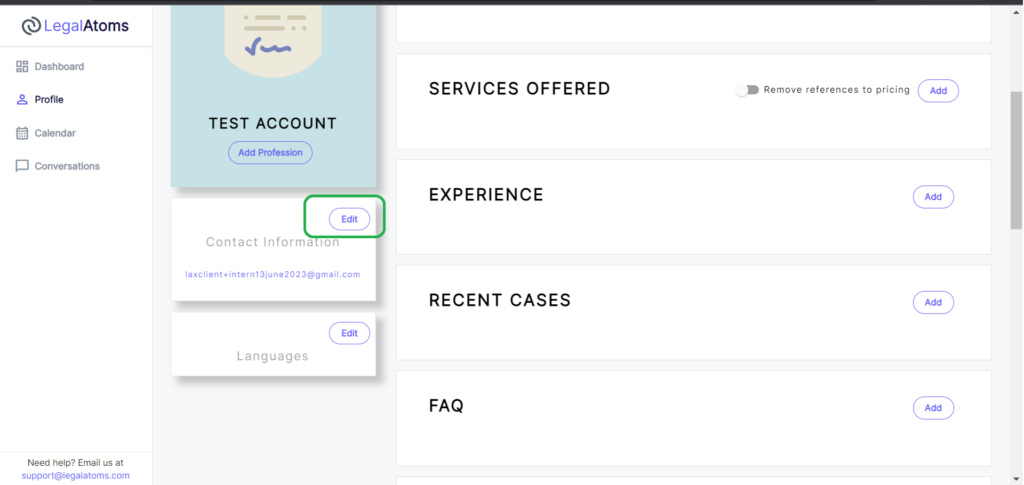
Step 7: Add Contact Information
In case you don’t have an office phone, then create a free Google Voice forwarding phone number to keep your personal phone number private
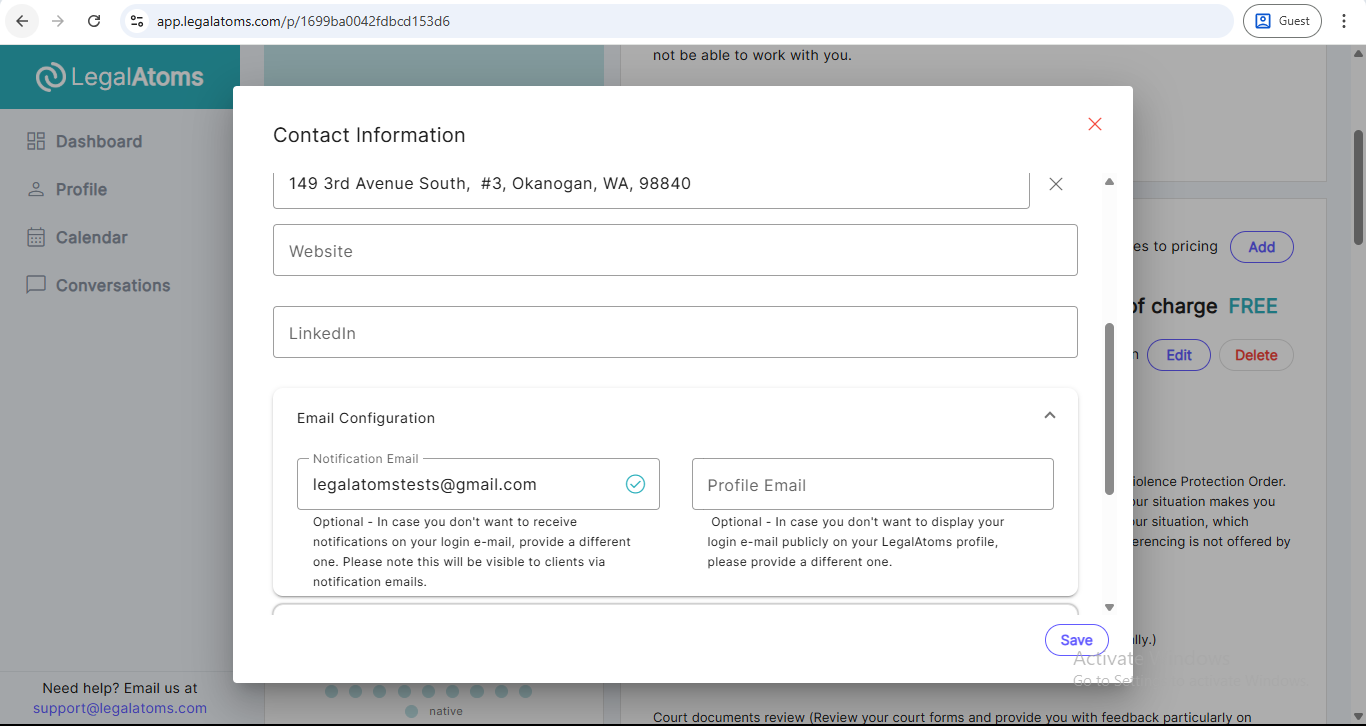
Step 7b: Address
For interns from Seattle University: Use the Seattle University Address in case you don’t have an office address: “901 12th Avenue, Seattle, Washington 98122“. This helps potential clients learn that you’re local intern in Washington State.
Step 7c: Email Configuration (Notification Email)
This section allows you to specify a Notification Email, which is where you will receive e-Filing notifications.
Notification Email Field
You can enter an email address different from your login email. This is helpful if you want to separate client-facing notifications from your internal email.
Important Notes:
-
The notification email will be used for sending e-filing-related notifications and updates.
- Make sure the email is active and monitored regularly to avoid missing any important client e-filing messages.
Additionally, there’s an optional Profile Email field if you want to publicly display a different email than your login email on your LegalAtoms profile.
Don’t forget to click the Save button after entering your contact and email details.
Step 8: Fill the Experience (Optional)
Add with your relevant work experiences. This is an optional section but will really help build confidence with potential clients.

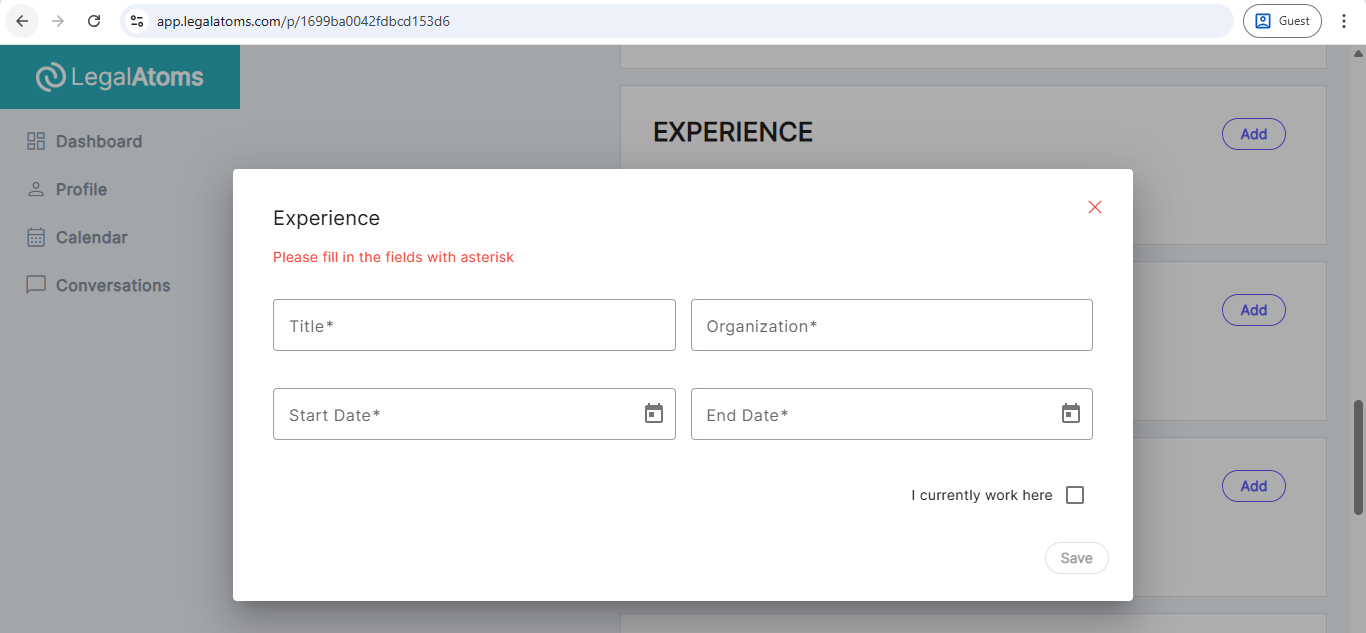
This helps with matching you with clients
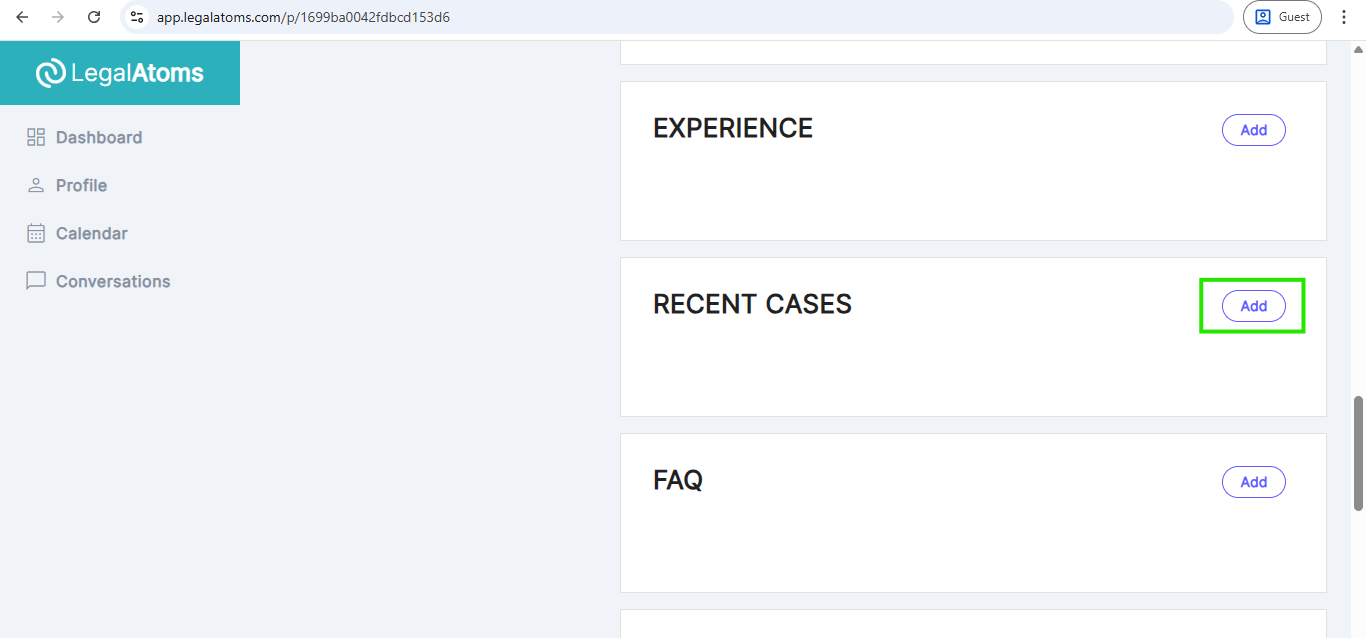
Step 9: Recent Cases (Optional)
You can discuss any cases you have worked on without revealing any client information. This section helps with the matching of clients with legal professionals.

Step 10: Services
For Legal Interns: This section is auto-populated when you select “Profession” and therefore you can skip it.
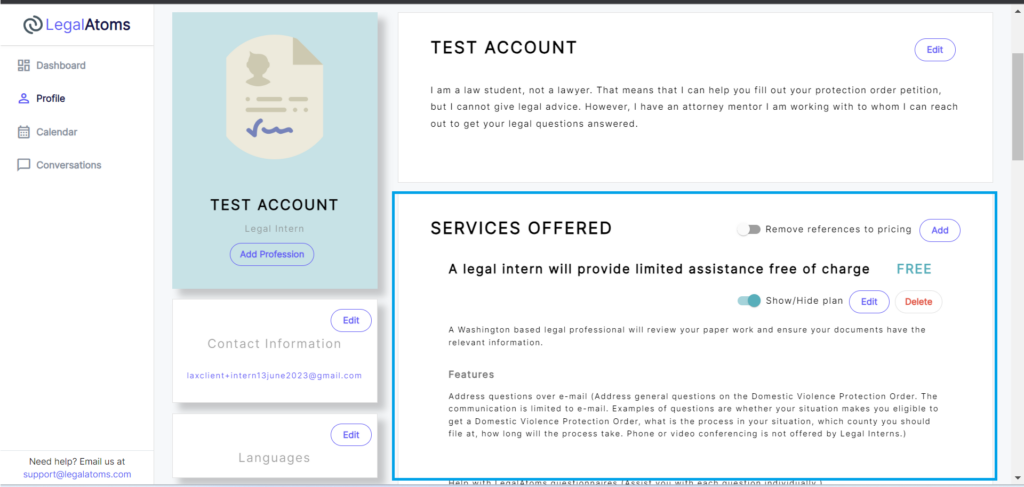
For all other professionals:
This is an important part of your profile if you want LegalAtoms clients to be able to find you based on the services you offer. In case you are using Legalatoms just to create documents for your existing clients (e.g. clients who call you but did not locate you via LegalAtoms0 then you can totally ignore this section.
For quick start: Click on Domestic Violence tab and enable the pro bono plan
Step 10B Add Custom Plans (Not needed for Legal Intern)
You can also define custom plans, which would be only visible on your profile. Here you can define the services offered as per your own preferences. https://legalatoms.com/2019/10/27/defining-custom-plans/
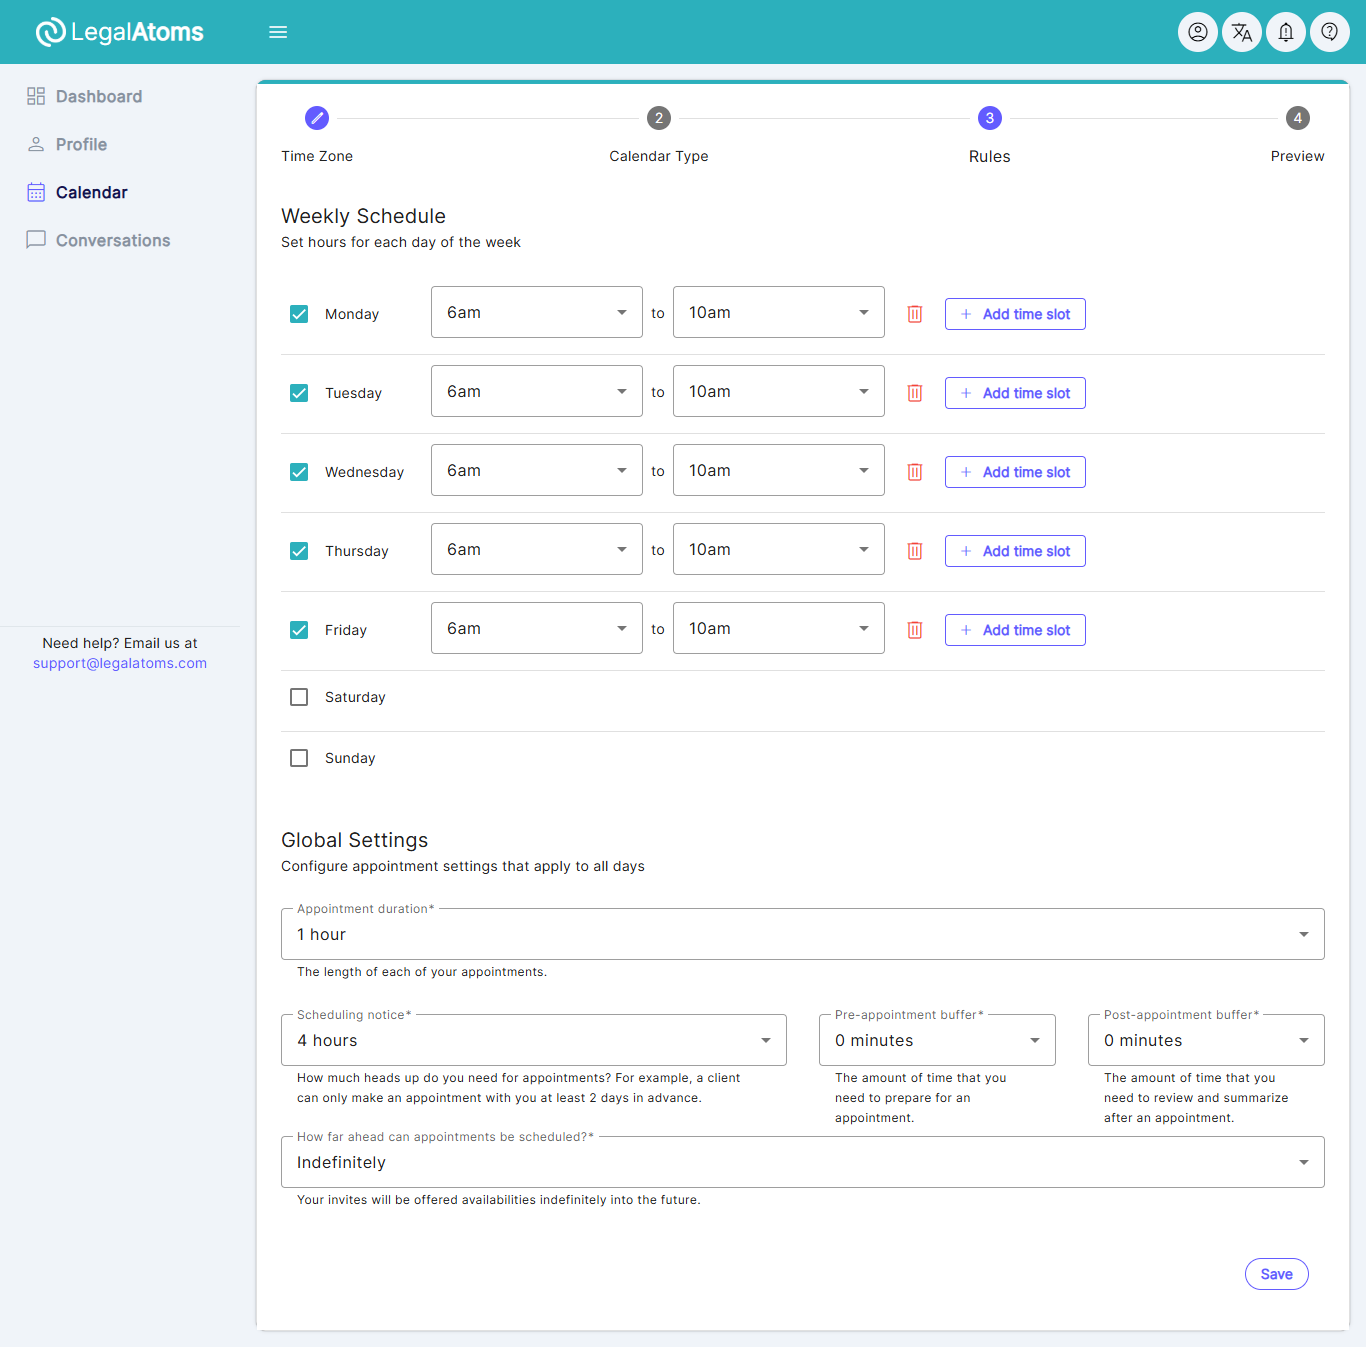
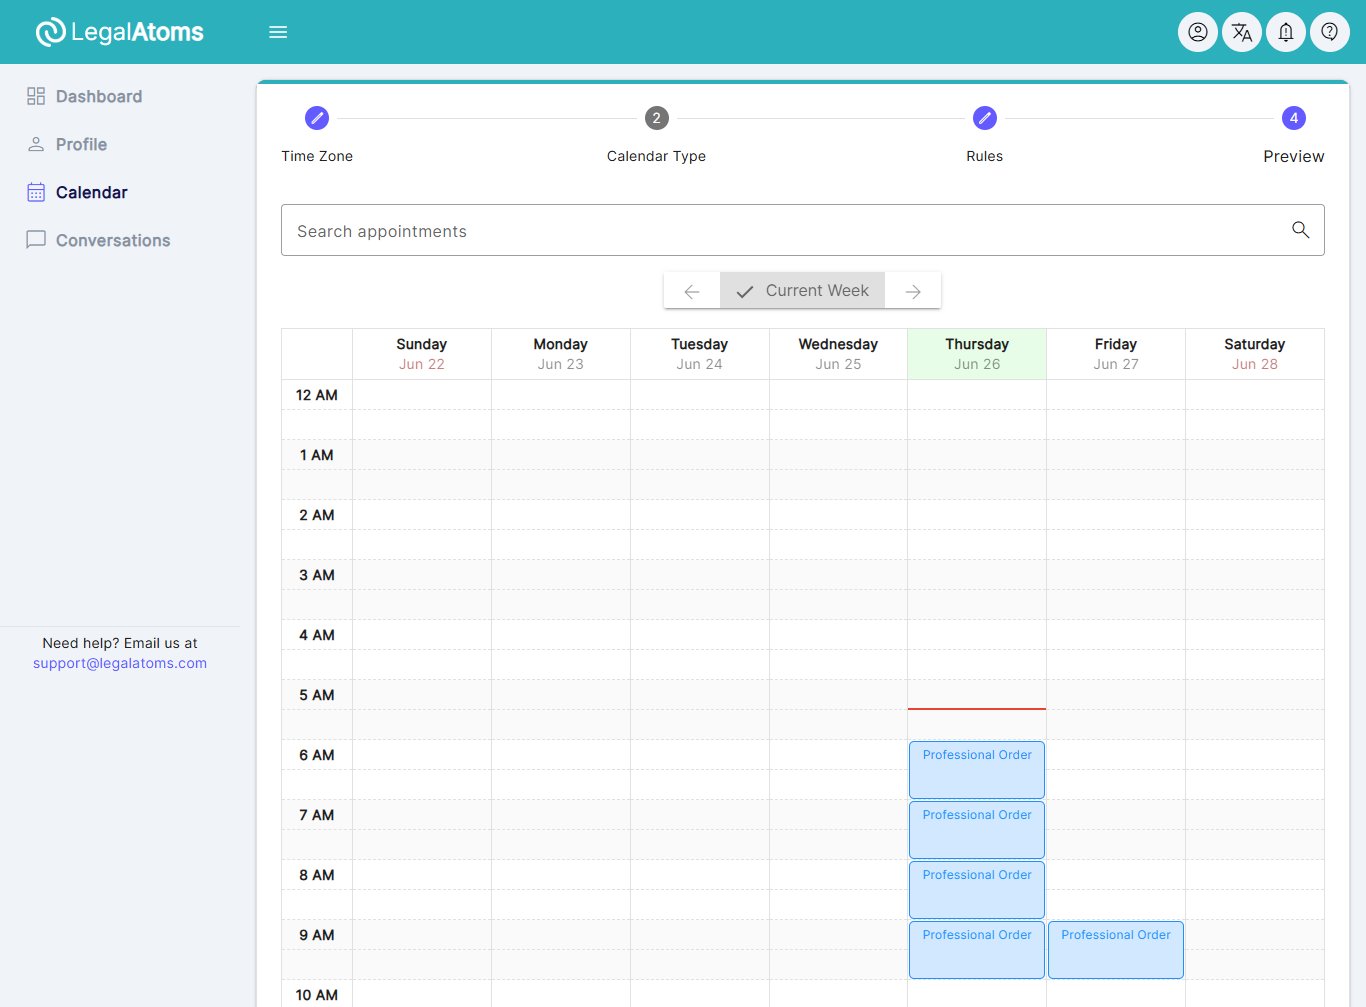
Step 11: Connect your calendar (Optional)
LegalAtoms allows you to link your calendar so appointment requests can be made by the clients. At the moment, only Legalatoms calendar and Google calendars are supported.
You have a fine set of controls for appointments such as
- Days of the week
- Start and end hours (e.g. Mon, Wed 12pm-2pm)
- Appointment duration
- Heads up you need (e.g. 1 day advanced notice)
- And a few other controls


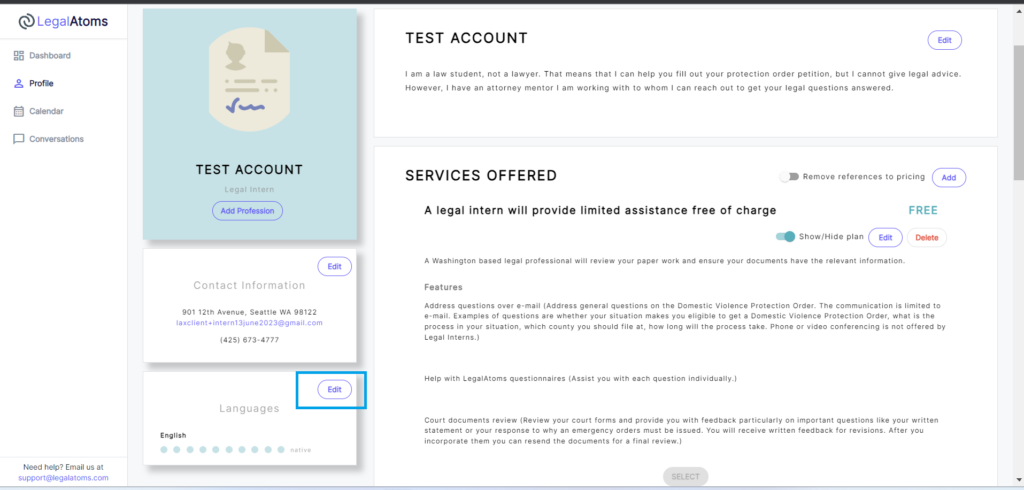
Step 12: Set Language
Add the languages you or your staff members are comfortable with.
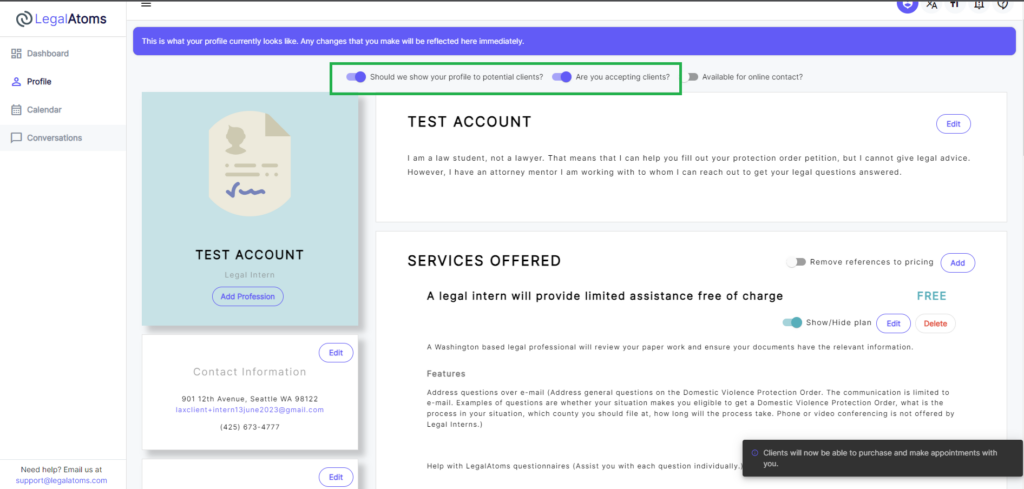
Step 13: Make your profile Public
There are two switches and both have to be turned on which are
- “Show we show your profile to professional clients?” : This switch just makes your profile visible to public. It does not enable making service requests to you. Typically you will leave it on always.
- “Are you accepting clients:” This would allow clients to see you as an option available for assistance (i.e. you’re offering services), and allow them to send you requests for assistance.
Once a client sends you request, you will receive an e-mail notification.