How to E-file into Tyler by using a PDF Document
Published
E-filing is a convenient way to submit court documents electronically. As a registered user on LegalAtoms, this guide will walk you through the process of e-filing into the Tyler system using a PDF document.
Step 1: Set up a payment account
When e-filing documents, it’s essential to set up a payment account to cover any associated fees. Follow the process of creating a payment account using a credit card in the Tyler e-filing system
Click on the profile icon and select the Settings section.
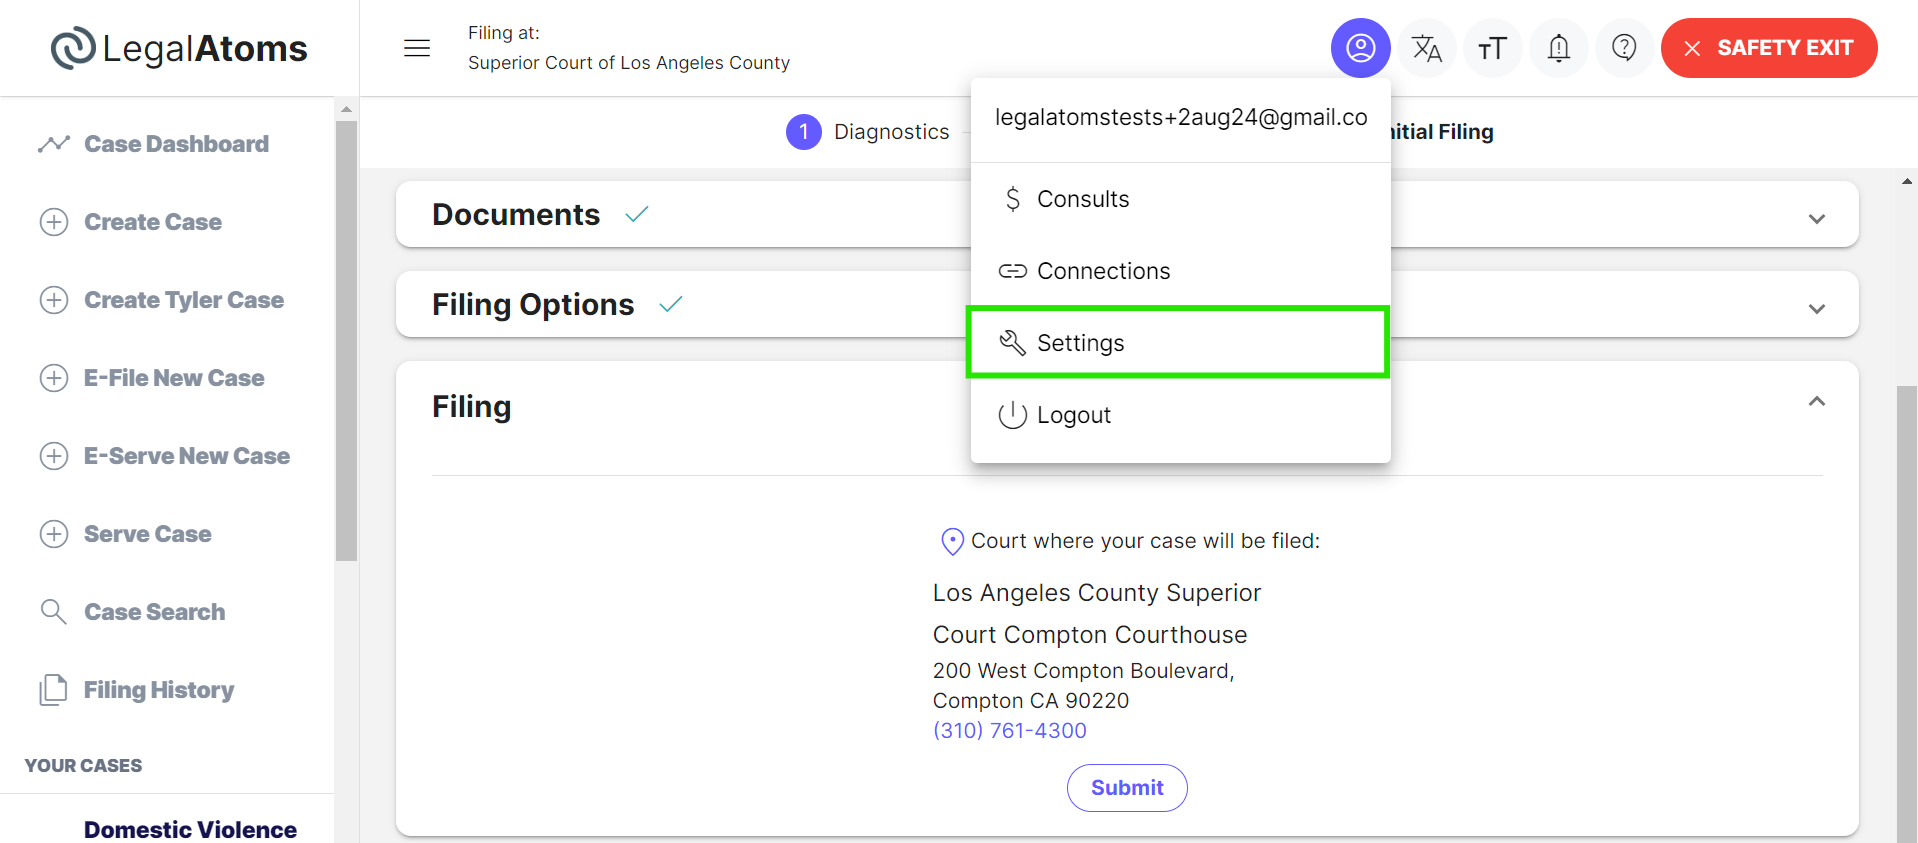
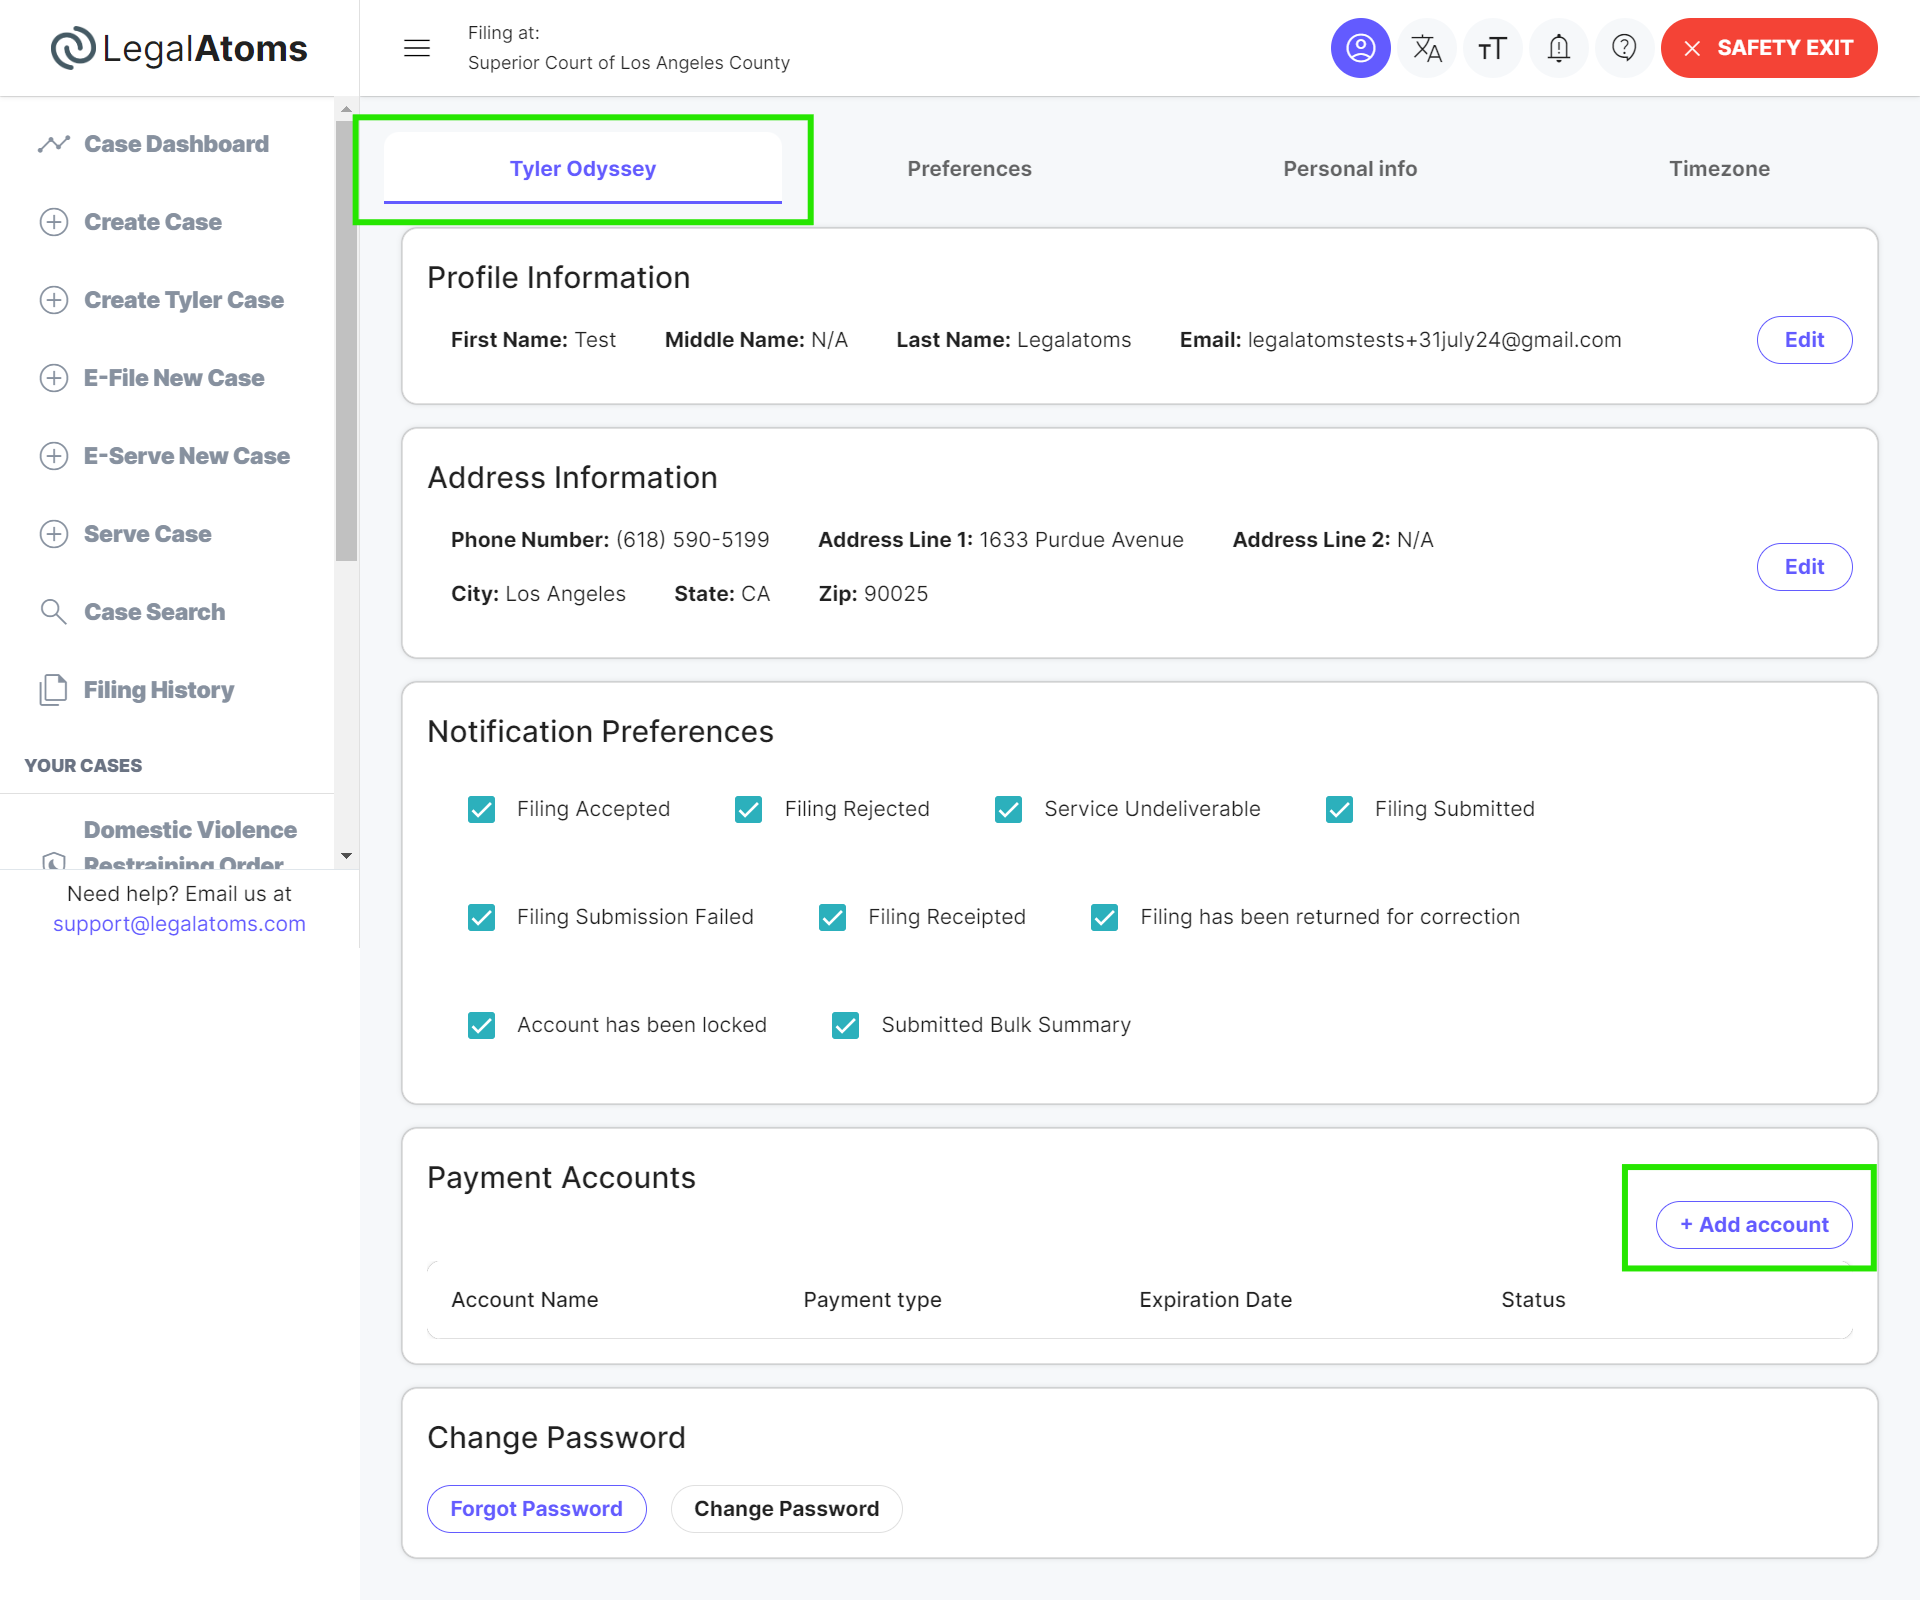
In the Tyler e-filing interface, locate and select the “Payment Accounts” section. This is found under the “Tyler Odyssey” tab.
Click on the “+ Add account” button to start setting up a new payment account.
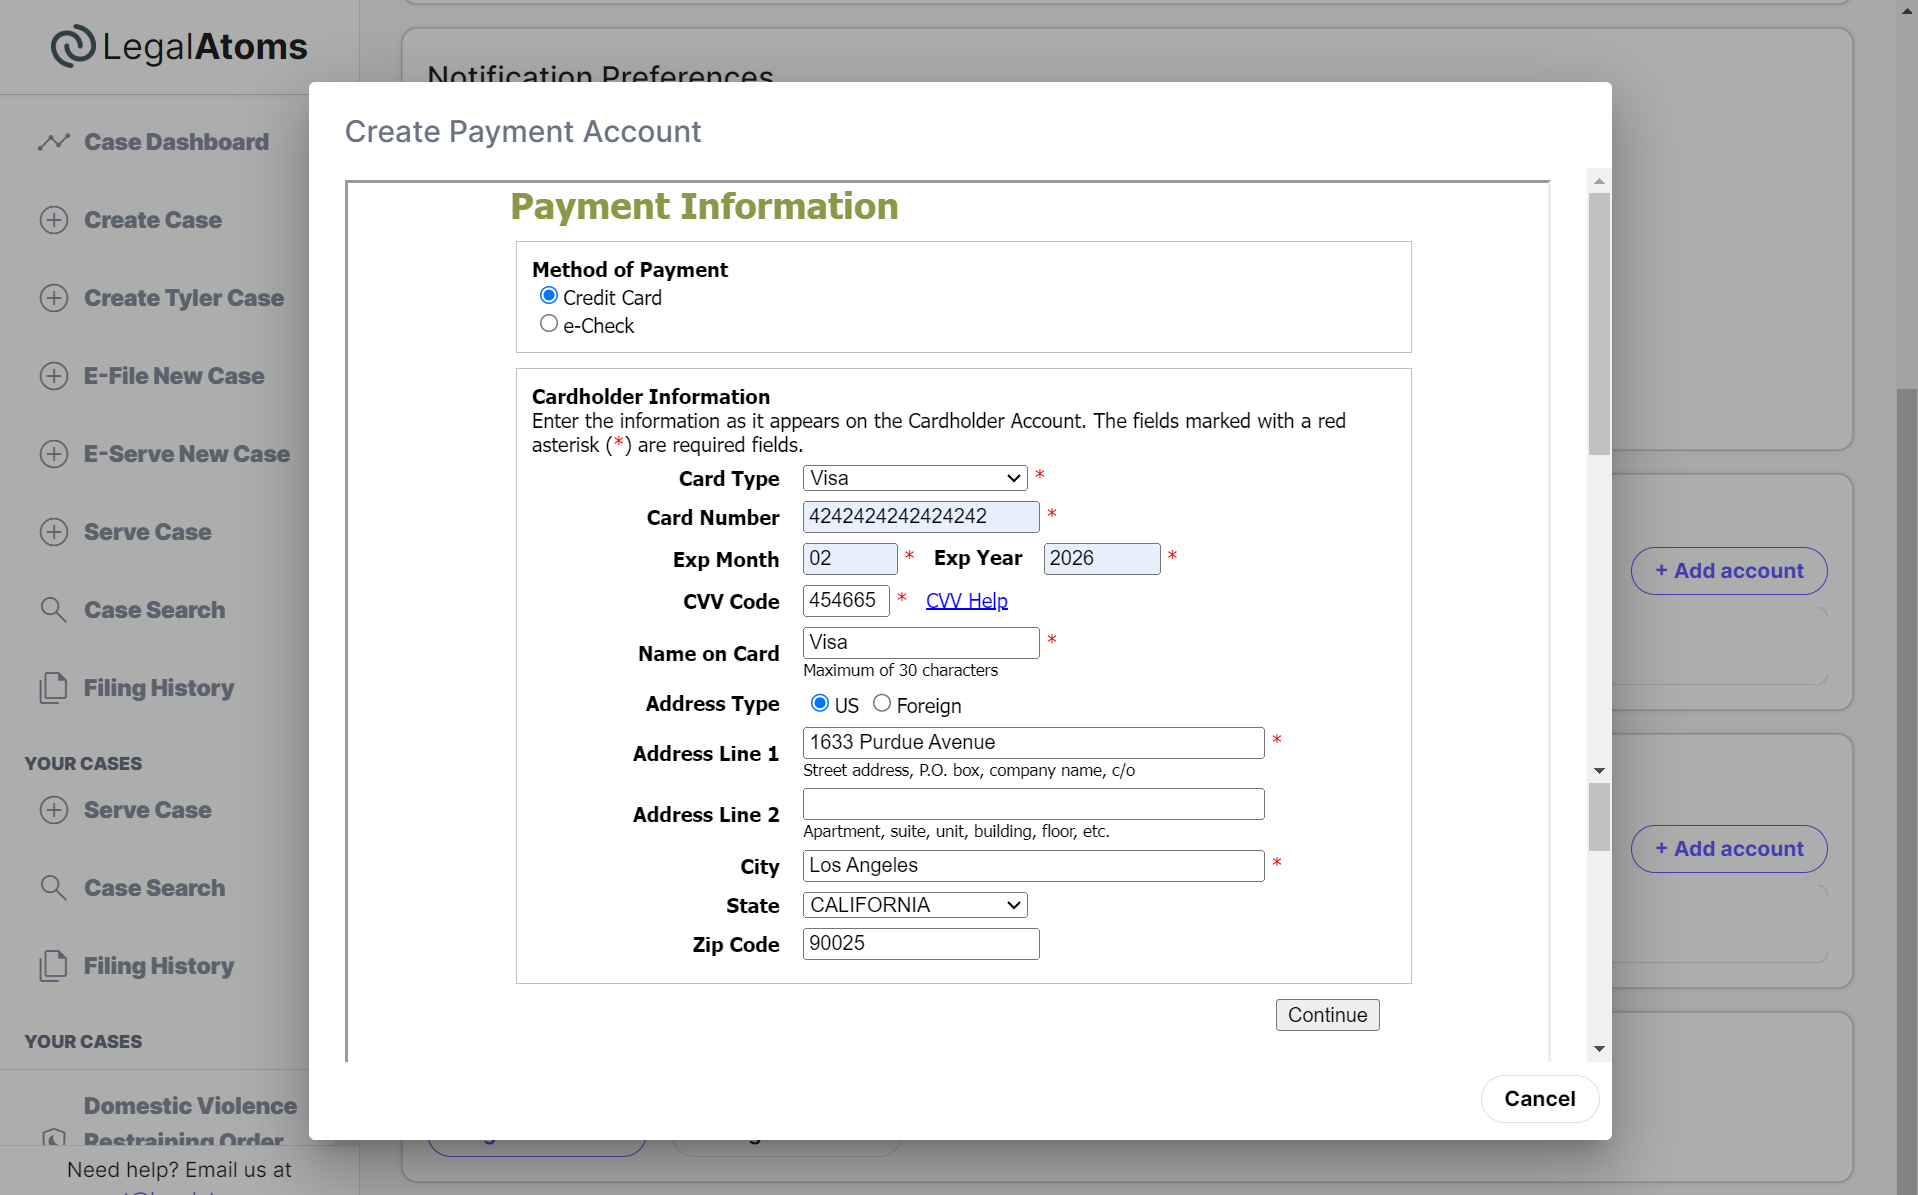
Select the method of payment. e.g. we’ll choose “Credit Card.”
Cardholder Information
- Card Type: Select your card type from the dropdown menu (e.g. Visa, MasterCard, etc).
- Card Number: Enter your credit card number. Ensure the number is accurate to avoid errors.
- Exp Month and Exp Year: Enter the expiration month and year of your credit card.
- CVV Code: Enter the CVV code found on the back of your card (usually a three-digit number).
- Name on Card: Type the name as it appears on the credit card.
Address Information
- Address Type: Select “US” if your billing address is within the United States or “Foreign” for addresses outside the US.
- Address Line 1: Enter the street address associated with the card. This field is required.
- Address Line 2: Include any additional address information, such as an apartment or suite number.
- City: Enter the city name.
- State: Select the state from the dropdown menu (e.g., California).
- Zip Code: Provide the ZIP code associated with the billing address.
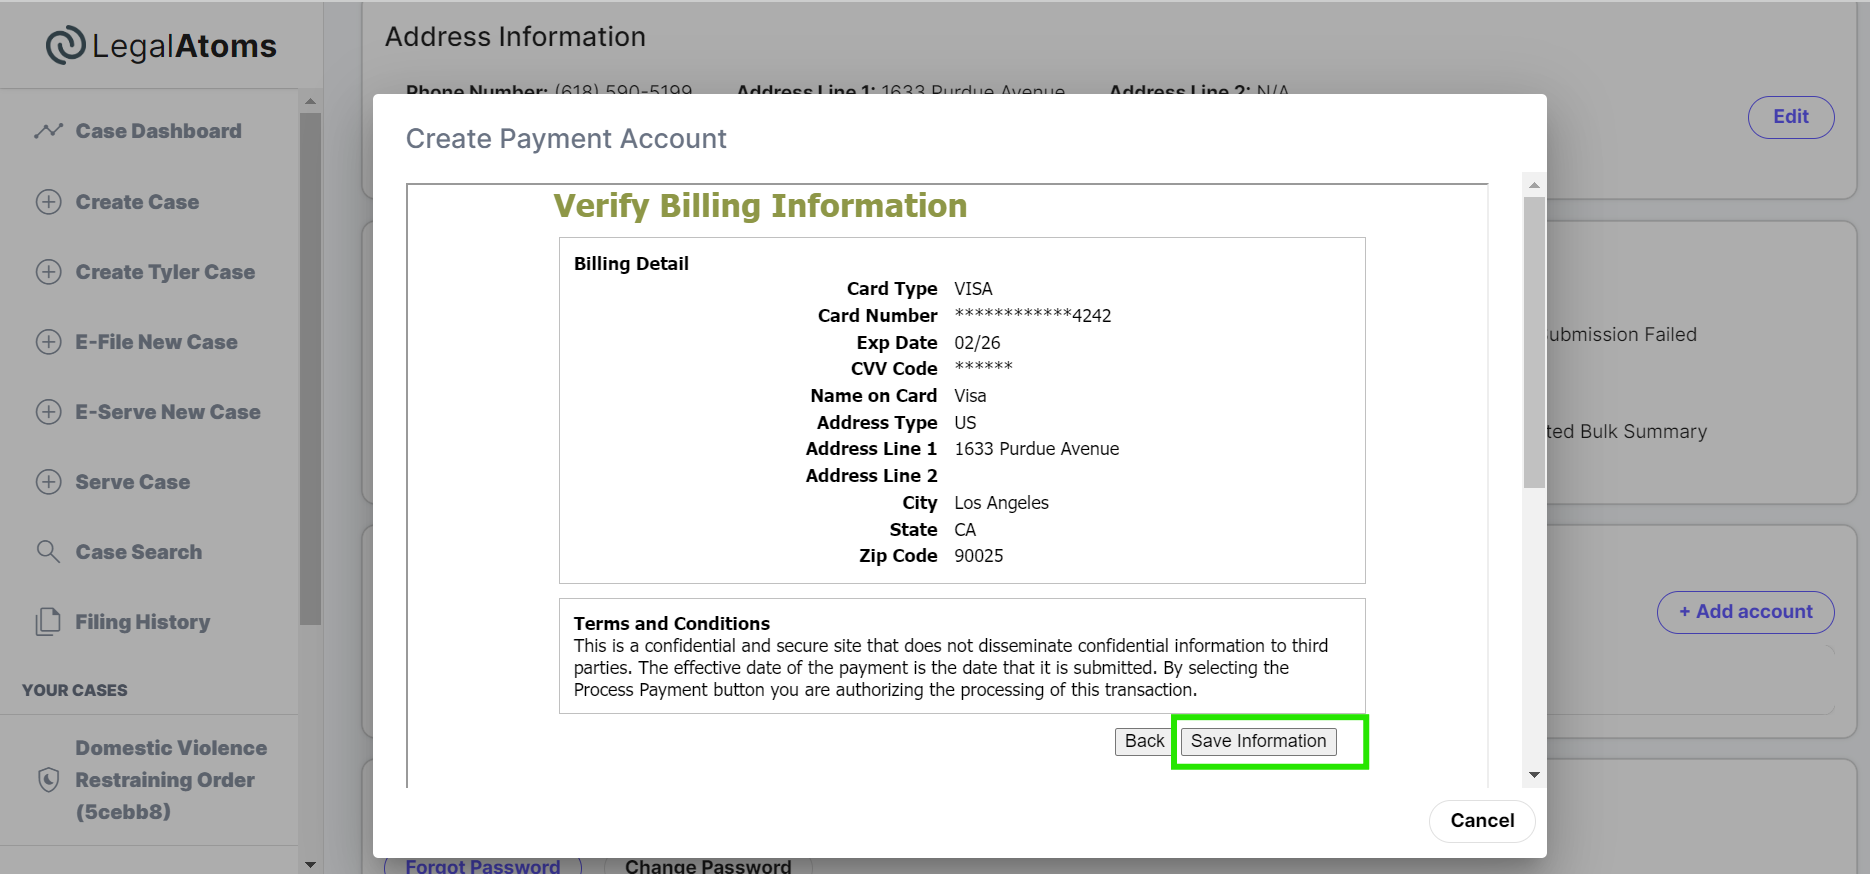
Click on the “Continue” button to save the payment information. Ensure all required fields marked with a red asterisk (*) are filled out.
Verify your billing information and click on the “Save Information” button.
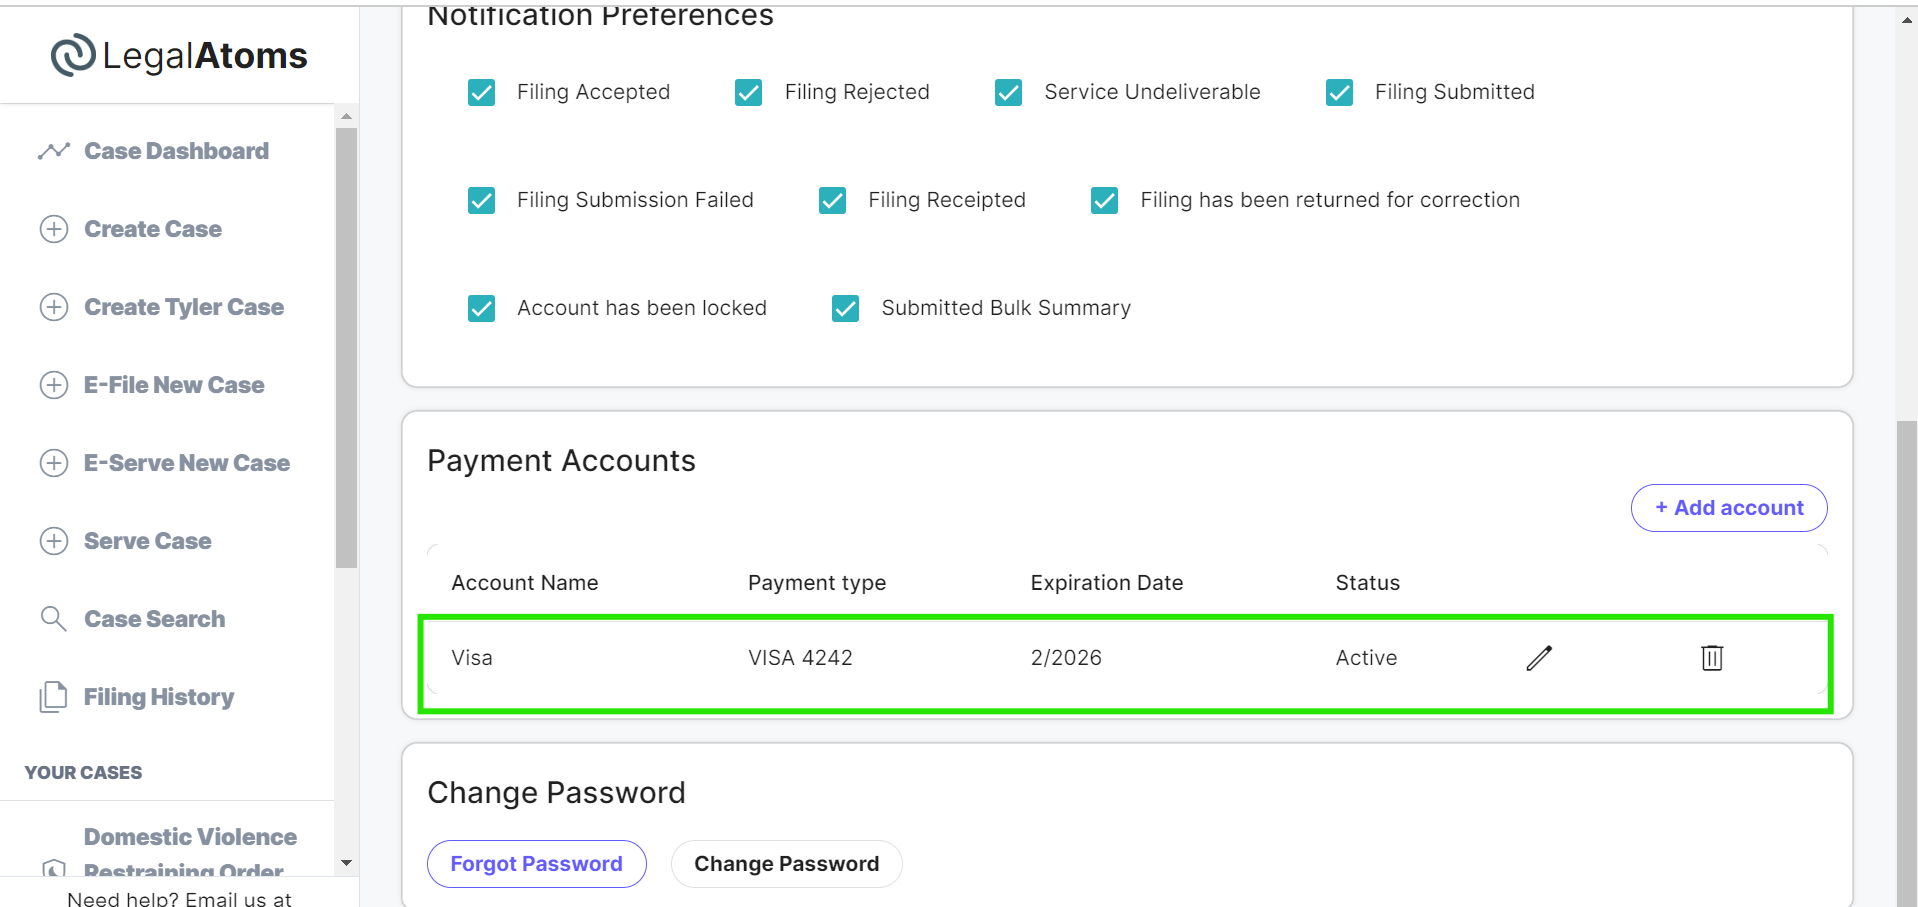
Added card information appears under the “Payment Accounts” section.
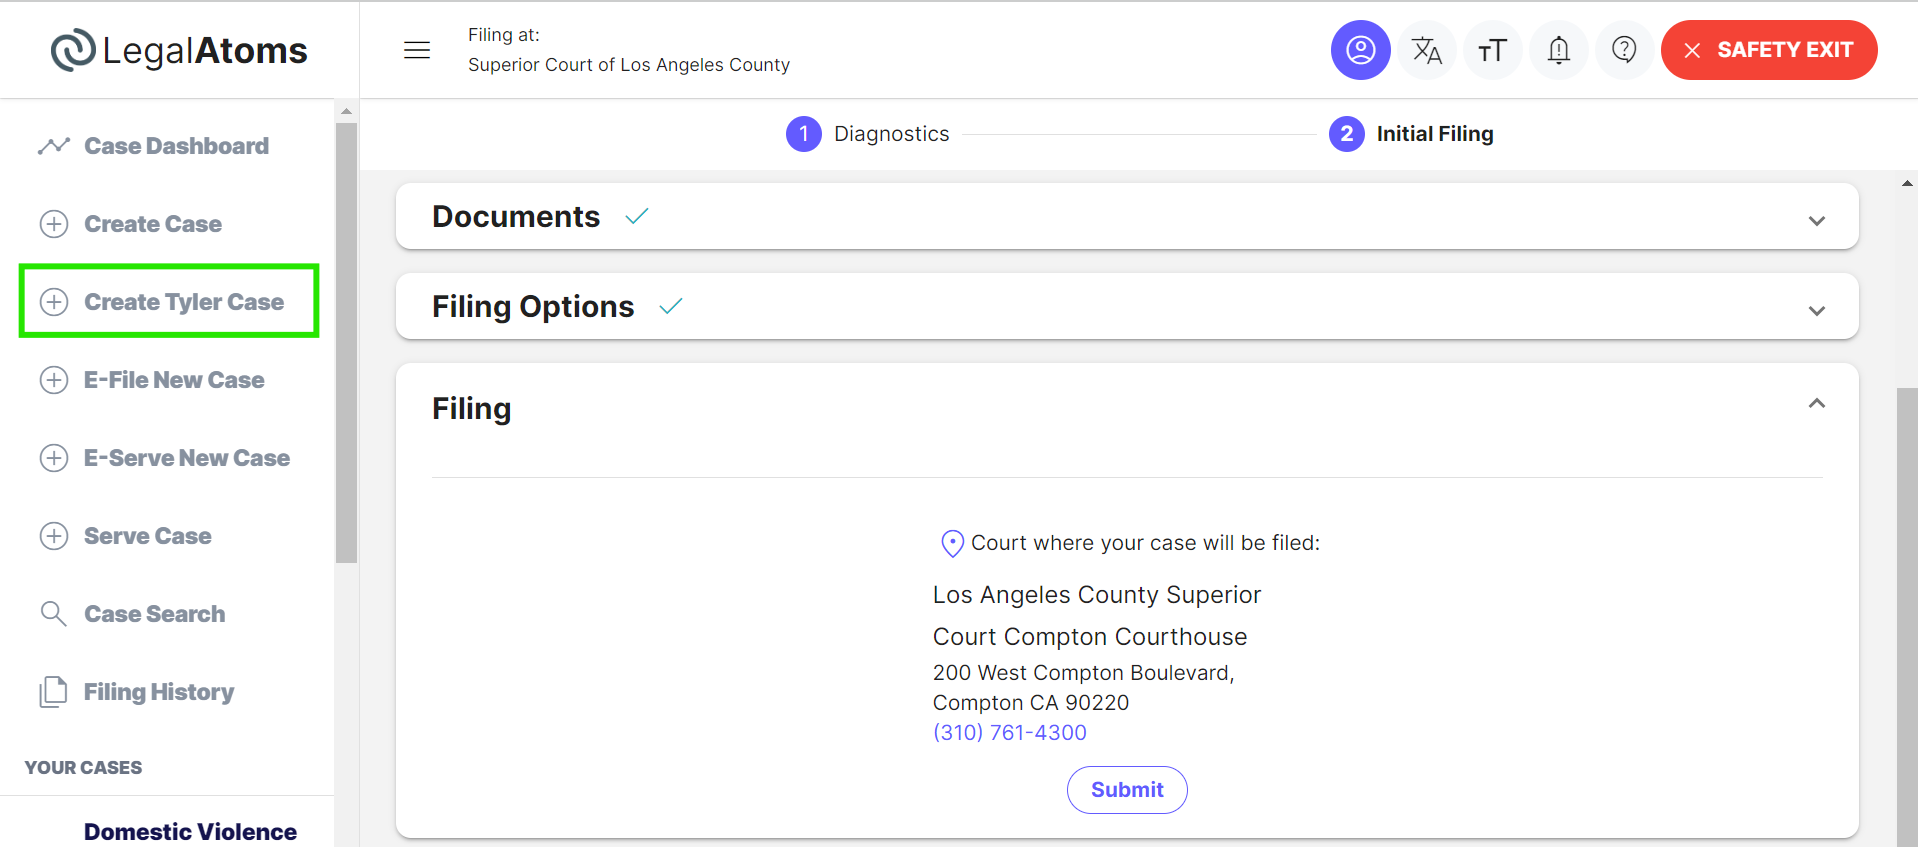
Step 2: Create Tyler Case
Select the option from the left sidebar to “Create Tyler Case”.
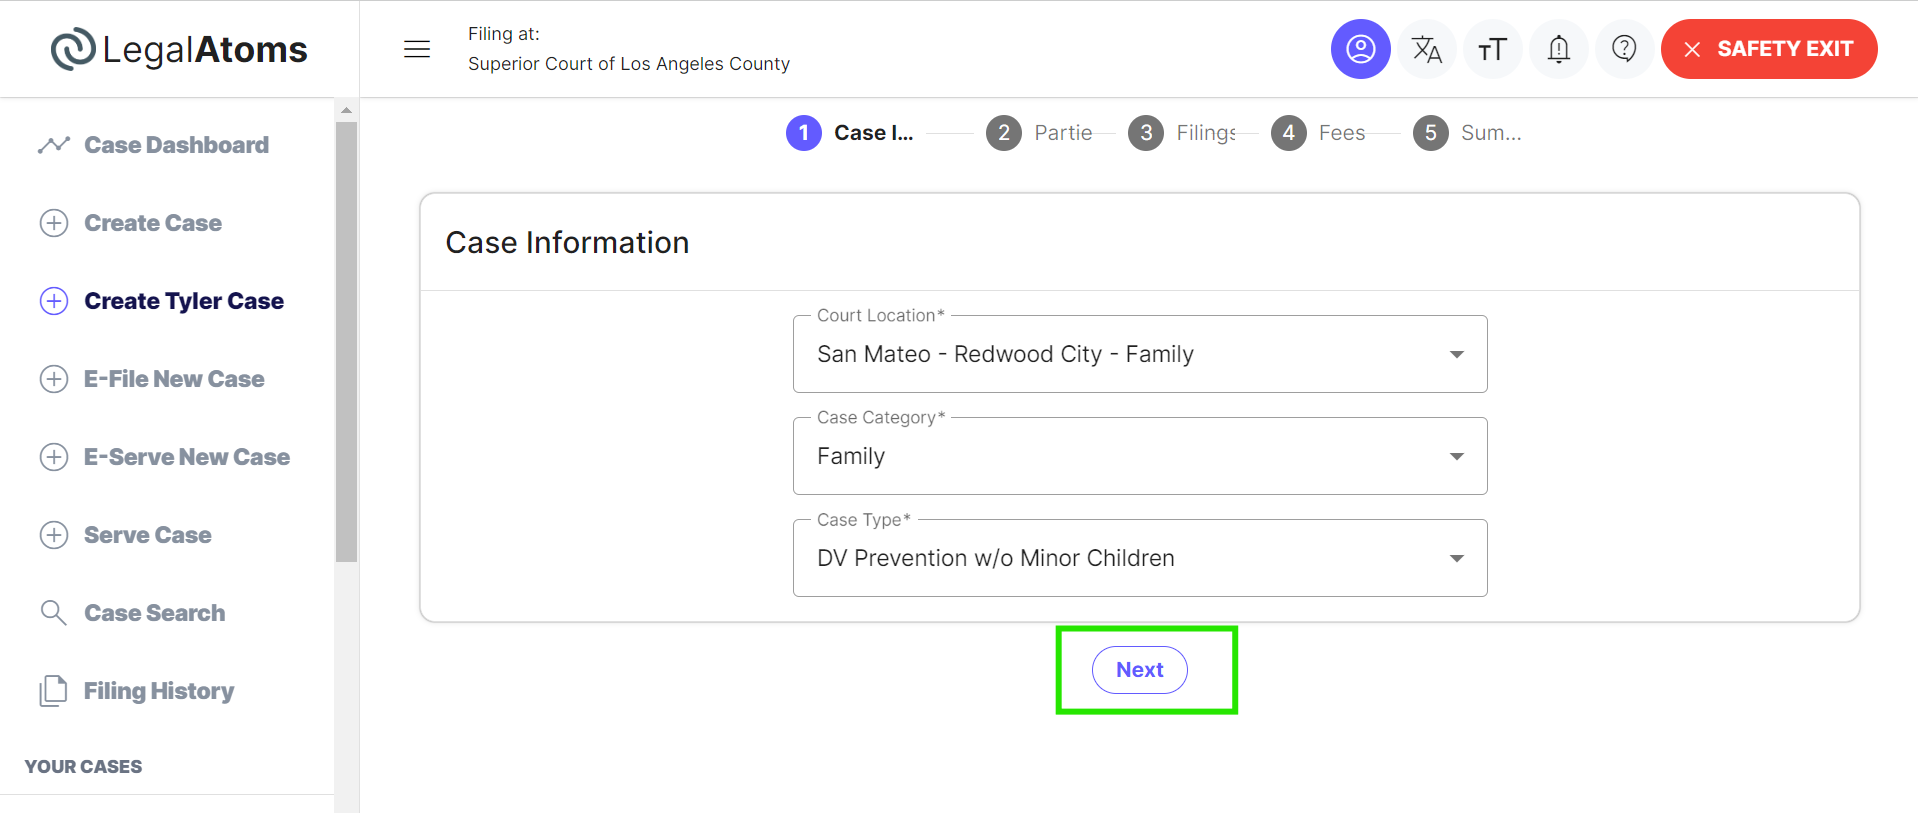
Step 3: Case Information
- Court Location: Select the court where the case will be filed. For example, “San Mateo – Redwood City – Family.”
- Case Category: Choose the category that best describes the nature of the case, such as “Family.”
- Case Type: Specify the case type, like “DV Prevention w/o Minor Children.”
Click on the “Next” button to proceed to the next step.
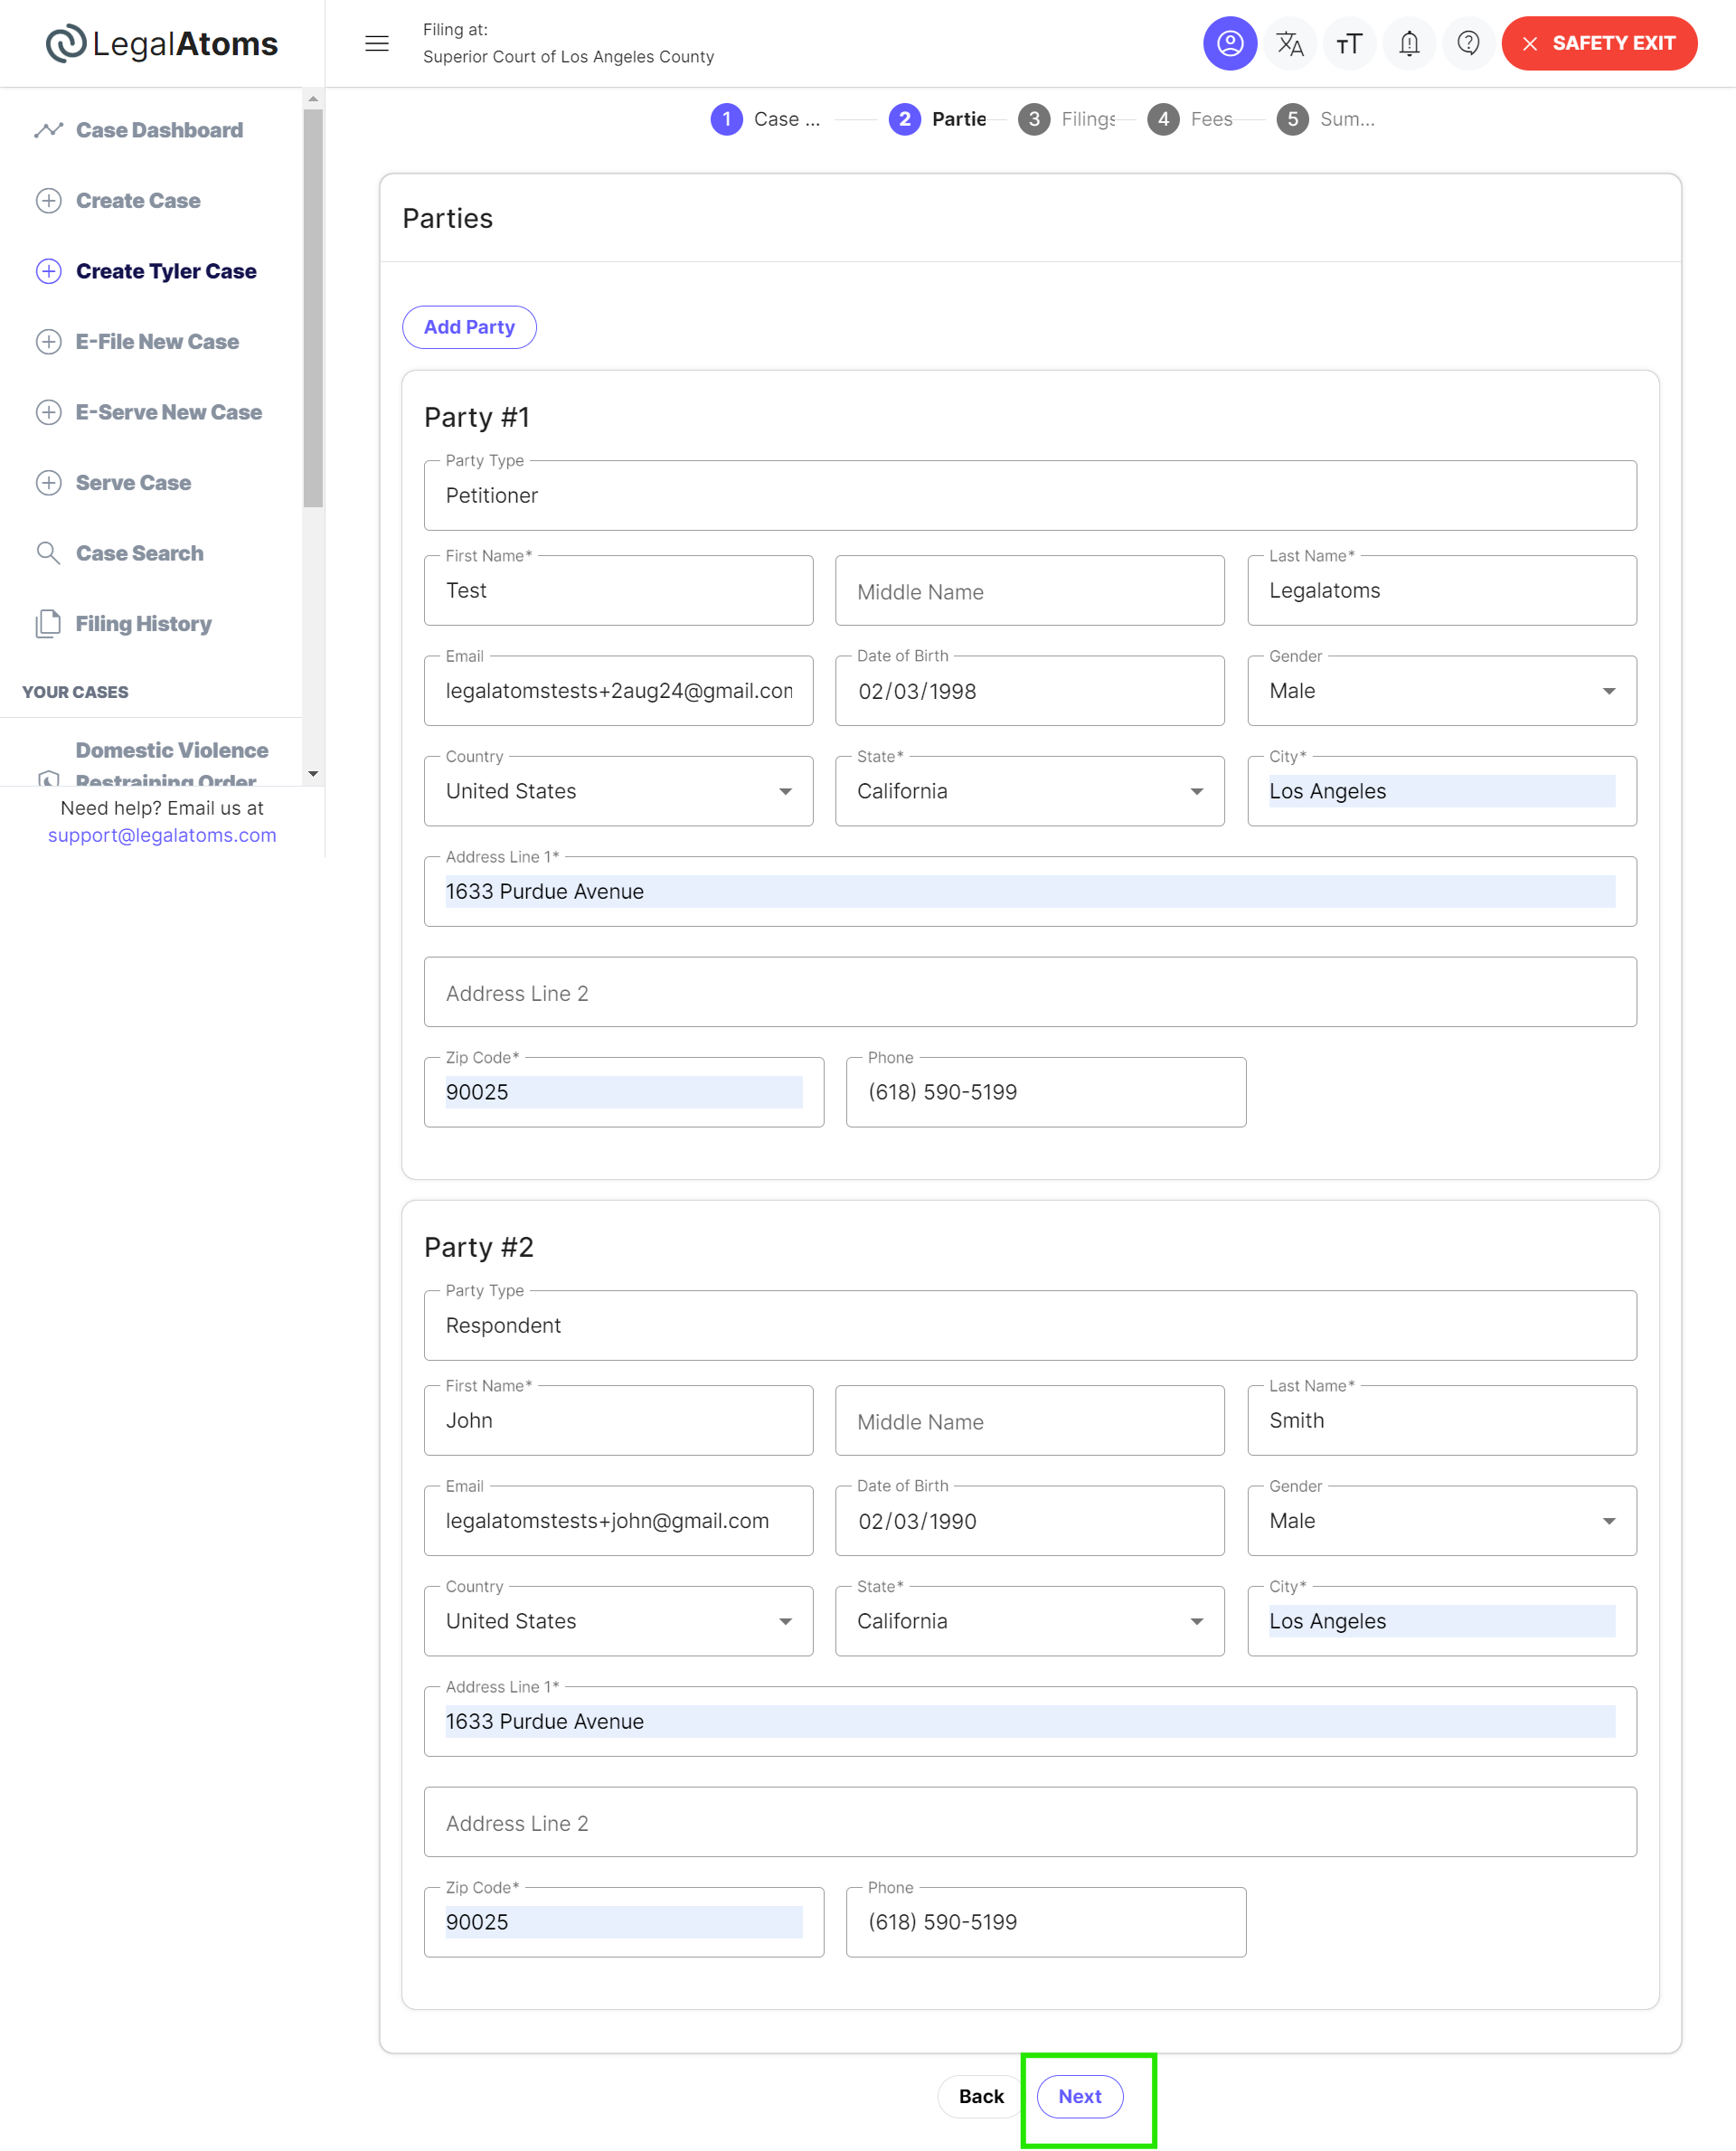
Step 4: Parties
- Add Party: You have to add at least two parties one is the Petitioner and another one is the respondent. Enters the required details for each party involved in the case.
There are the following details to enter for both parties e.g.
- First Name
- Last Name
- Email:
- Date of Birth
- Gender
- Country
- State
- City
- Address
- Phone
Click on the “Next” button to continue.
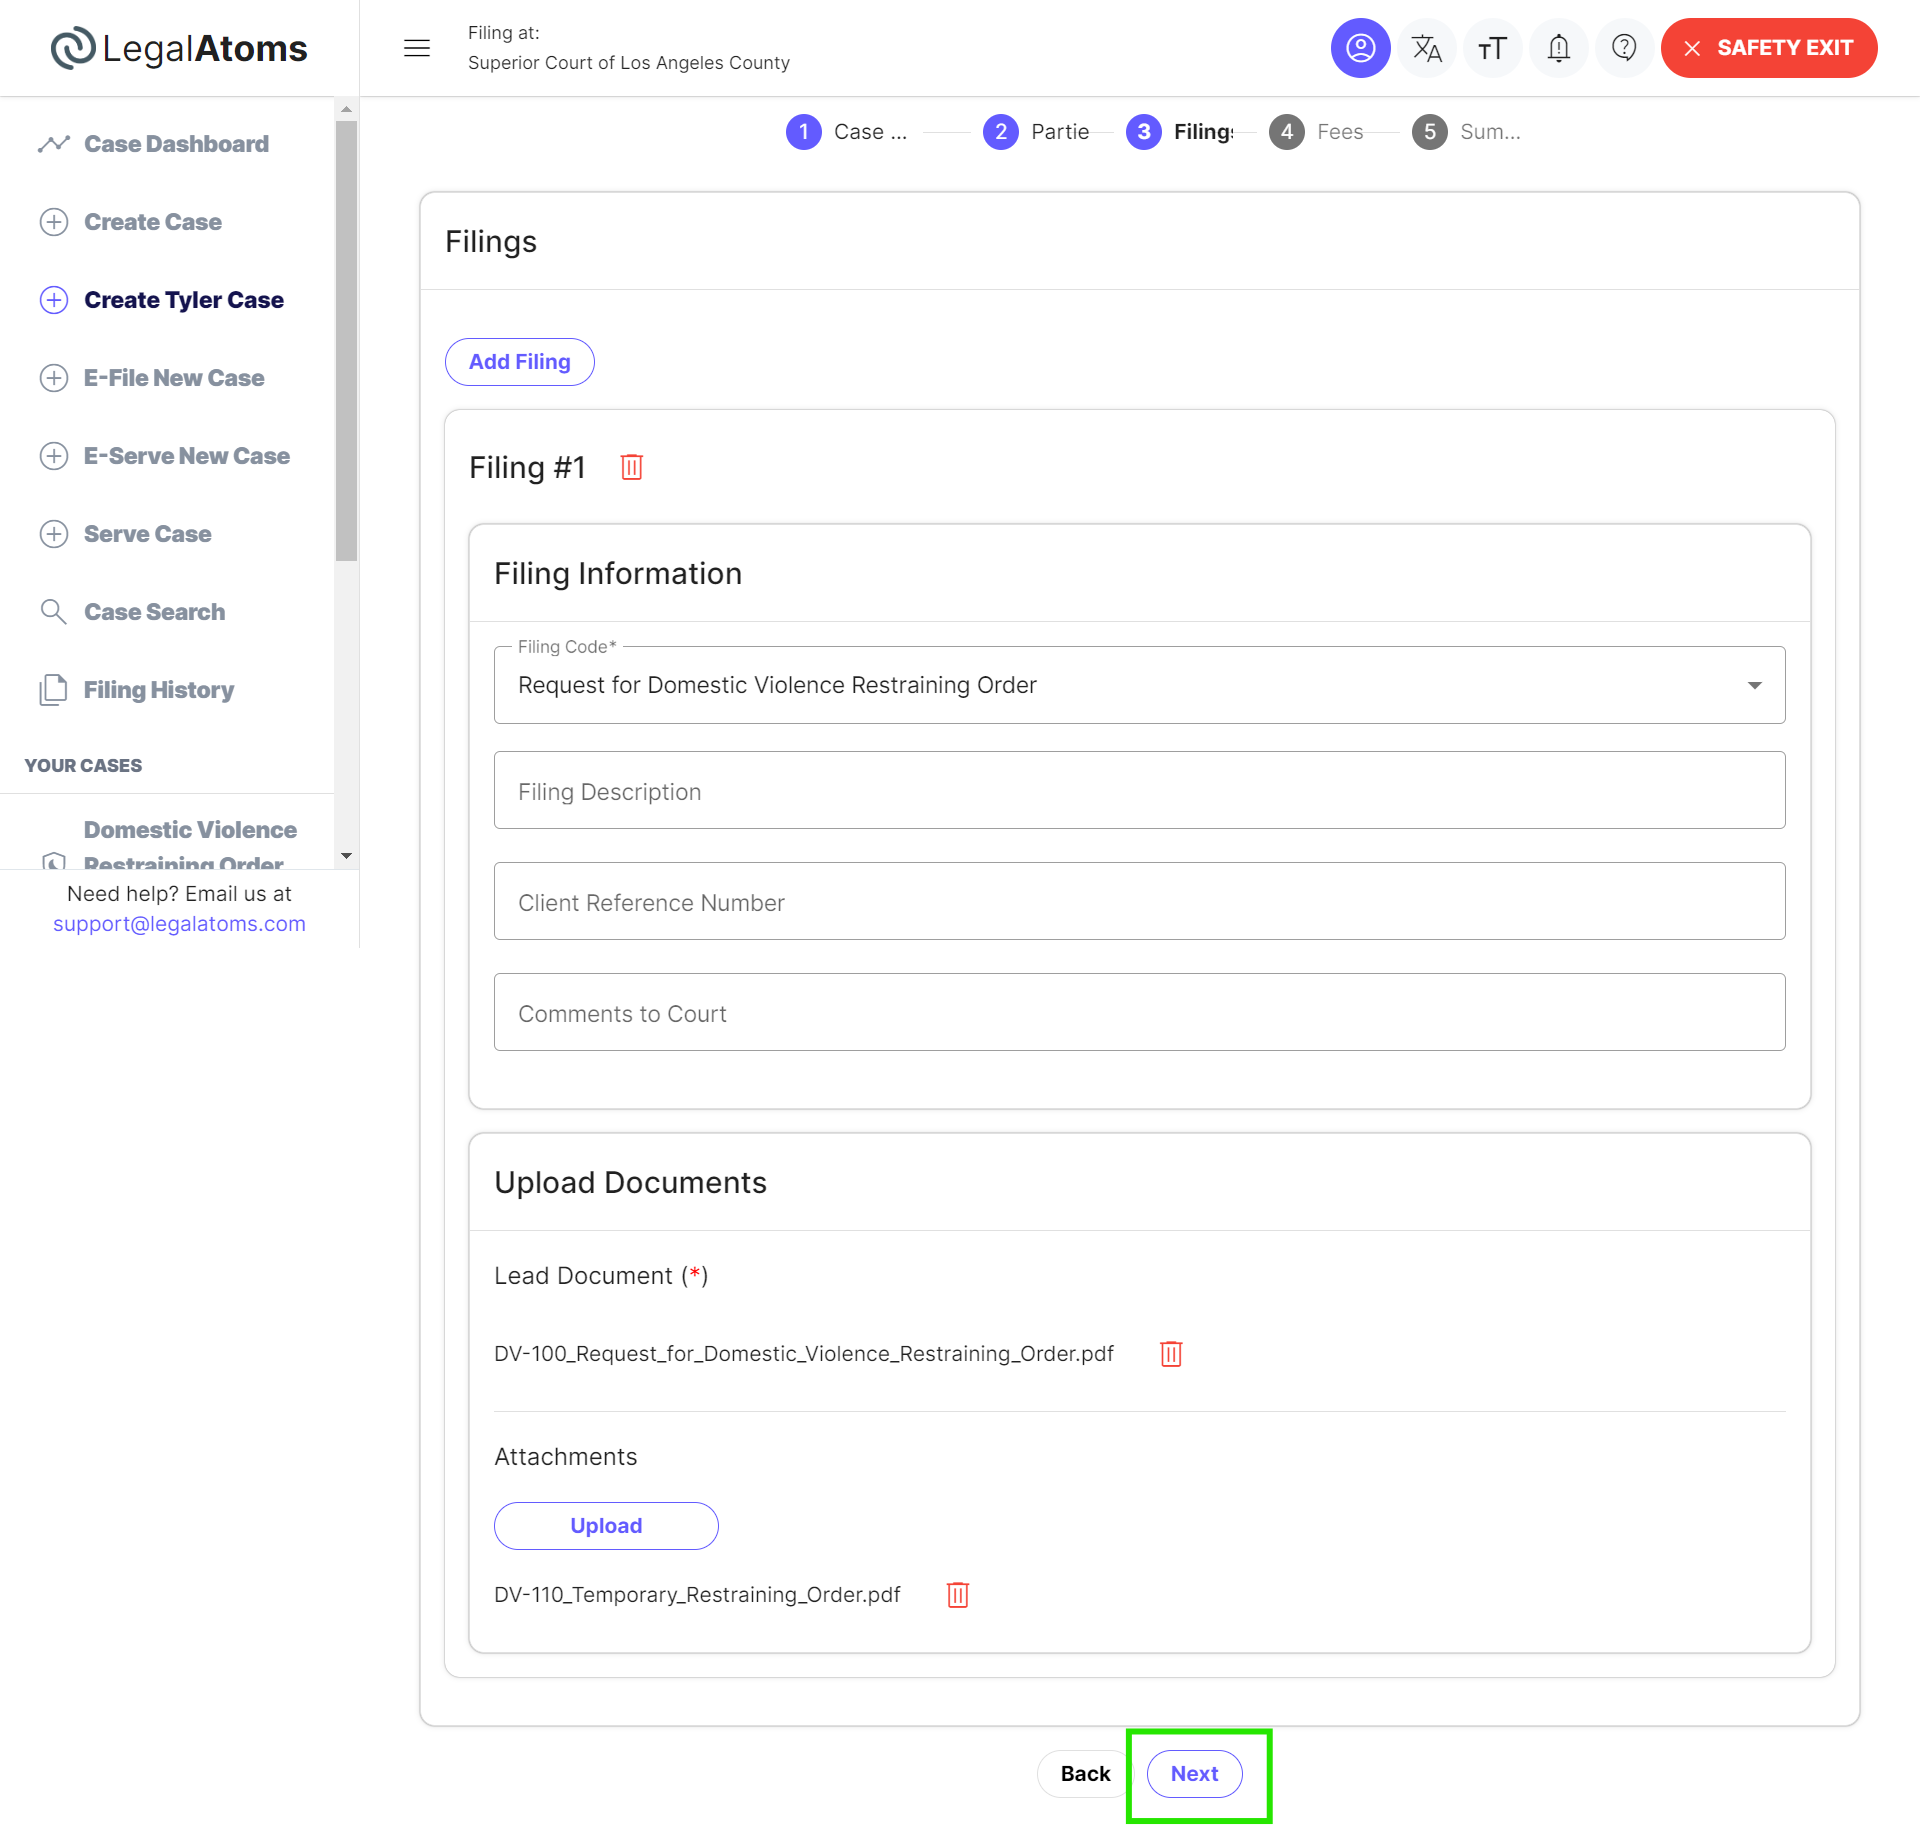
Step 5: Filings
Filing Information:
- Filing Code: Select the appropriate code, such as “Request for Domestic Violence Restraining Order.”
- Filing Description: Add any additional description if needed.
- Client Reference Number: Enter the client’s reference number if applicable.
- Comments to Court: Include any necessary comments.
Upload Documents:
- Lead Document: Upload the main document, e.g., “DV-100_Request_for_Domestic_Violence_Restraining_Order.pdf.”
- Attachments: Add any additional supporting documents, e.g., “DV-110_Temporary_Restraining_Order.pdf.”
Click “Next” to proceed to the fees section.
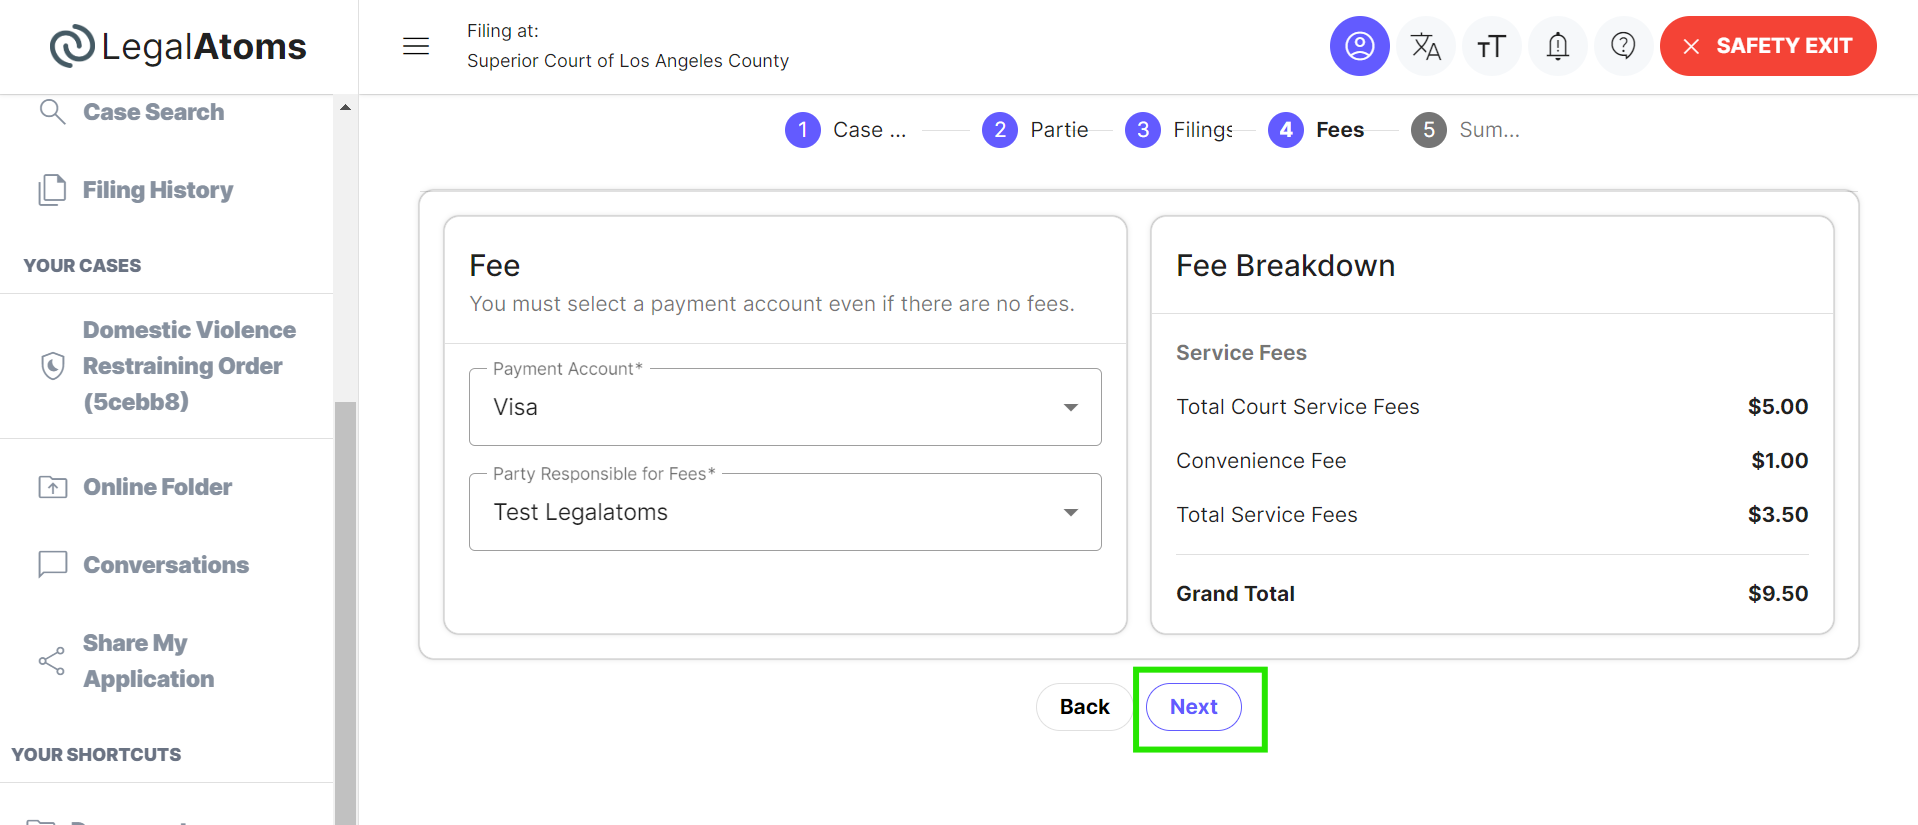
Step 6: Fees
- Select a payment account. Ensure you have an active payment account set up.
- Select the Party responsible for the fee.
- Review the fees associated with the filing. Click “Calculate Fees” to see the total.
Click “Next” to move to the summary.
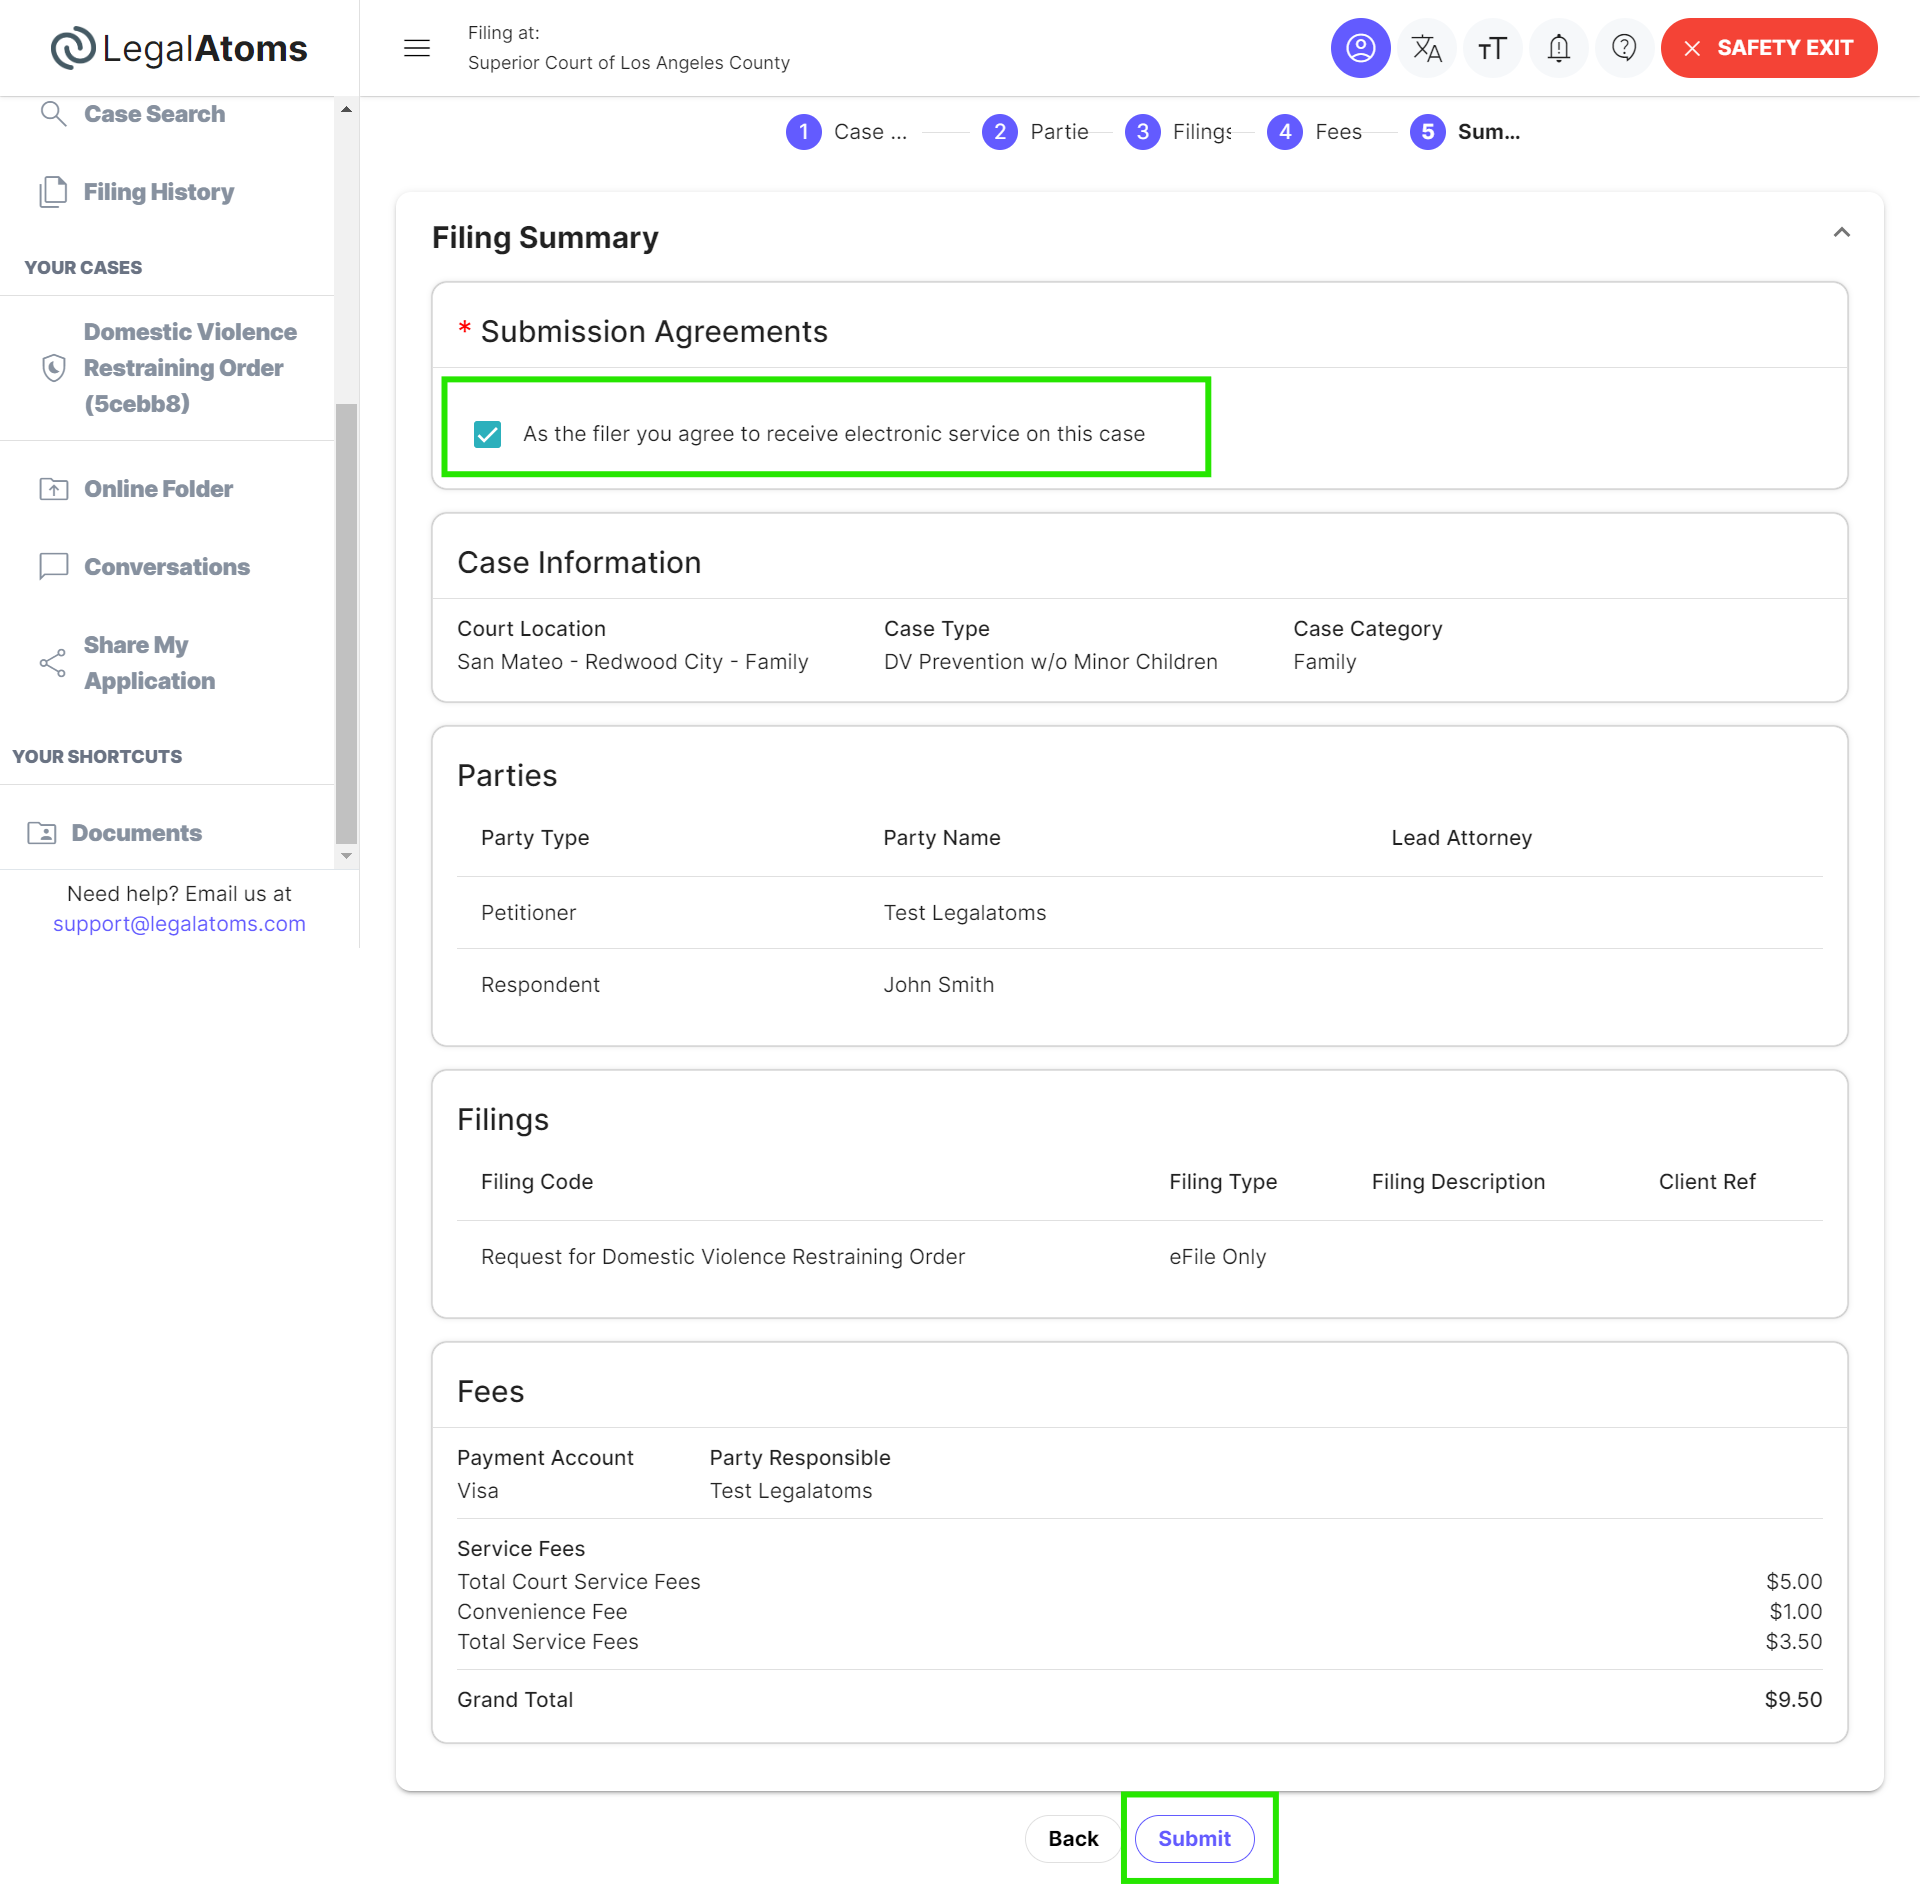
Step 7: Summary
Review all the entered information entered. Ensure all details are correct, and all required documents are attached.
Once verified, select the checkbox “As the filer you agree to receive electronic service on this case” and click on the “submit” button for the e-filing. You may receive a confirmation email or reference number for your submission.