The ability for Judge to deny temporary order with Hearing for Upload Case
Recently updated on January 12th, 2026 at 03:21 am
This manual provides a step-by-step guide for clerks and judges using LegalAtoms to process cases, including uploading, reviewing, and denying a temporary order with a hearing.
Assuming you have received the service request outside of LegalAtoms i.e. via e-mail, fax, or a physical copy of the case documents
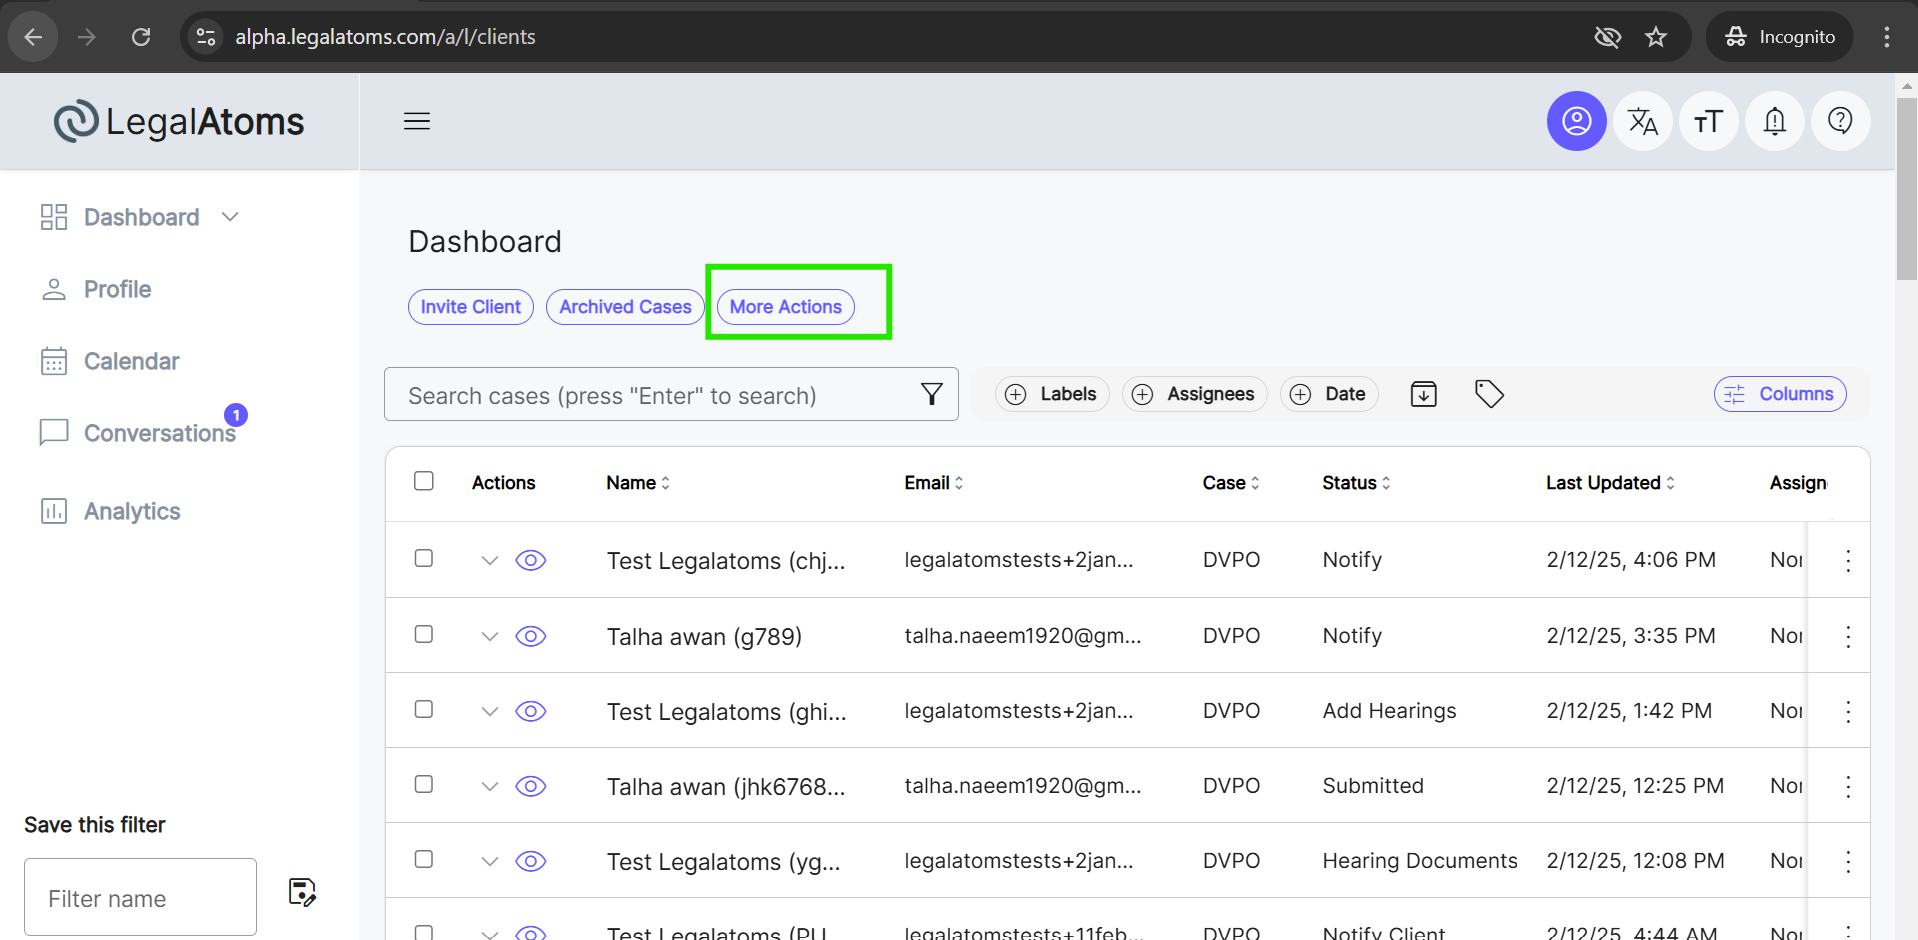
Step 1: Select the More Actions Button
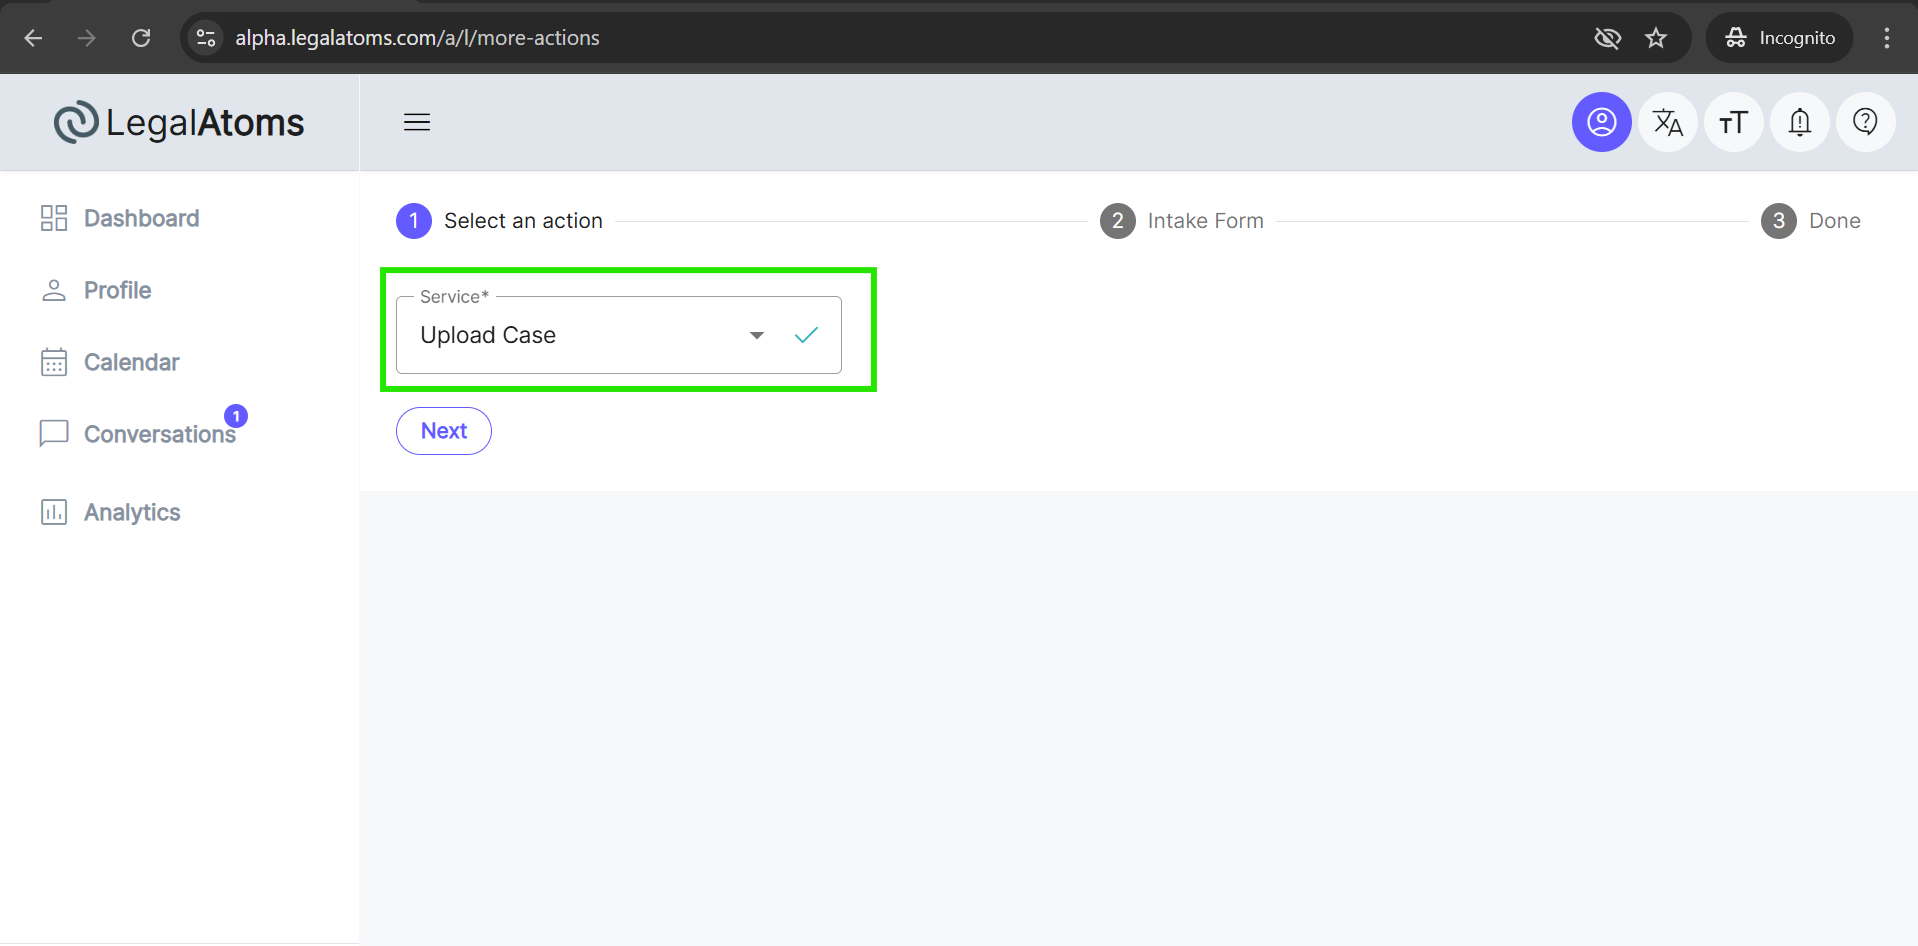
Step 2: Select an action
Within the Service category, the option to create a case “Upload Case” is automatically selected. Click on the “Next” button to fill out the intake form.
Step 3: Intake Form
Enter all required case details, including:
- Case Type and Case Status
- The set of documents to upload
- The court requesting service
- The case transferred to a different court
- Case/Cause number
- Petitioner and respondent’s name
Step 1 – Fill the Case Info Section
- Select Case Type
- Select Case Status (The professional has to select case status as “Submitted”)
- Select the set of documents to upload
- Select the court requesting service
- Select Case transferred to a different court
- Select the Case/Cause number
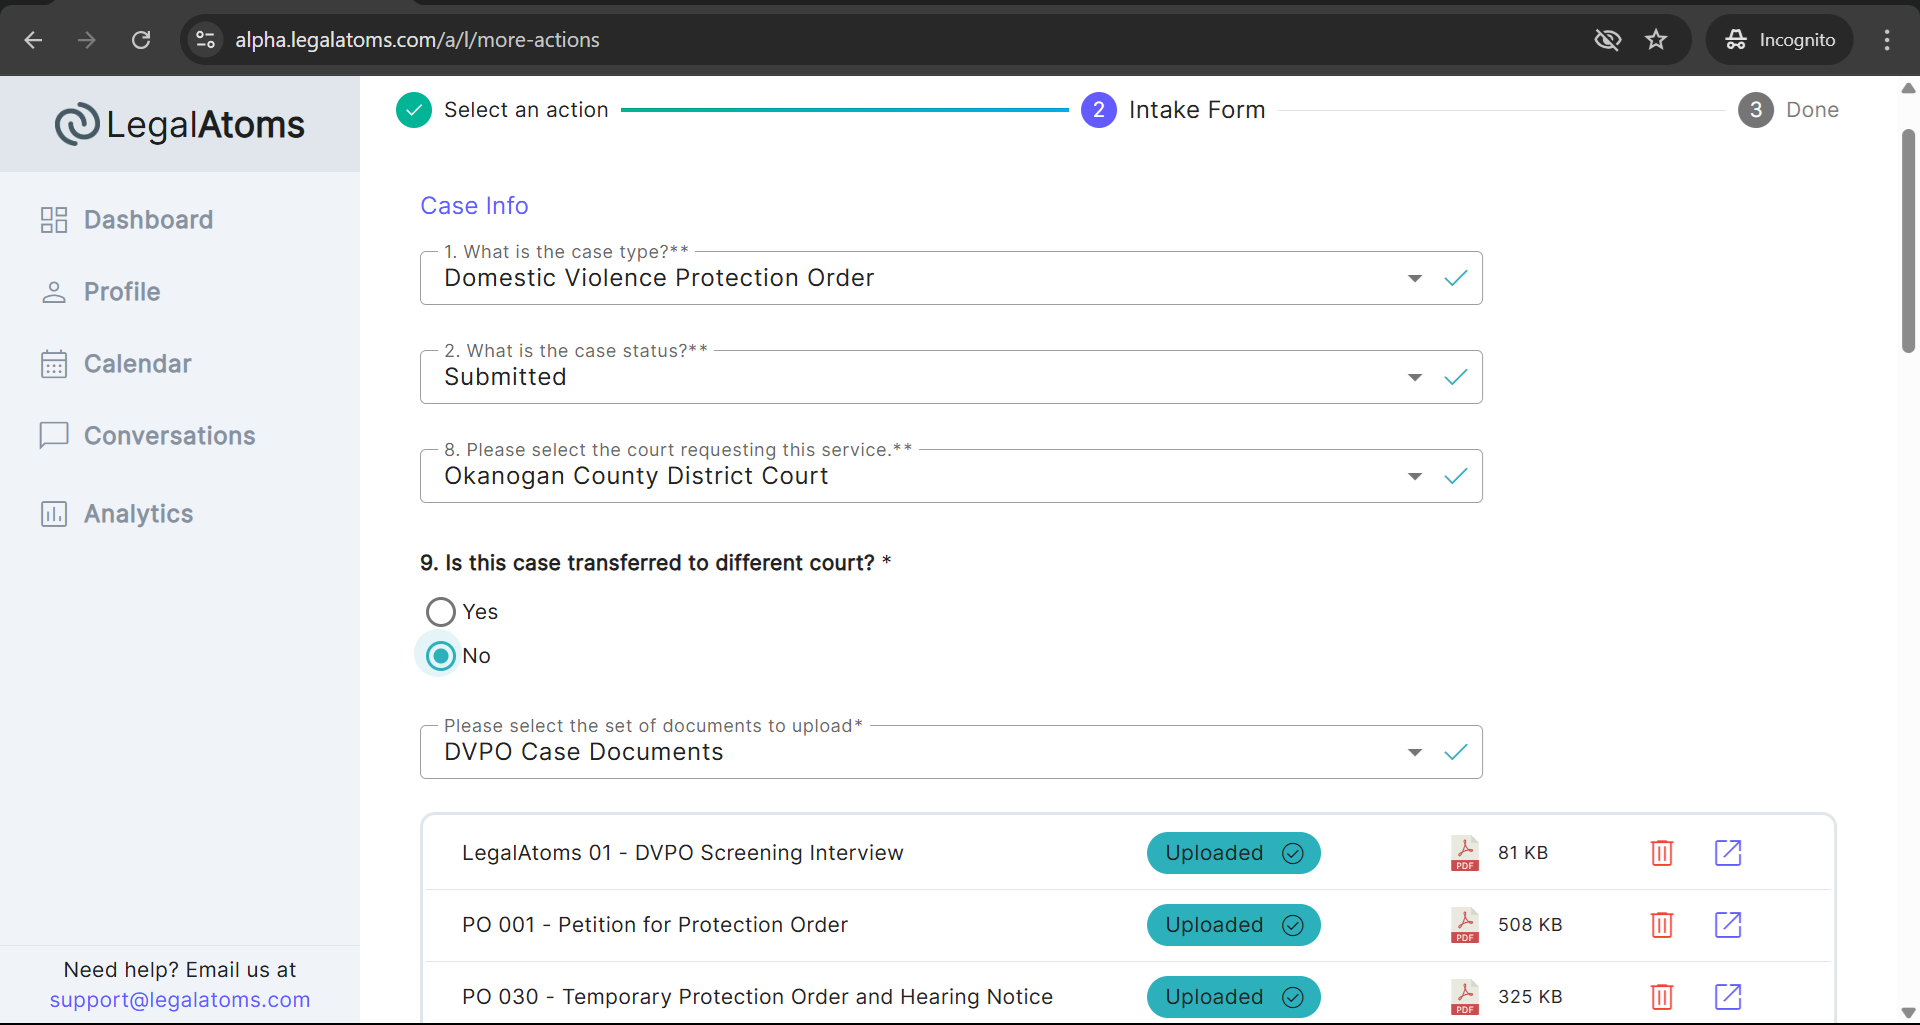
Select the set of documents to upload
The page contains a series of line items. This is the key step whereby you would click and upload documents. The documents to be uploaded must be in the PDF file format.
Notes
-
- If you have a document that doesn’t belong to any of the pre-specific slots, you can add it manually using Attach other documents button.
- You should upload all the documents in one go.
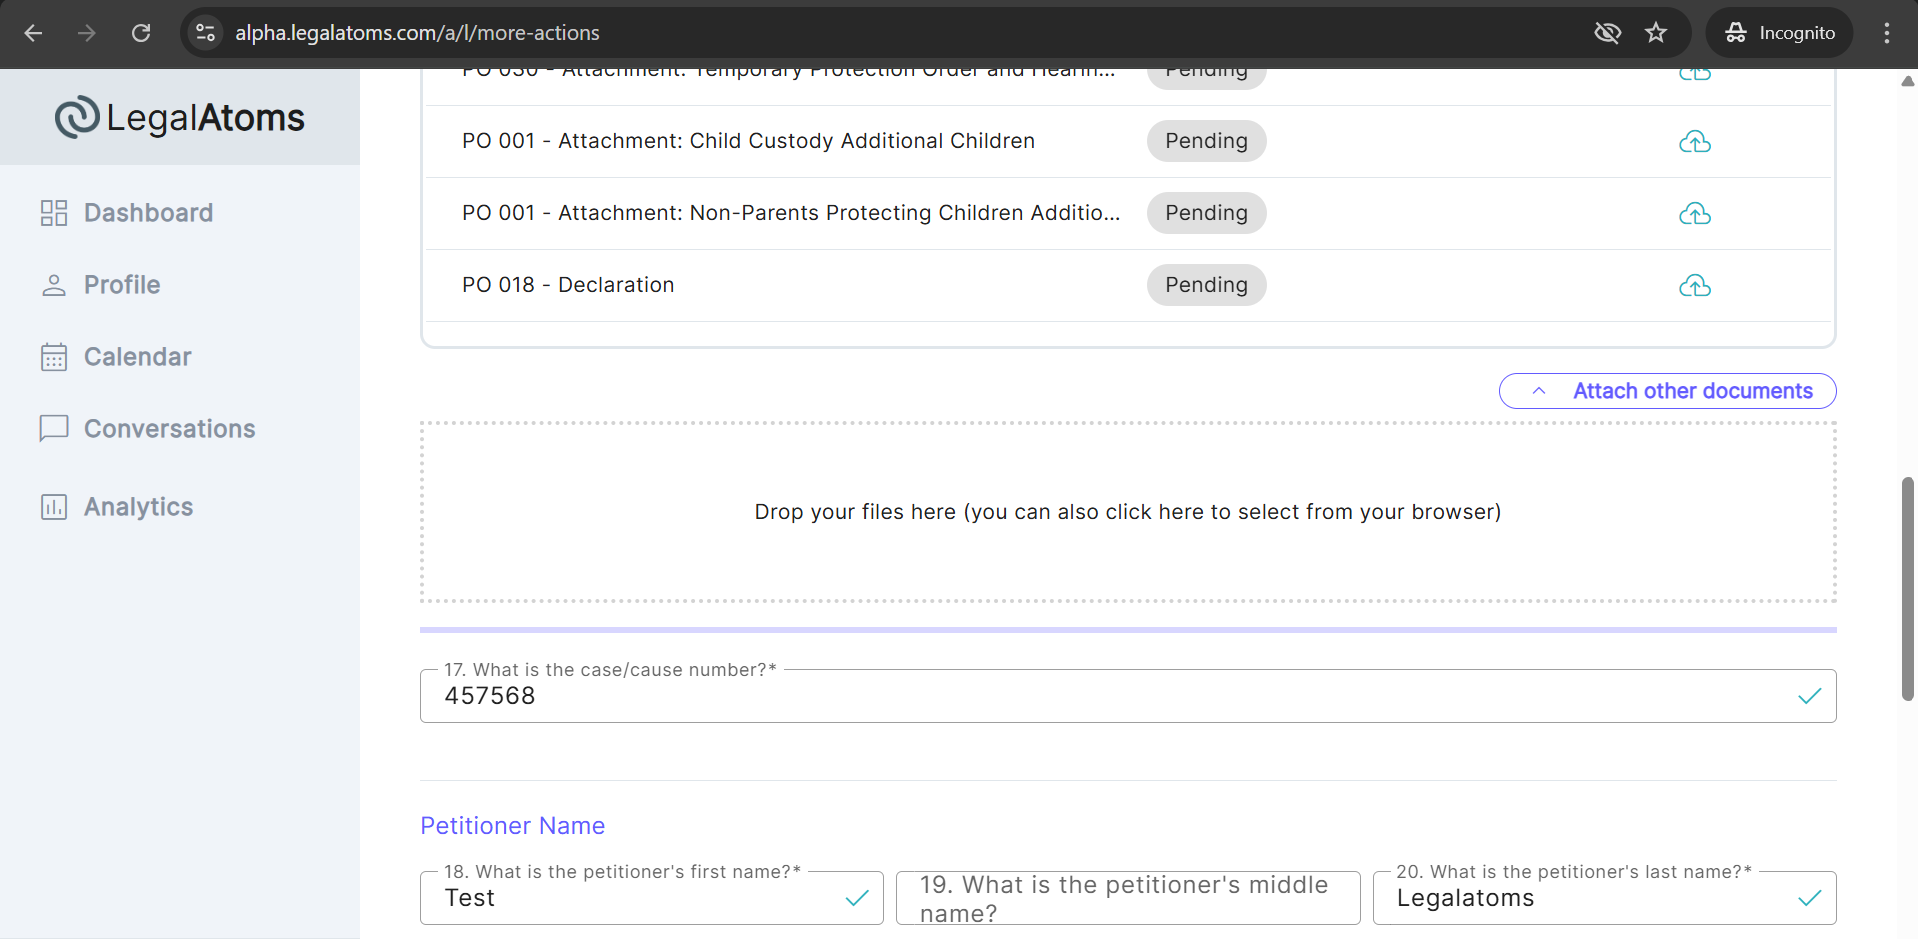
Step 2 – Fill the Petitioner Info
This is used in various places e.g. as the row title in the dashboard or the summary section of the case.
- Petitioner First Name
- Petitioner Middle Name
- Petitioner Last Name
- Petitioner Date of Birth (DOB)
- Petitioner Email
- Petitioner Phone Number
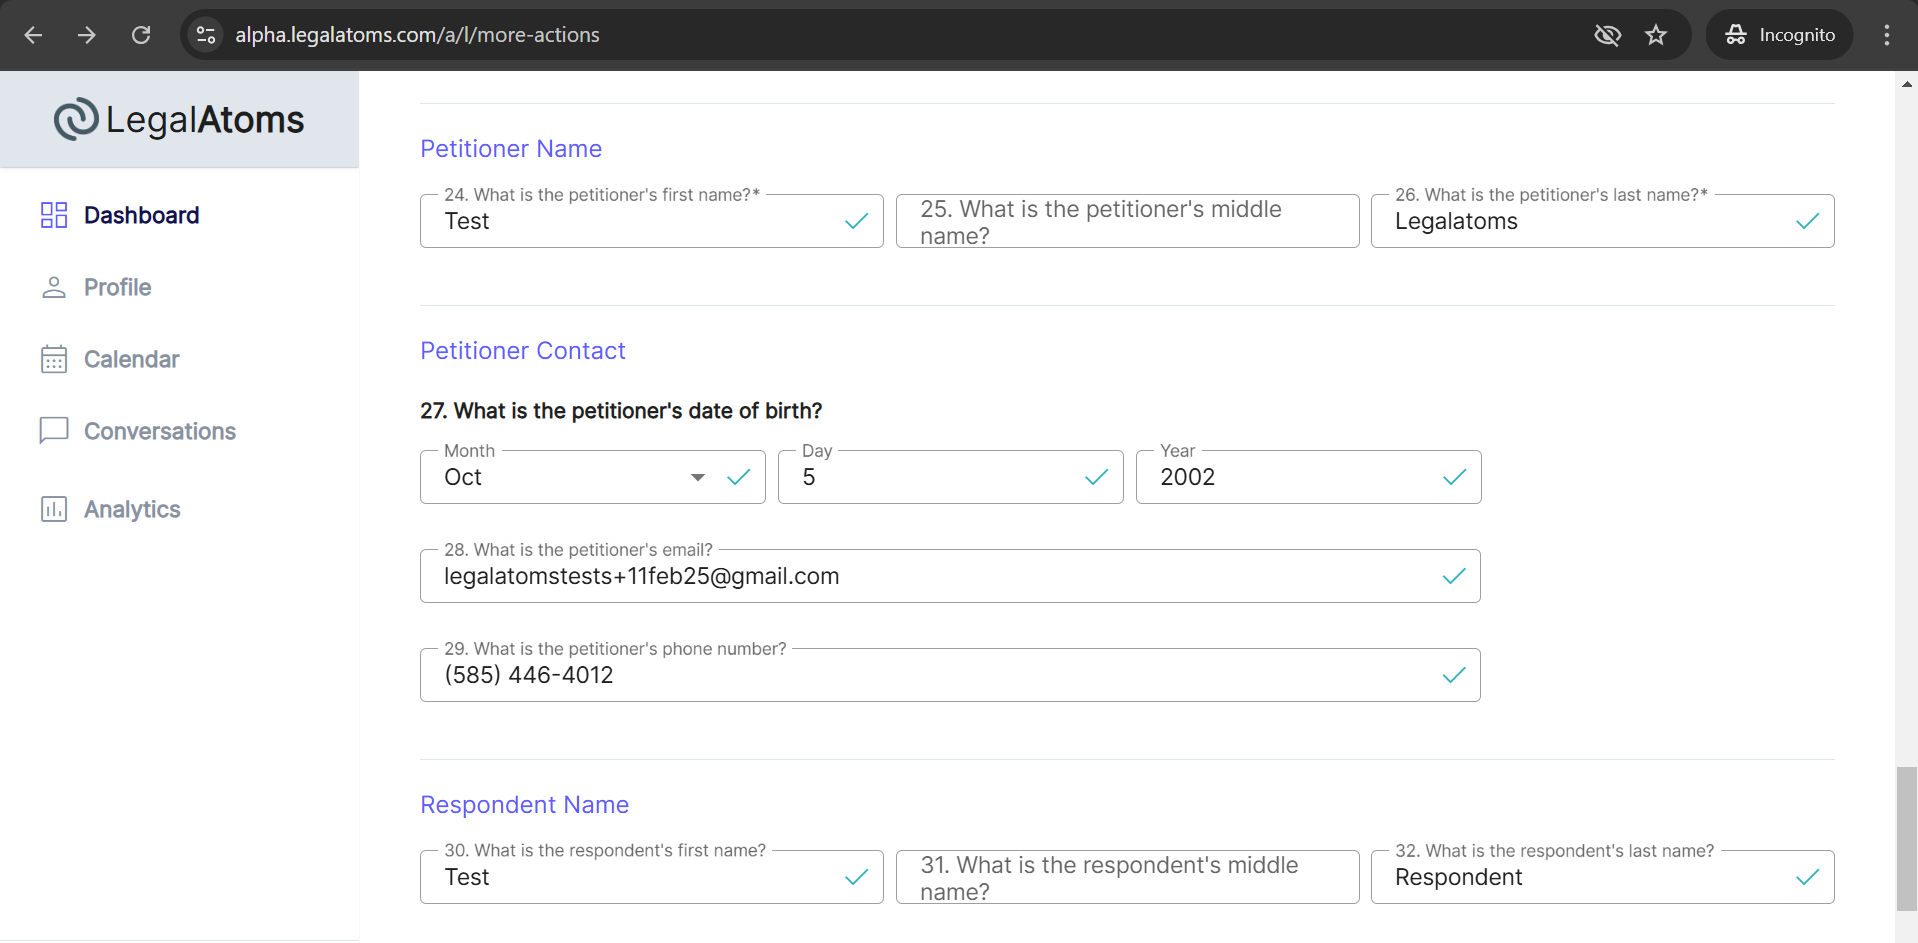
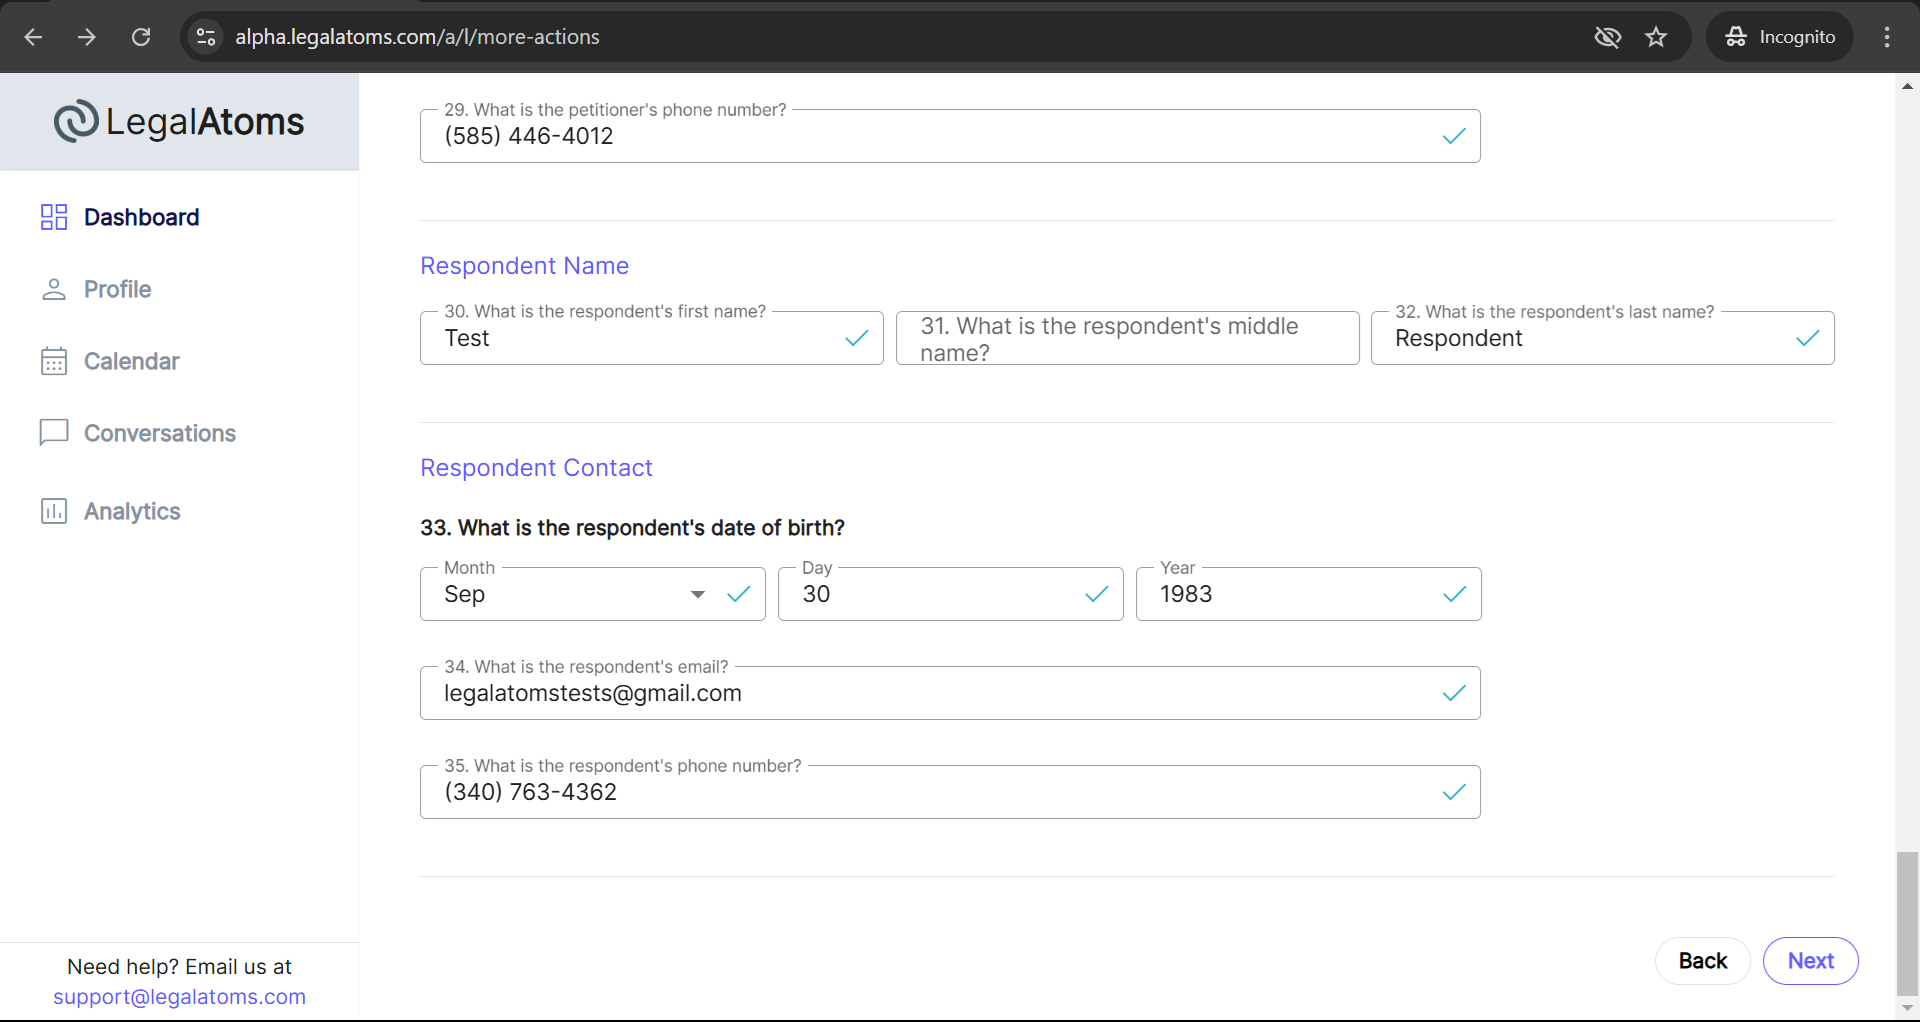
Step 3 – Fill the Respondent Info
- Respondent First Name
- Respondent Middle Name
- Respondent Last Name
- Respondent’s Date of Birth (DOB)
- Respondent Email
- Respondent Phone Number
Step 4: Done
Finally, clicking on the next button will submit the intake form.
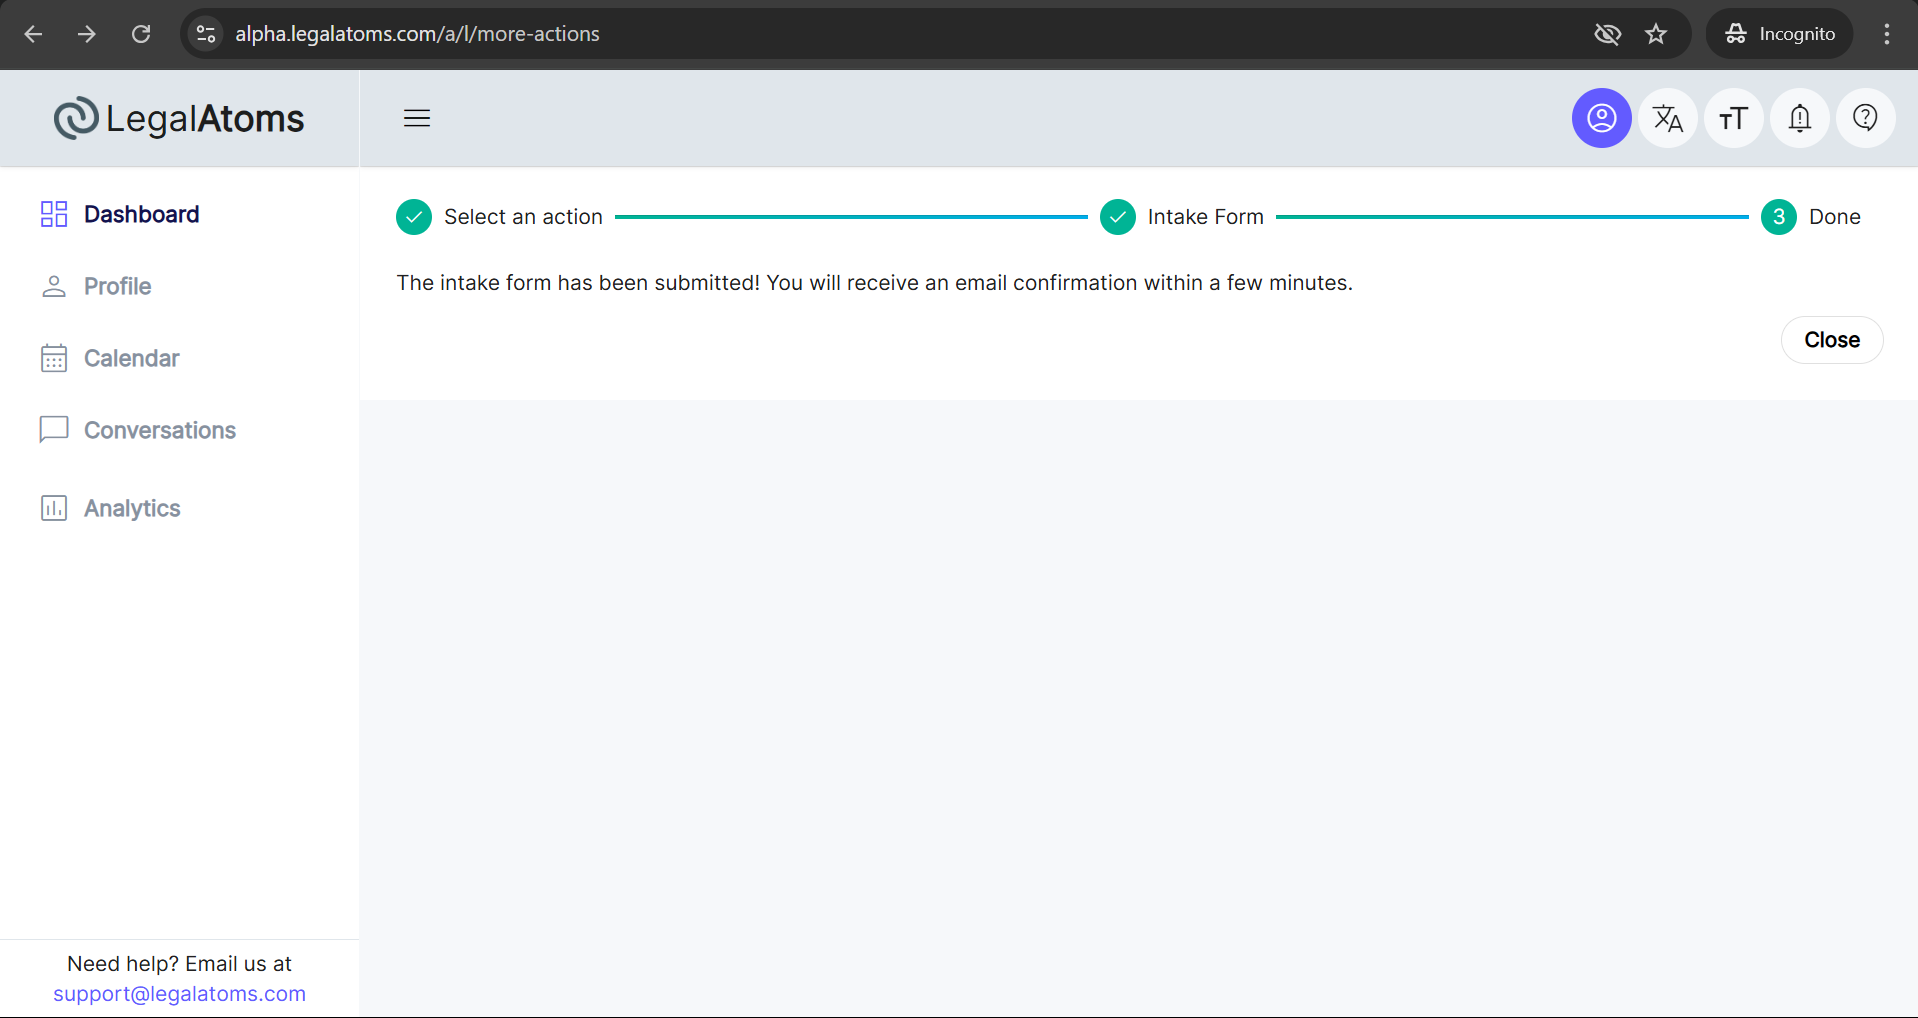
At this point, the case will appear on your dashboard.

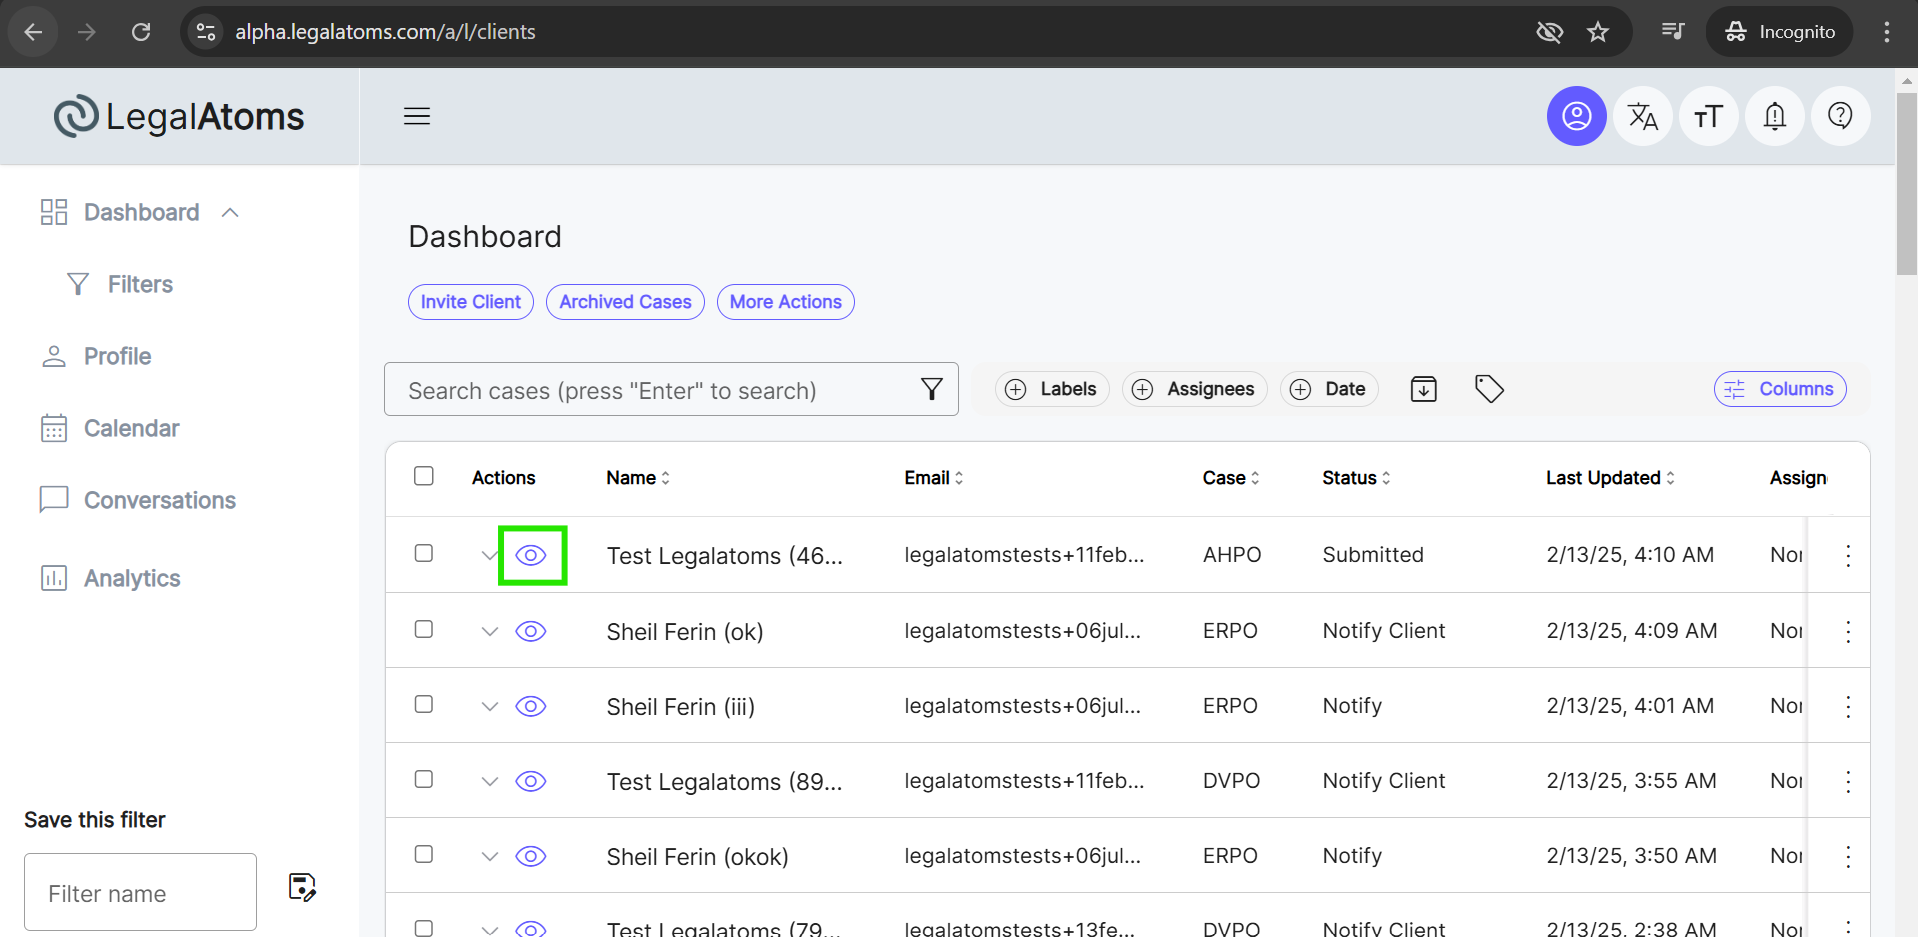
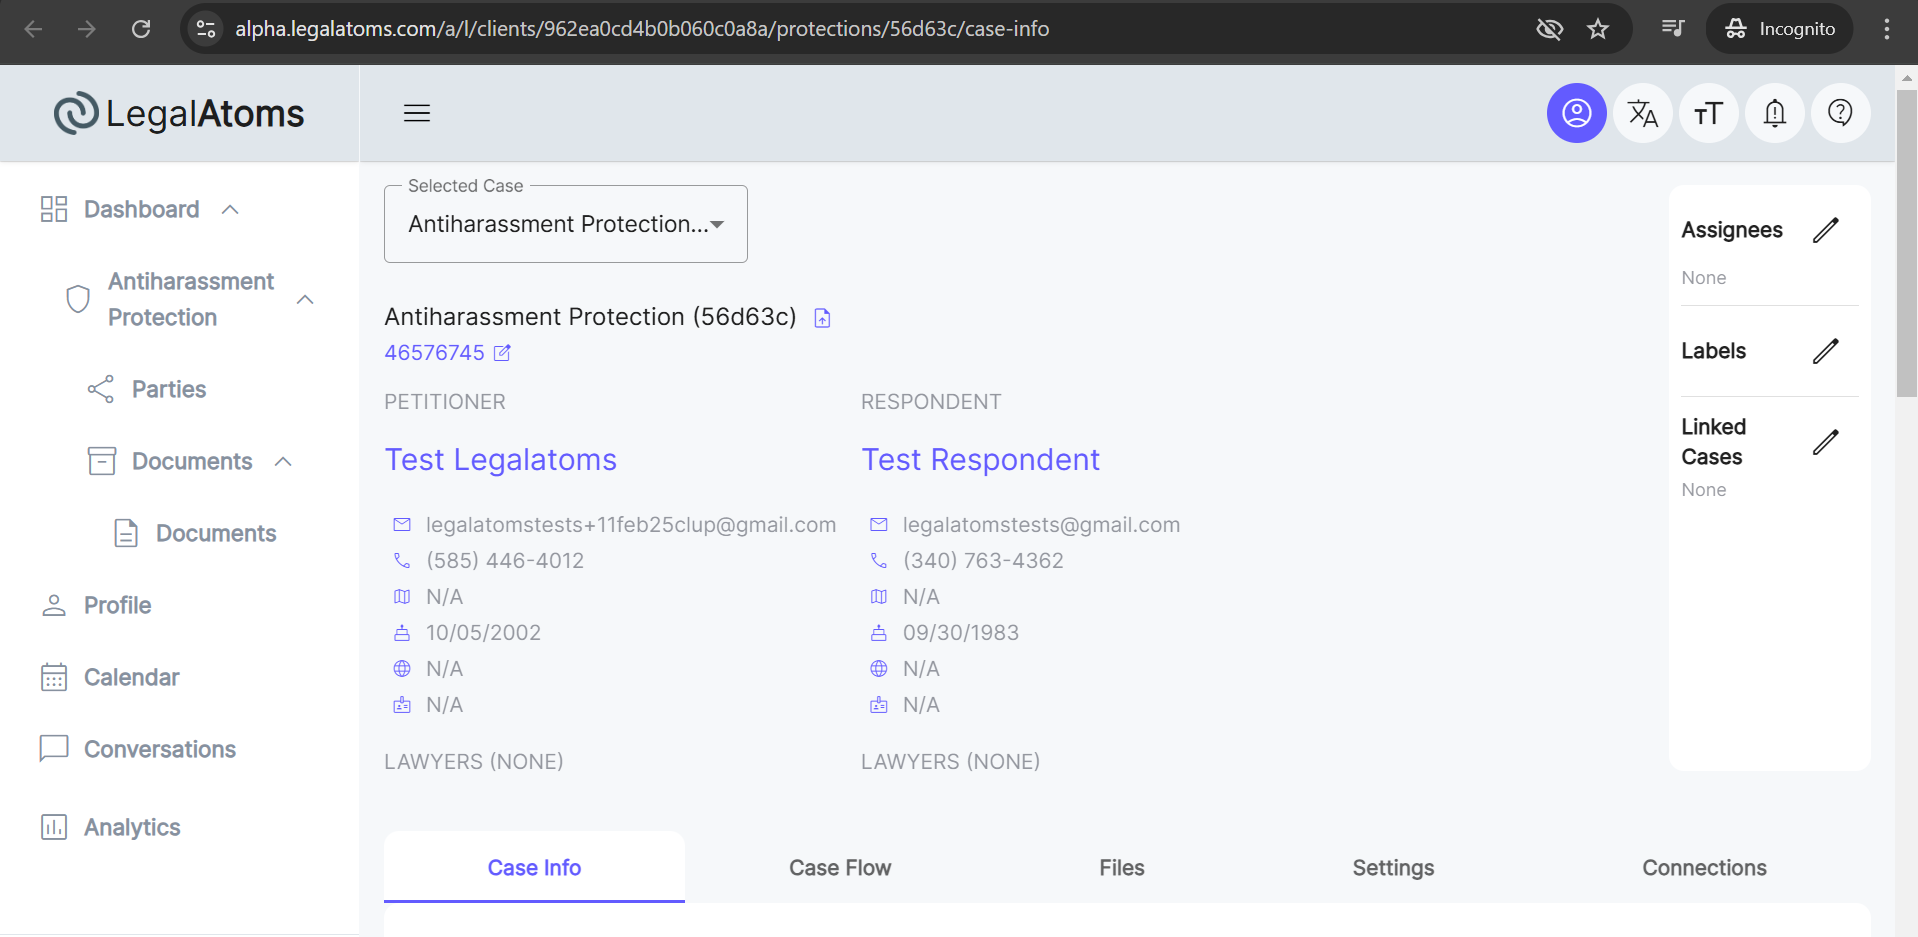
Step 5: Accessing the Case Detail Page
Once the case is uploaded, it will appear on your dashboard. You have to select the case with the status Submitted by clicking on the eye icon.
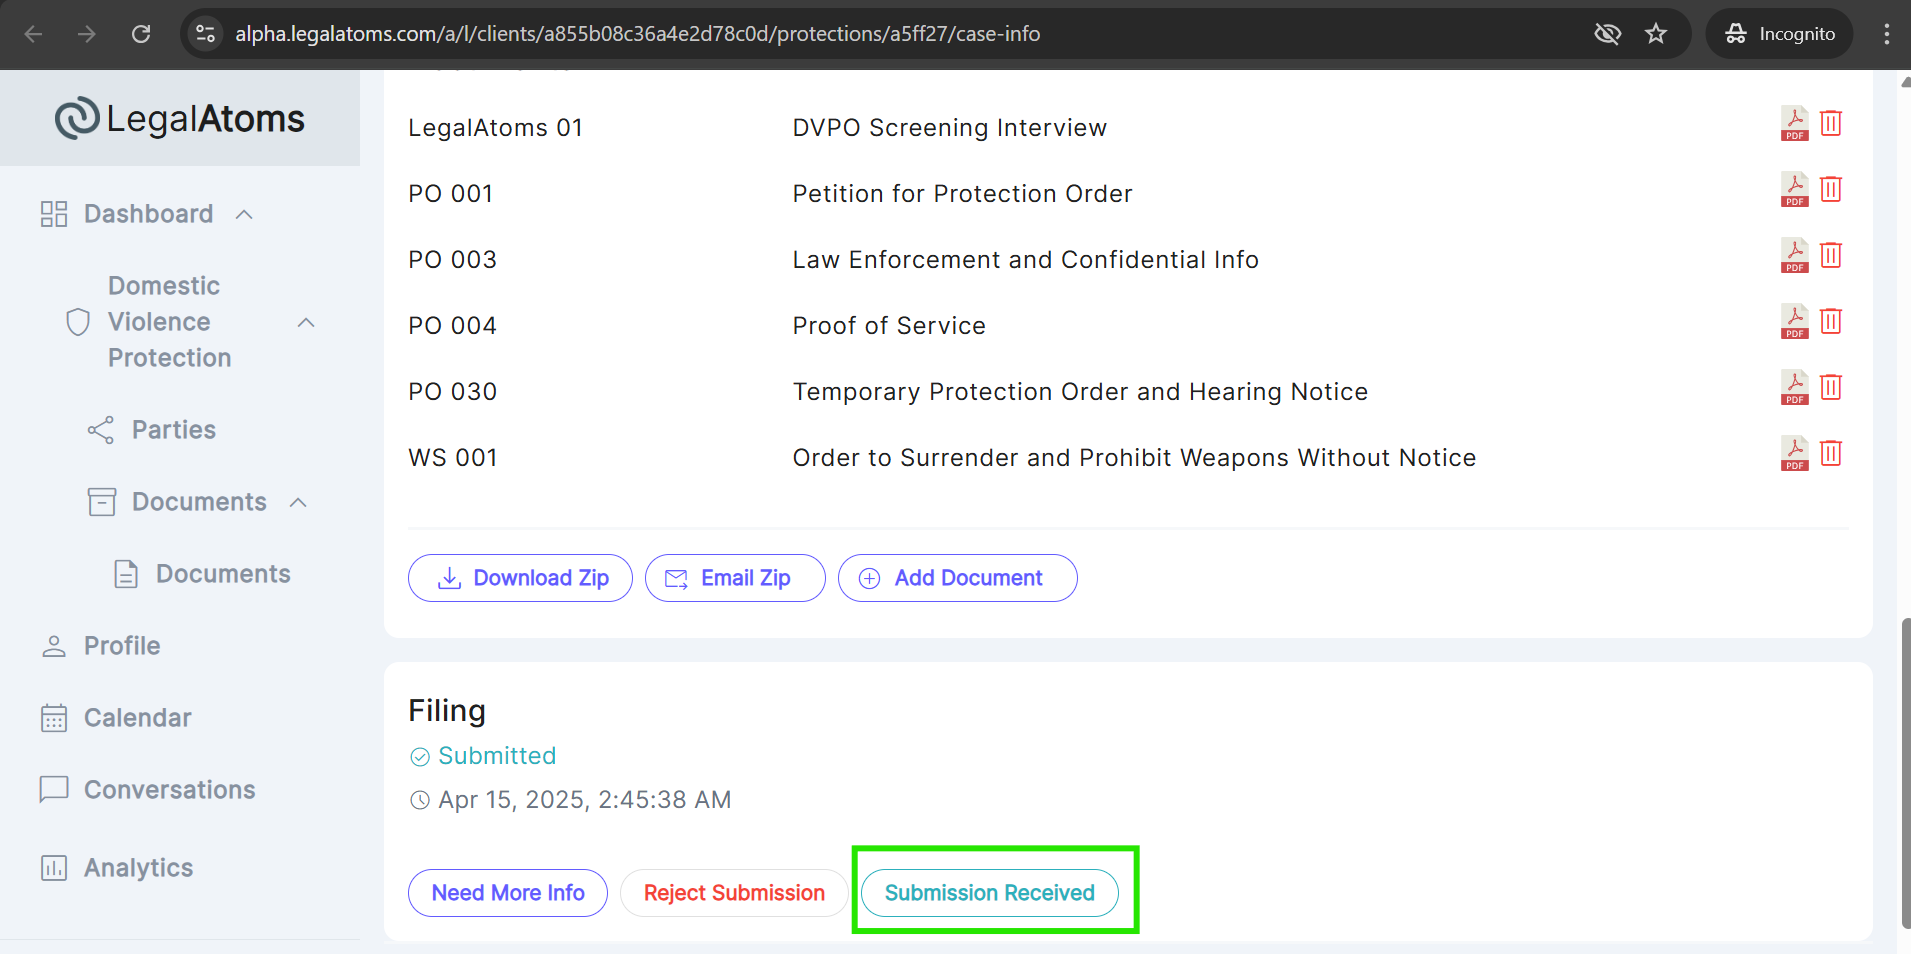
Step 6: Clerk Approves the case
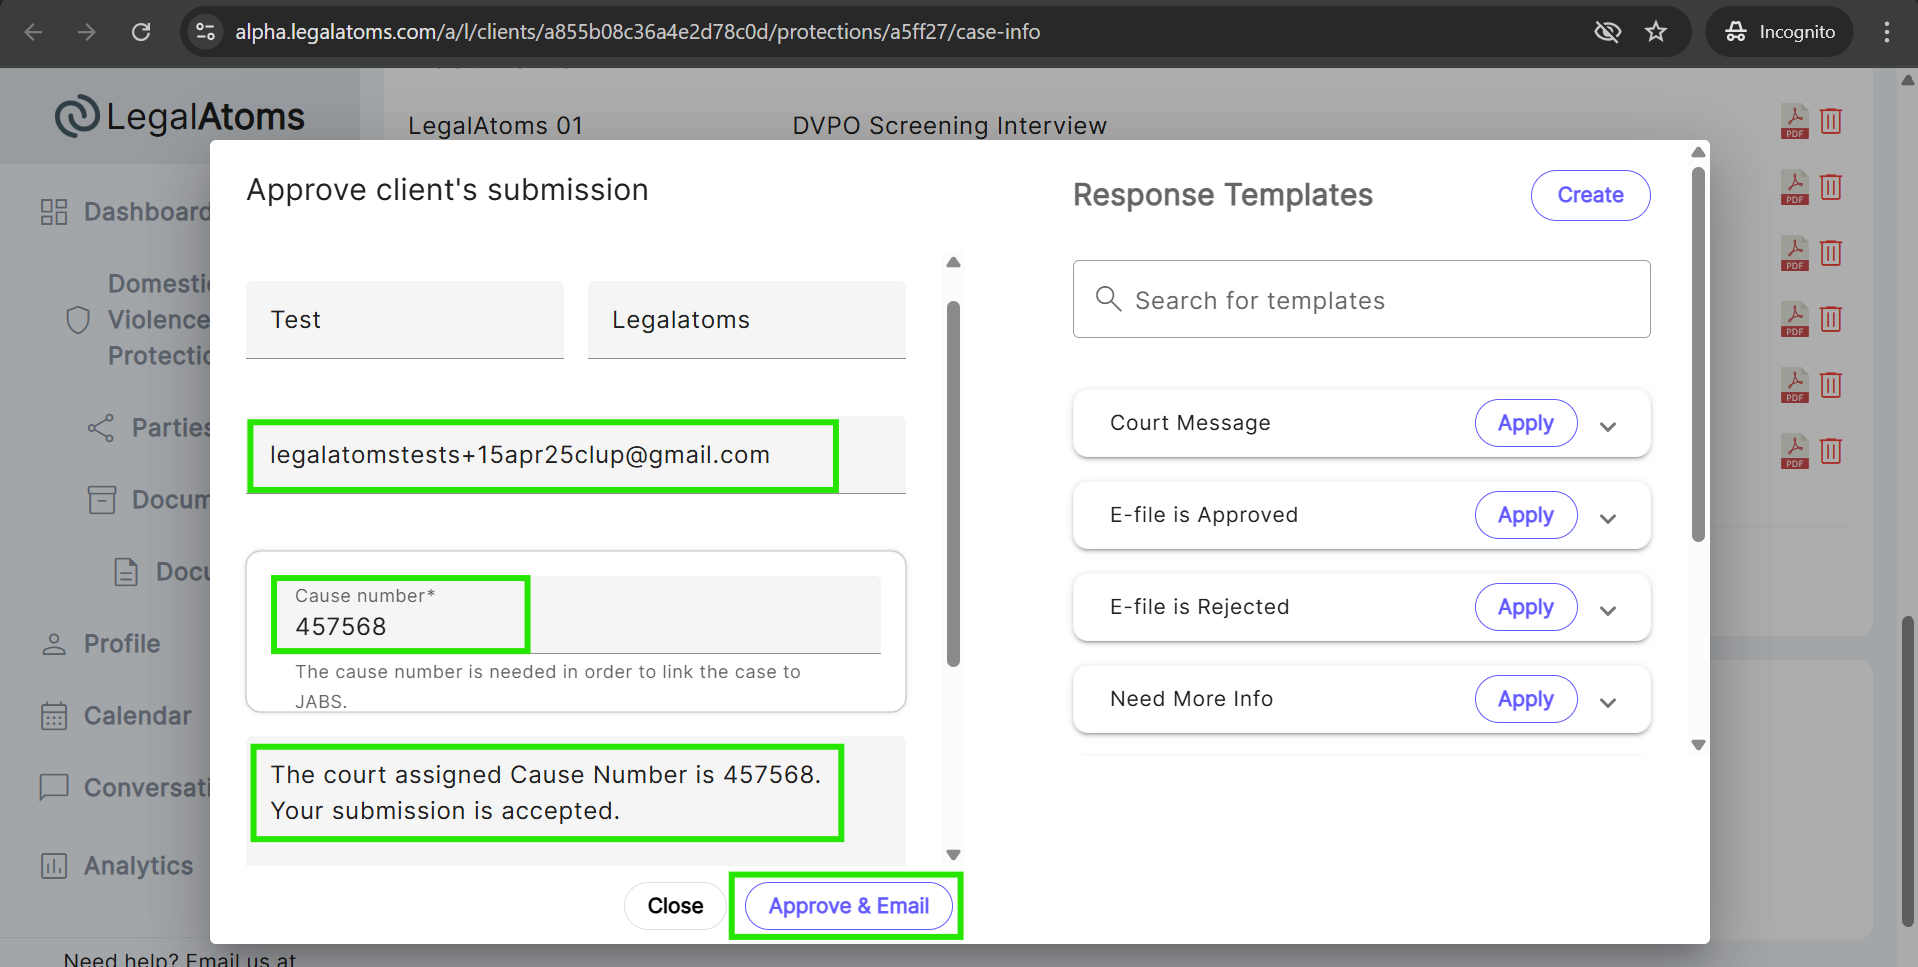
- When the clerk clicks on the Submission Received button a popup will appear where the clerk enters the Cause Number and Email Content.
- If the clerk did not provide the petitioner’s email while uploading the case, LegalAtoms allows the clerk to enter the email. Without entering the petitioner’s email, the clerk cannot accept the case.
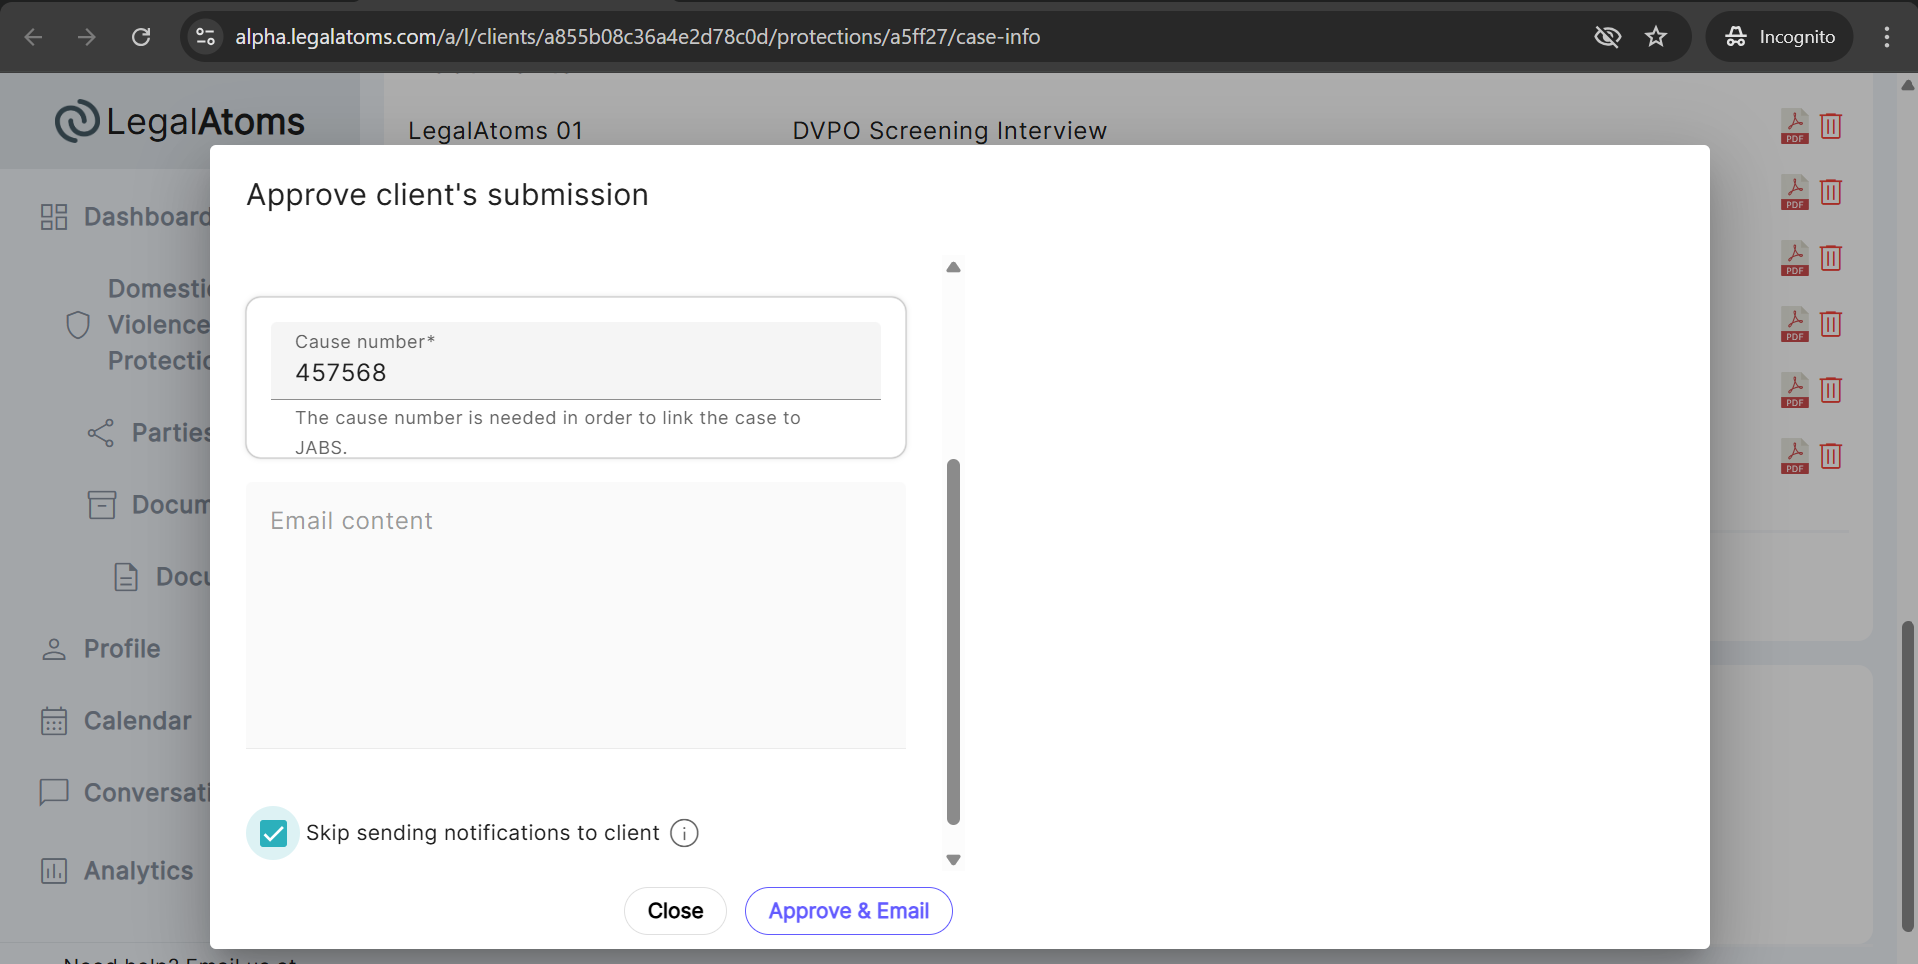
- The clerk can approve the submission without sending an email, SMS, or in-app notification to the client by simply checking the ‘Skip sending notification to client’ checkbox (In this case, the clerk can accept the case if they did not provide the petitioner’s email while uploading the case).
- Next, the clerk will click the Approve & Email button in order to approve the case.
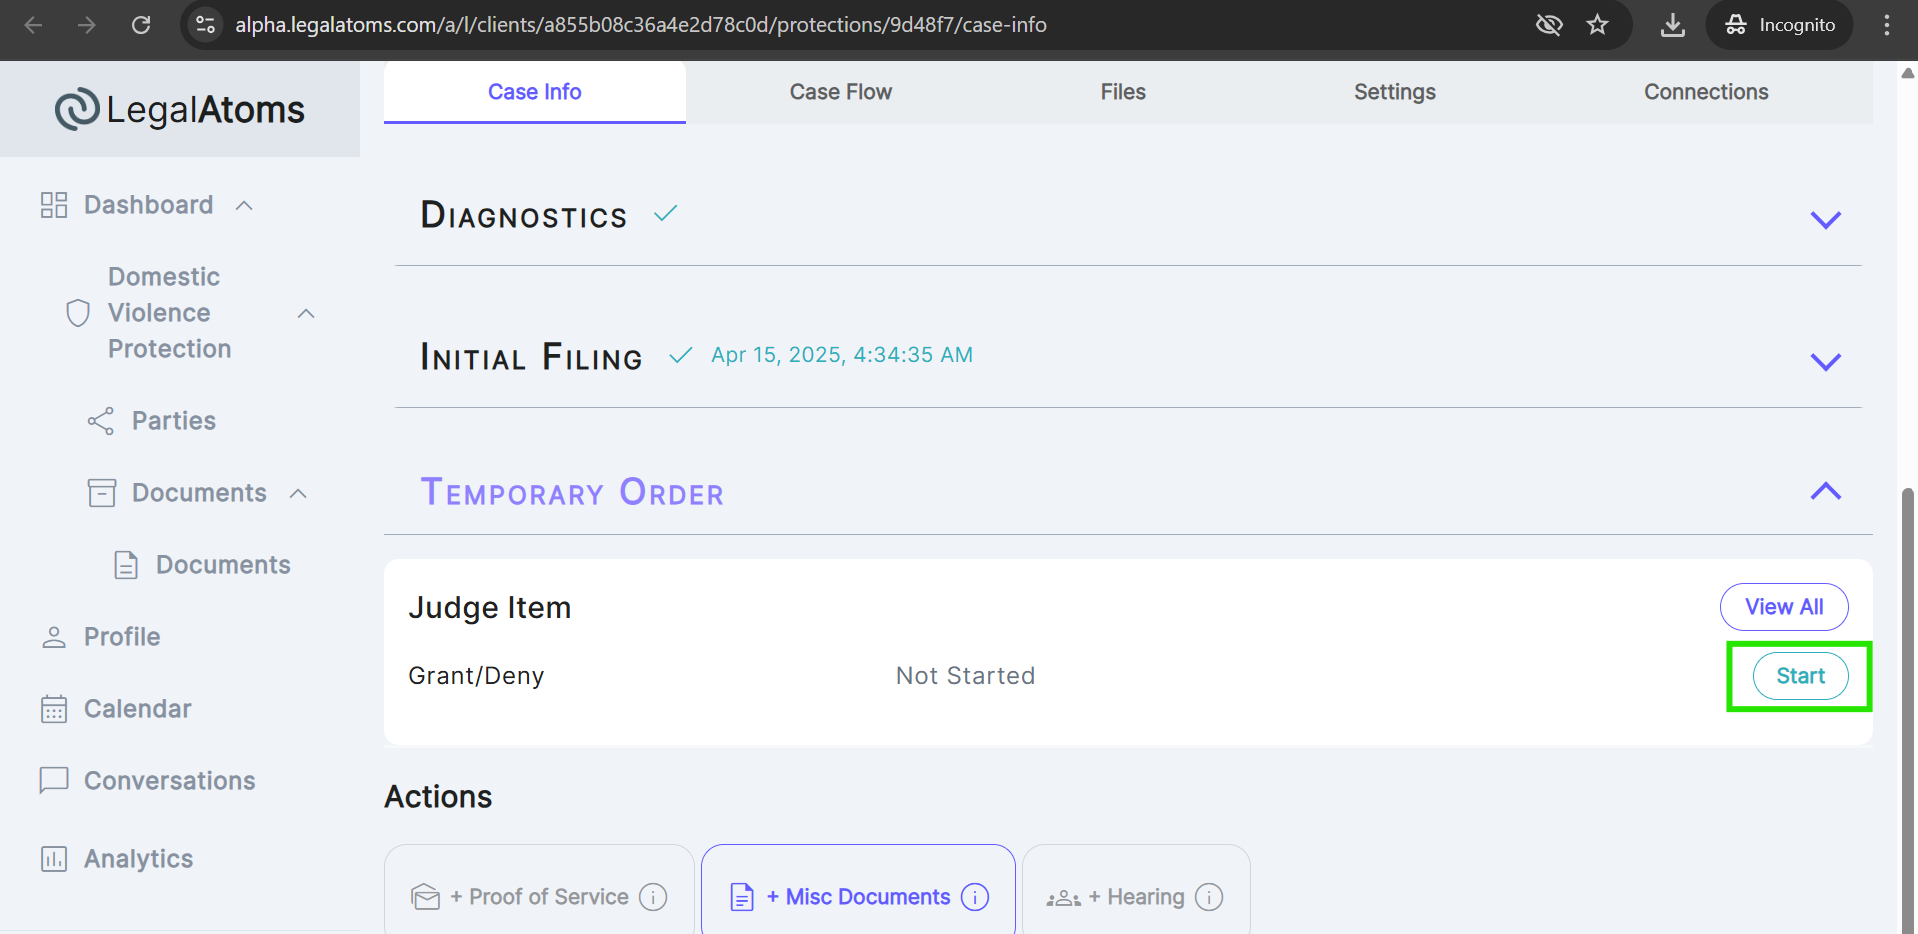
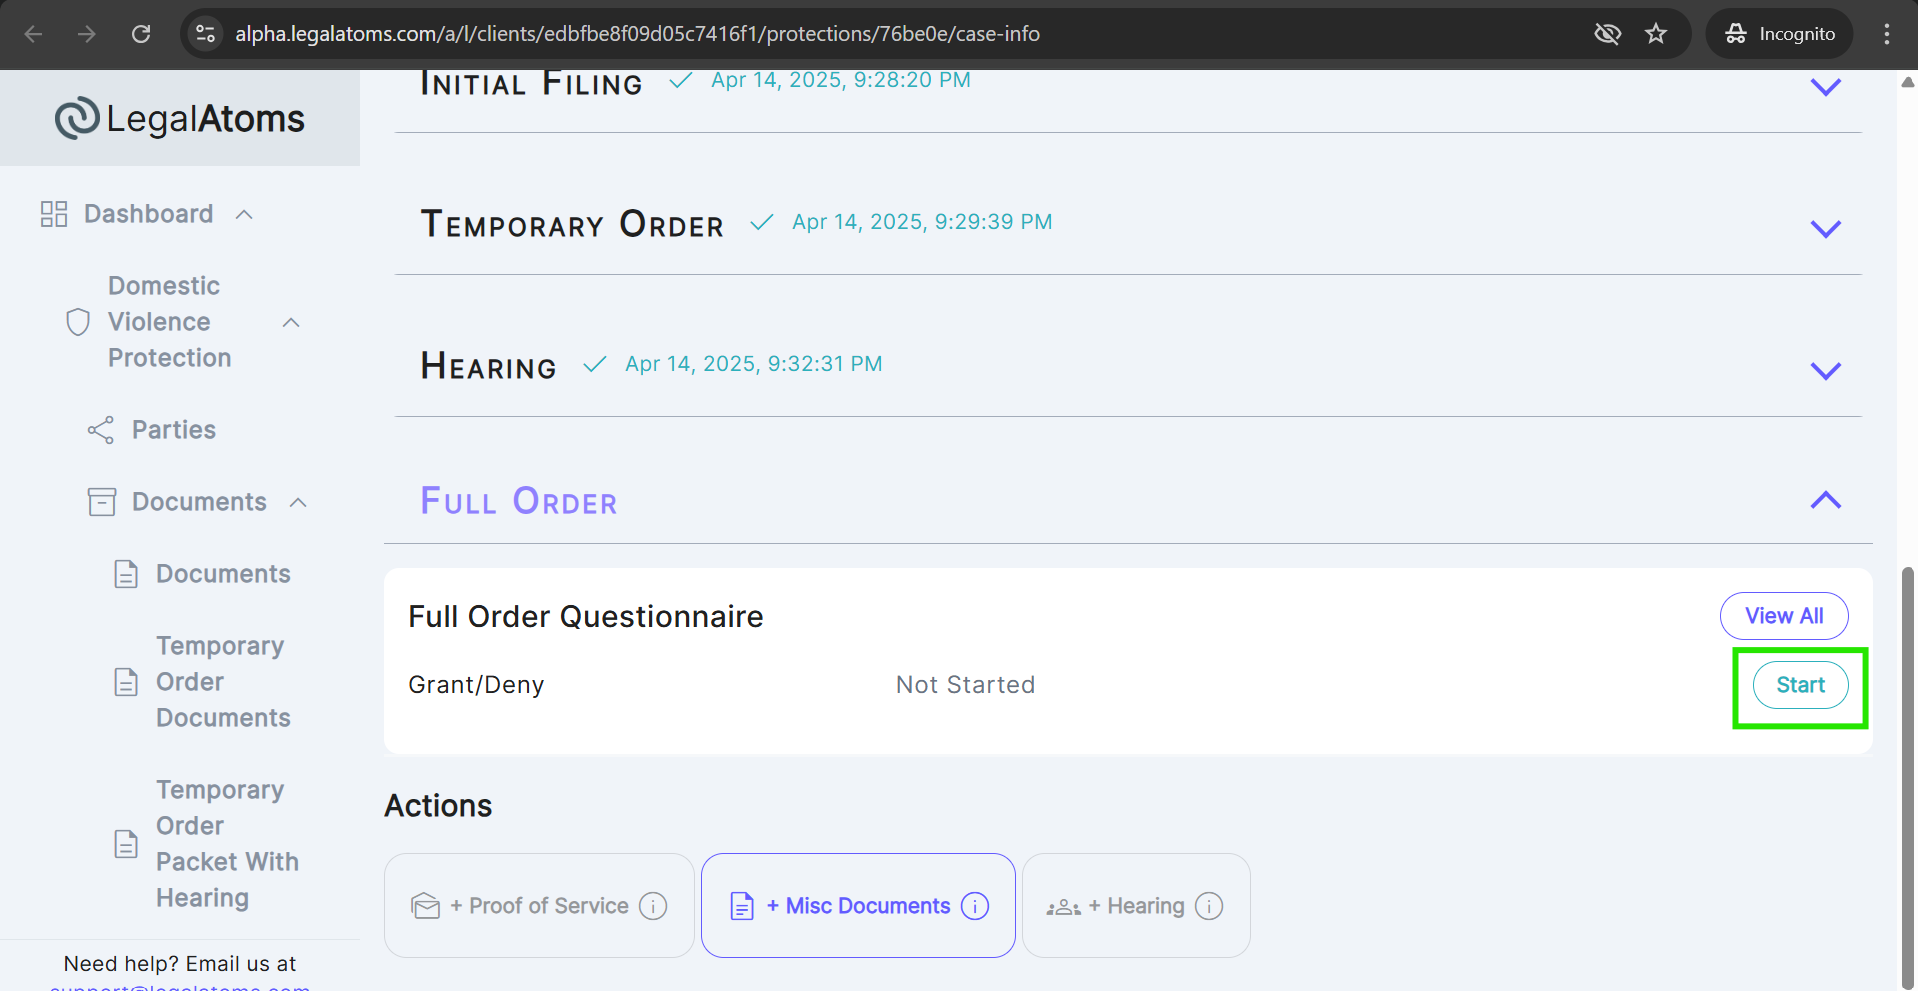
Step 7: Judge Item
The Judge can grant or deny the case by clicking the Start button.
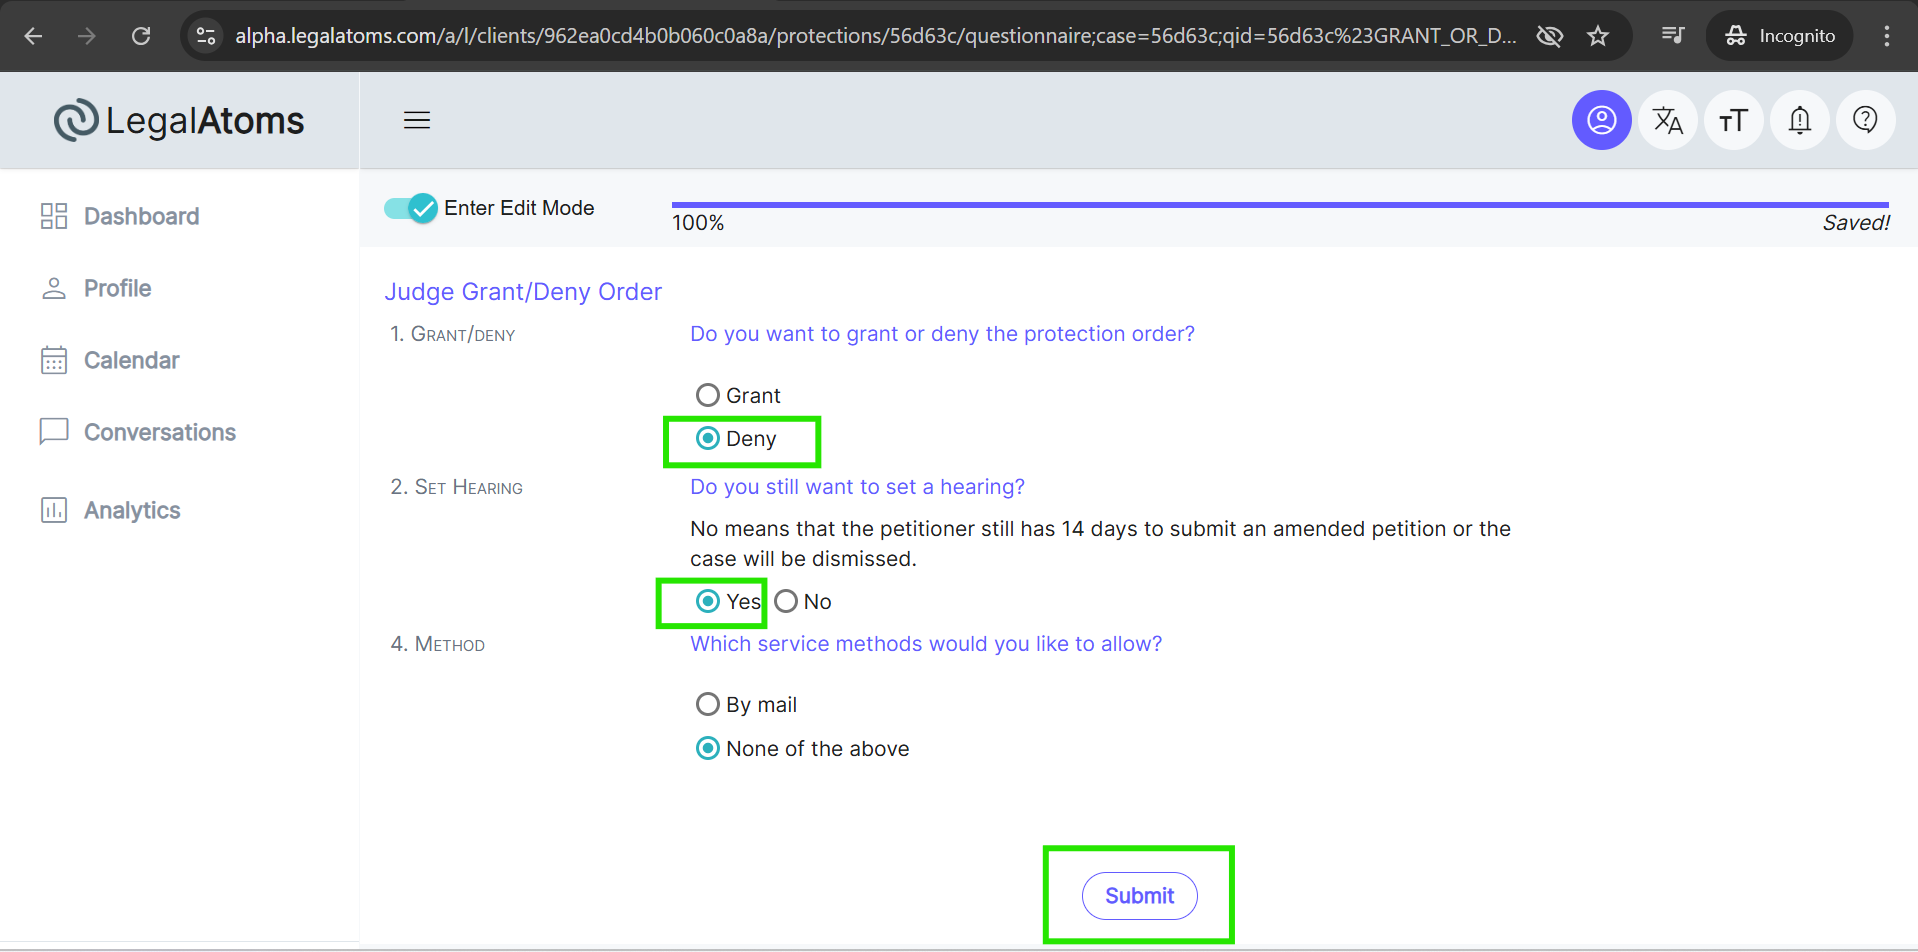
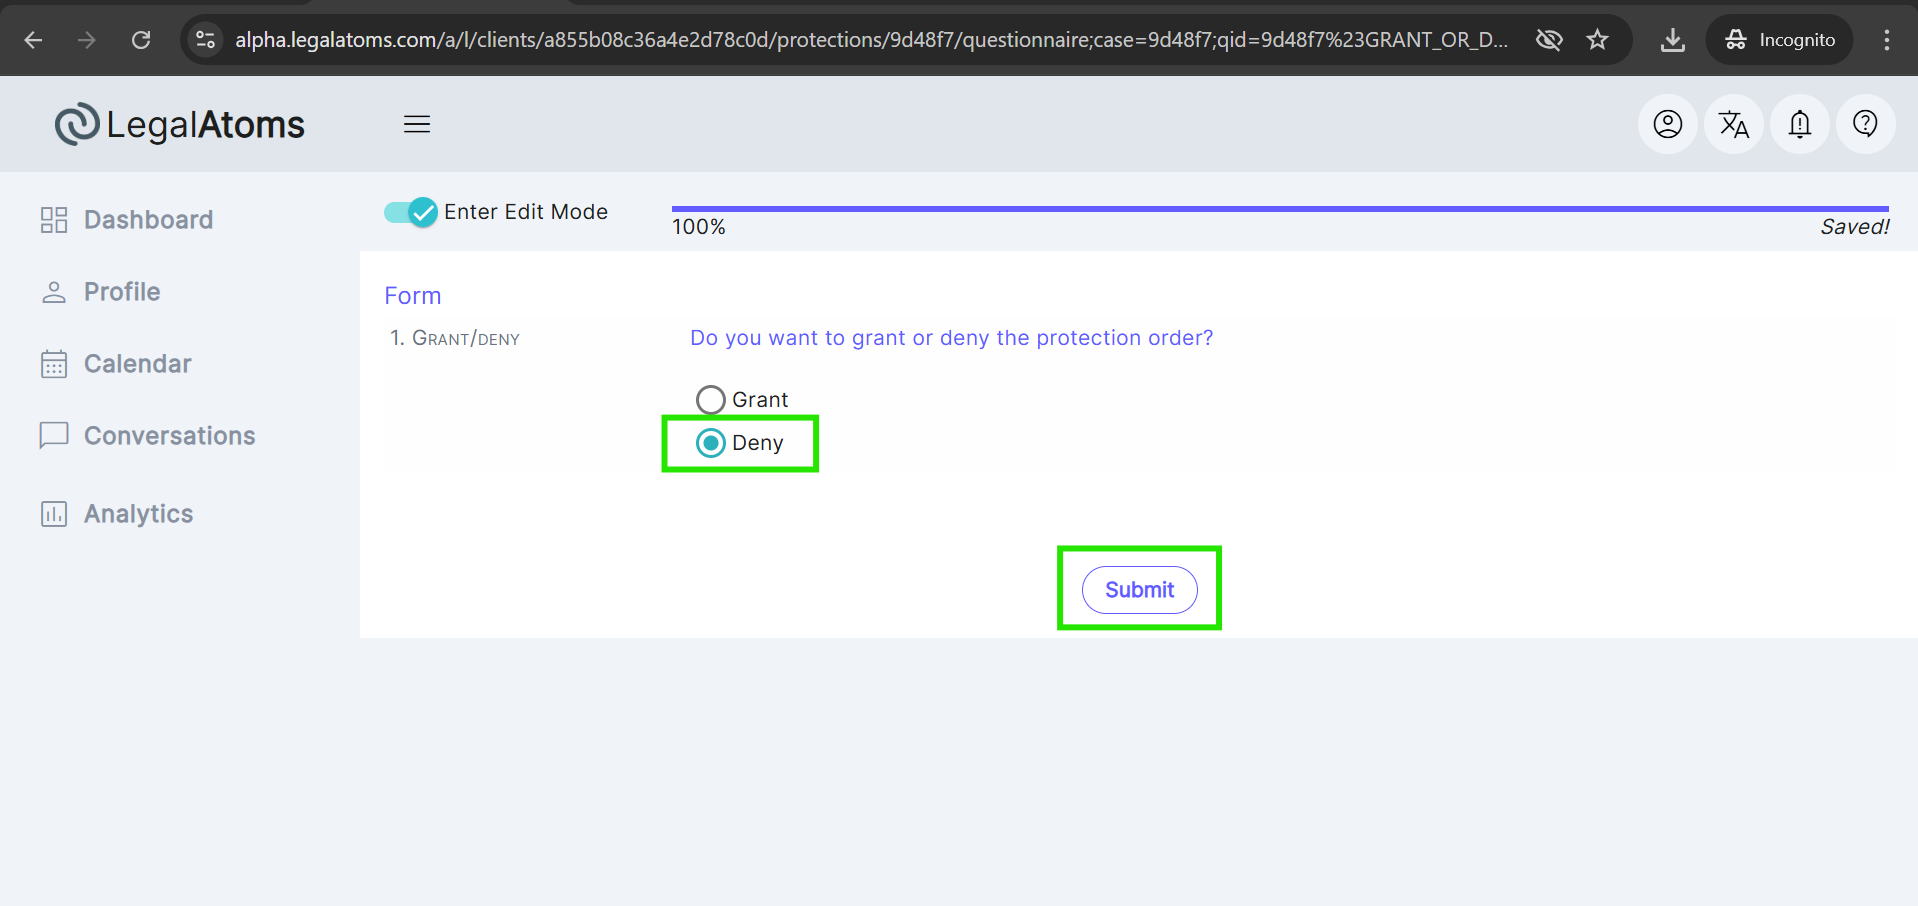
- The judge Deny the protection order
- Submit the form
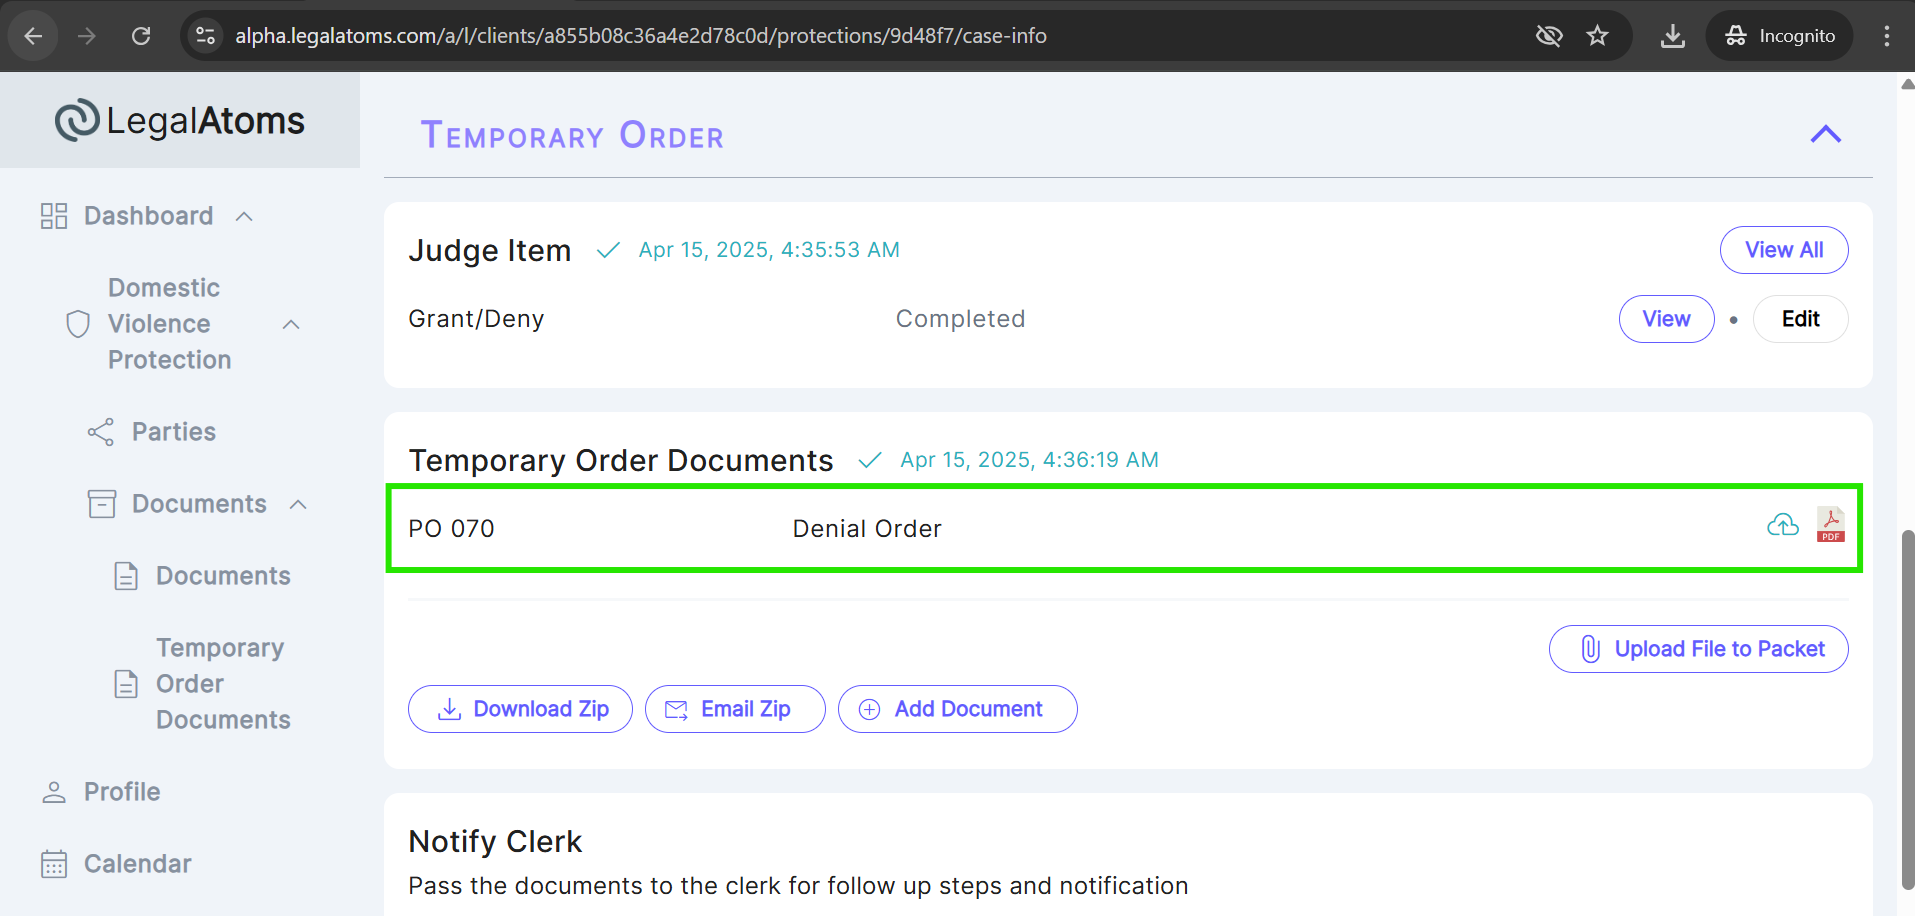
Step 8: Make Edits and Sign the Temporary Order Documents
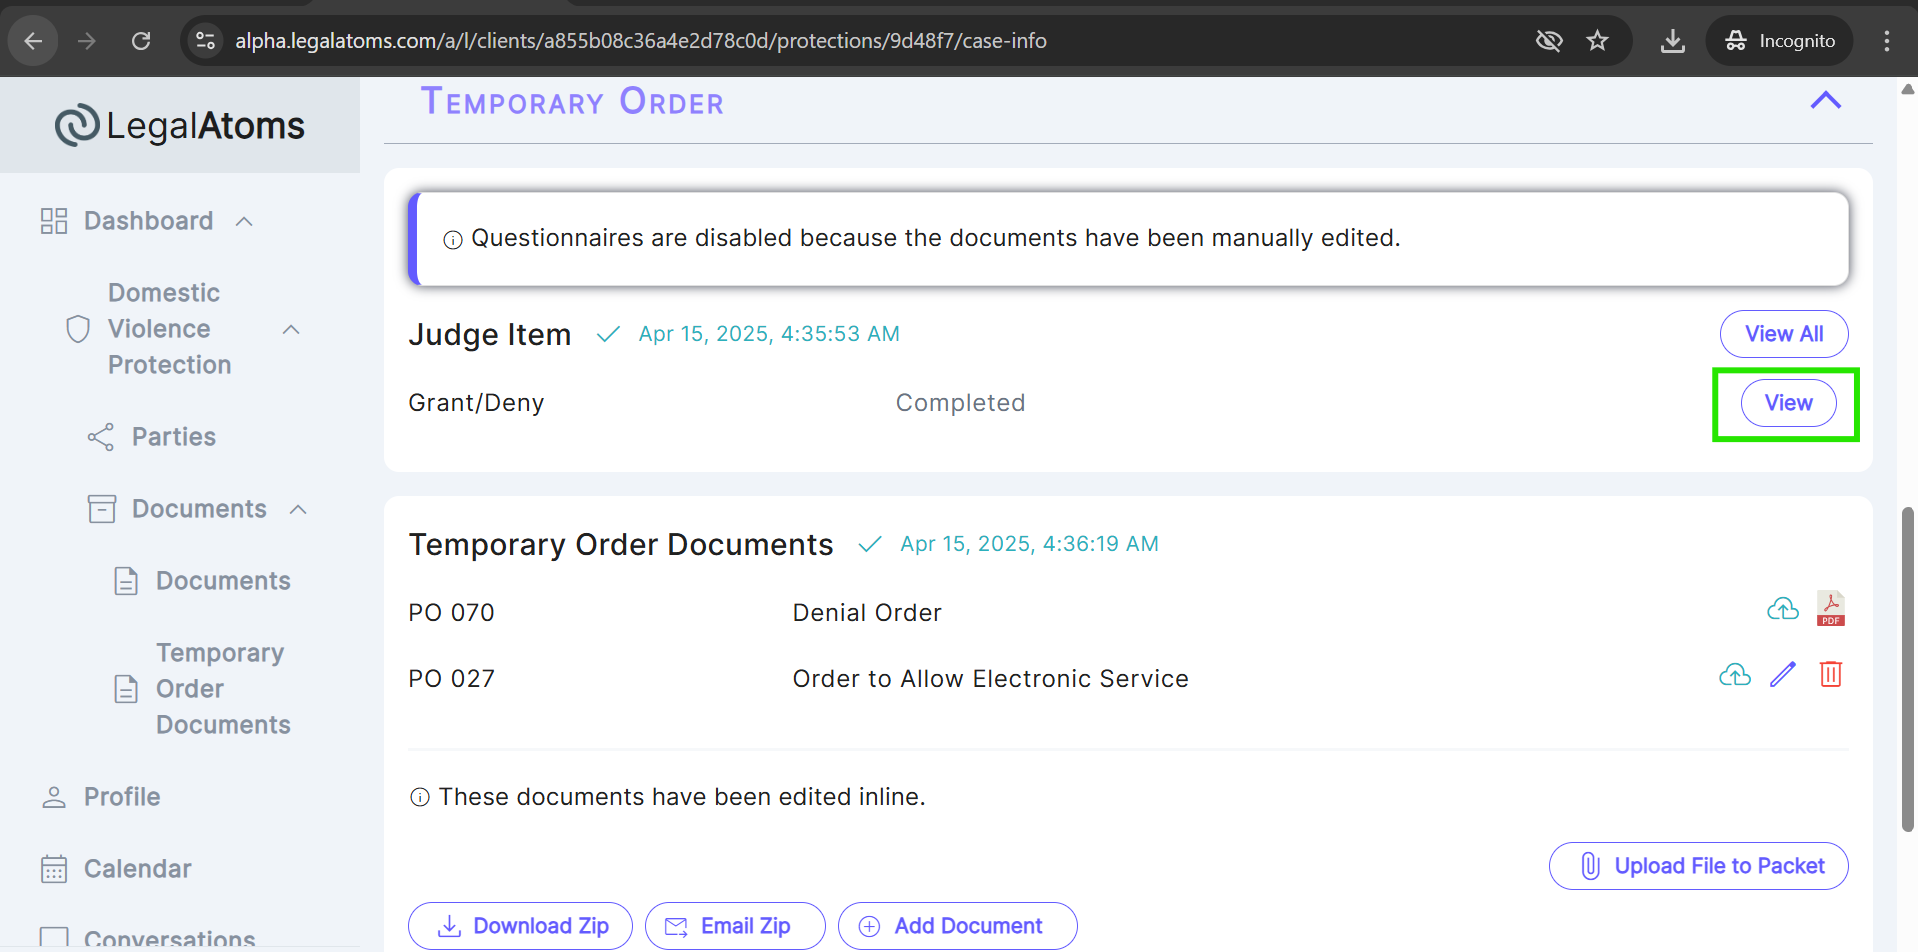
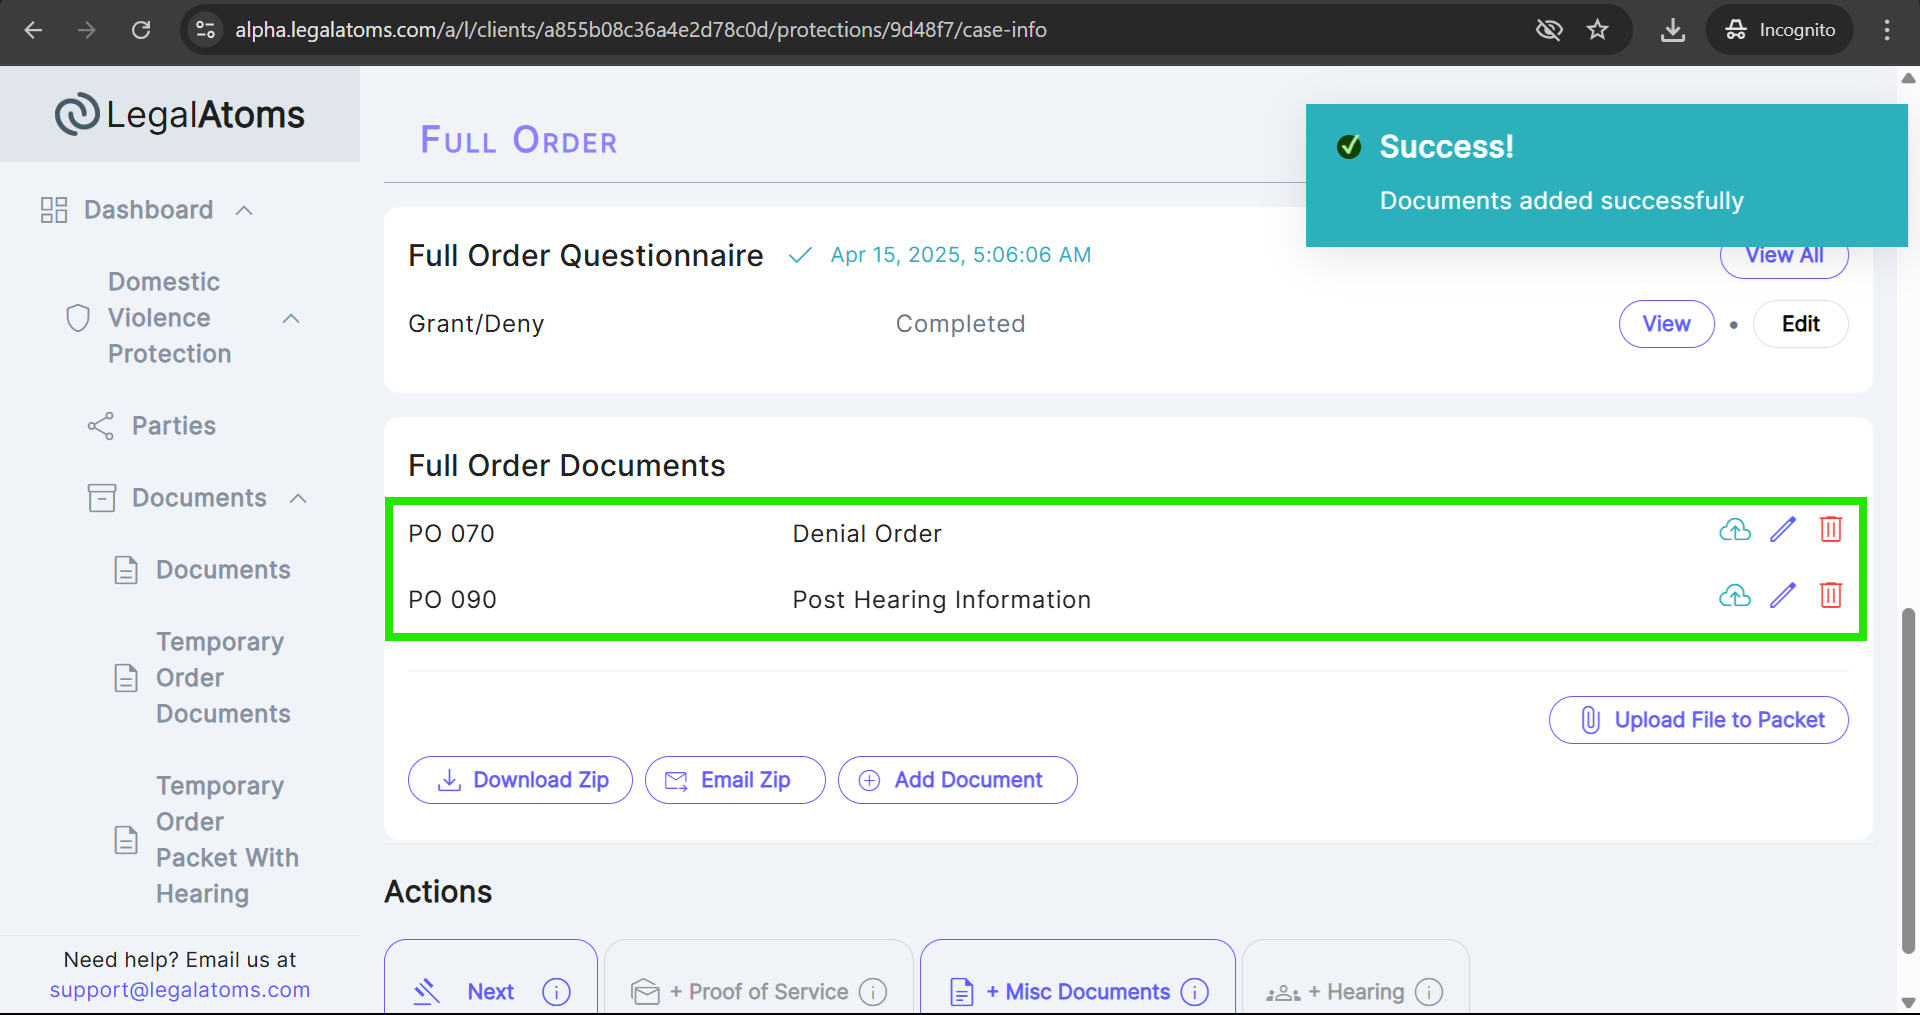
After Grant/Deny the protection order, the document starts auto generate and you will see the uploaded temporary order document that matches with the current section document.
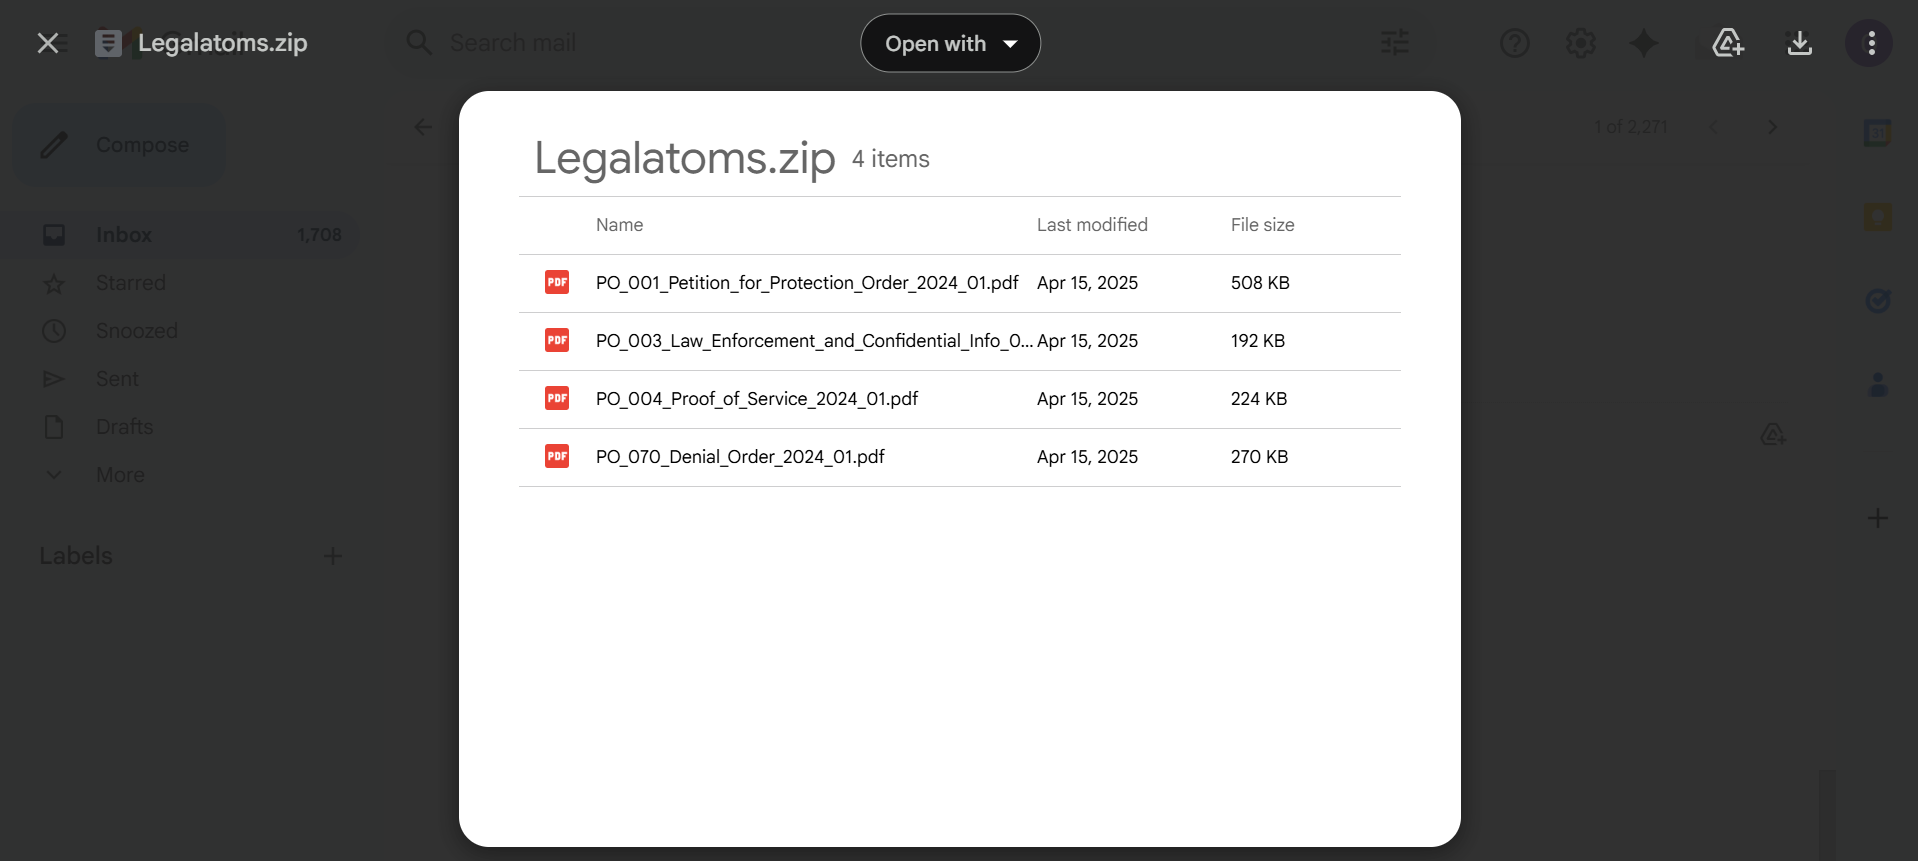
Verify these documents are generated under (Temporary Order Documents, and Temporary Order Packet) if the judge provides them while uploading the case.
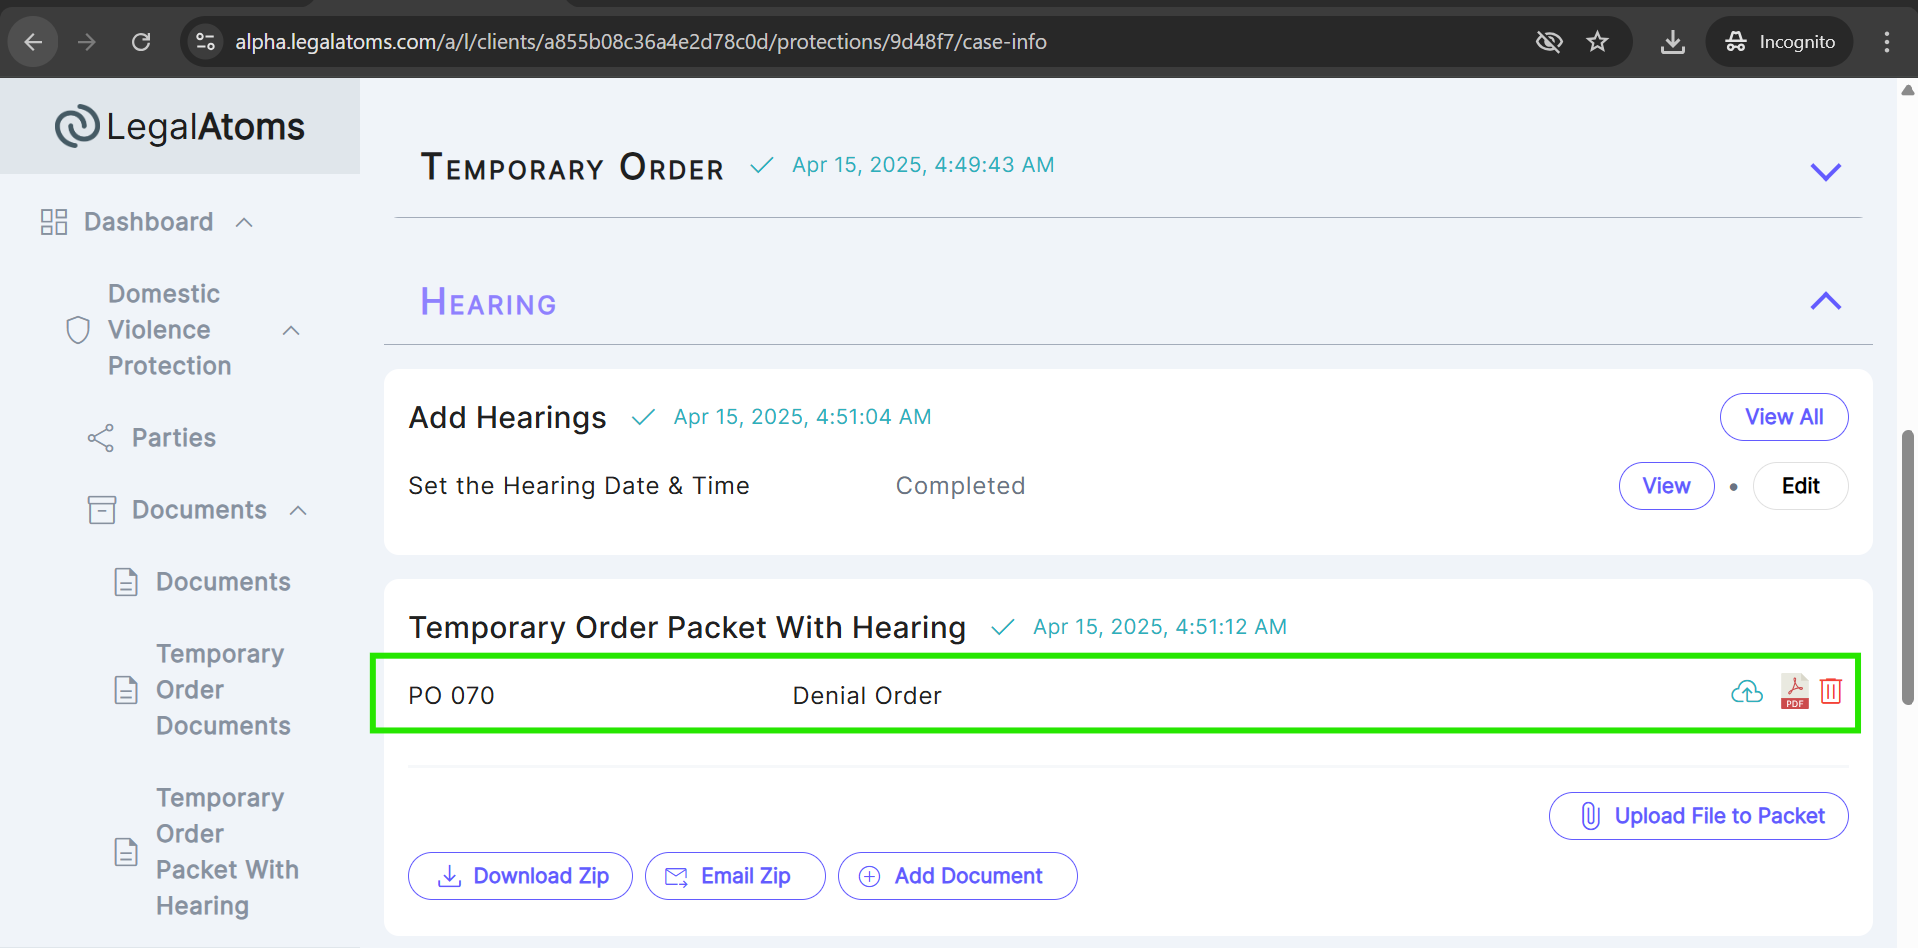
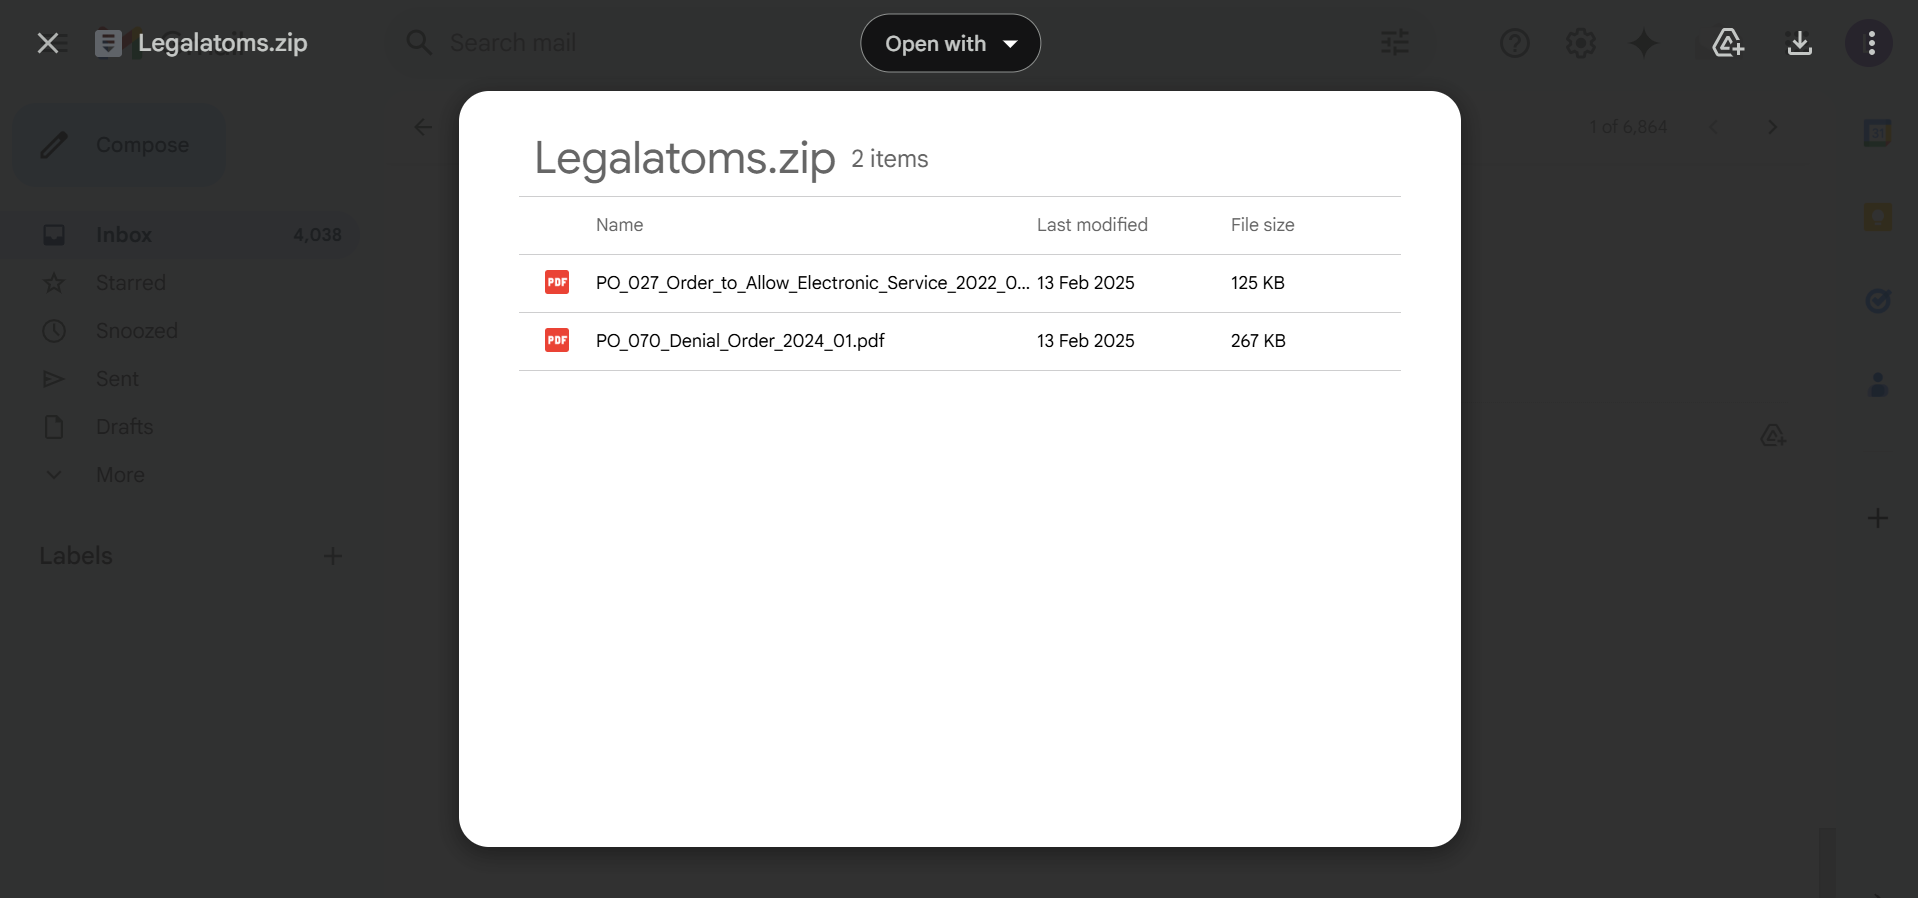
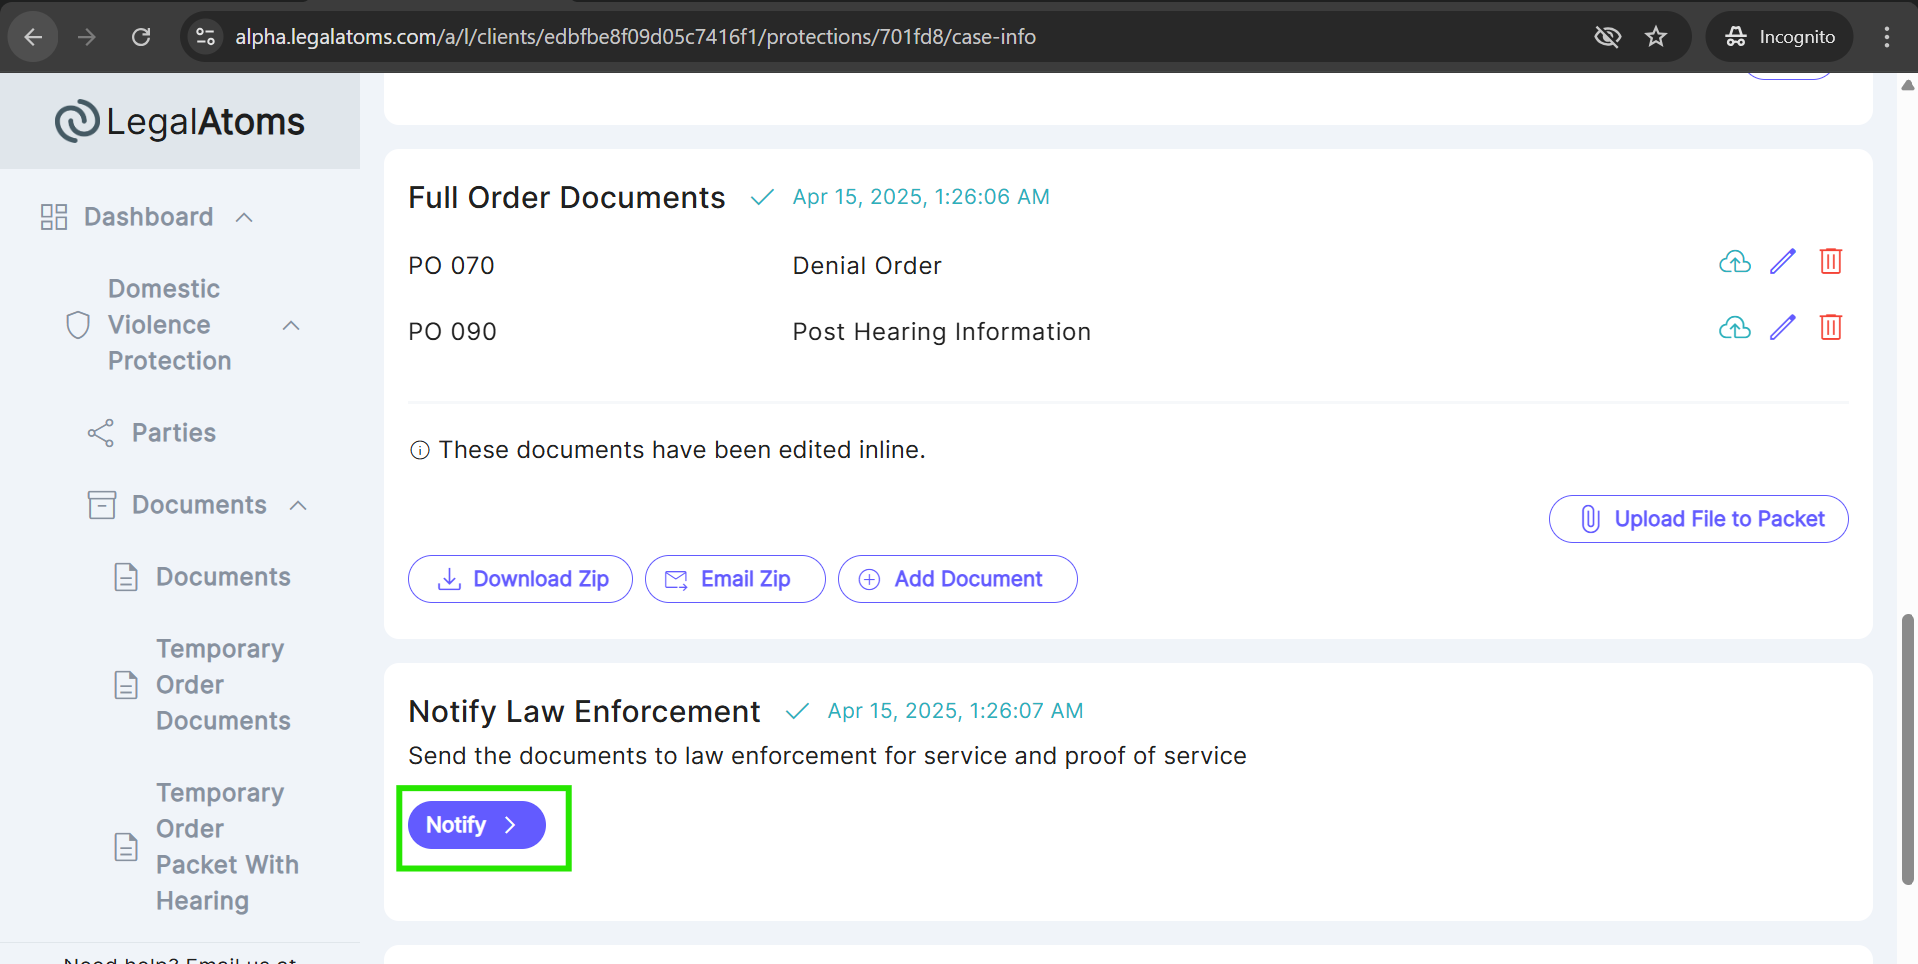
1. PO 070 Denial Order
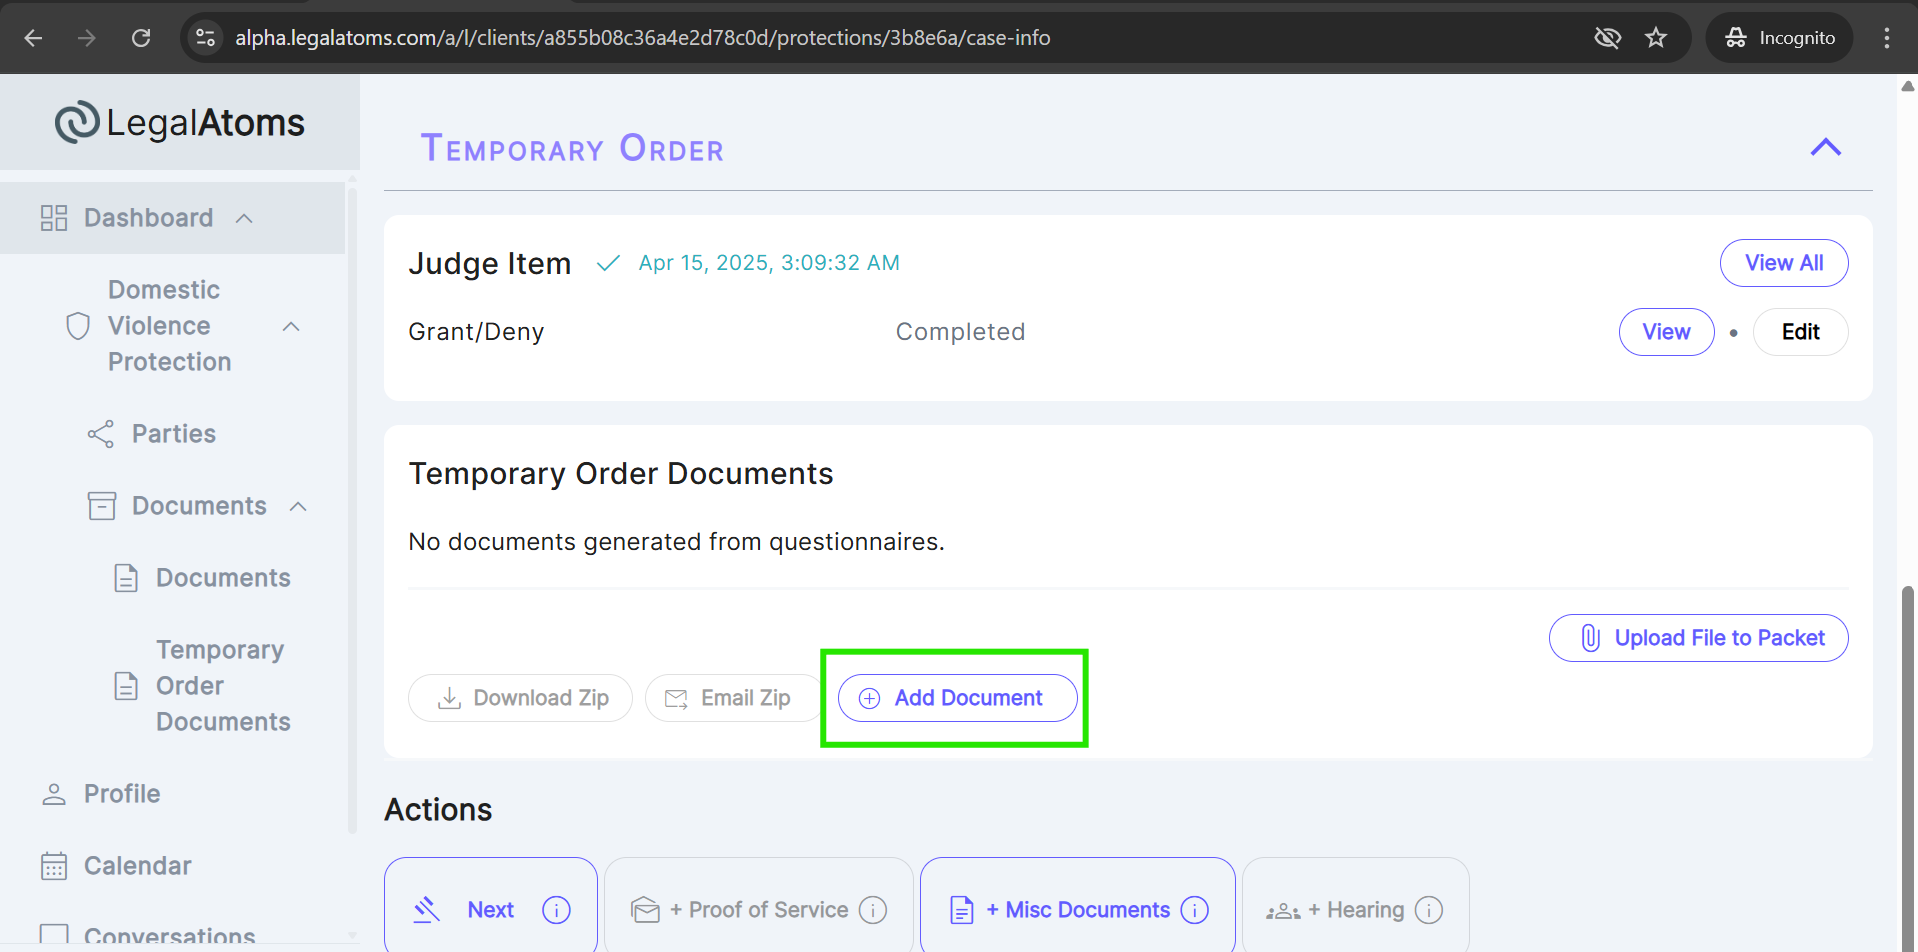
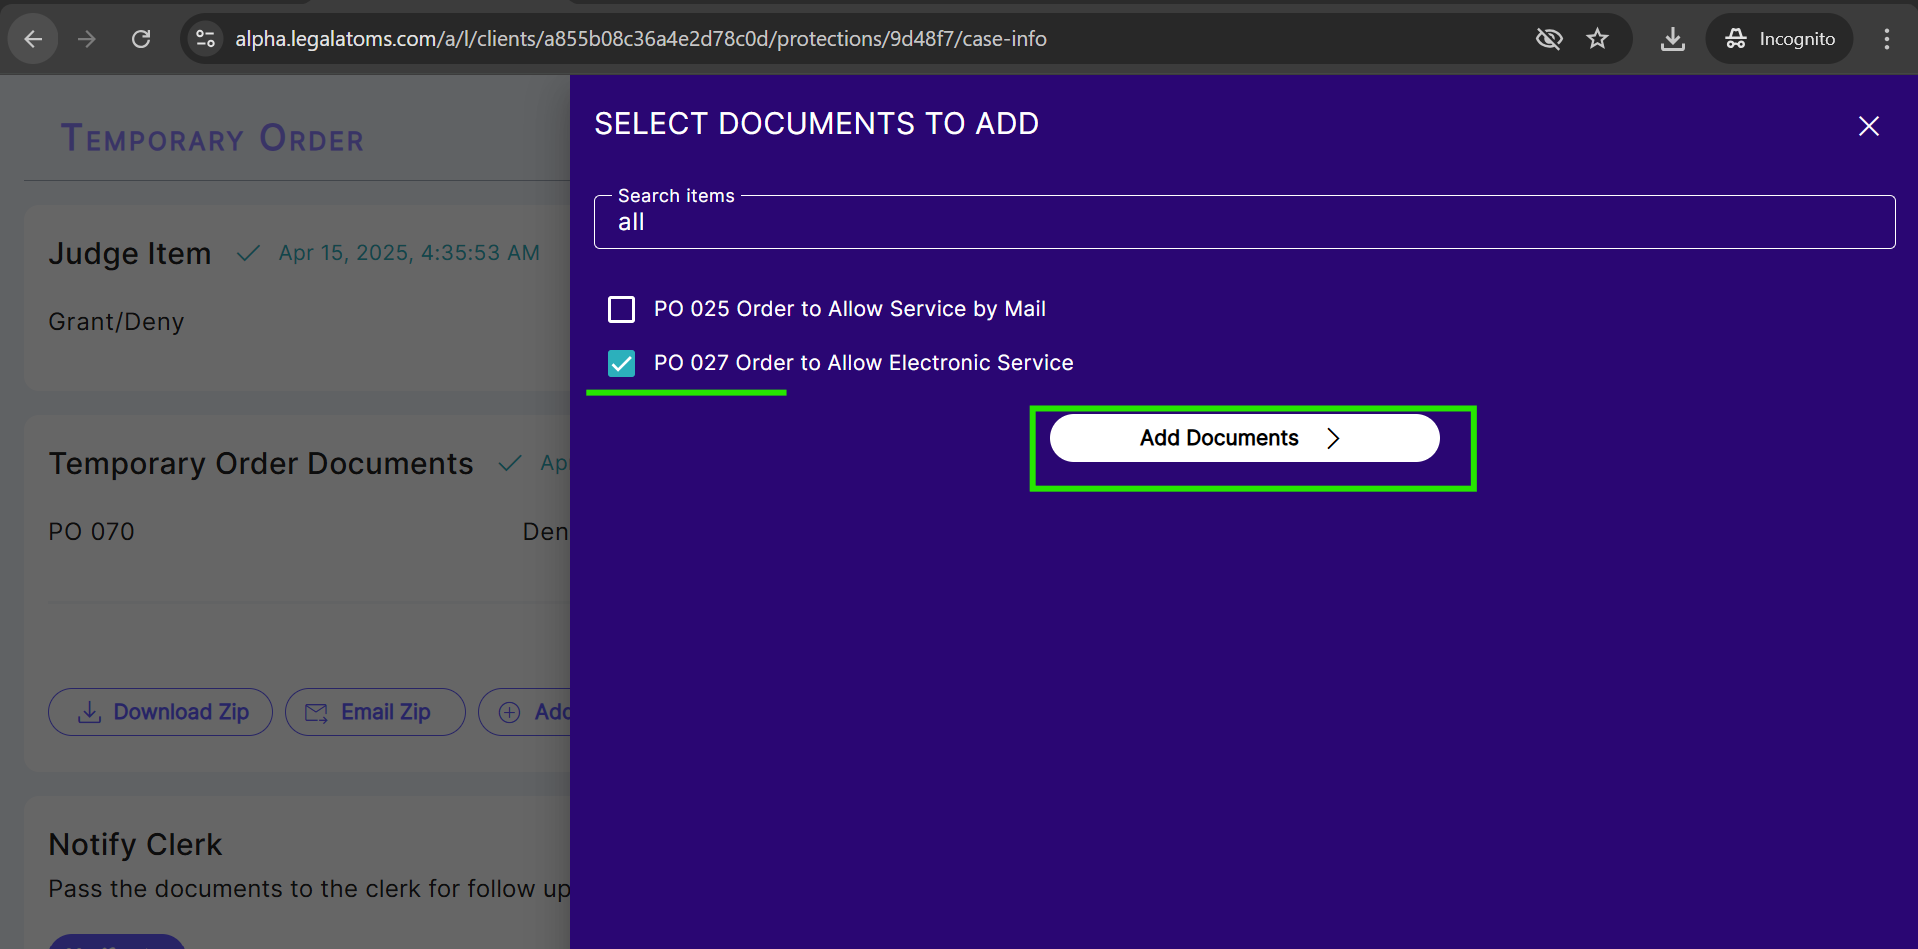
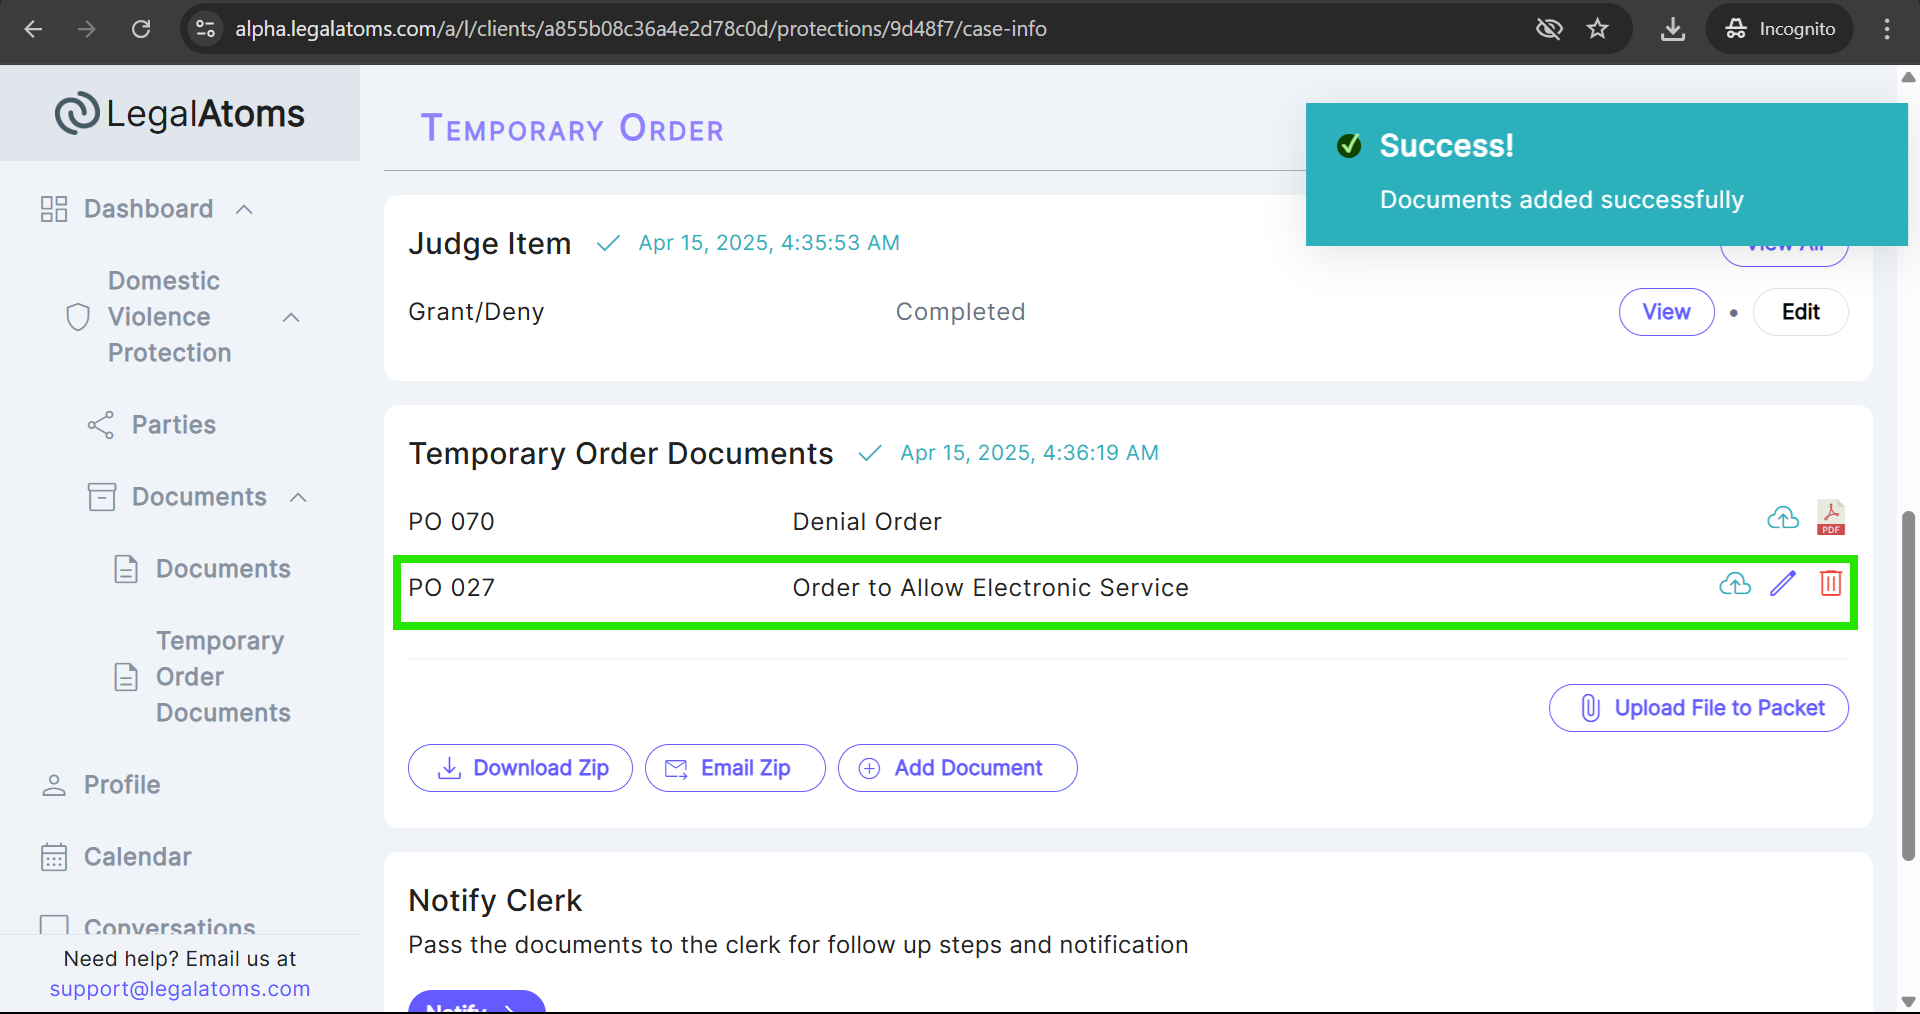
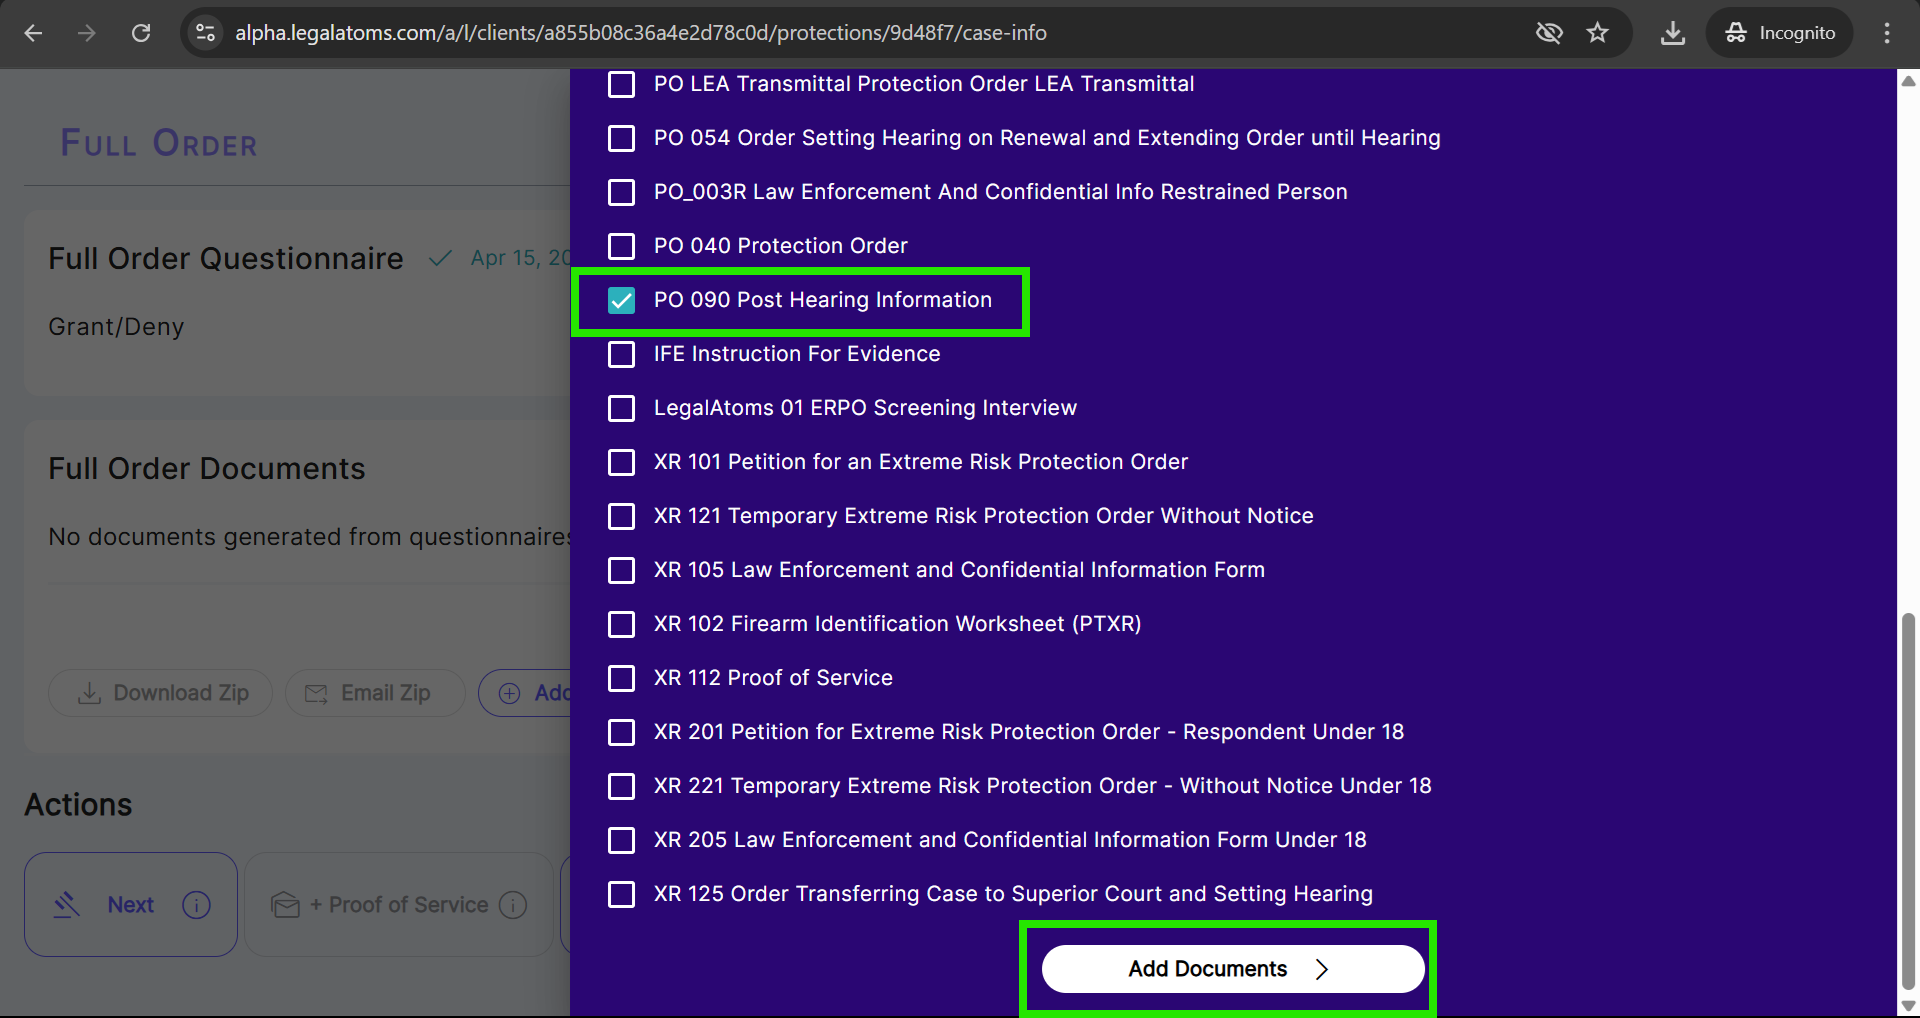
We never generate any missing LegalAtoms documents for uploaded cases. If no document is generated in the temporary order document, the judge can add it via the “Add document” button.
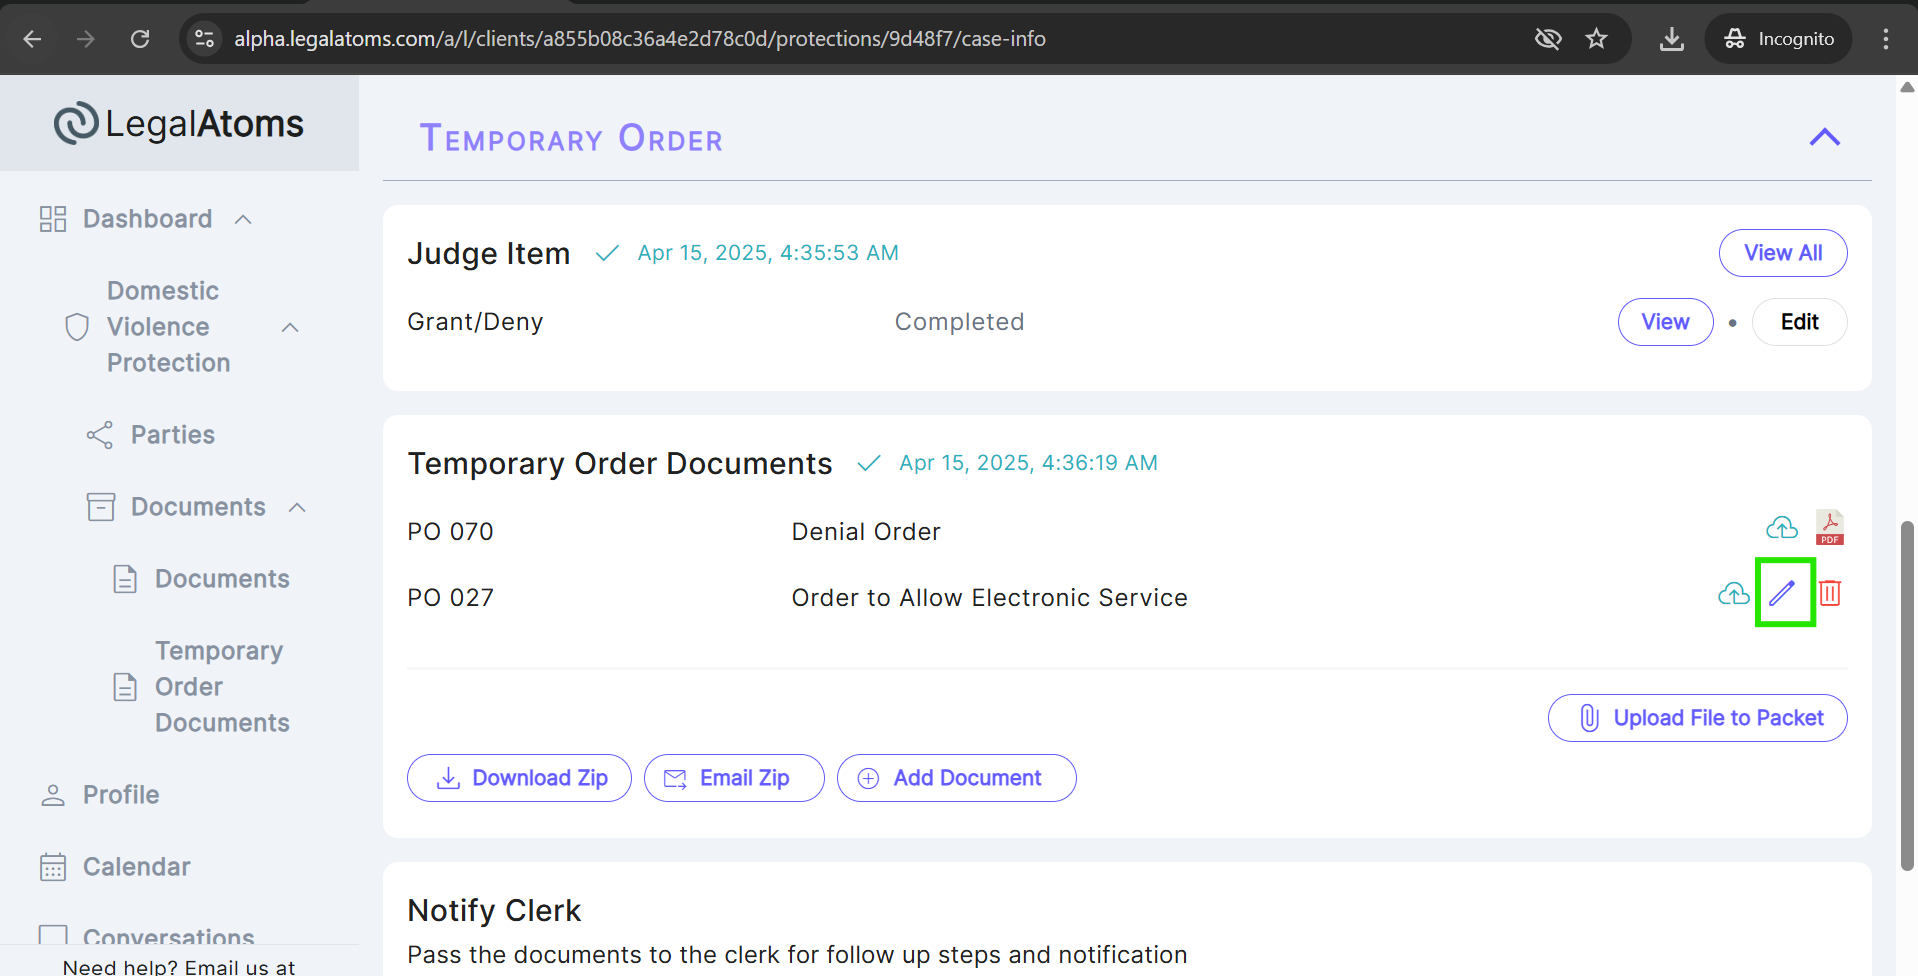
LegalAtoms allows the judge to add a signature to a Temporary Order document using the “Edit HTML” feature available for the added document. Follow the given steps to add a signature to the document.
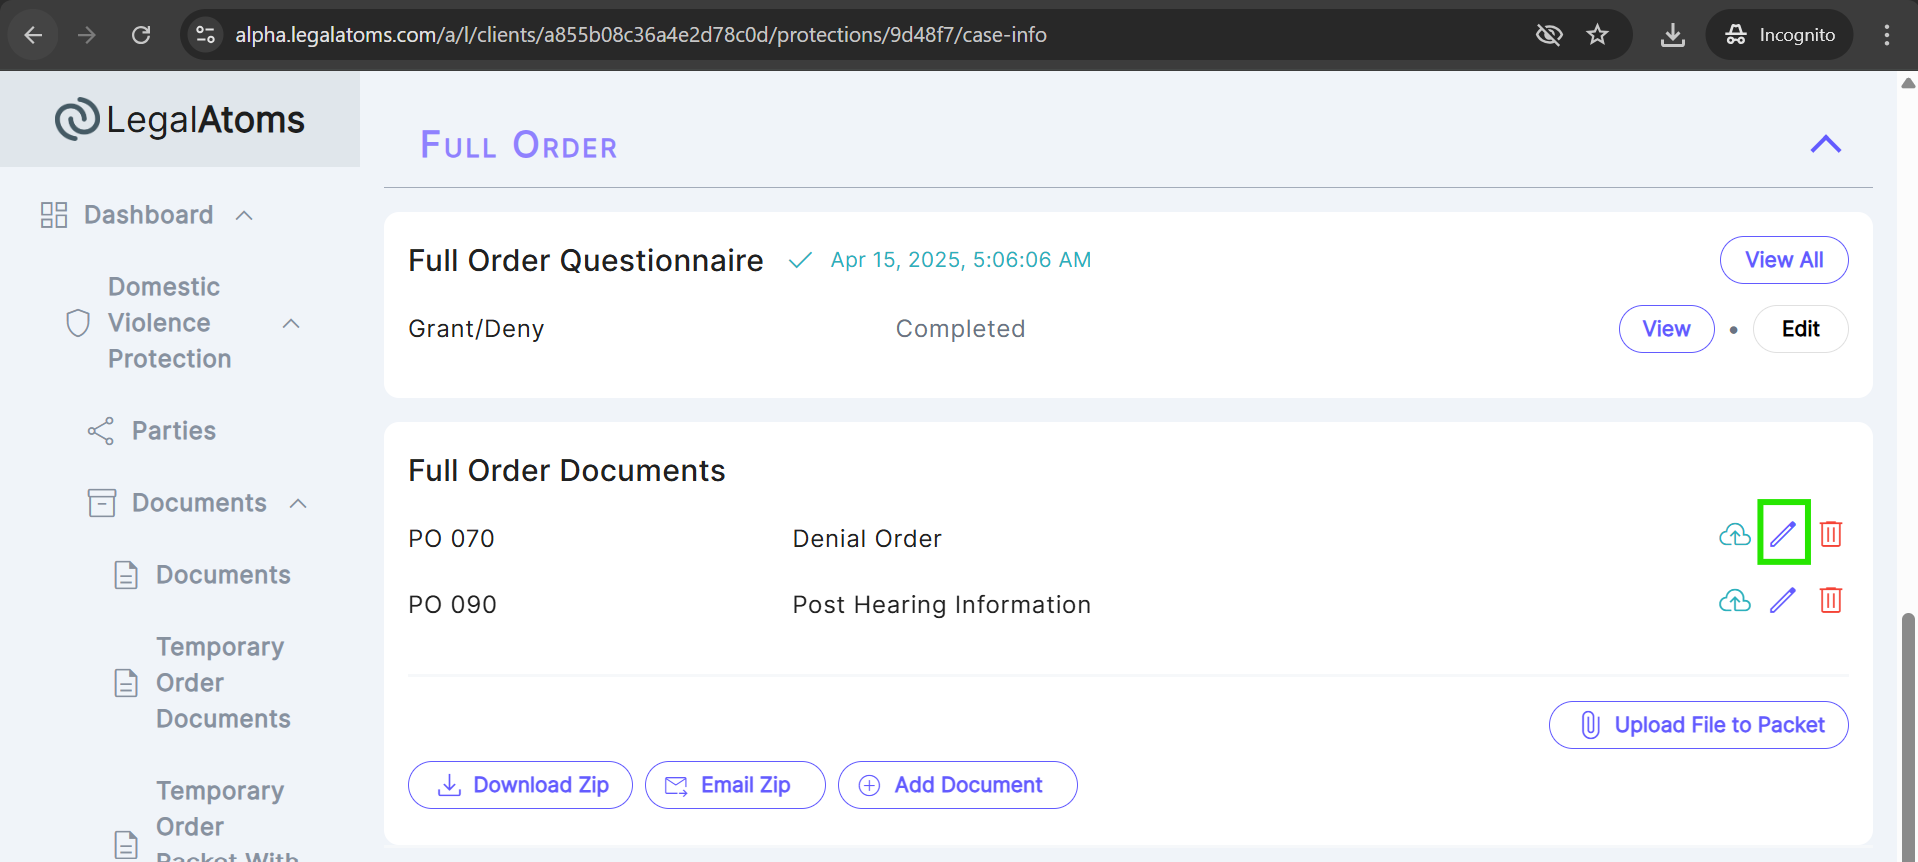
- Click the Edit icon/button to open the document in edit mode.
- In the document editor, click on the top left Edit button to switch to Edit HTML view.
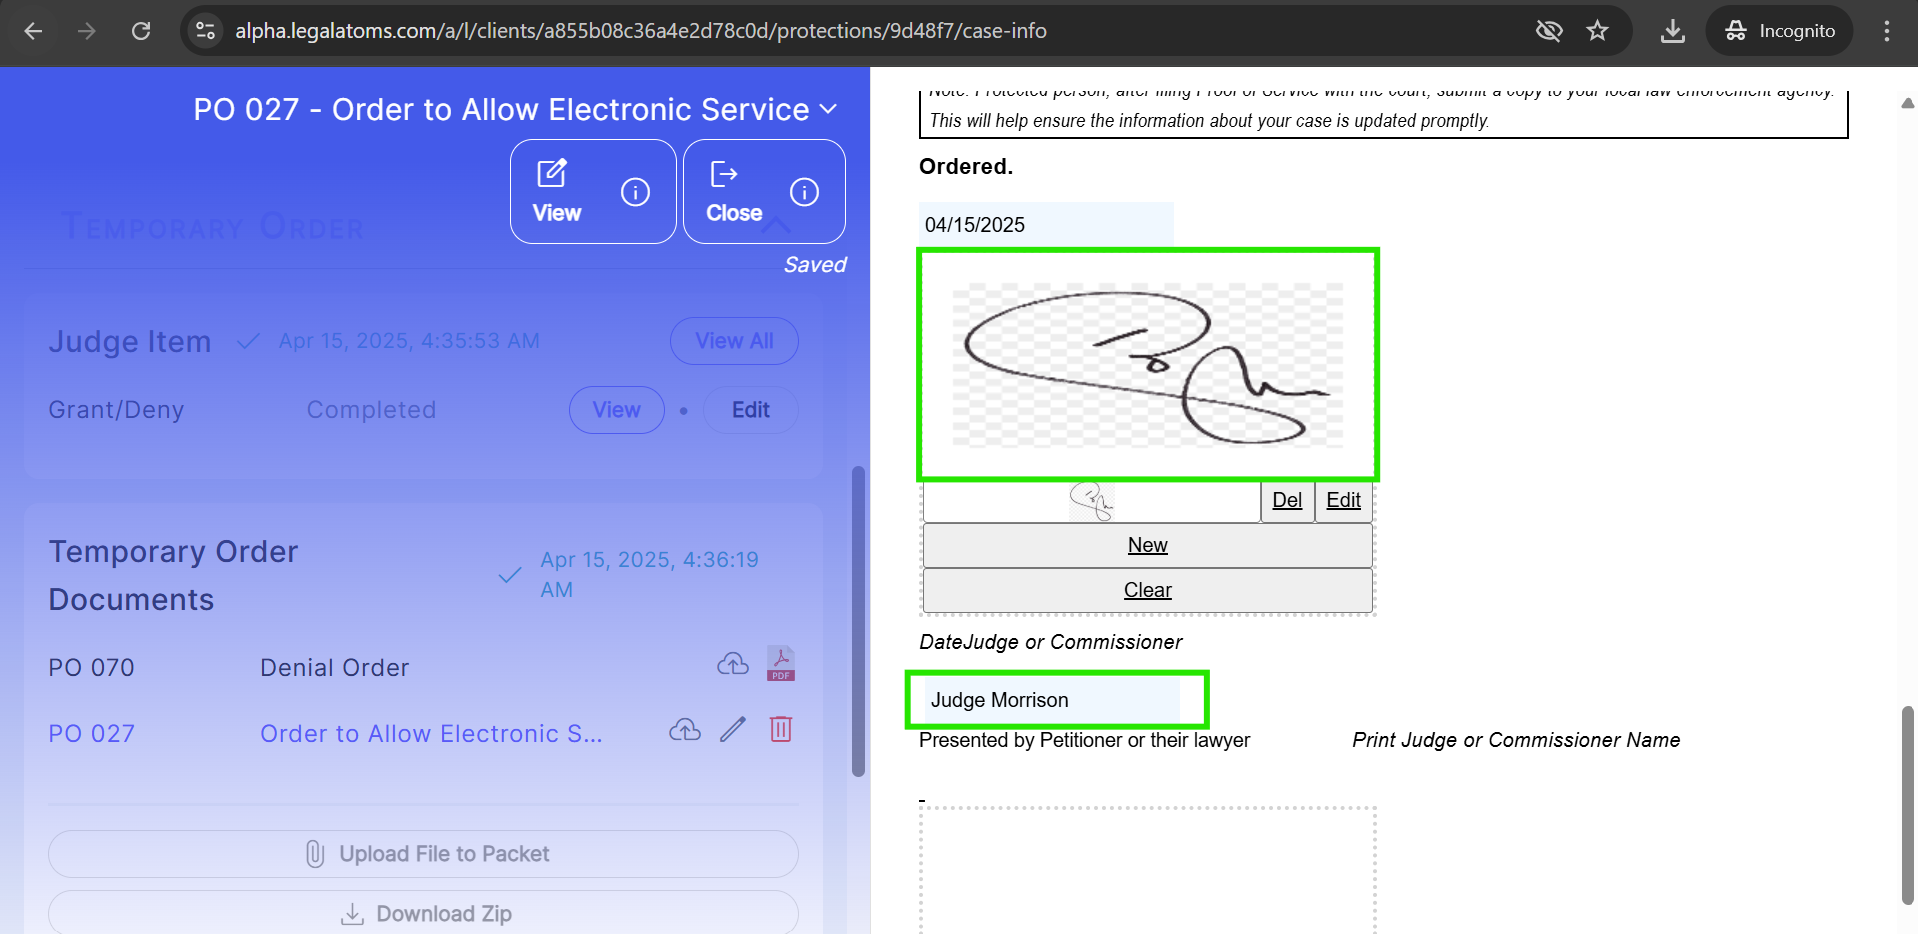
- Scroll through the Edit HTML document to locate the judge section where the signature should be placed.
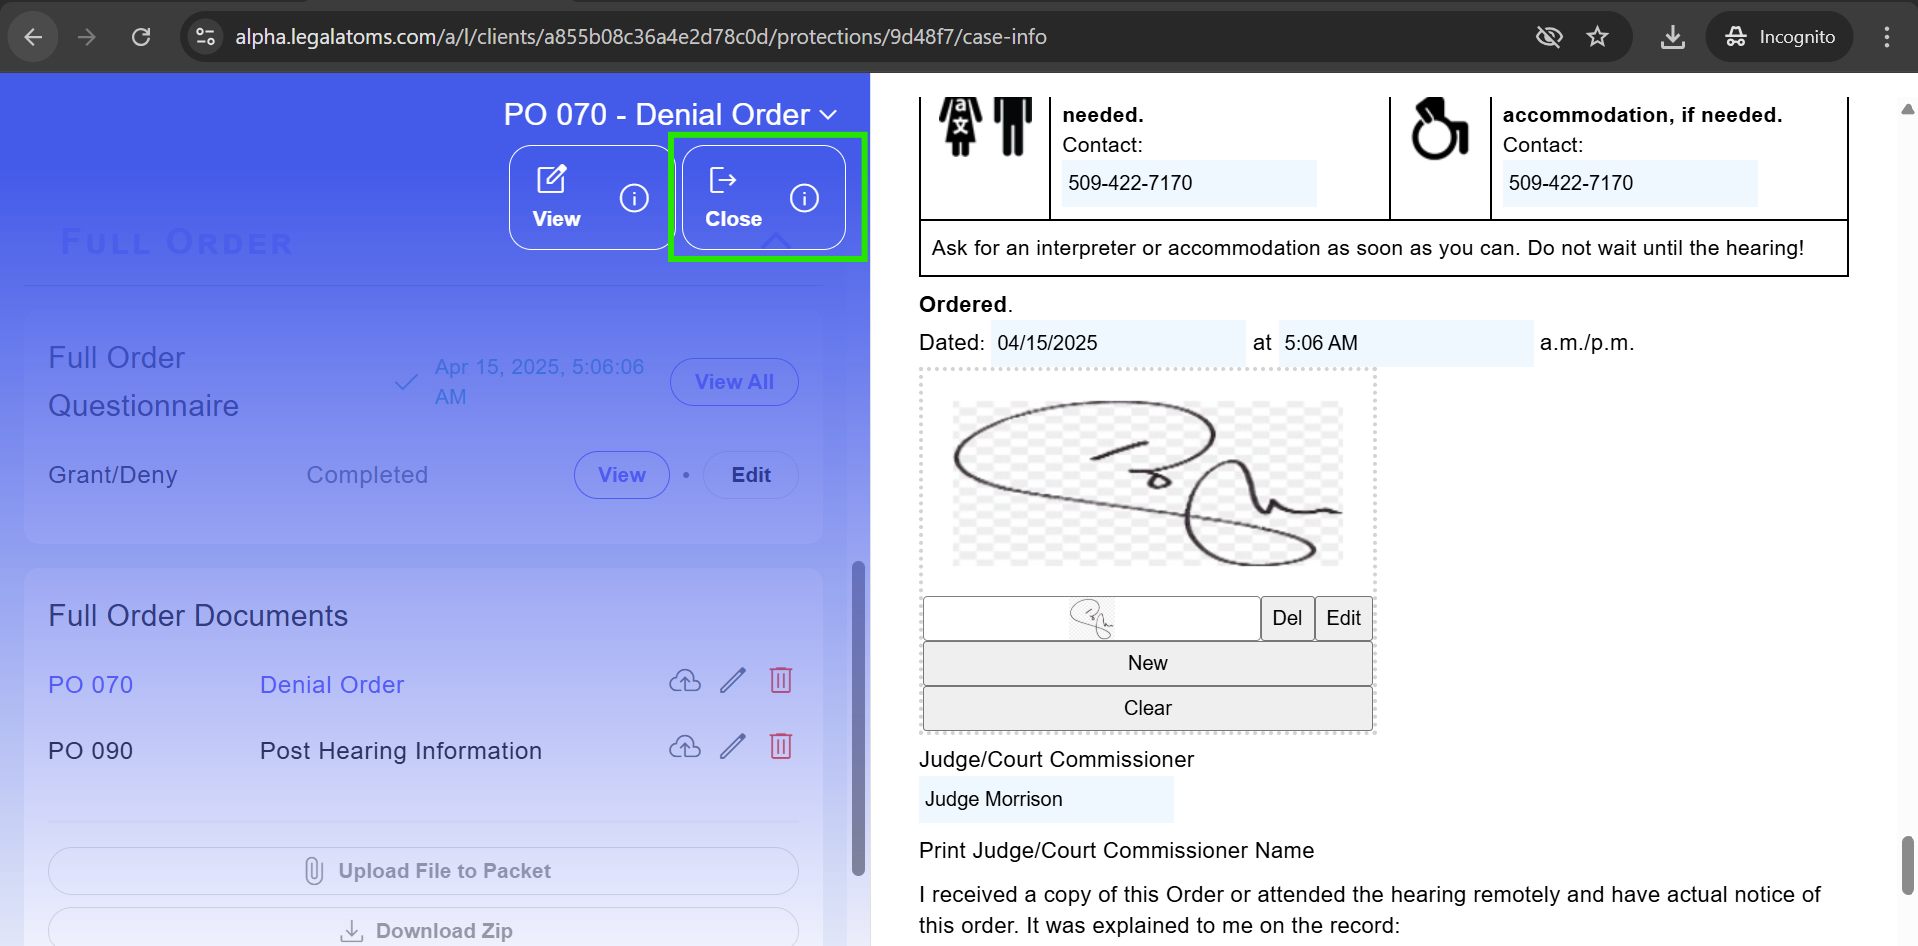
- Place your cursor in the desired location for the signature. Judge can upload signature or can add signature as a plain text.
- Judge can add name in the input field “Print Judge/Court Commissioner Name”.
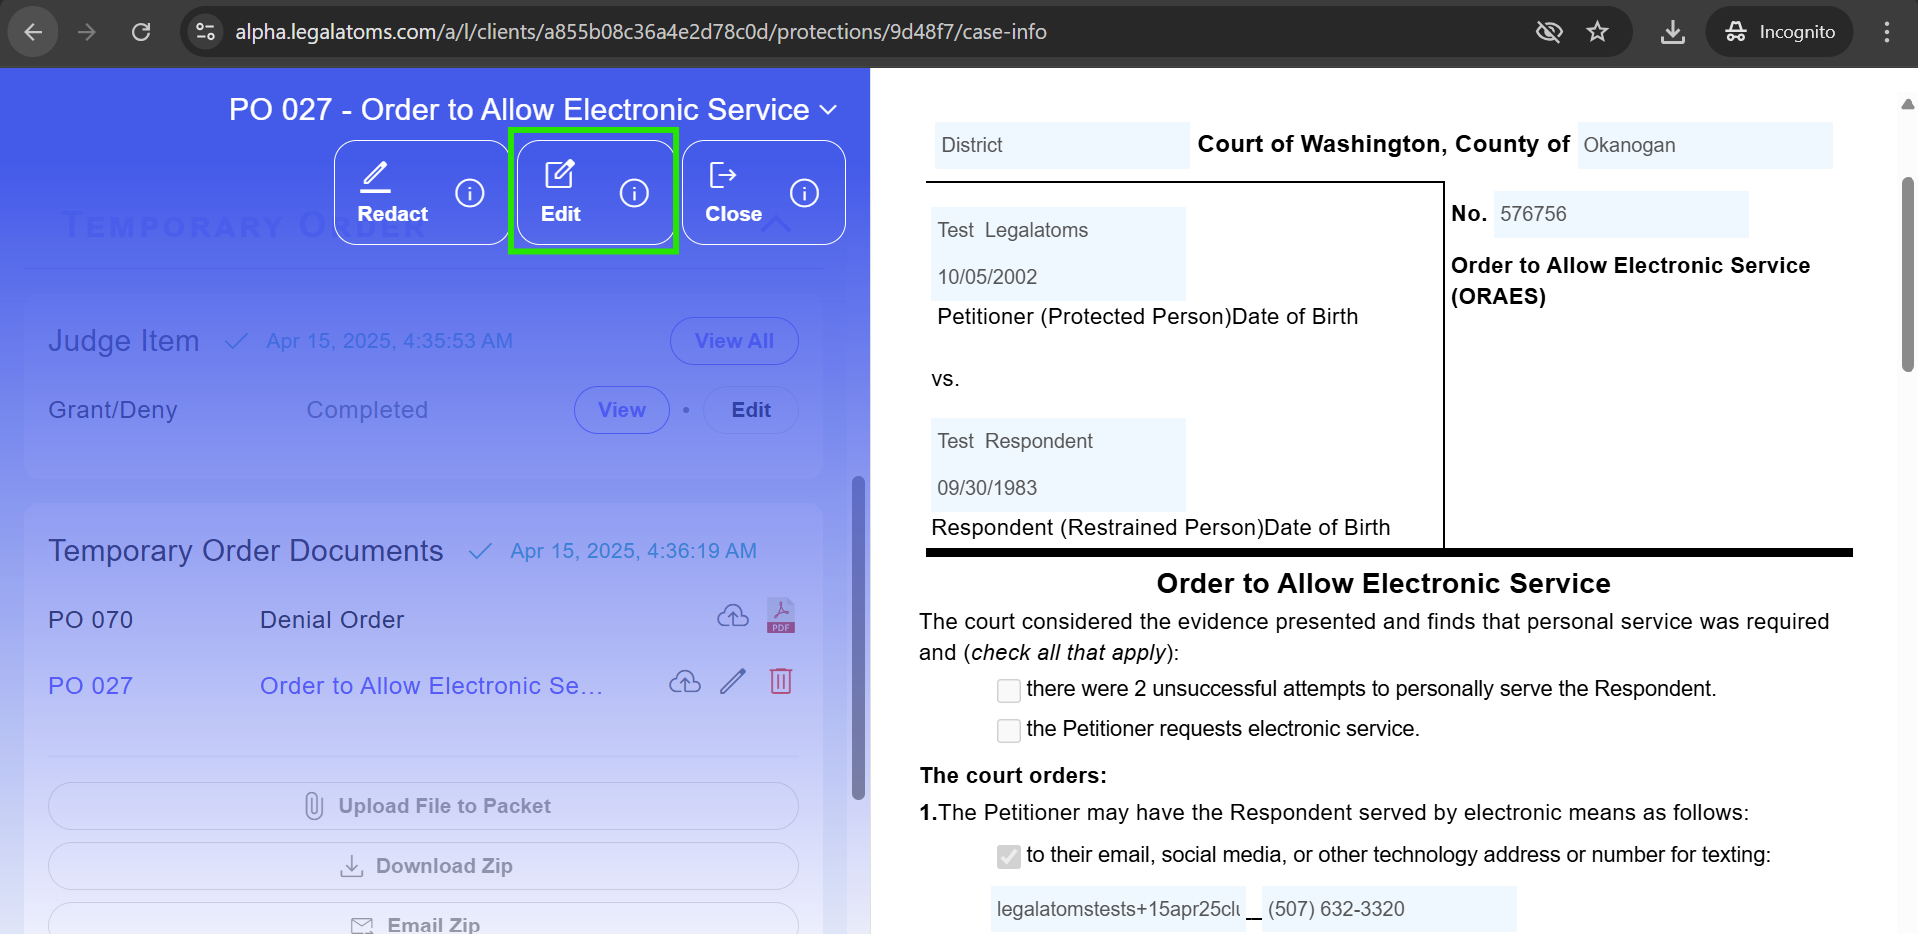
- Once the judge has added the signature and name, click on the Close icon button to save the changes to the document.
- The changes will be auto save and reflected in all the documents within the section.
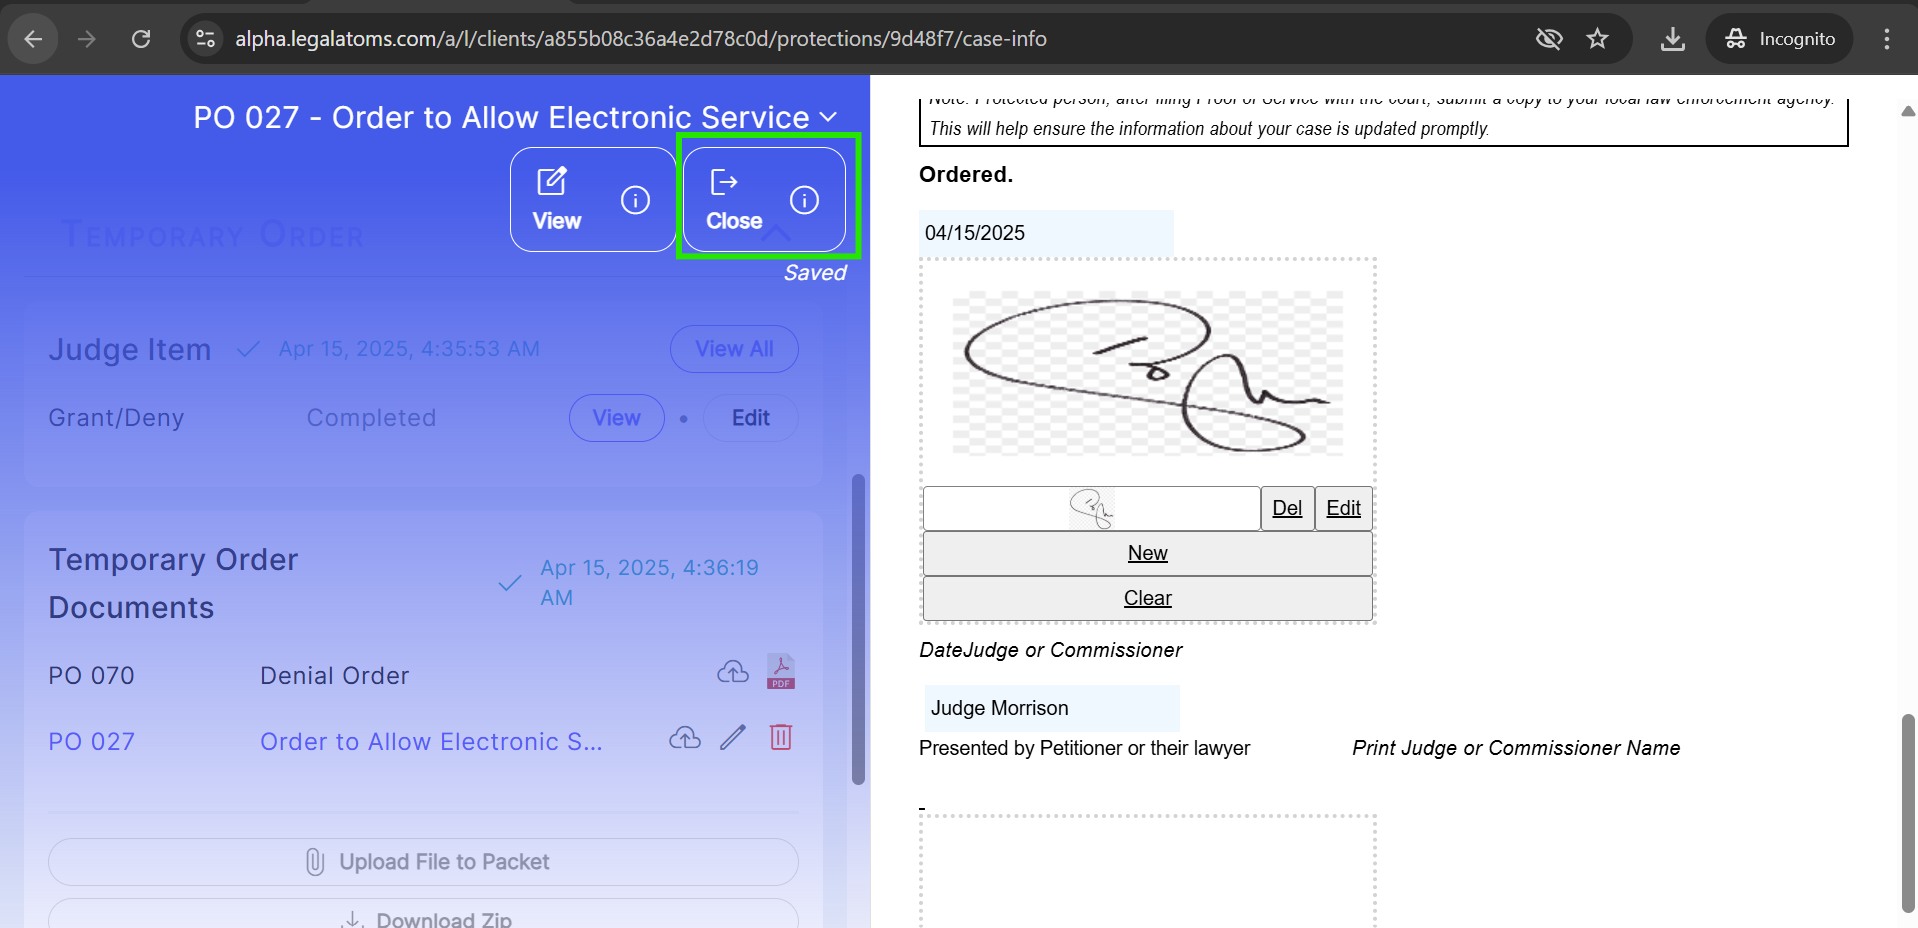
- After changing the document manually via Edit HTML feature judge can not amendment to the question he can only view the questionnaire.
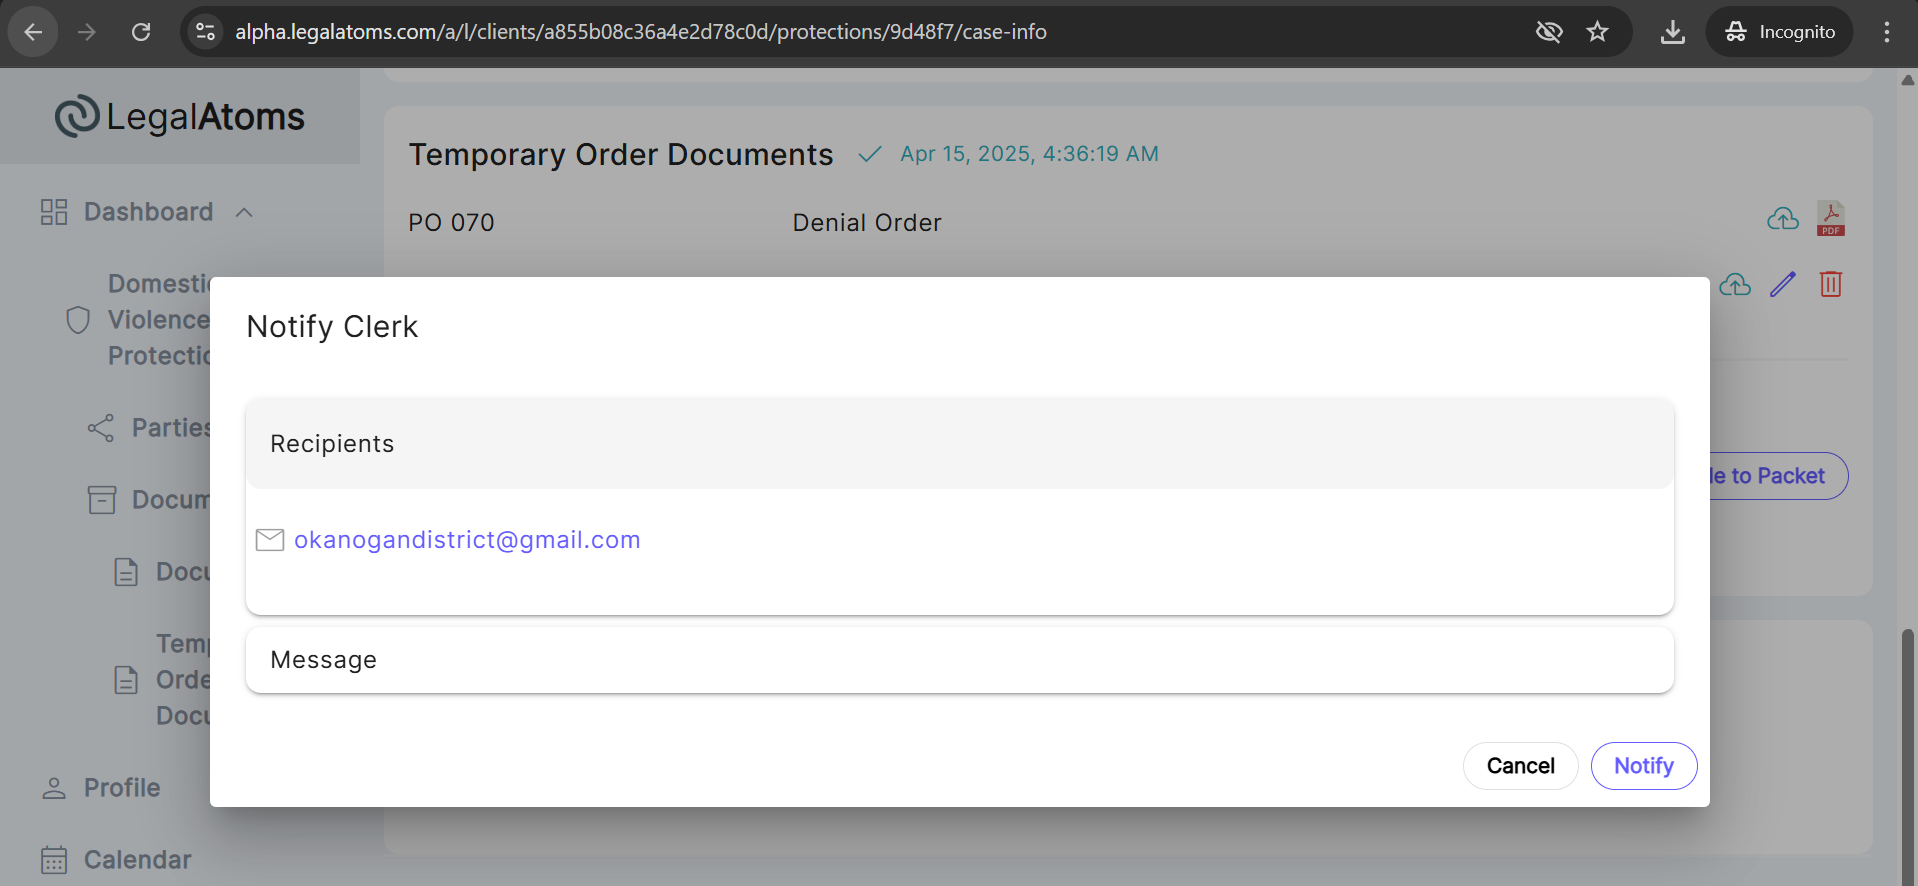
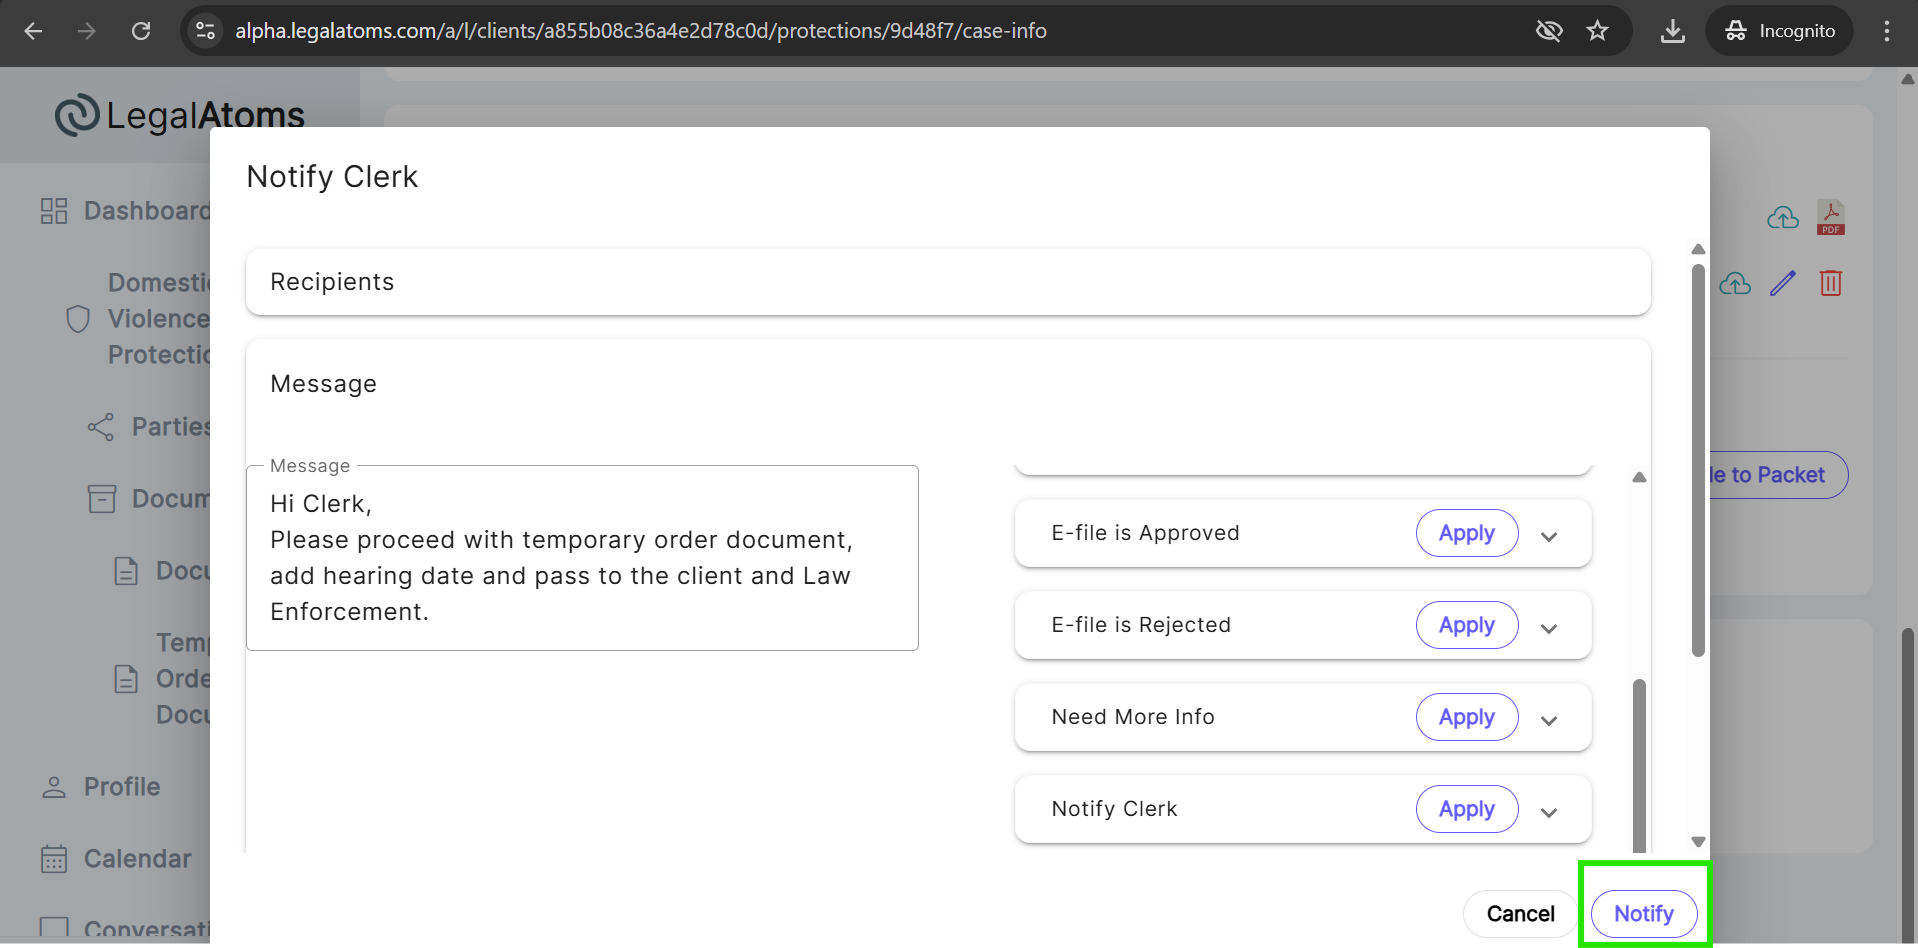
Step 9: Notify Clerk
Simply click on the Notify button to send the temporary order documents to the clerk. A popup will appear where the Judge can adds a message and clicks the Notify button.
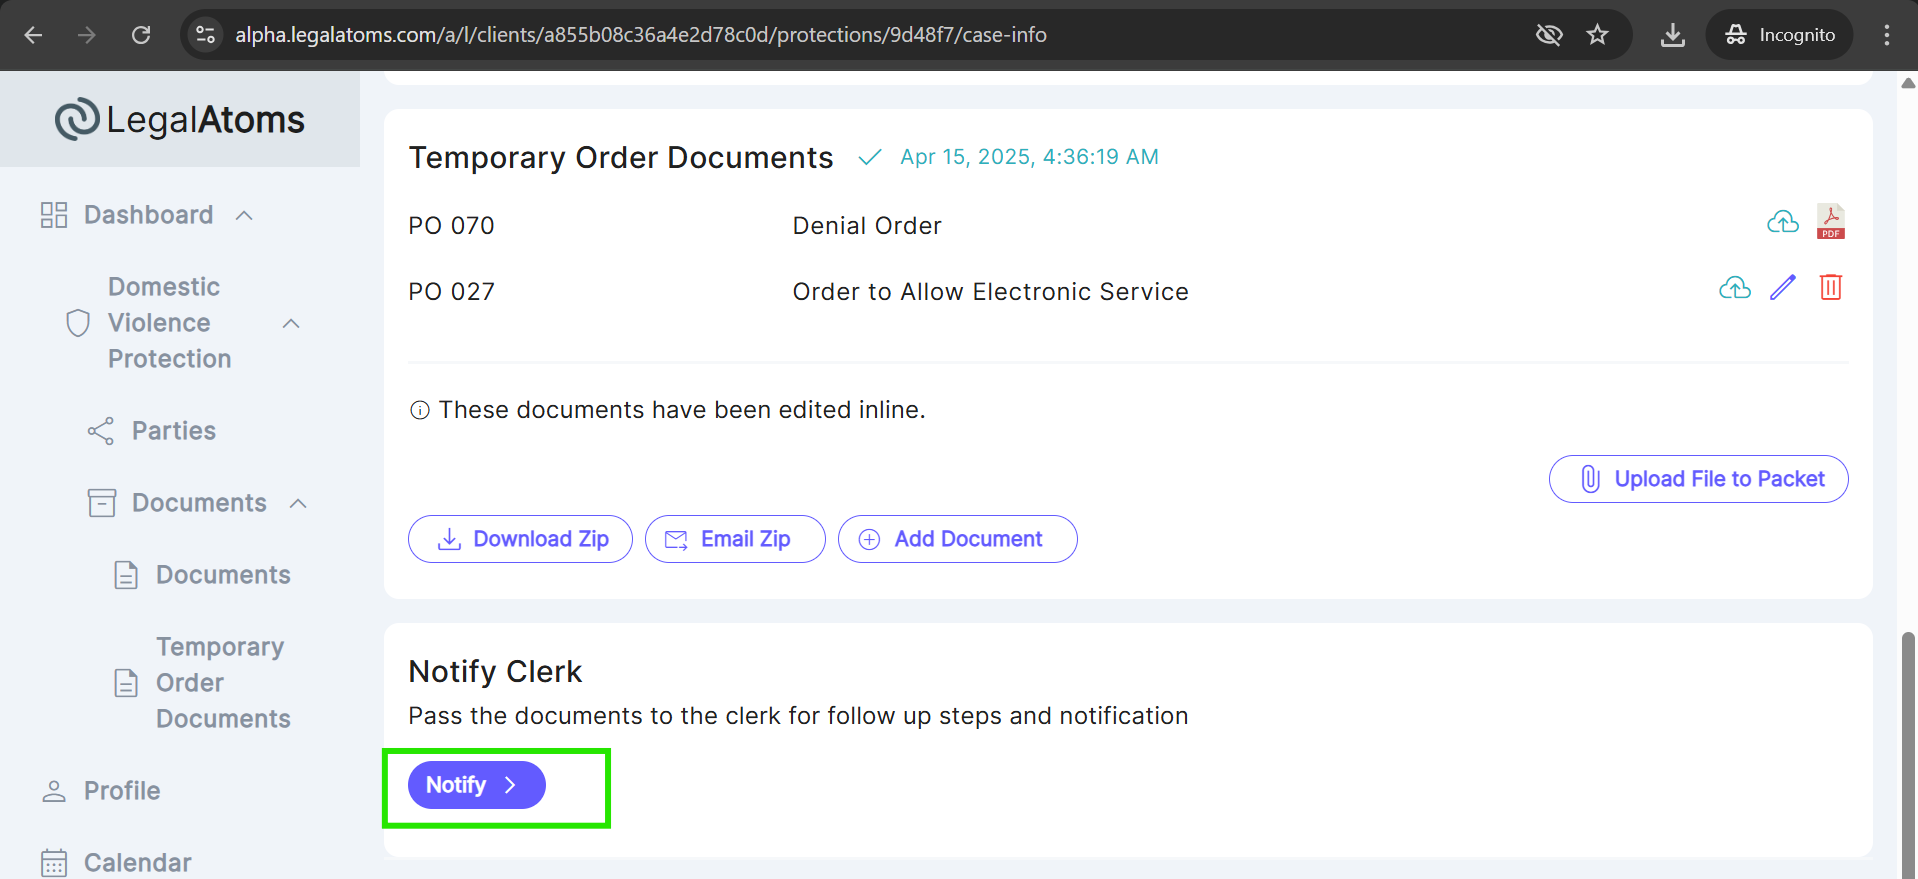
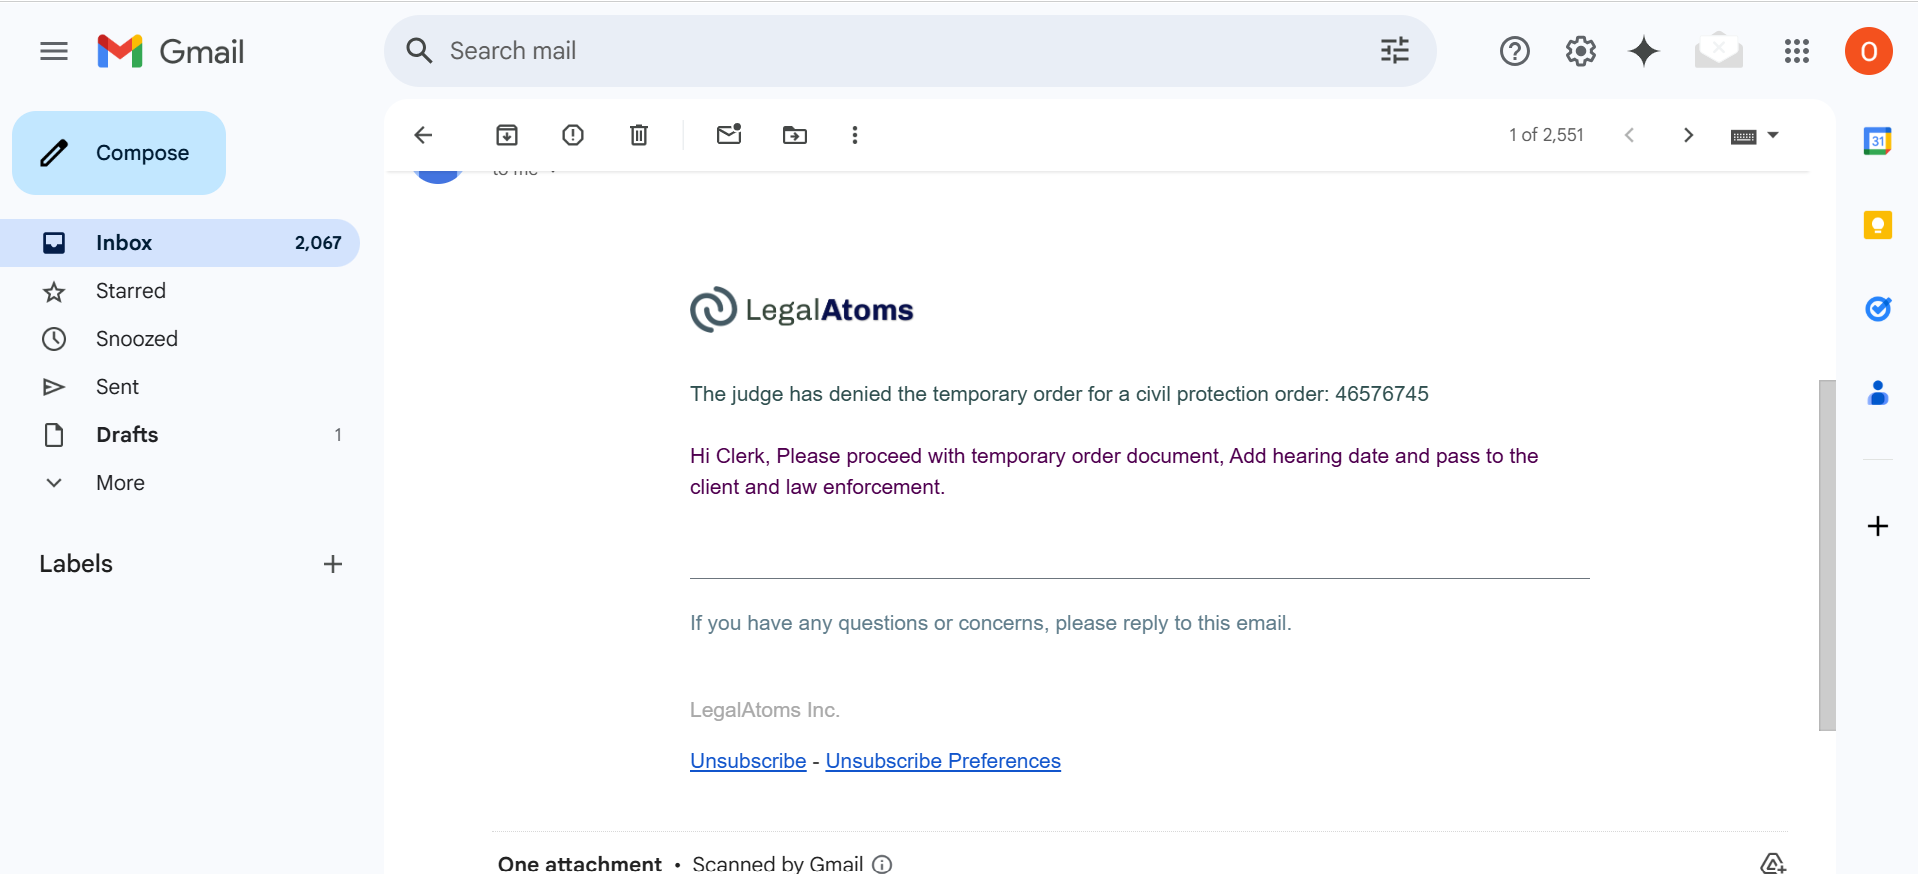
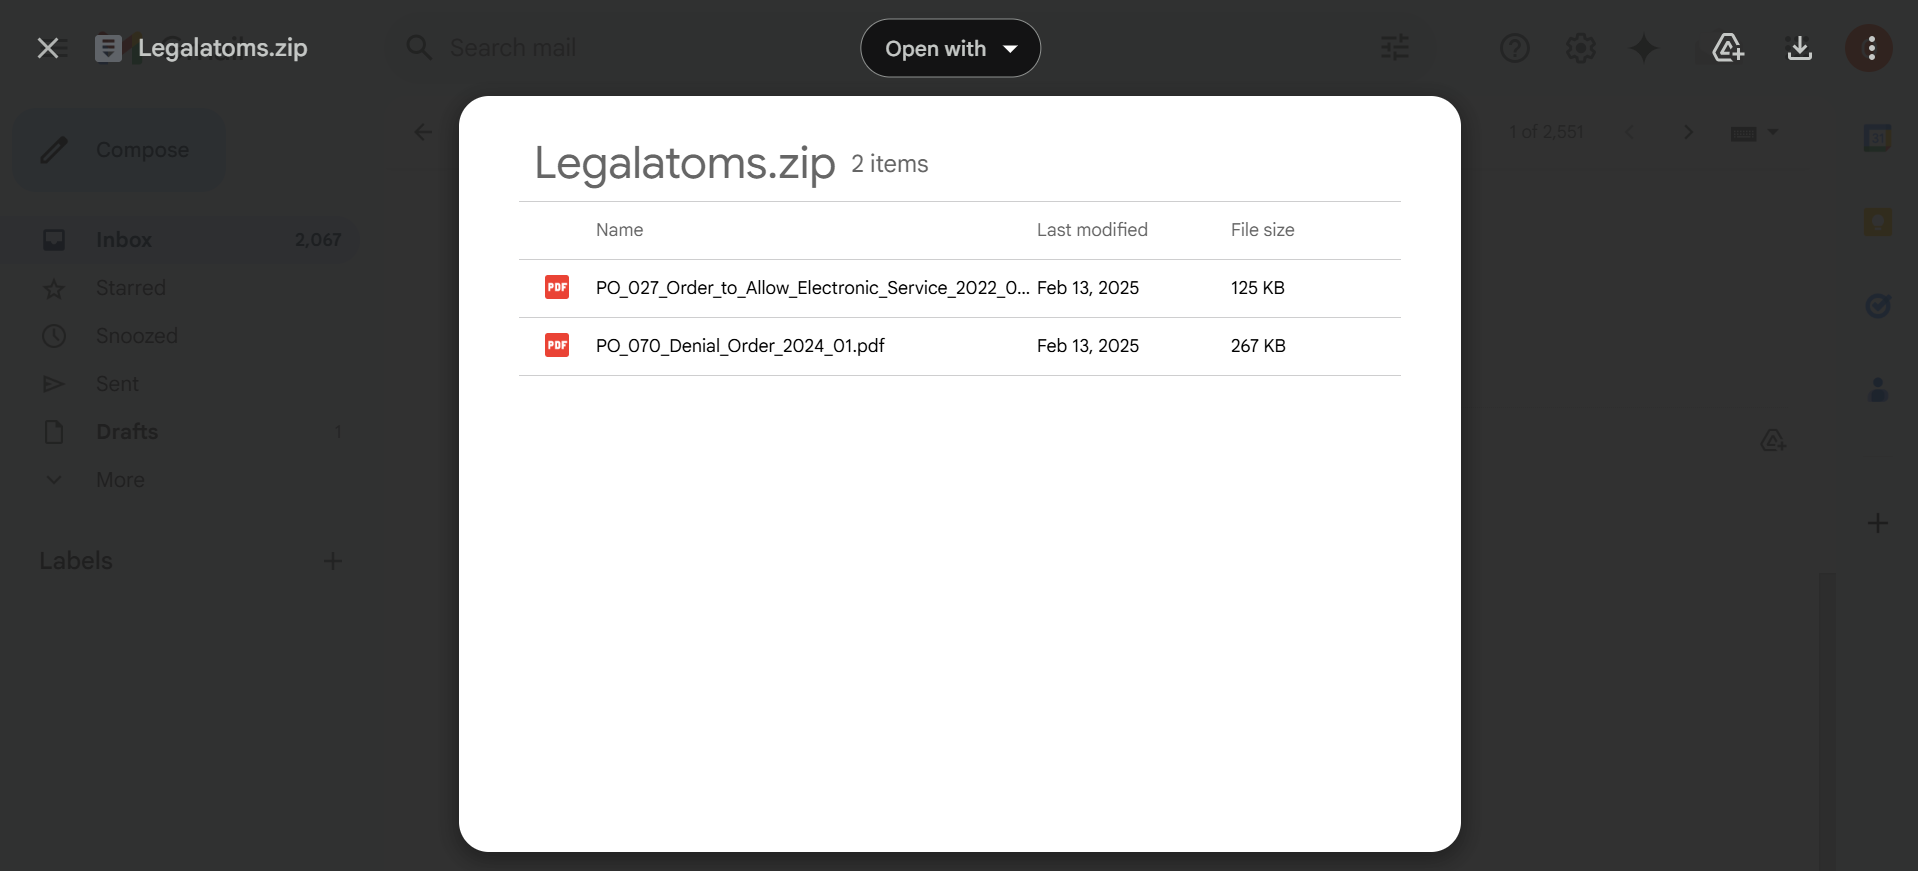
After Notify the clerk, the document will start auto-generate, after generating the document an email with the attached zip PDF document will be sent to the clerk.
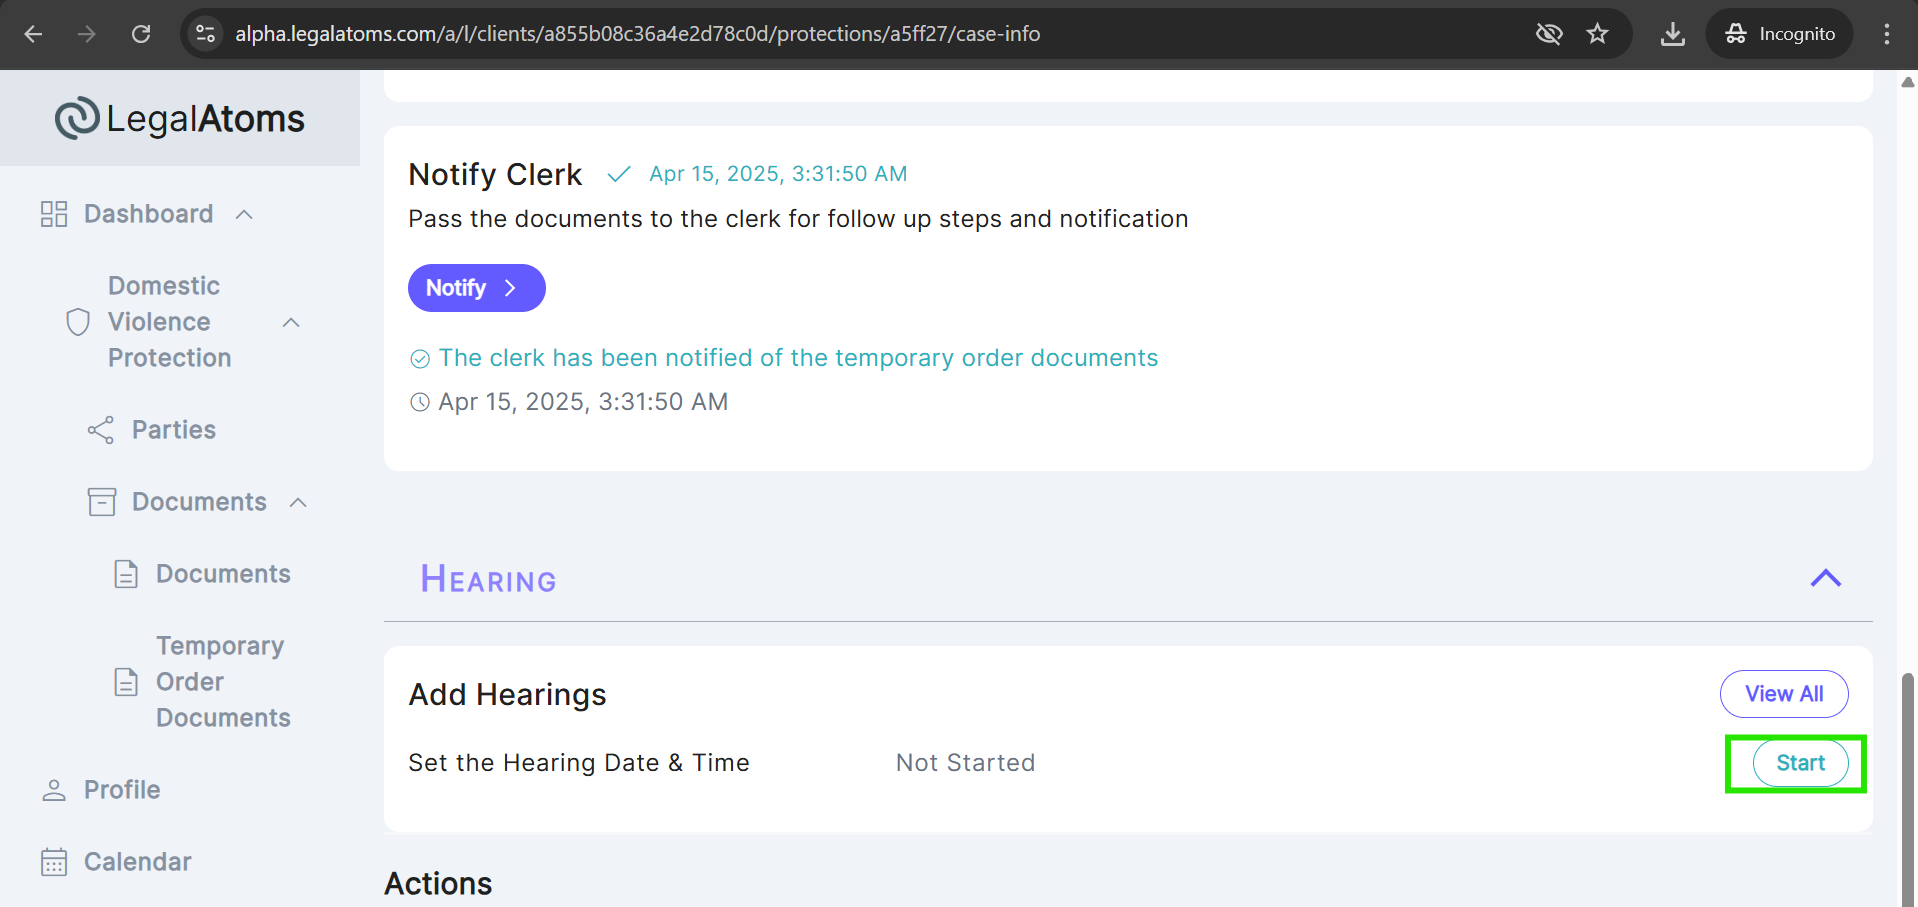
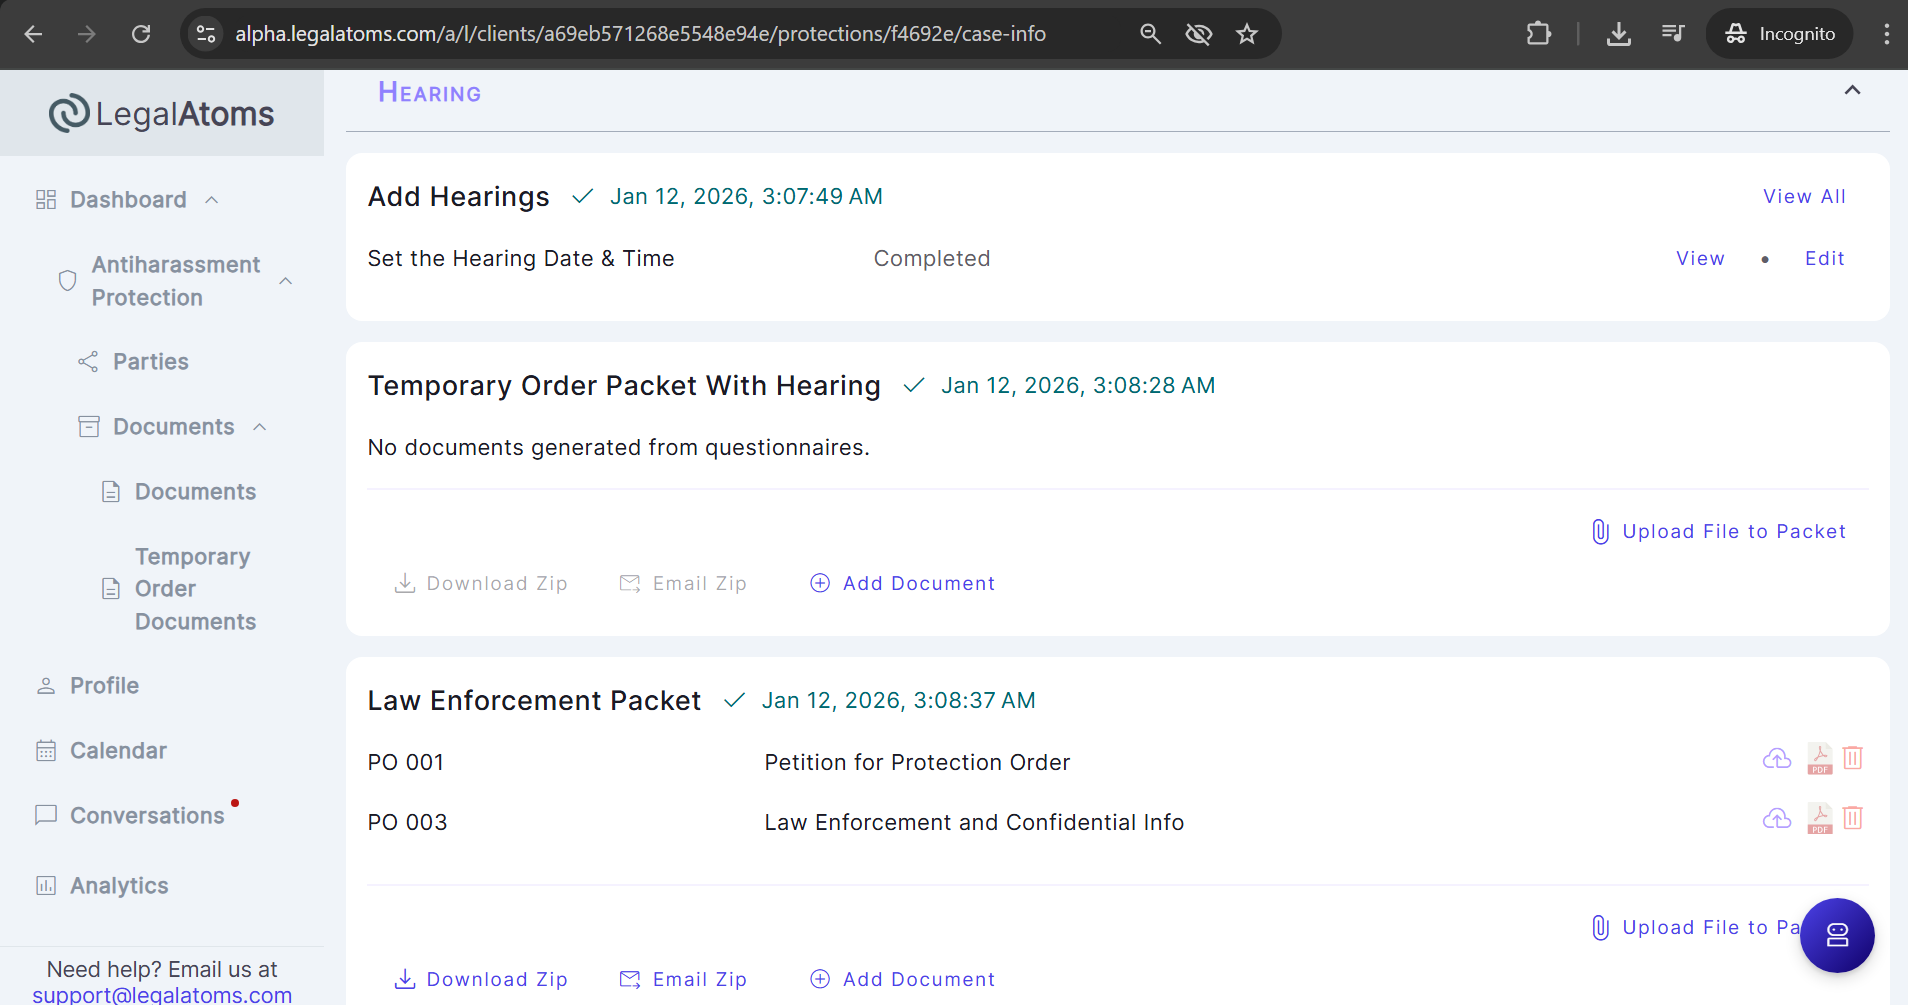
Step 10: The clerk set a hearing
After Notify the clerk, the section titled Document Packets and Notifications will be displayed. Hearings can be set as follows:
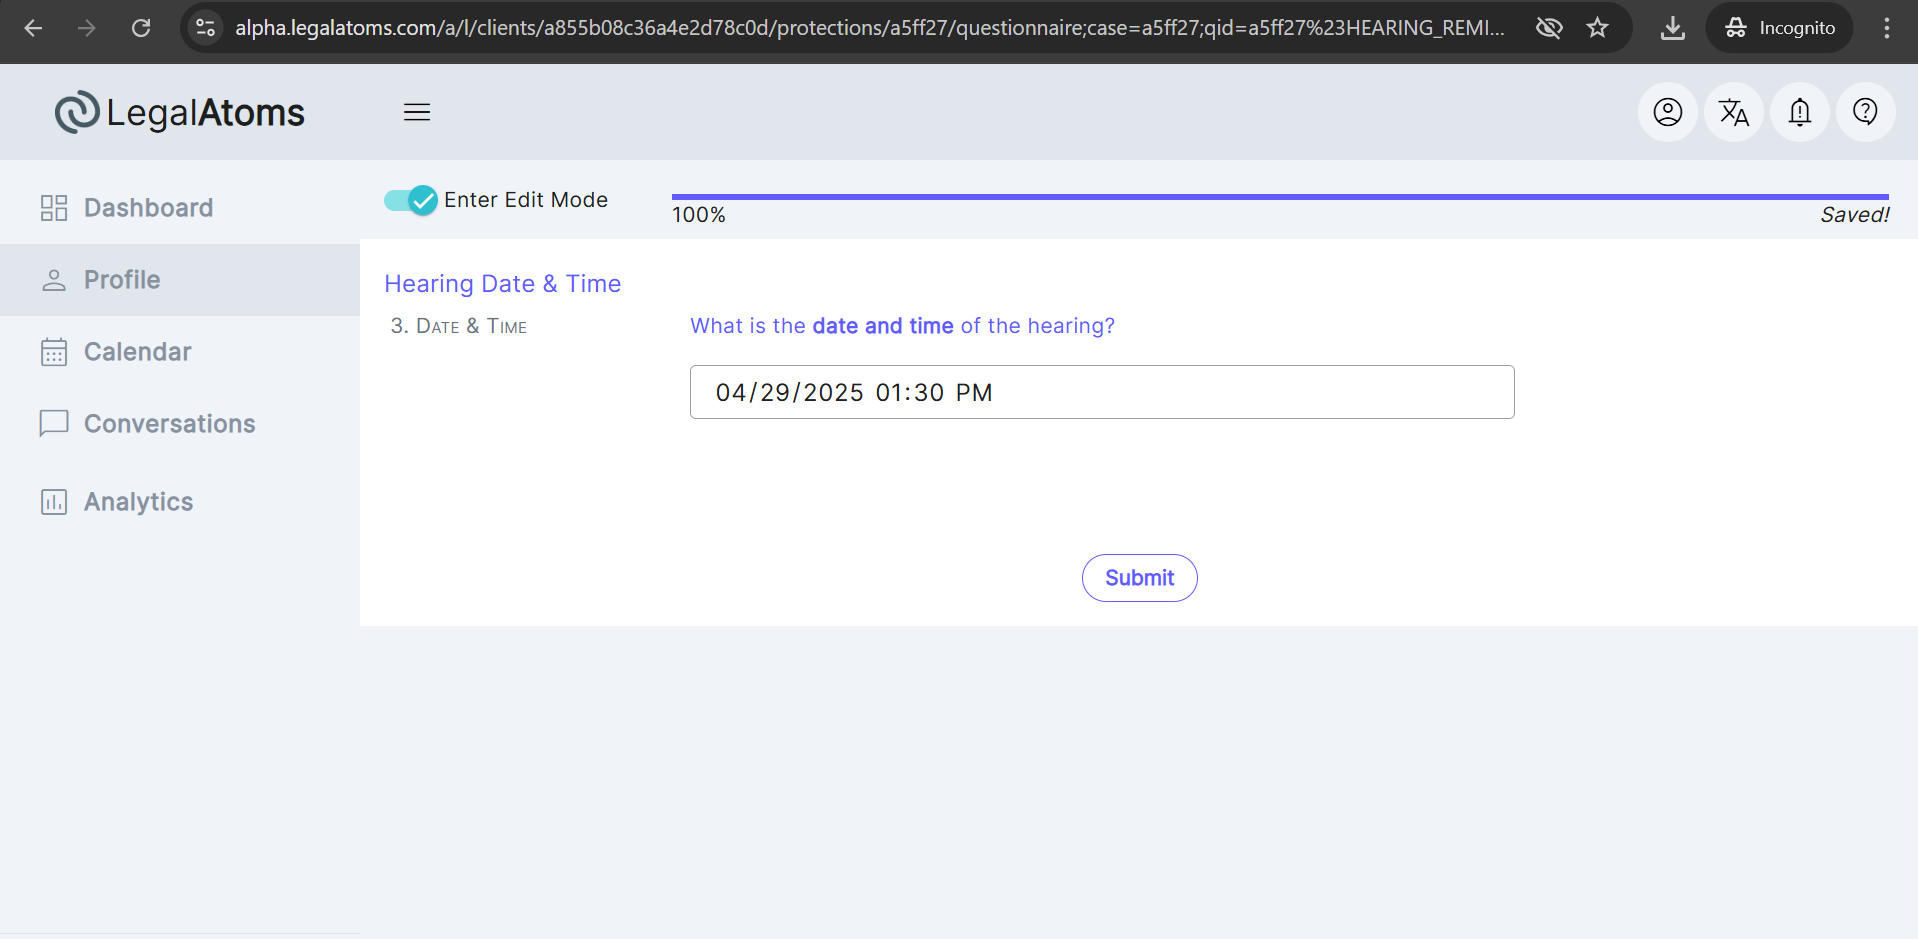
- Click on the Start button
- The hearing date and time are auto populate, and the clerk can also change the hearing date.
- Click on the Submit button
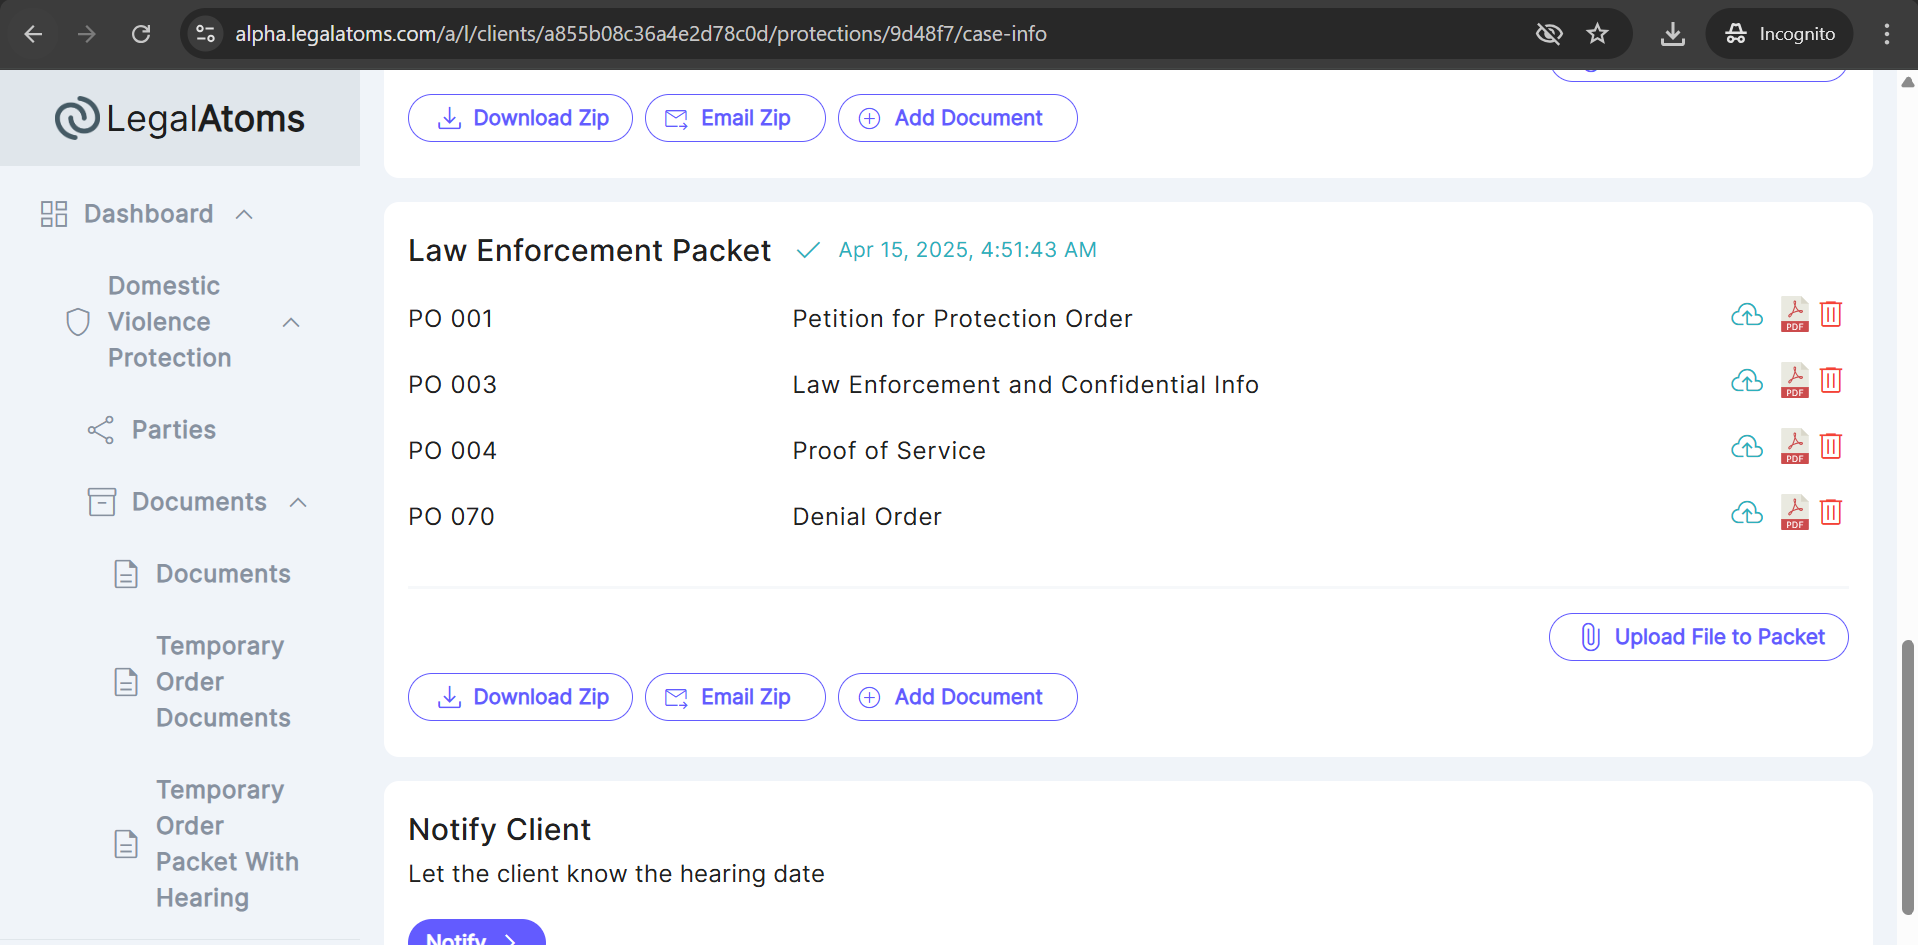
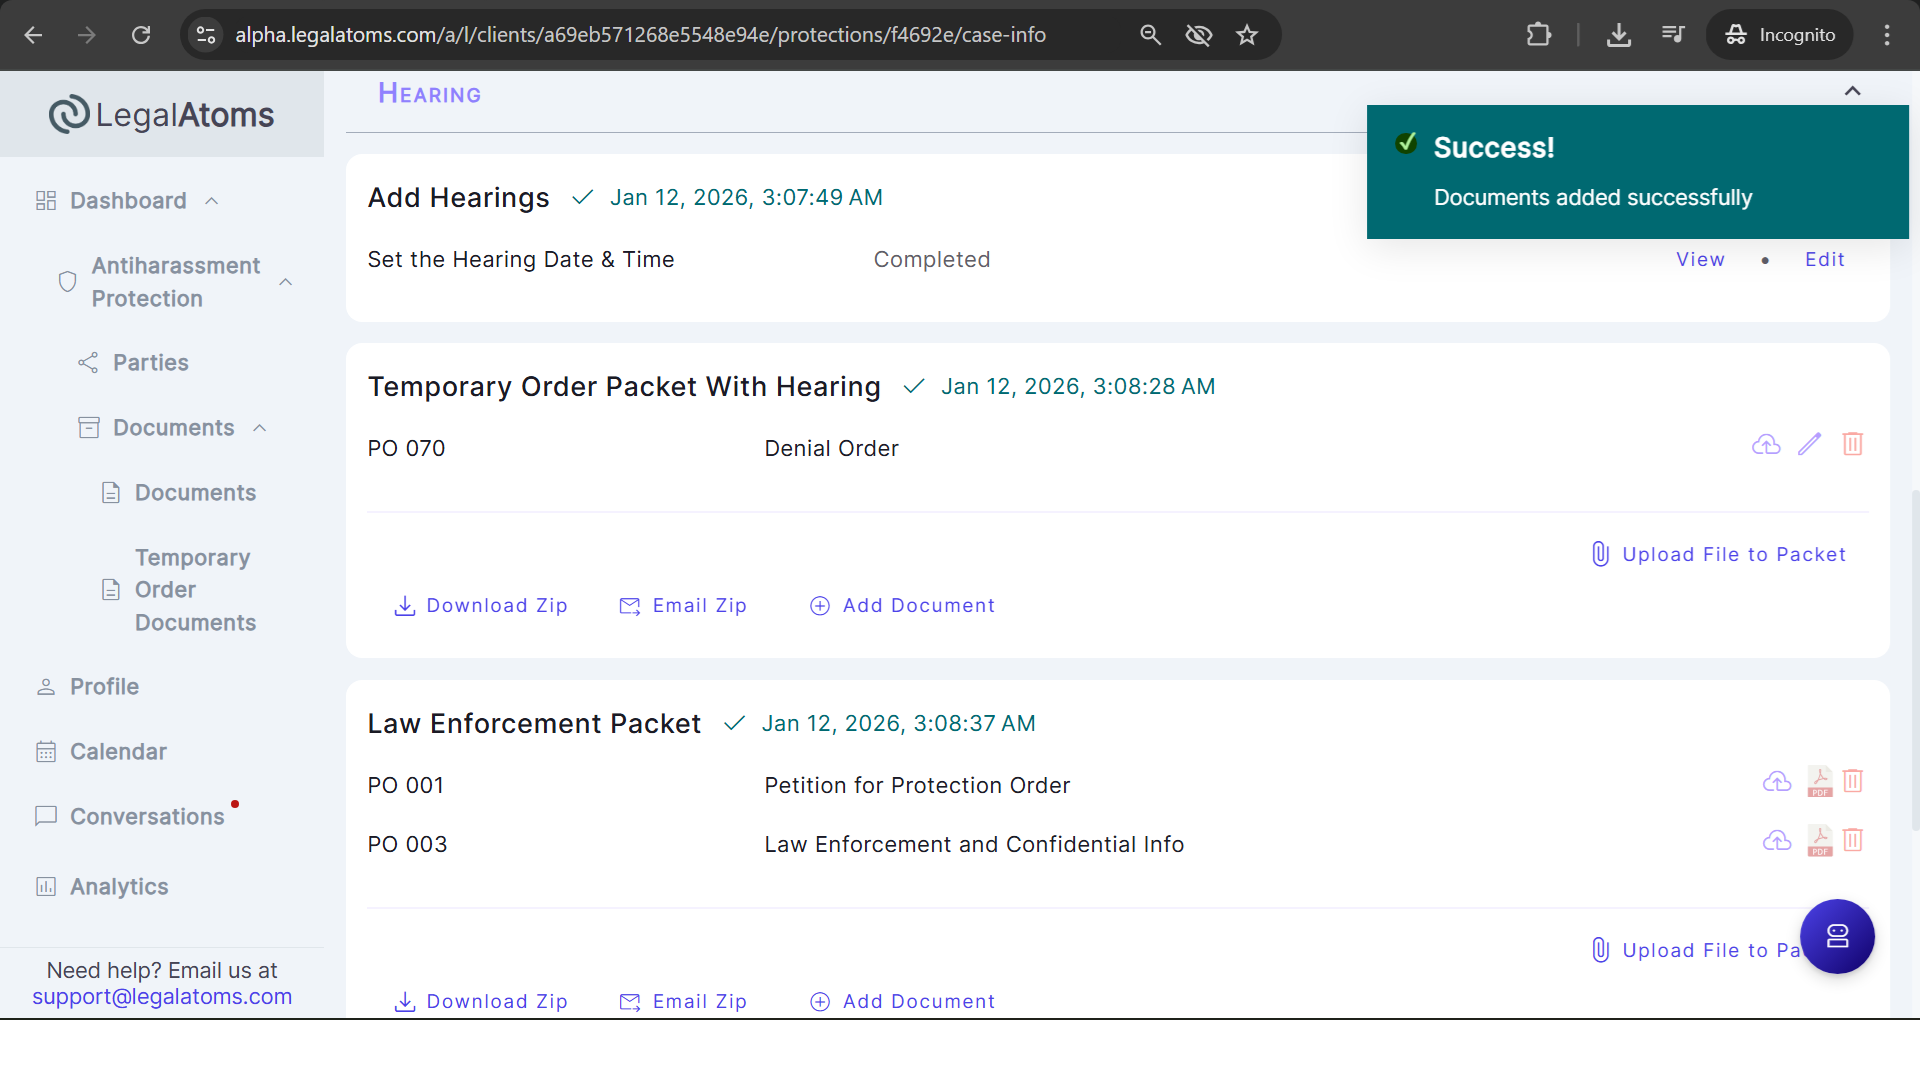
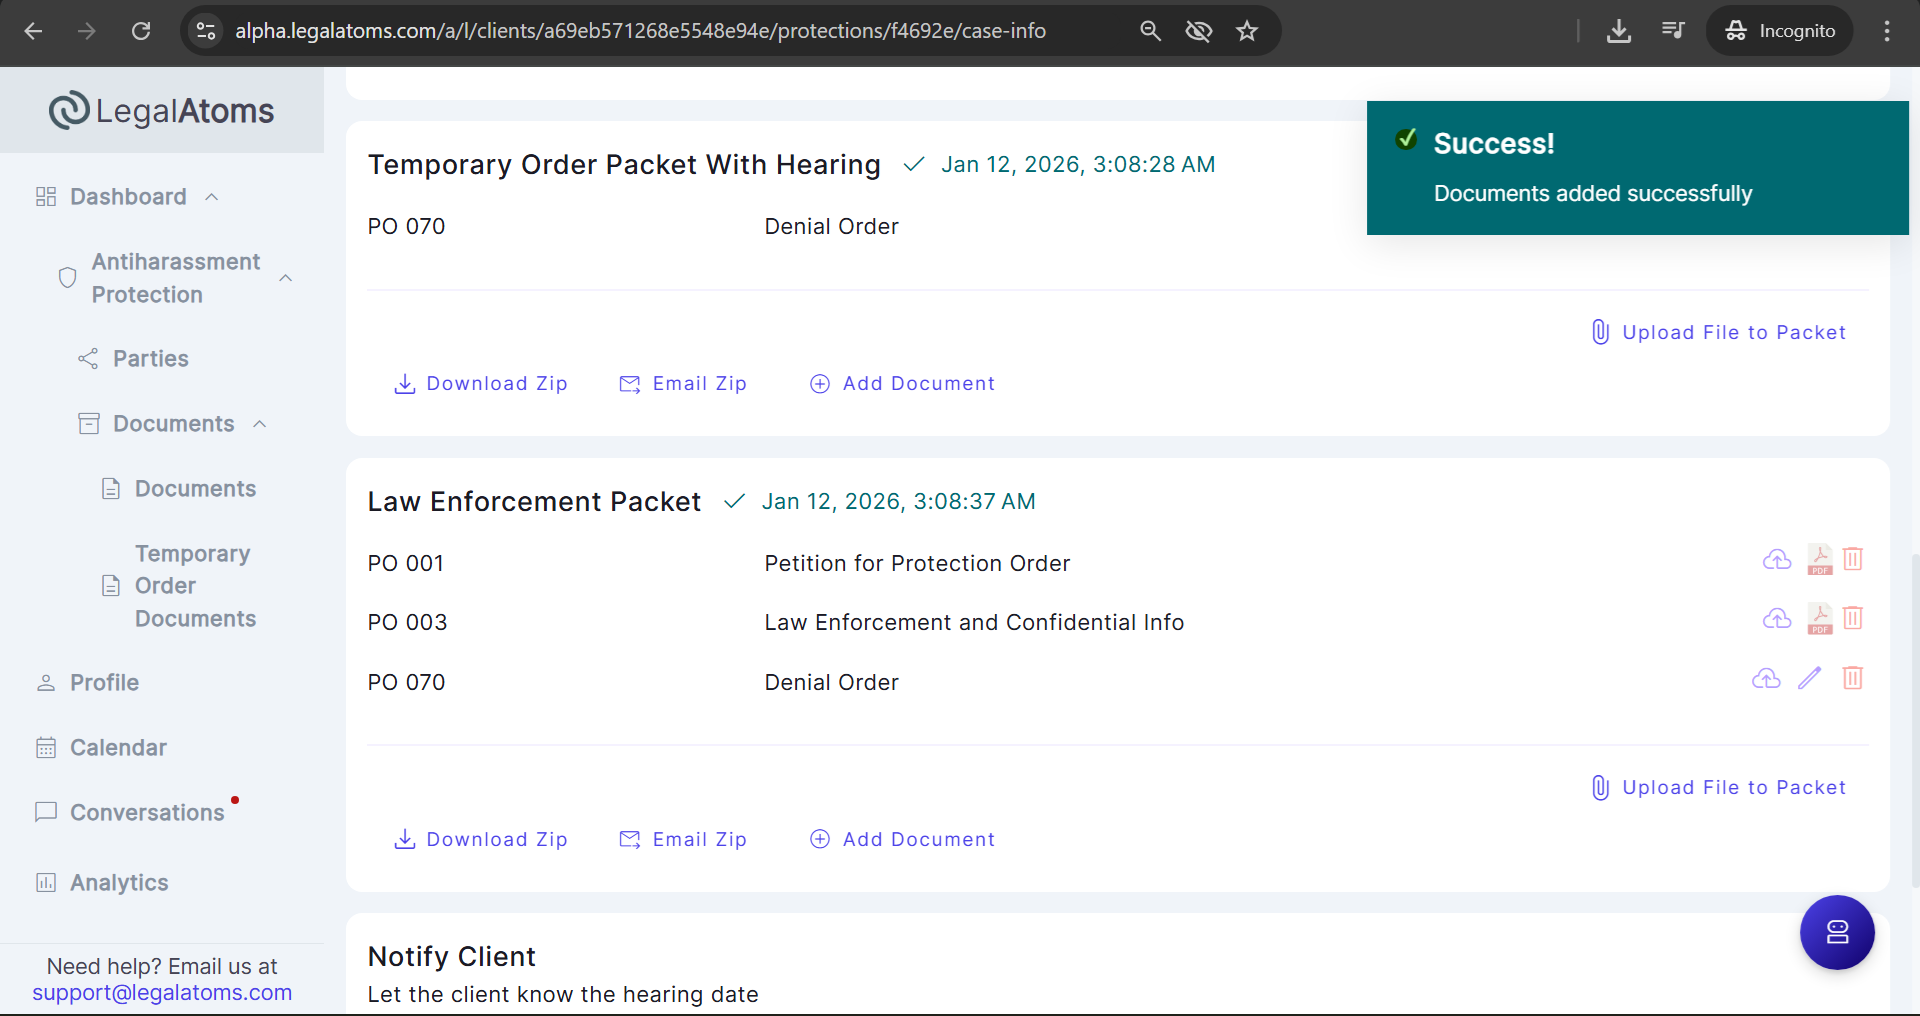
- The document will start auto-generate. After generating the document uploaded document will appear under (Temporary Order Packet With Hearing, and Law Enforcement Packet) section.
Note: We do not carry forward documents added in the Temporary Order section to the Temporary Order Packet With Hearing and Law Enforcement Packet sections via the Add Document button. If no document is generated in these sections, the judge/clerk can add it again using the Add Document button.
We never generate any missing LegalAtoms documents for uploaded cases. If no document is generated in the (Temporary Order Packet With Hearing, and Law Enforcement Packet), the judge/clerk can add it via the “Add document” button.
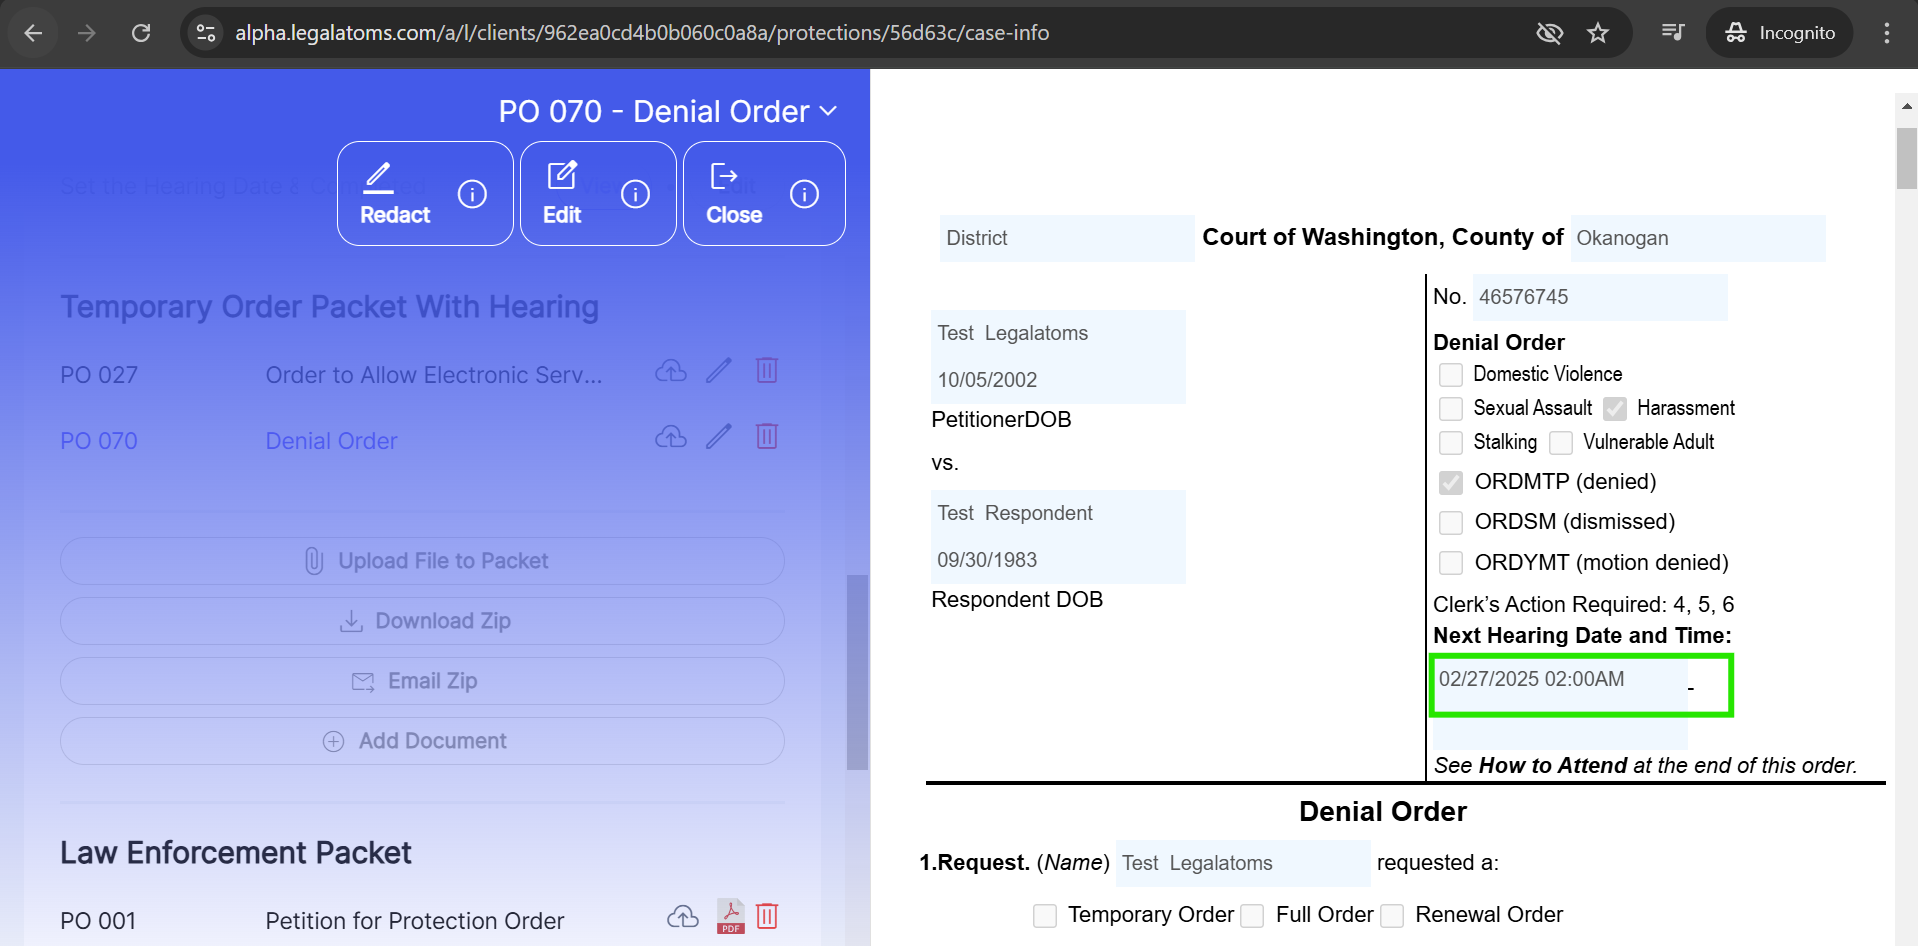
After generating the document, the hearing date will be populated in (Denial Order) document. If the document is added via the “Add Document” button
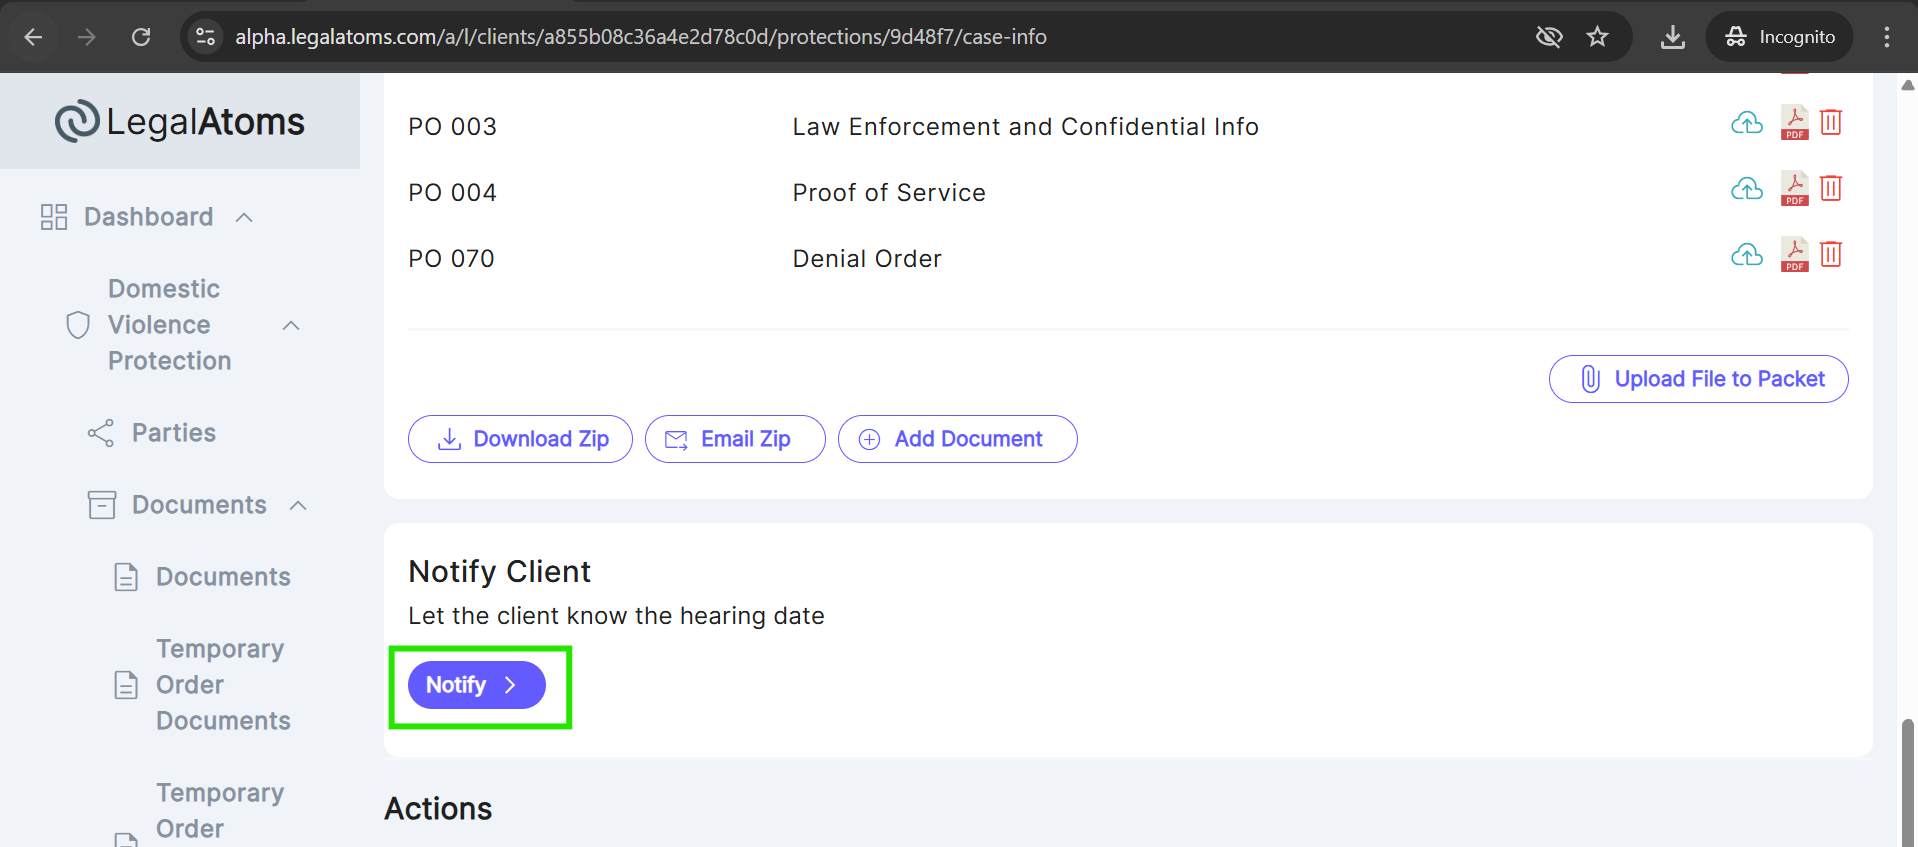
Step 11: Notify Client
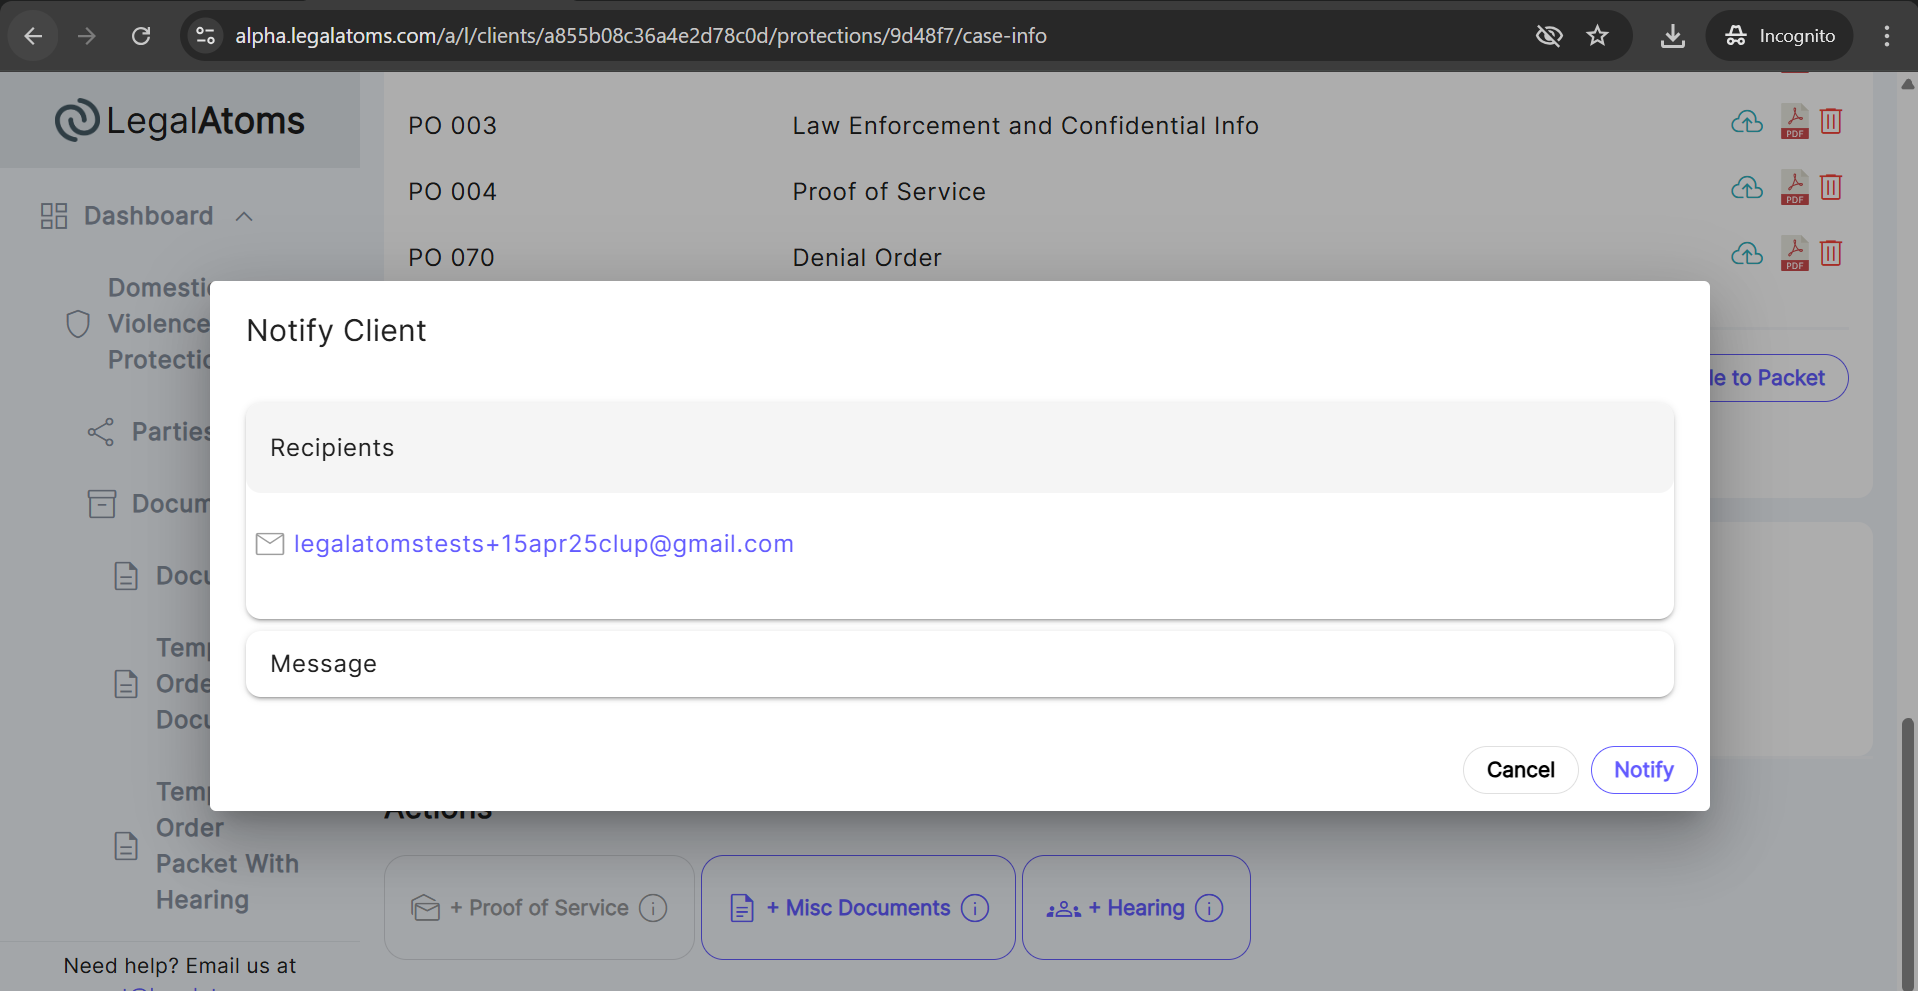
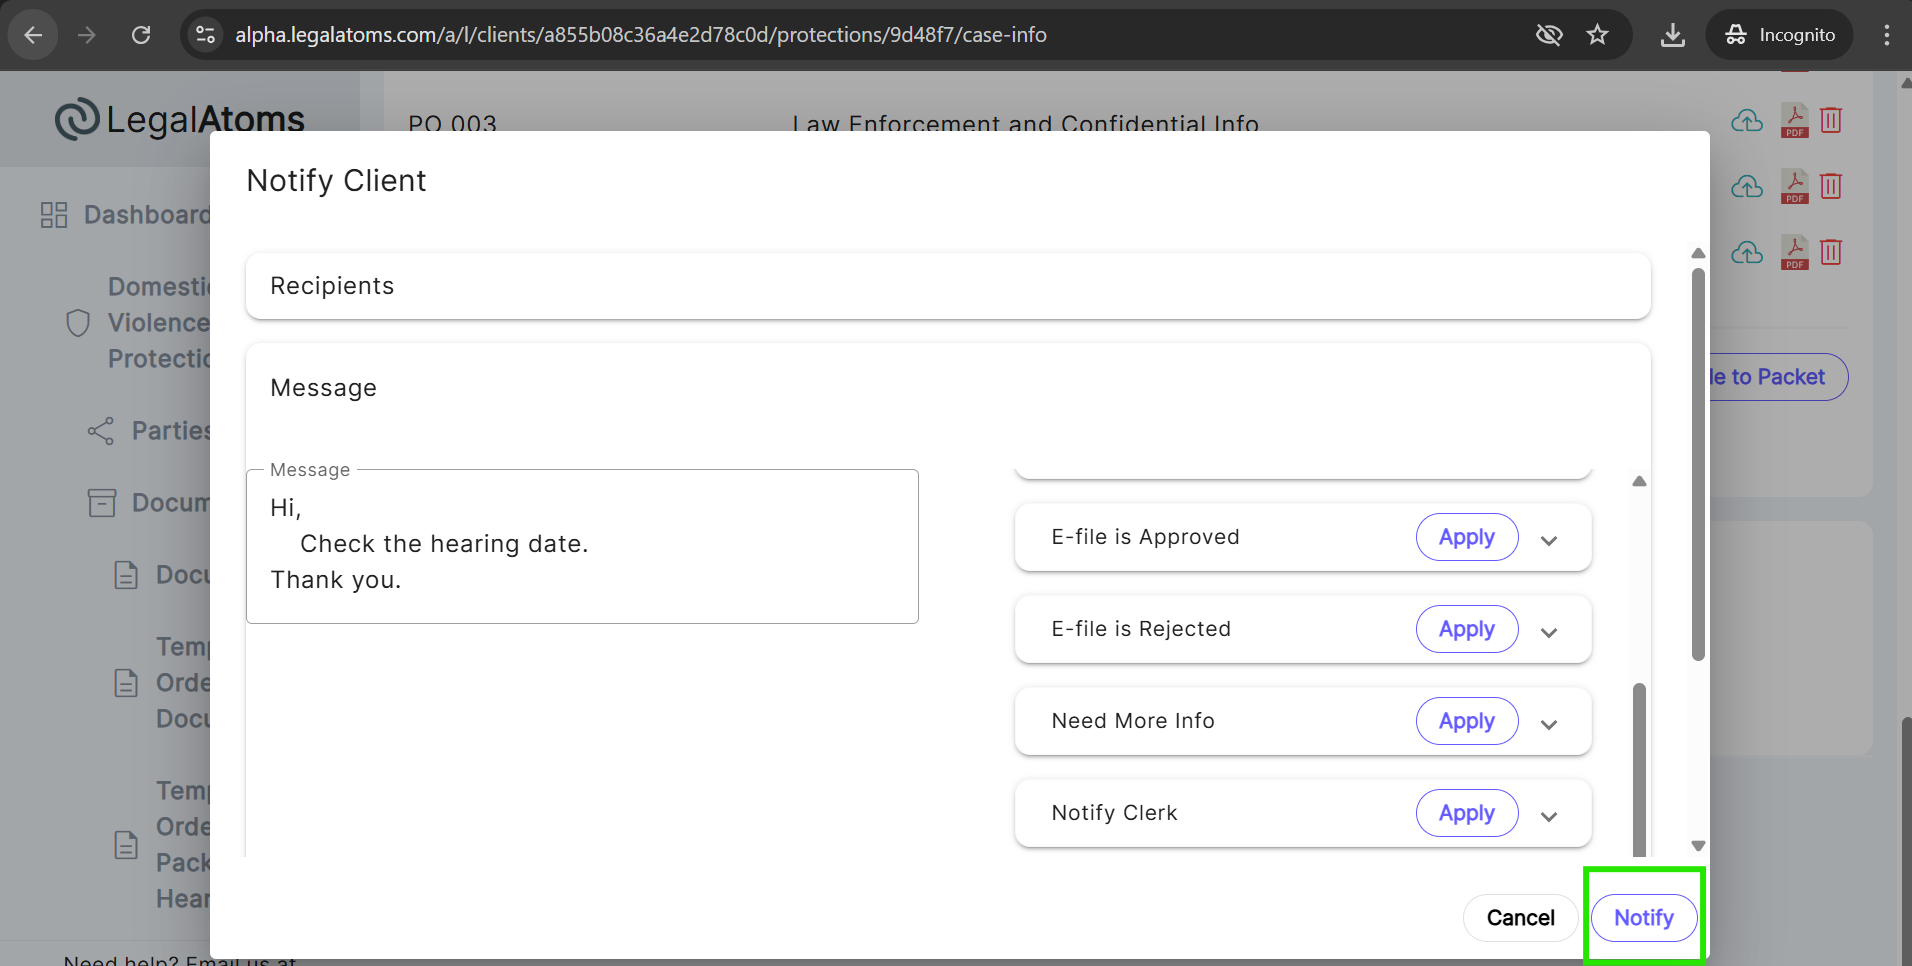
Simply click on the Notify button to send the “temporary order Packet with hearing” documents to the client. A popup will appear where the clerk adds a message and clicks the Notify button.
Note: If the clerk/judge did not provide the petitioner’s email while uploading the case, while Notify the email will not be sent to the petitioner.
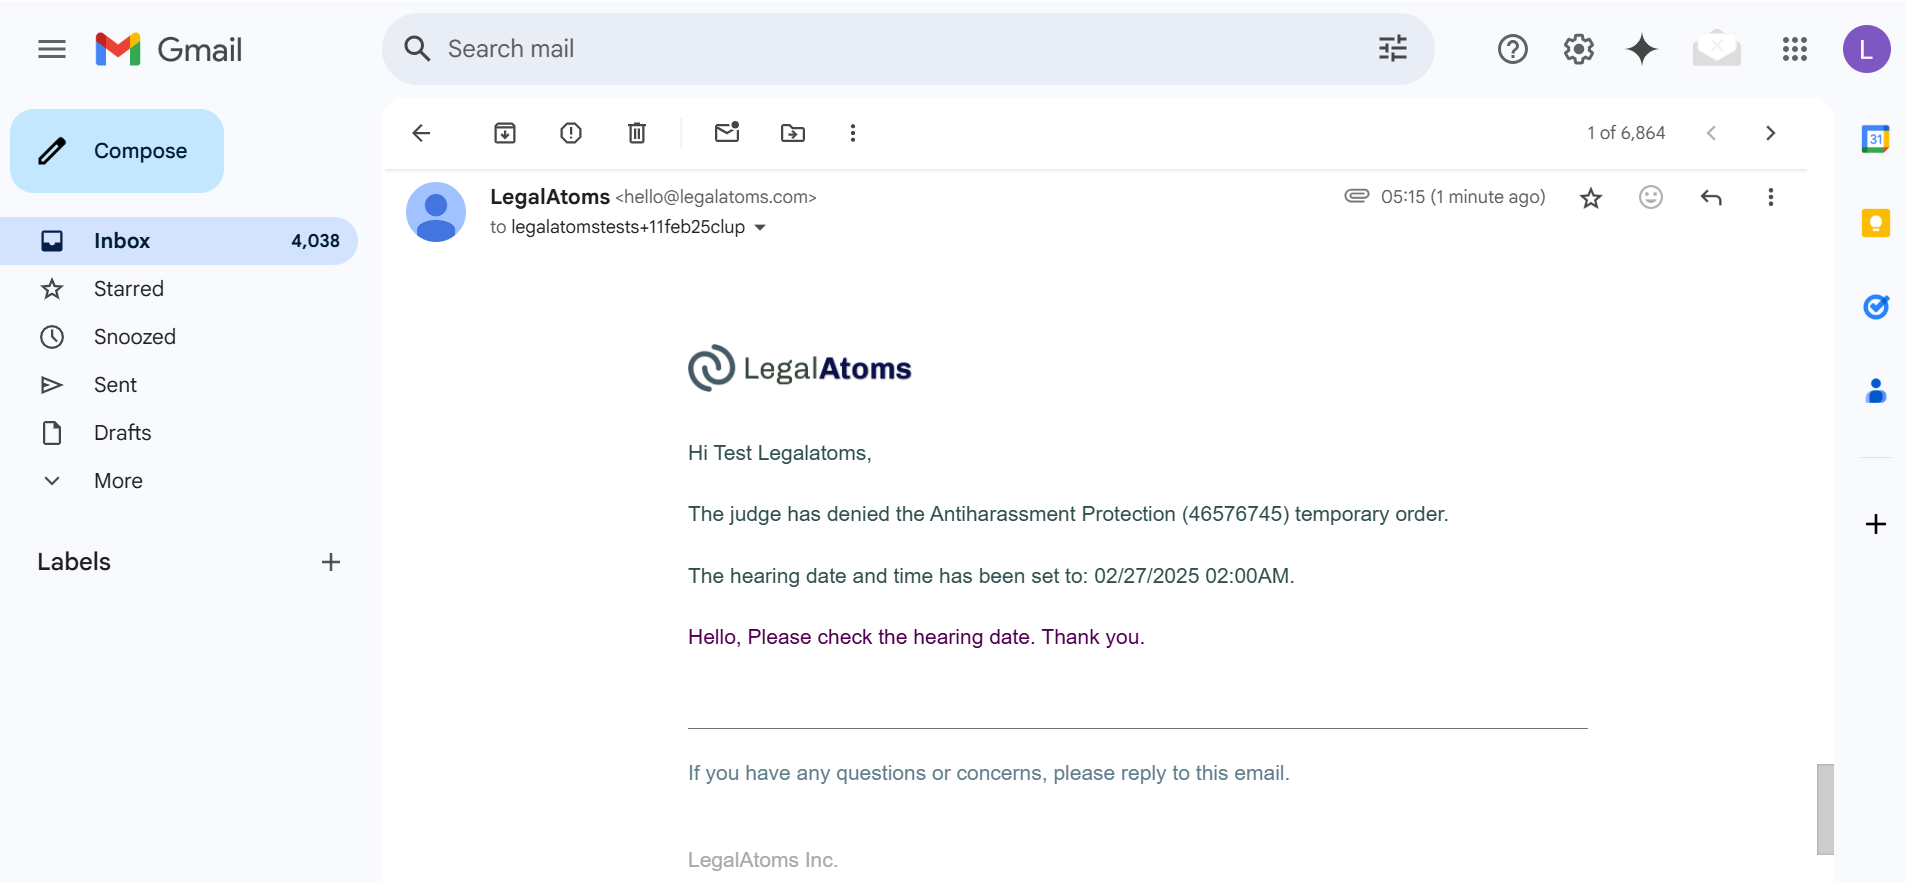
After Notify the client, the document will start auto generate, after generating the document an email with the attached zip PDF document will be sent to the client.
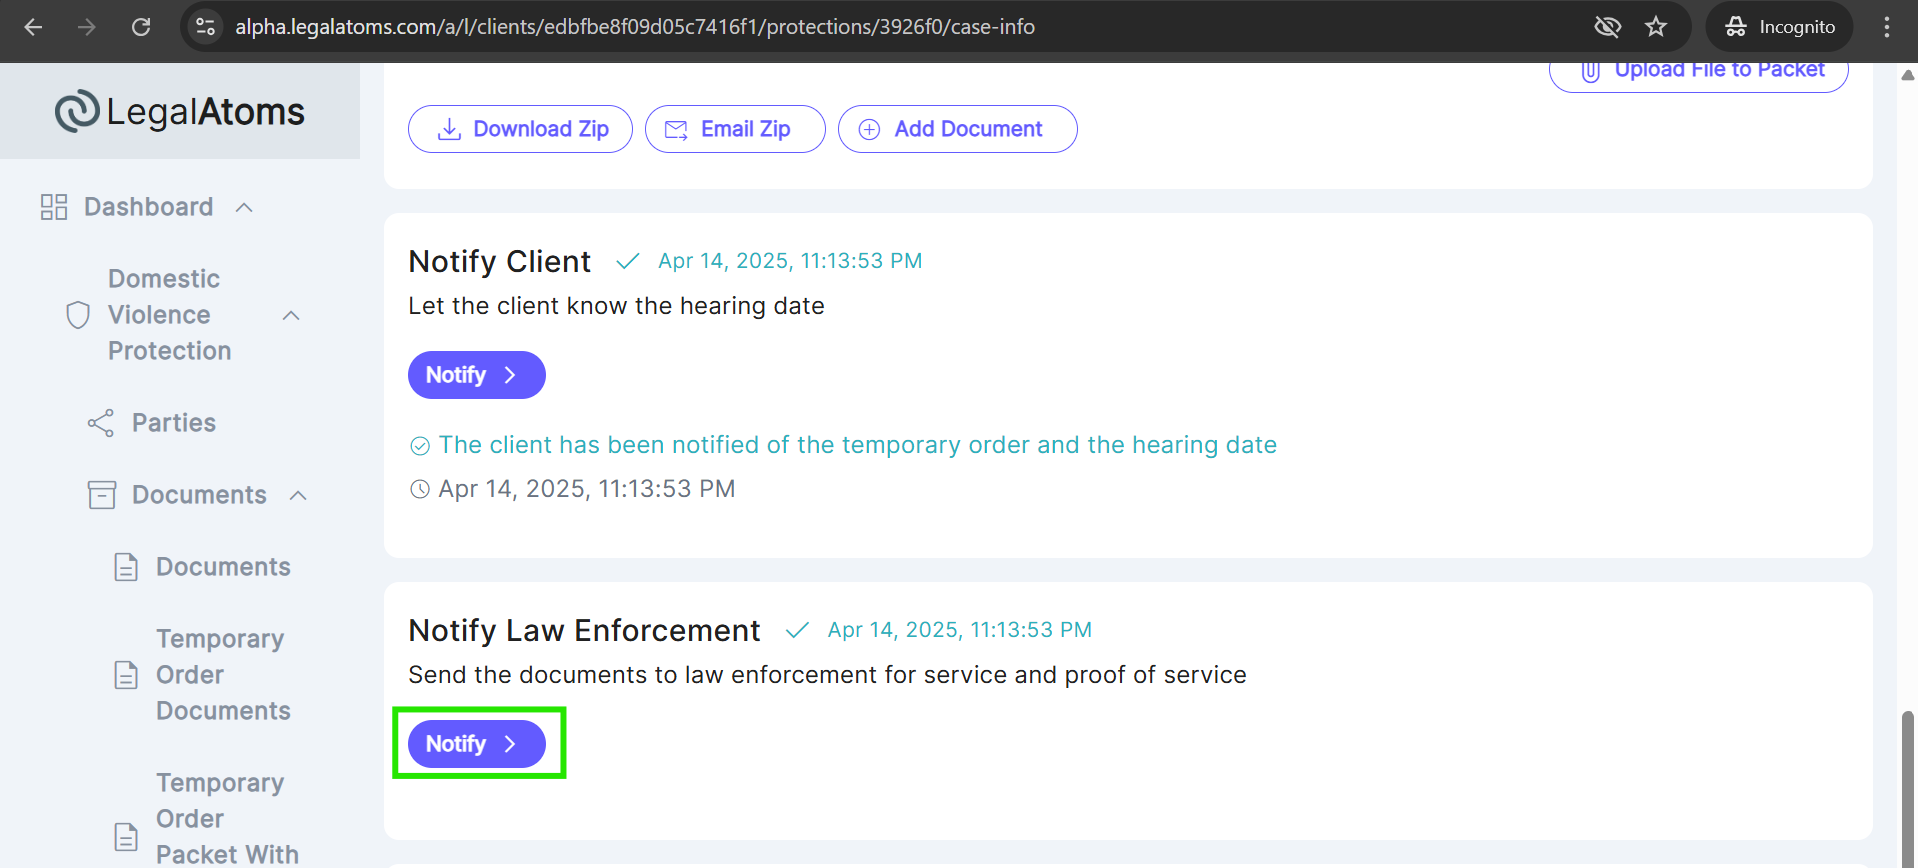
Step 12: Notify Law Enforcement
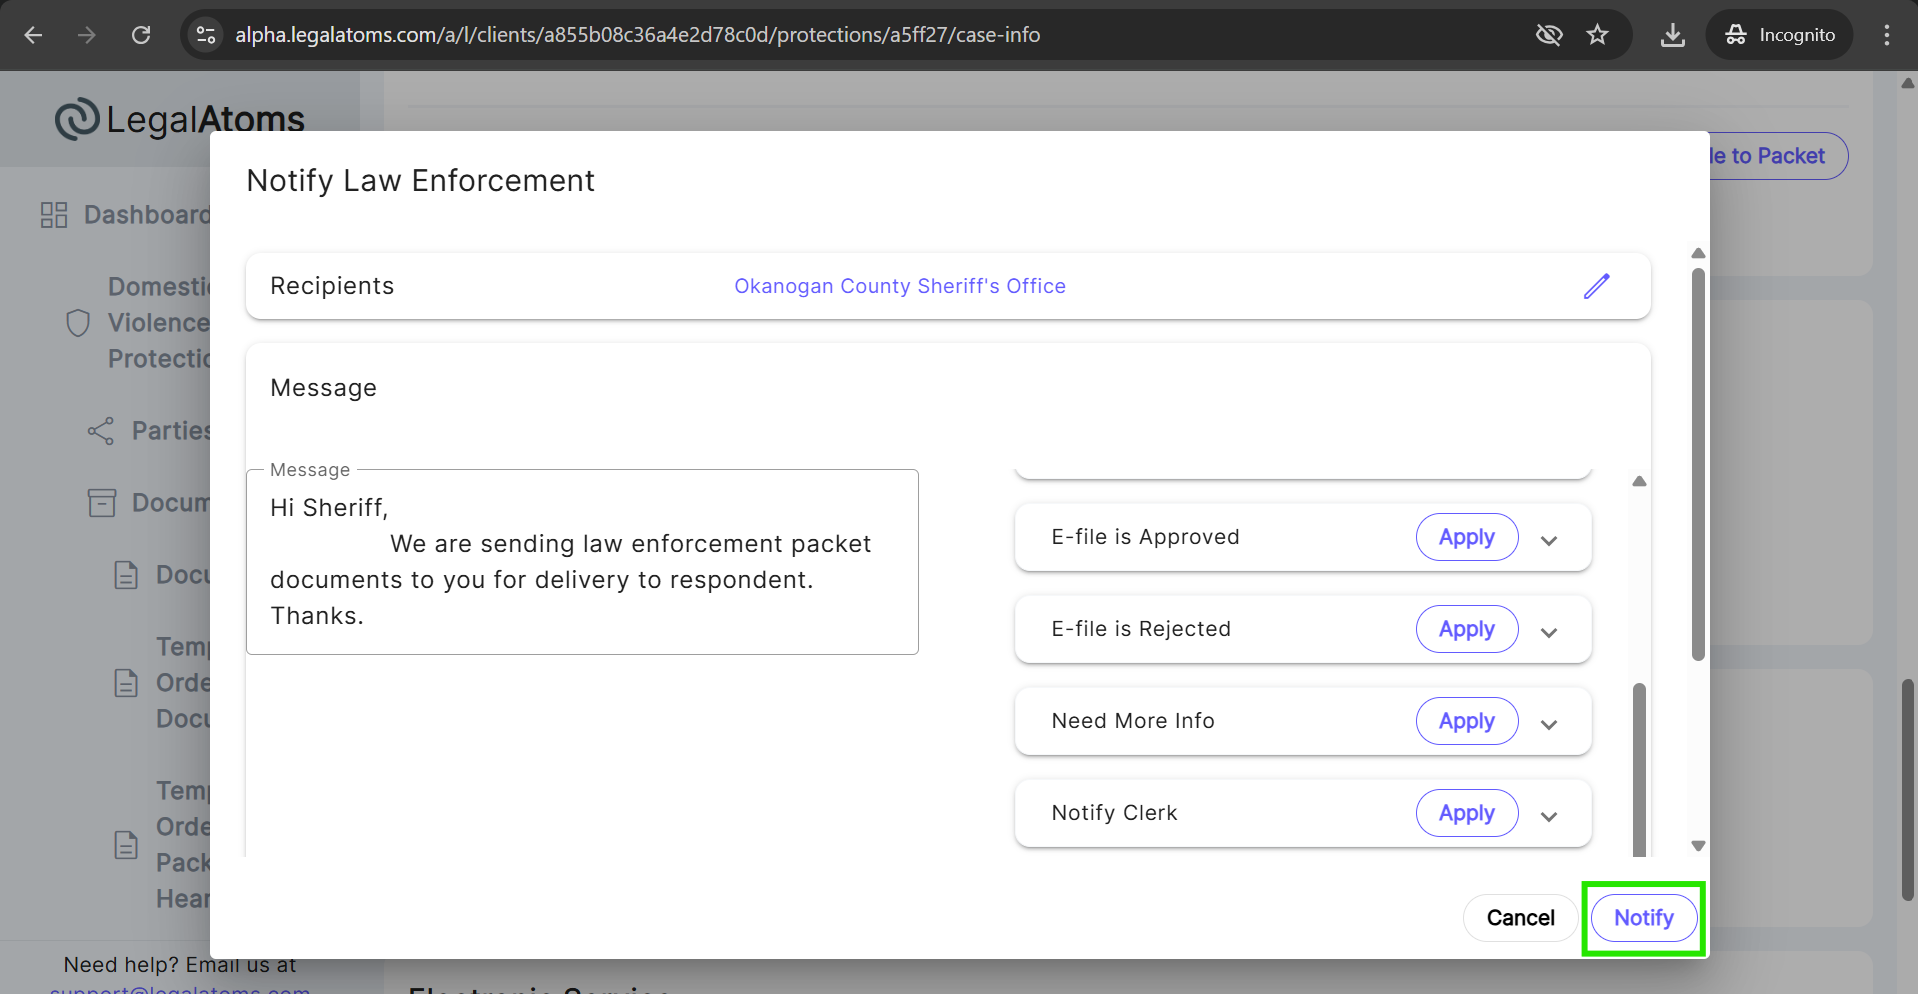
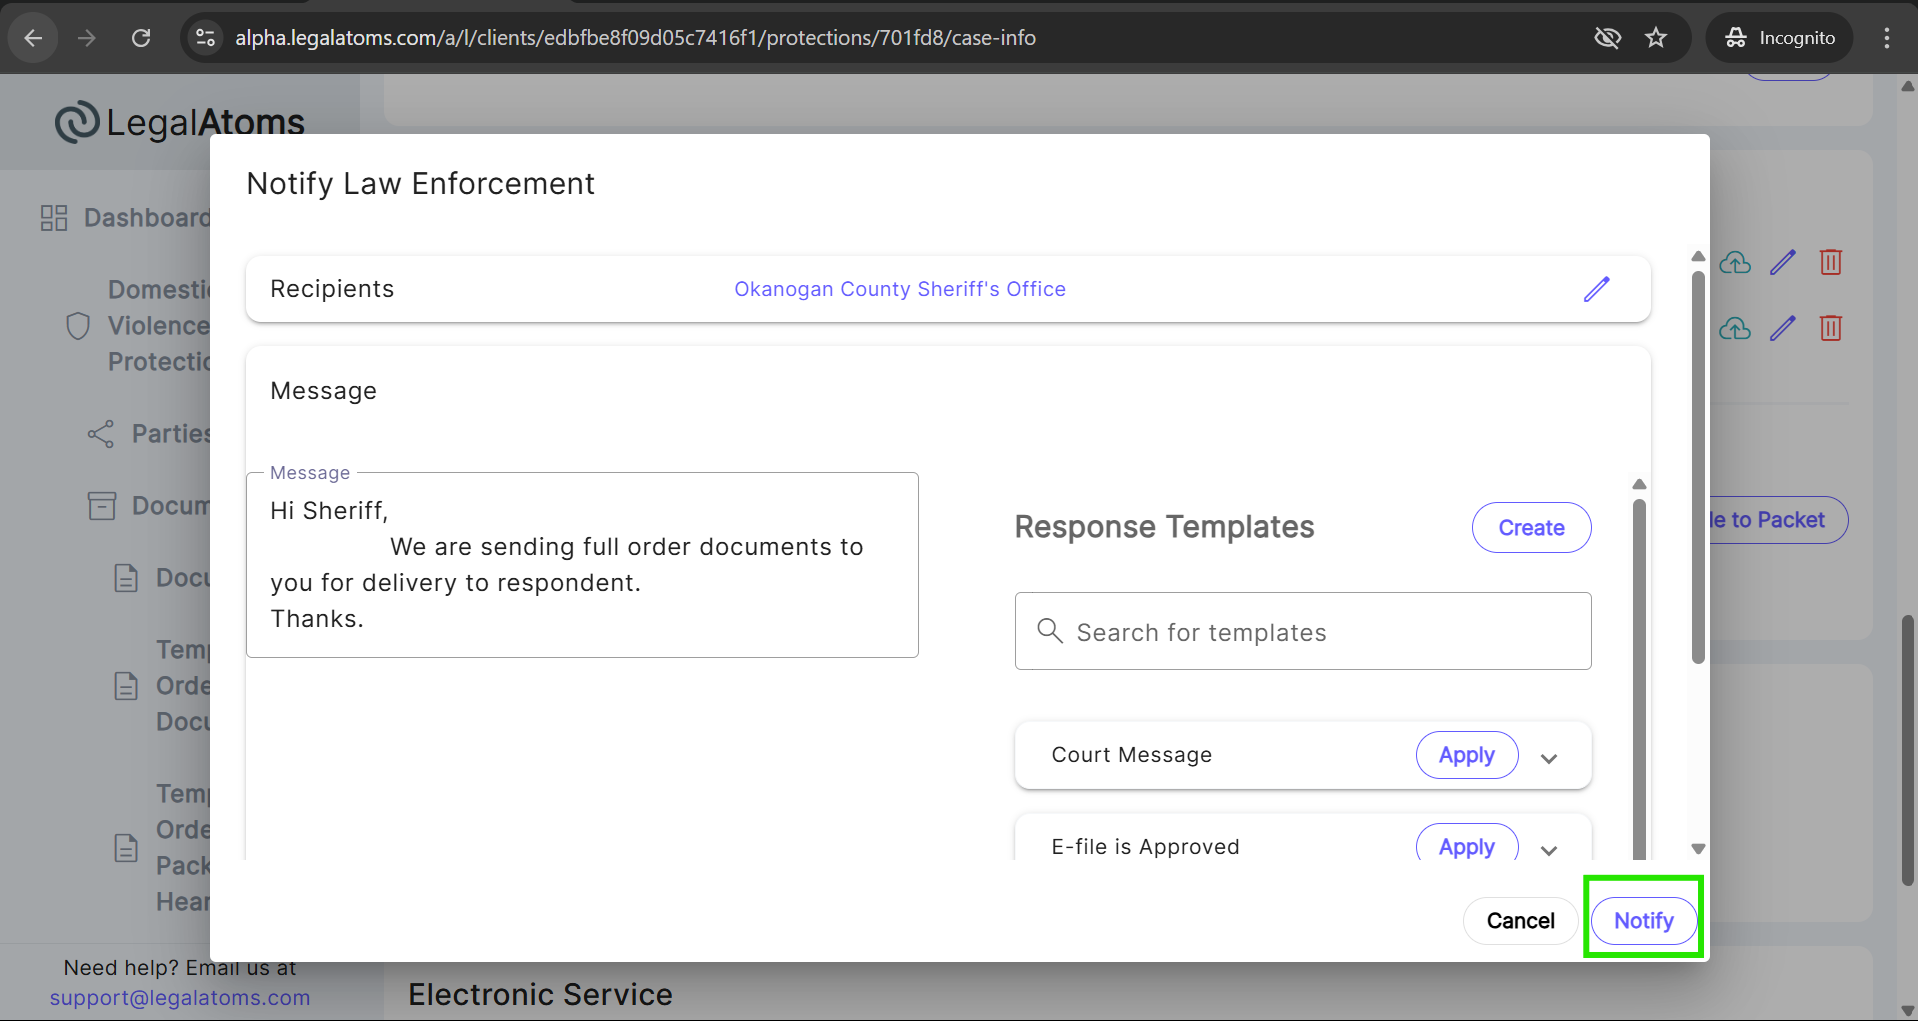
Simply click on the Notify button to send the “Law Enforcement Packet” documents to the sheriff. A popup will appear where the law enforcement name is auto-populated, and the clerk adds a message and clicks the Notify button.
The clerk can Notify different law enforcement agencies by simply re-click “Notify” law enforcement in which case the law enforcement packet of documents would be delivered to the subsequent law enforcement agency.
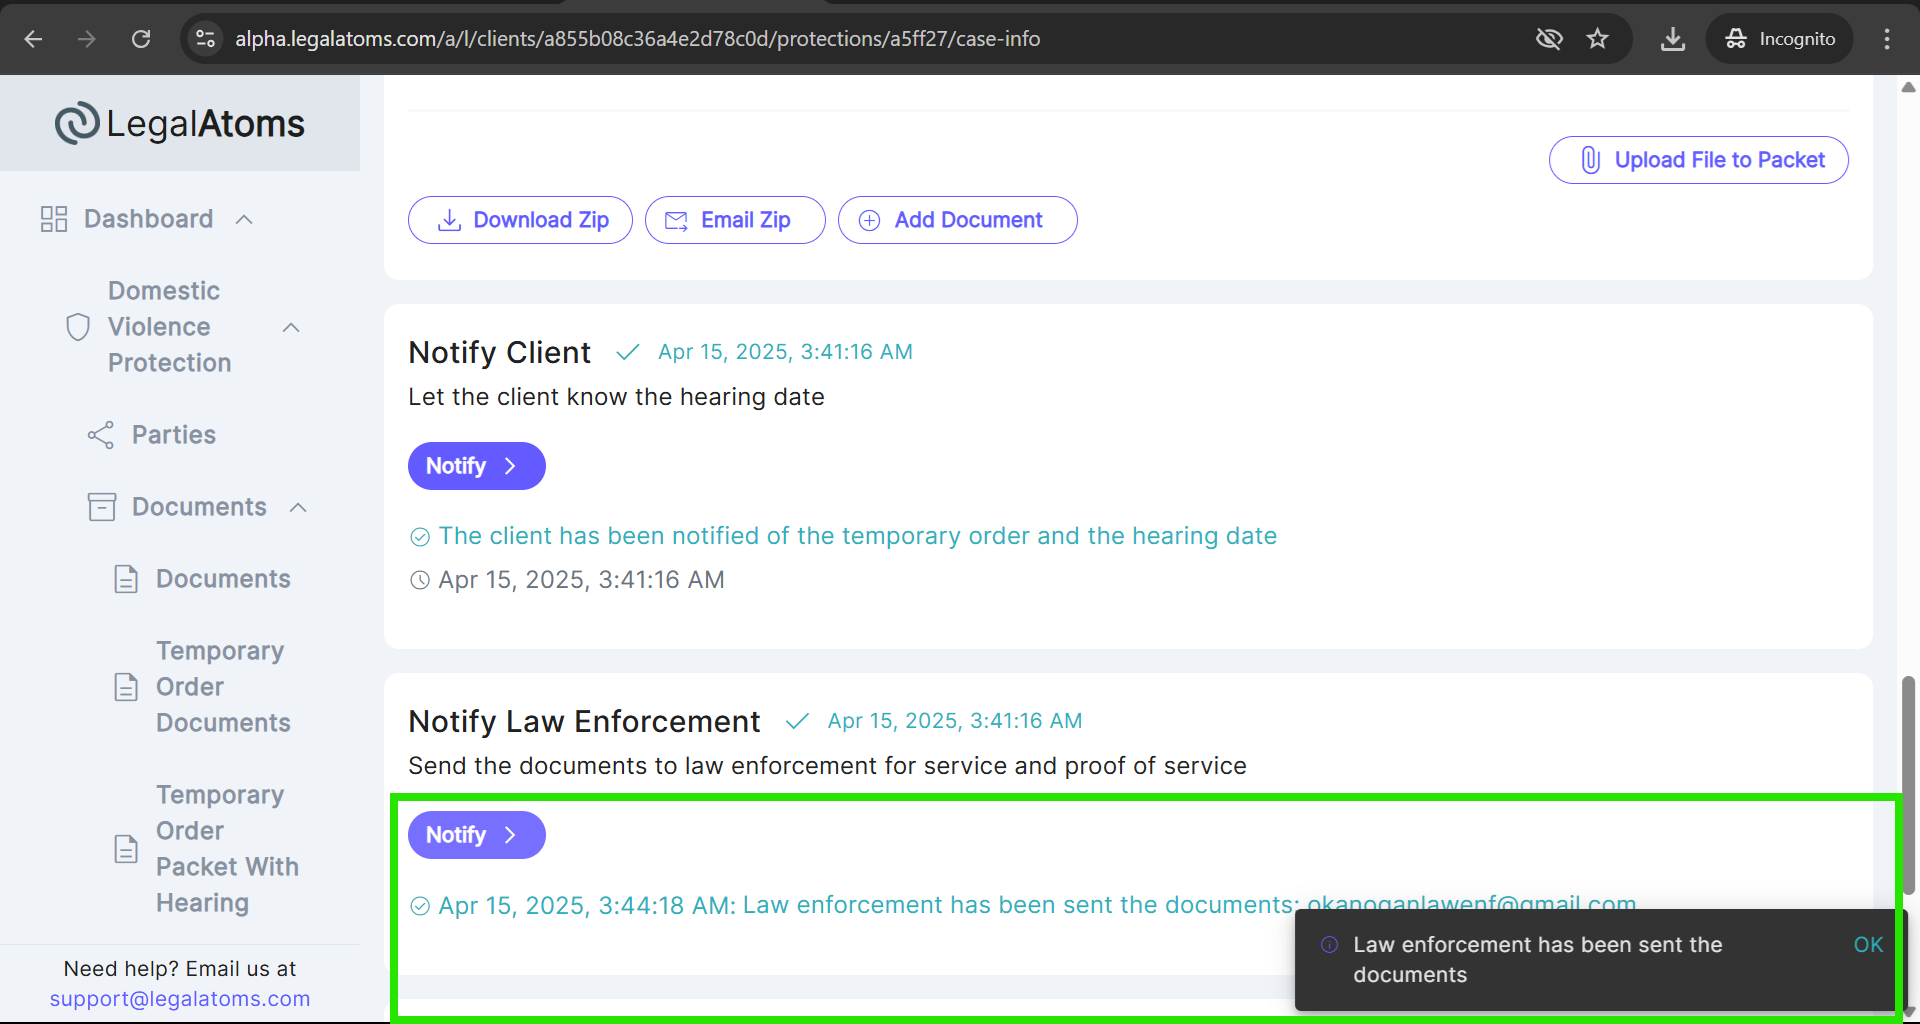
After Notify the LE, the document will start auto generate, after generating the document an email with the attached zip PDF document will be sent to the sheriff.

Step 13: Judge Denies Full Order
After the Proof of Service and hearing documents are completed, the Full Order section becomes visible to the judge. From there, the judge can begin the process to grant or deny the full order by clicking the “Start” button.
- Choose whether to Grant / Deny the protection order
- Submit the form
Step 14: Make Edits and Sign the Full Order Documents
After Deny the full protection order, the document starts auto generate and you will see the uploaded full order document that matches with the current section document.
If the judge denies the full order, LegalAtoms does not provide the option to send a notification. The “Notify” section remains disabled in cases of denial.
We never generate any missing LegalAtoms documents for uploaded cases. If no document is generated in the full order document, the judge can add it via the “Add document” button.

LegalAtoms allows the judge to add a signature to a Full Order document using the “Edit HTML” feature available for the added document. Follow the given steps to add a signature to the document.
- Click the Edit icon/button to open the document in edit mode.
- In the document editor, click on the top left Edit button to switch to Edit HTML view.
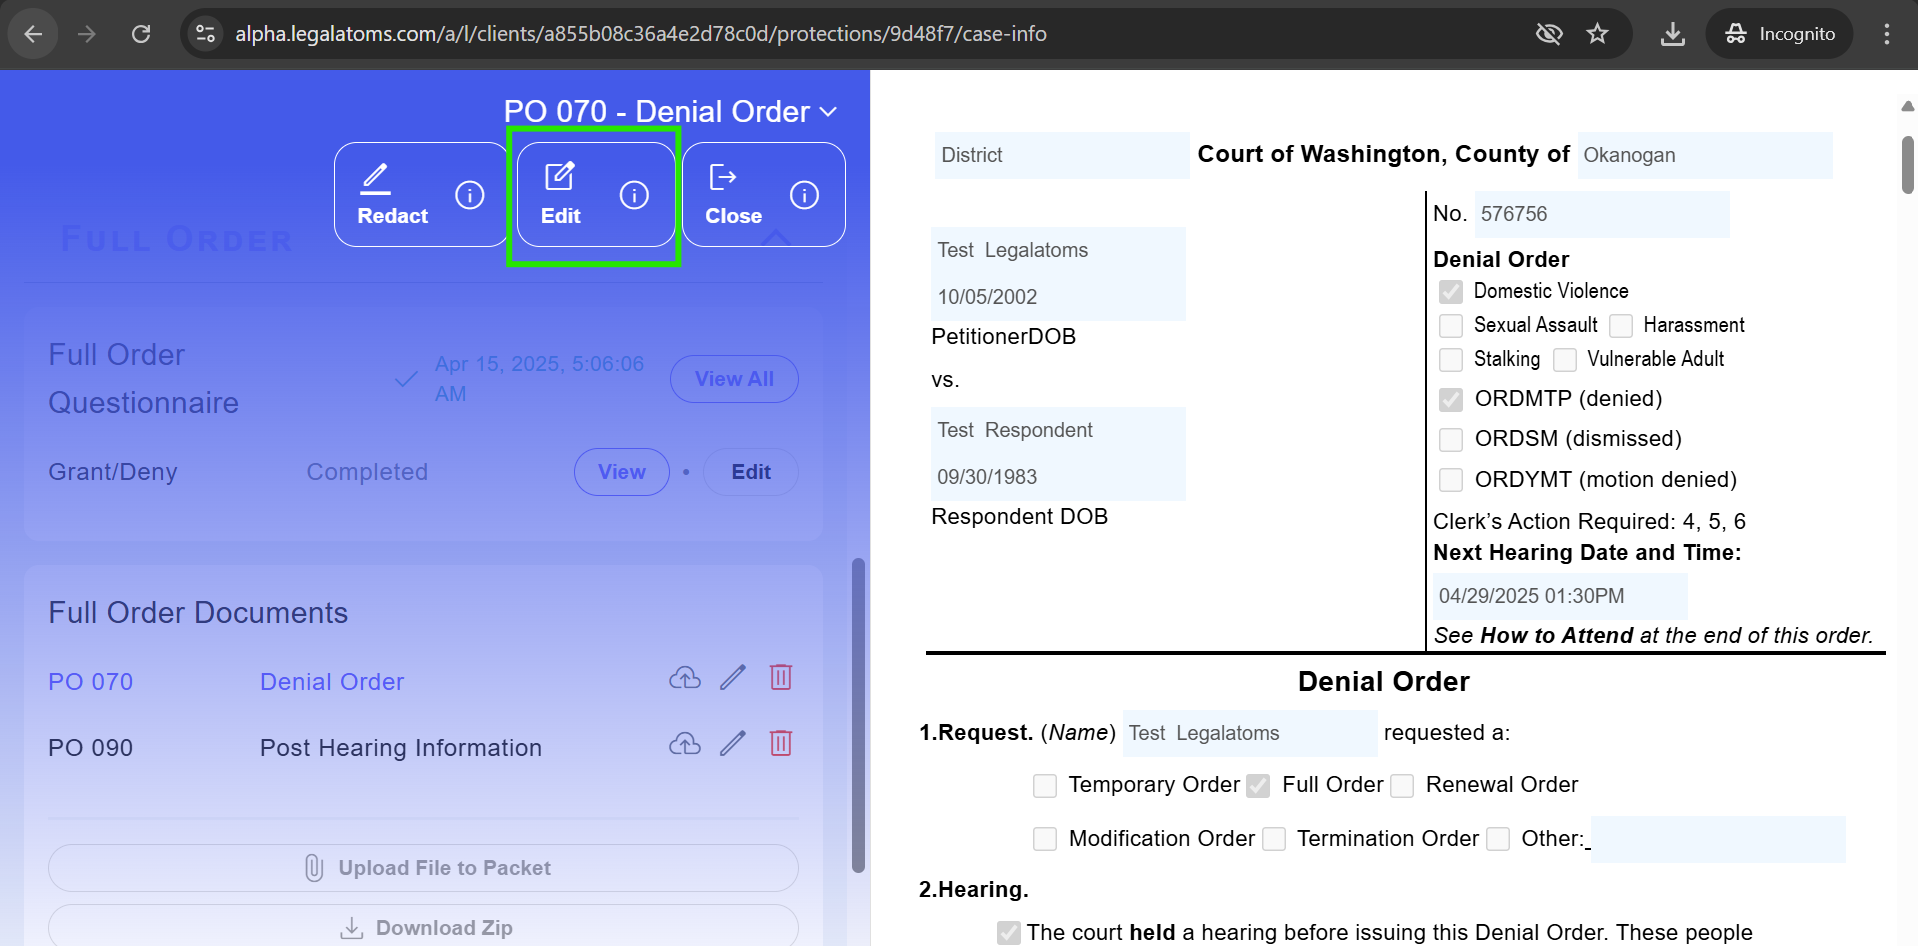
- Scroll through the Edit HTML document to locate the judge section where the signature should be placed.
- Judge can add name in the input field “Print Judge/Court Commissioner Name”.
LegalAtoms includes a feature where, if the judge has added a signature during the Temporary Order stage, the same signature will automatically carry over to the Full Order document. This means the judge does not need to re-enter the signature. However, if the judge wants to use a different signature, they can simply clear the existing signature by clicking on the clear button and add a new one.

- Once judge have added the signature and name, click on the Close icon button to save the changes to the document.
- The changes will be auto save and reflected in all the documents within the section.
- After changing the document manually via Edit HTML feature judge can not amendment to the question he can only view the questionnaire.

Step 15: Notify Law Enforcement
Legalatoms allow to judge to send the full order document to law enforcement for service. Simply click on the Notify button to send the “Law Enforcement Packet” documents to the sheriff. A popup will appear where the law enforcement name is auto-populated, and the clerk adds a message and clicks the Notify button.

After Notify the LE, the document will start auto generate, after generating the document an email with the attached zip PDF document will be sent to the sheriff.
Law enforcement may use the E-Service option to serve documents. Once the service is completed, they can file the Proof of Service. This document will then become visible to the judge for review.
